Claude Skills let you run pre-built workflows, like a full Meta Ads audit or generate SEO performance reports with a single prompt. But a skill is only as good as the data behind it, and that data comes from platforms you connect through Two Minute Reports.
The setup follows one simple chain:
Your platforms (GSC, GA4, Meta, Google, etc) → Two Minute Reports → Claude
Once that pipeline is in place, you can run any skill you prefer. By the end, you’ll be able to:
- Connect your platform to Two Minute Reports
- Create and enable accounts inside the Hub to analyze performance
- Link Two Minute Reports to Claude
- Have your first skill uploaded and running within minutes
Before You Begin
A couple of things to check before you start:
- Account access: You’ll authorize your client accounts during setup, so ensure you can sign in to them and grant permissions.
- Enable Code Execution & File Creation in Claude: Go to Settings → Capabilities and turn on Code execution and file creation. Once this is enabled, Claude can edit docs, spreadsheets, presentations, PDFs and reports.
With your prerequisites ready, let's set up Claude Skills via Two Minute Reports.
Phase 1: Sign Up for a 14-Day Free Trial
Goal: Log in to Two Minute Reports and organize your workspace.
1. Start your free trial: Head over to the Two Minute Reports website and click Try for free to begin your 14-day free trial. No credit card required.
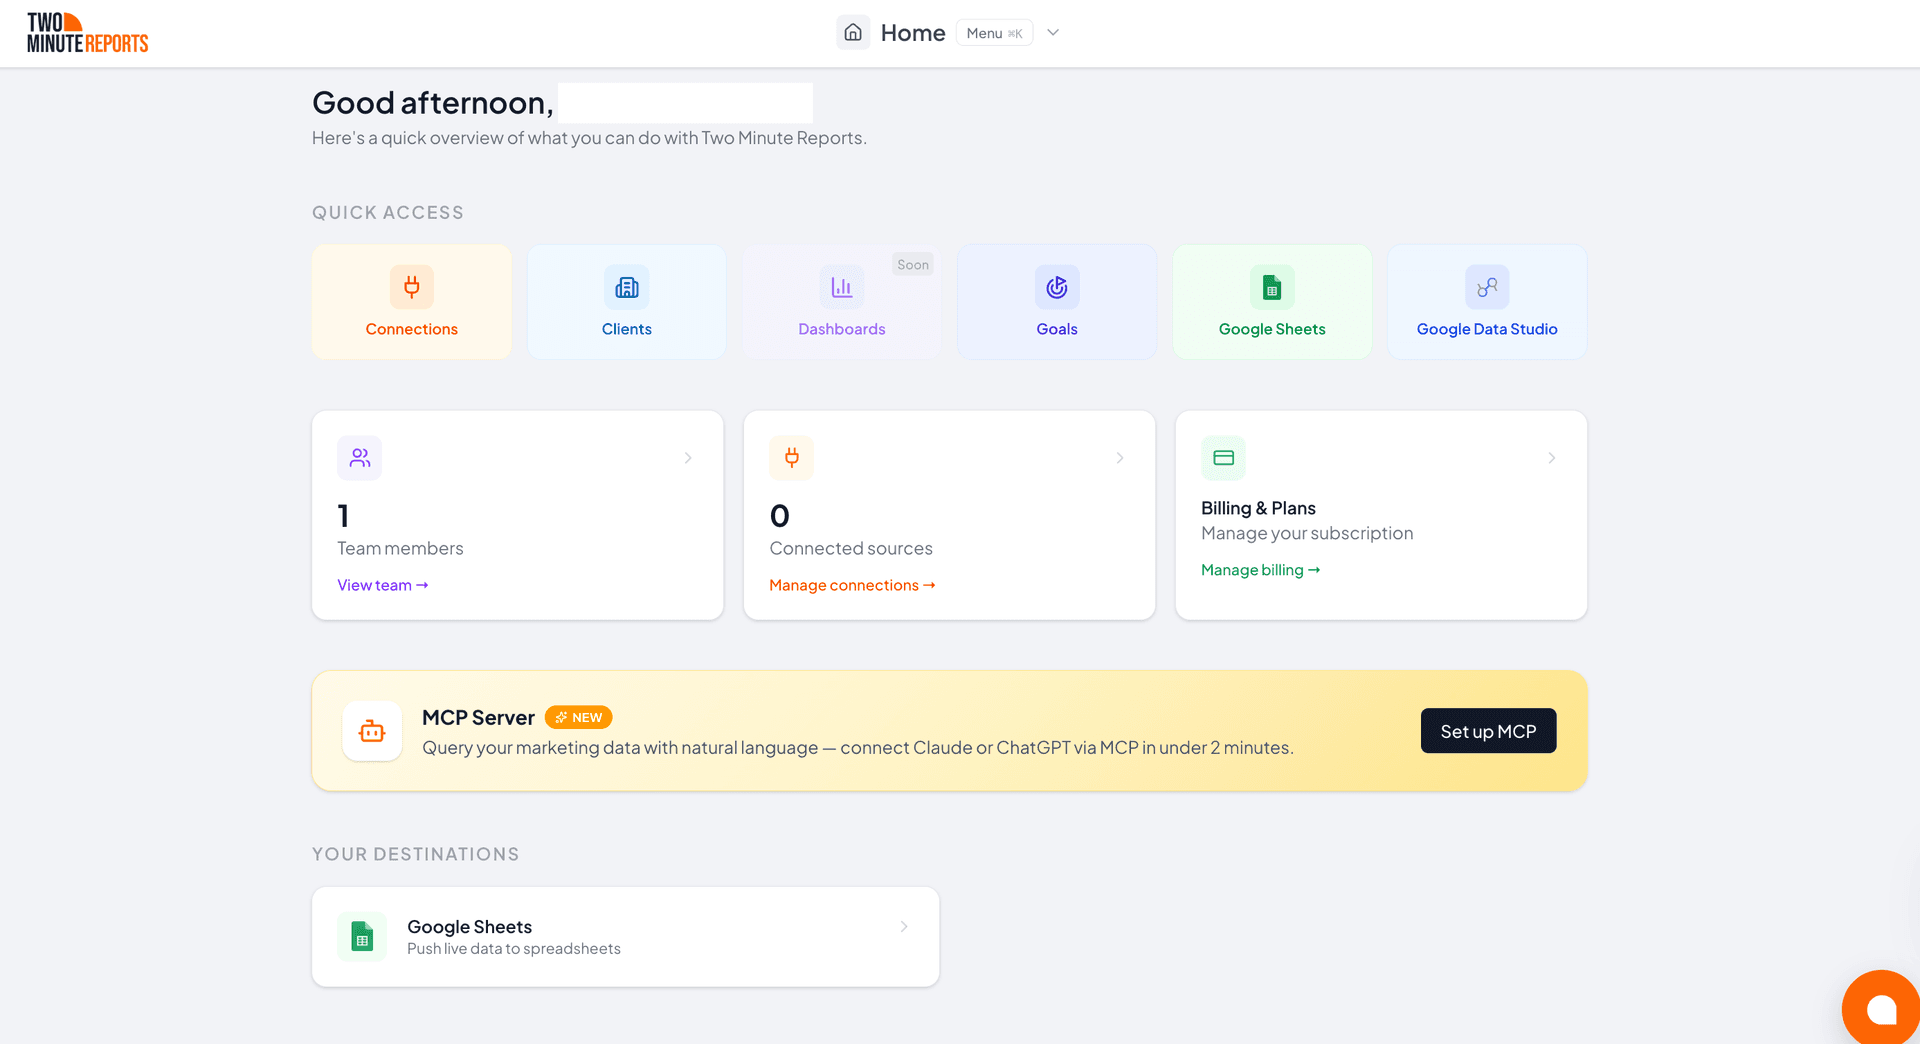
2. Meet the Hub: Once you sign up, you’ll land in the Two Minute Reports Hub – your centralized workspace for adding, managing, and organizing accounts. Everything you connect lives here.

Phase 2: Connect Your Platform to Two Minute Reports
Goal: Sync your account to Two Minute Reports, so you can hook it to Claude and use the data to run the skill.
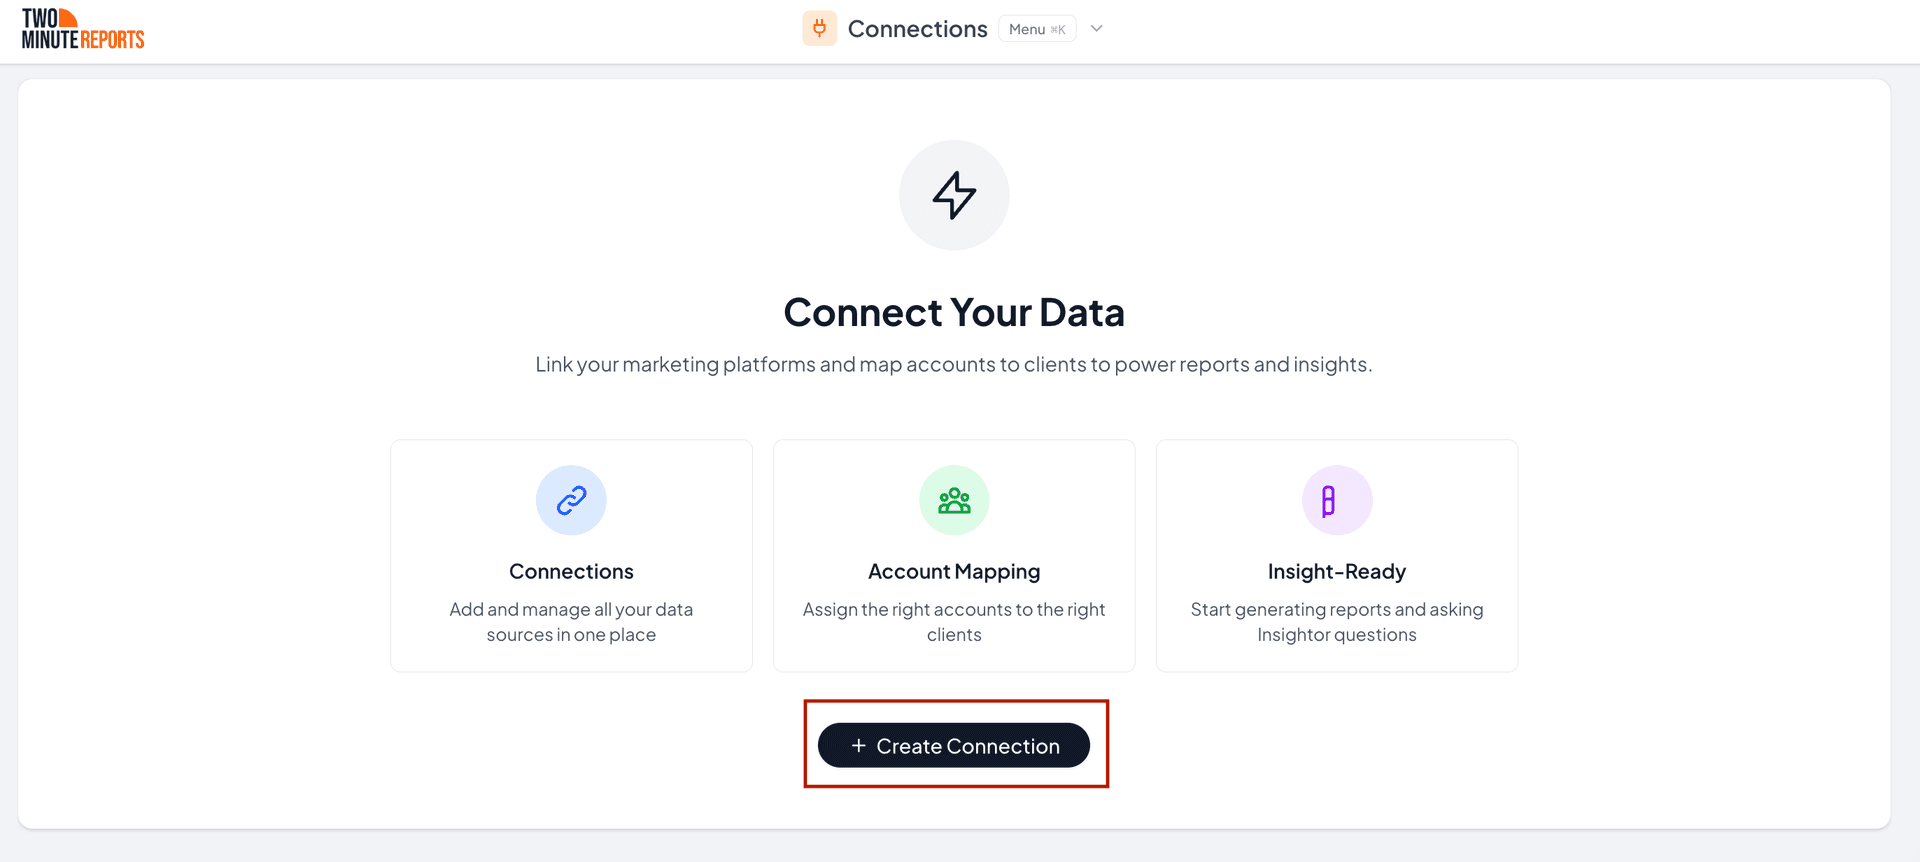
1. Create a Connection: A Connection securely syncs your account with Two Minute Reports through one-click authentication. Click Connections → Create Connection, as shown below:

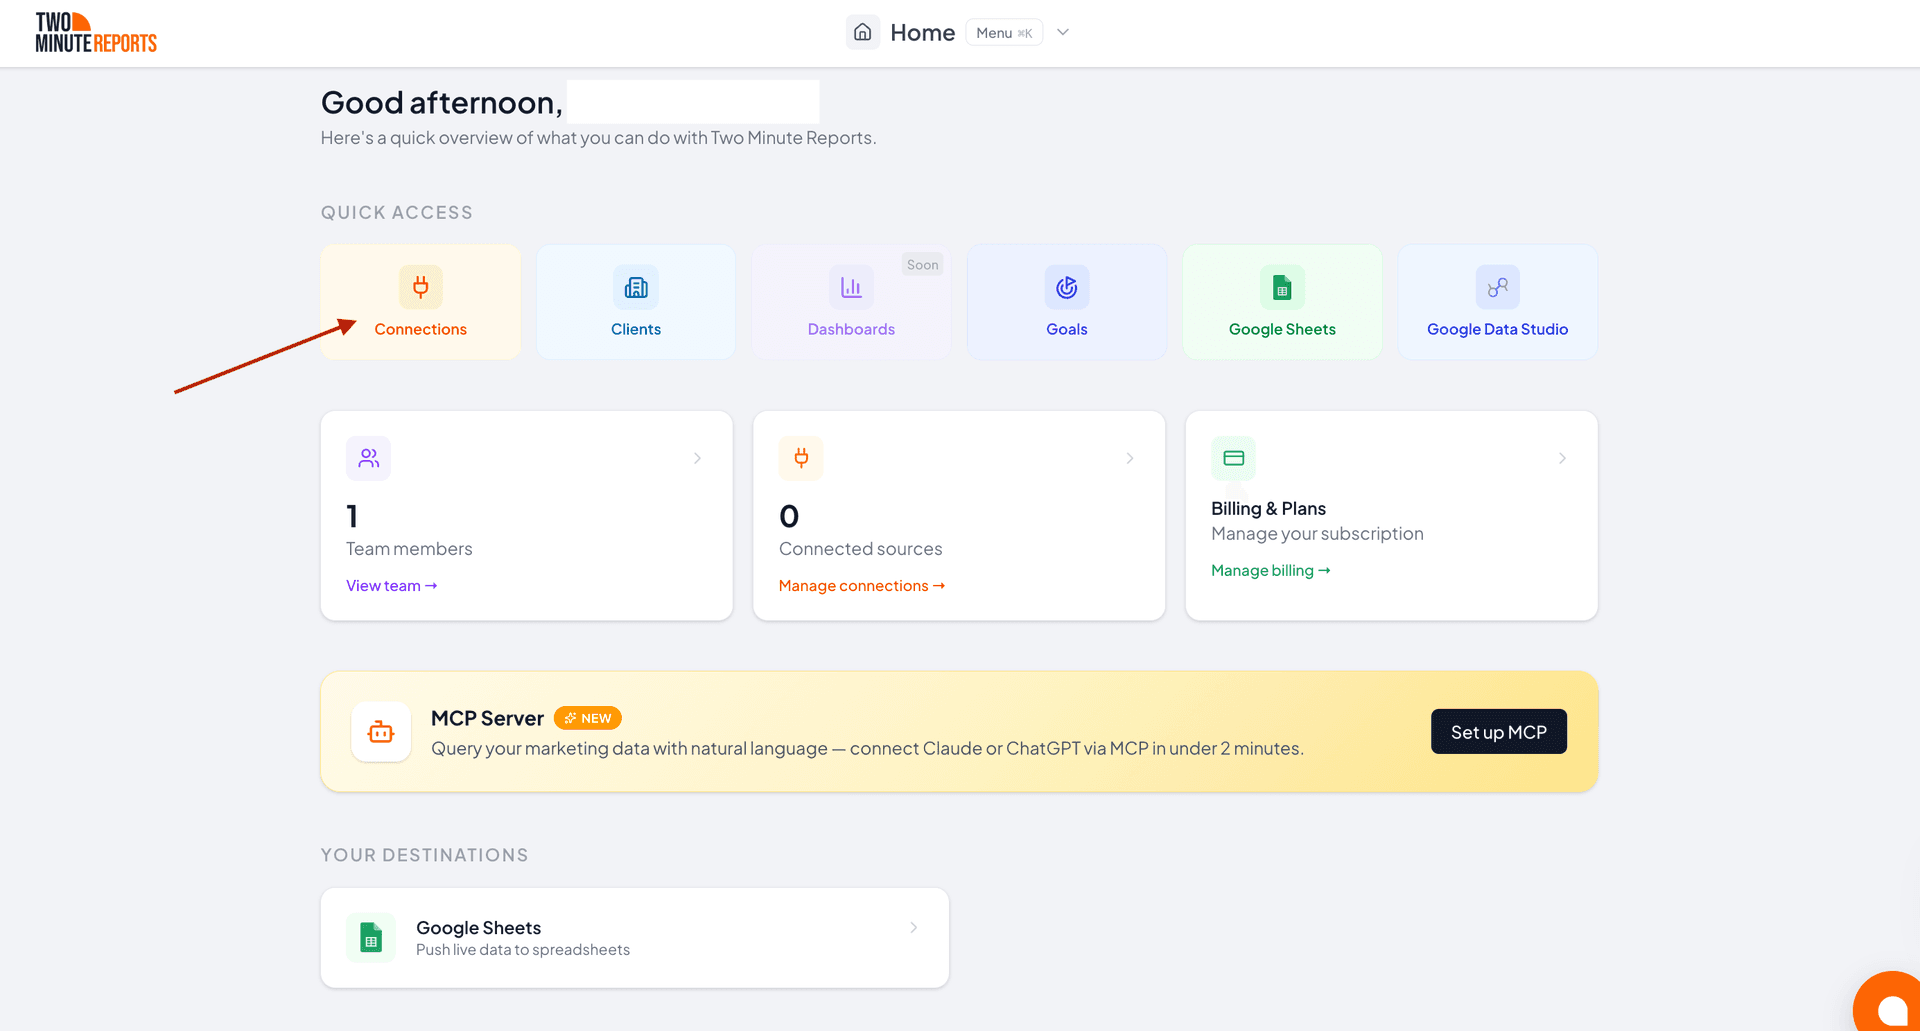

Note: If you already have Connections set up, go to Connections → New Connection instead. Either way, the remaining steps are the same.
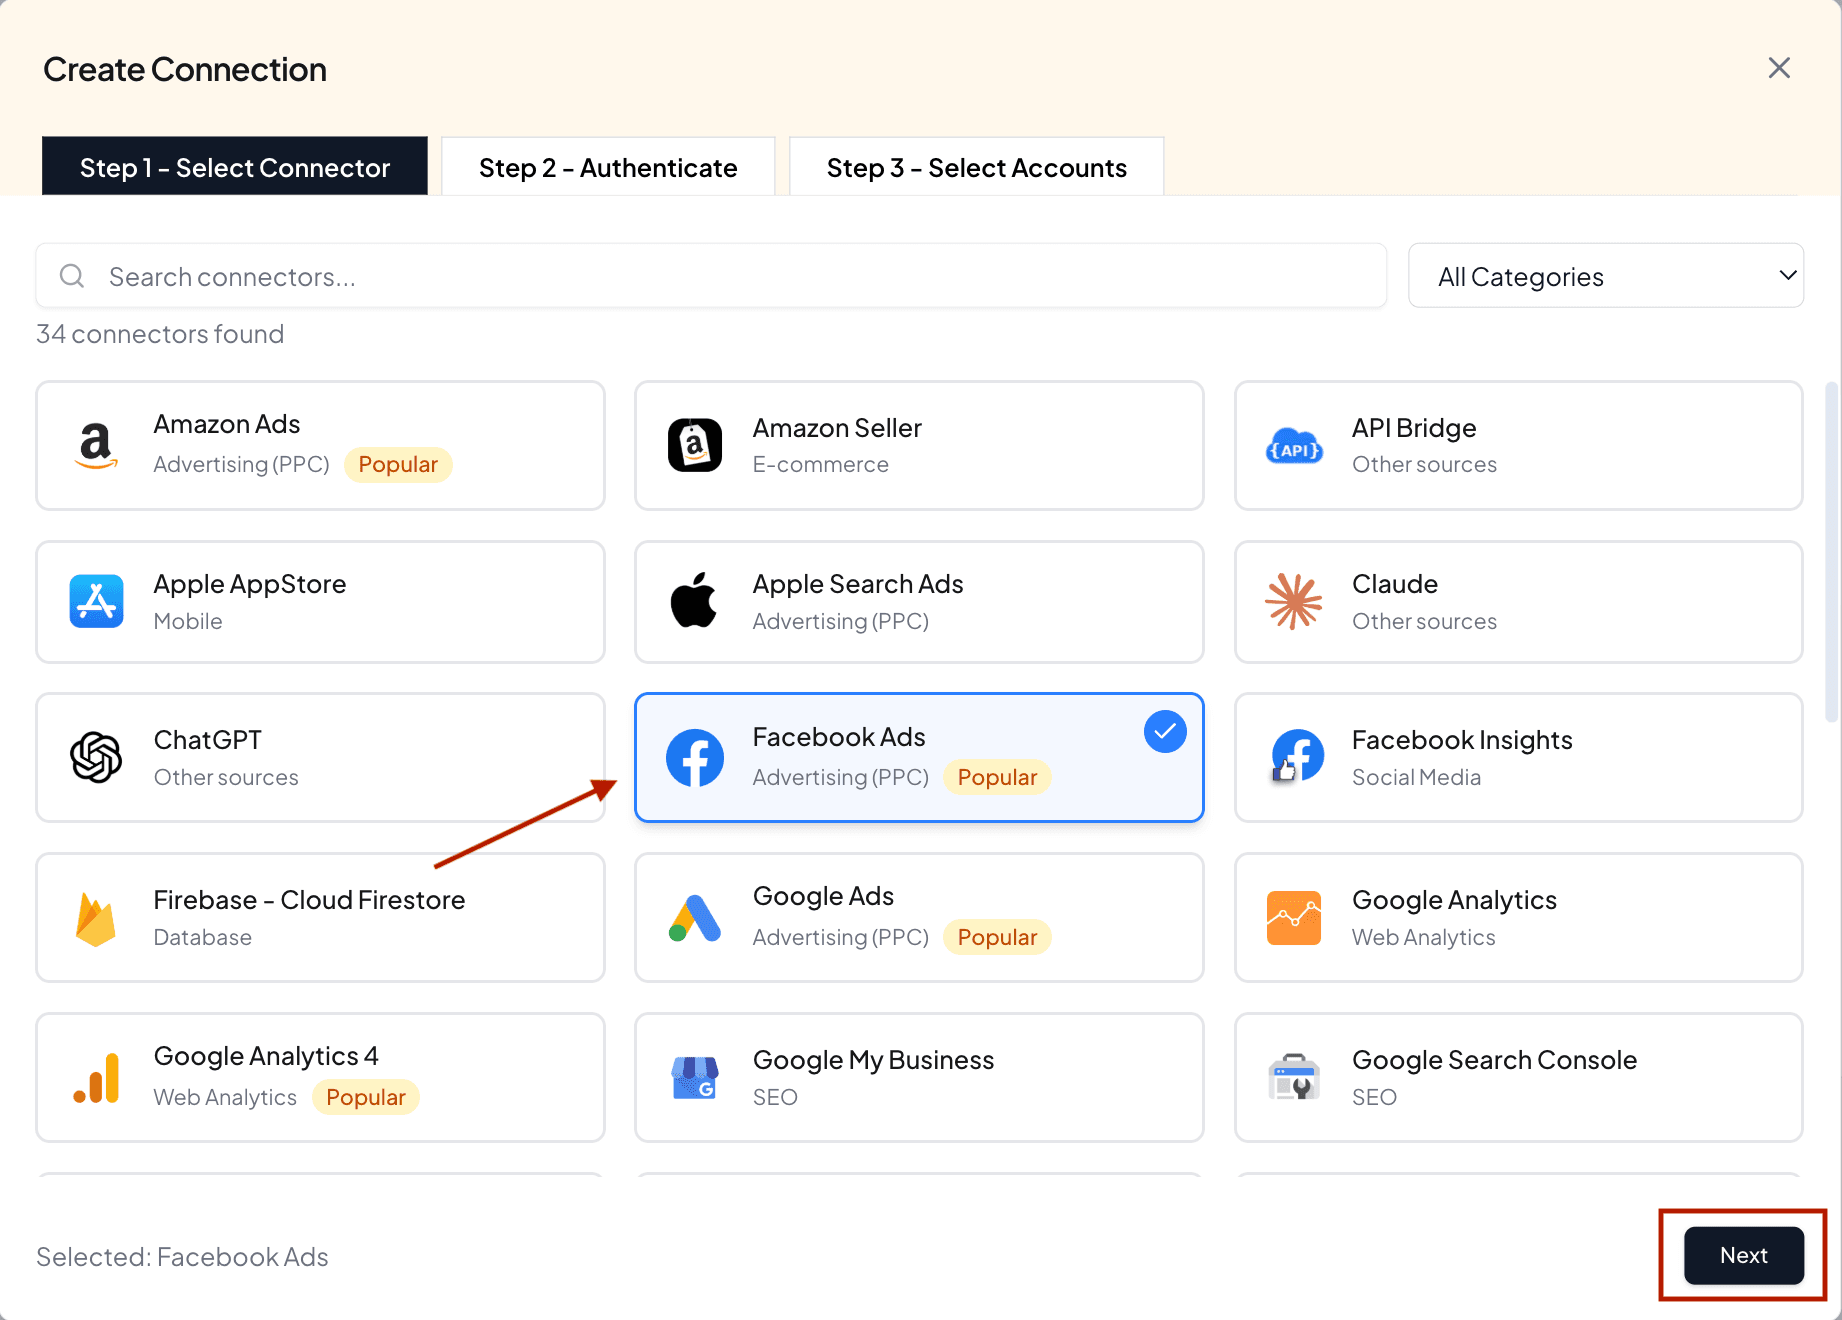
2. Choose your connector: Select your connector from the given options. In this example, Facebook Ads.

3. Authorize the Connection: Enter a name for your Connection, then click to authorize. A secure sign-in window opens. Log in to your account and approve the requested permissions. This links your Meta Ads account to Two Minute Reports.
4. Enable your accounts: Turn on the ad accounts you want to use. Only enabled accounts can be queried; disabled ones can't pull data.

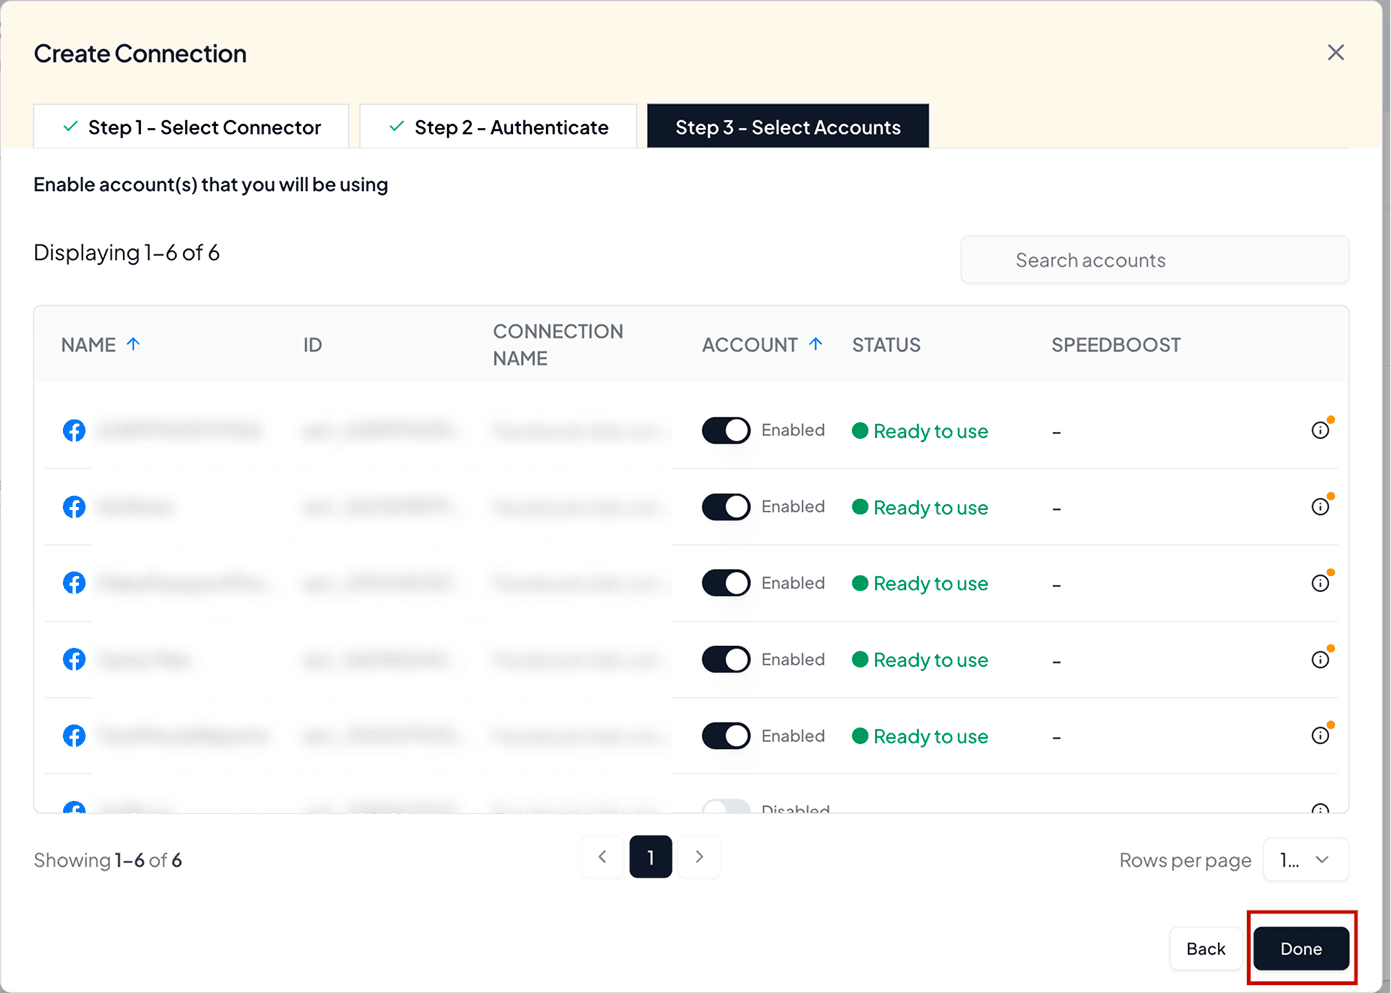
5. Confirm the Connection: Click Done. Your Meta Ads account is now synced with Two Minute Reports.
You’re set when you’ve successfully enabled your accounts, and they are ready to use.
You've now connected your data to Two Minute Reports, but Claude can't see it yet. The next step builds the bridge between them.
Phase 3: Connect Two Minute Reports to Claude
Goal: Build the bridge so Claude can read your marketing data through Two Minute Reports MCP.
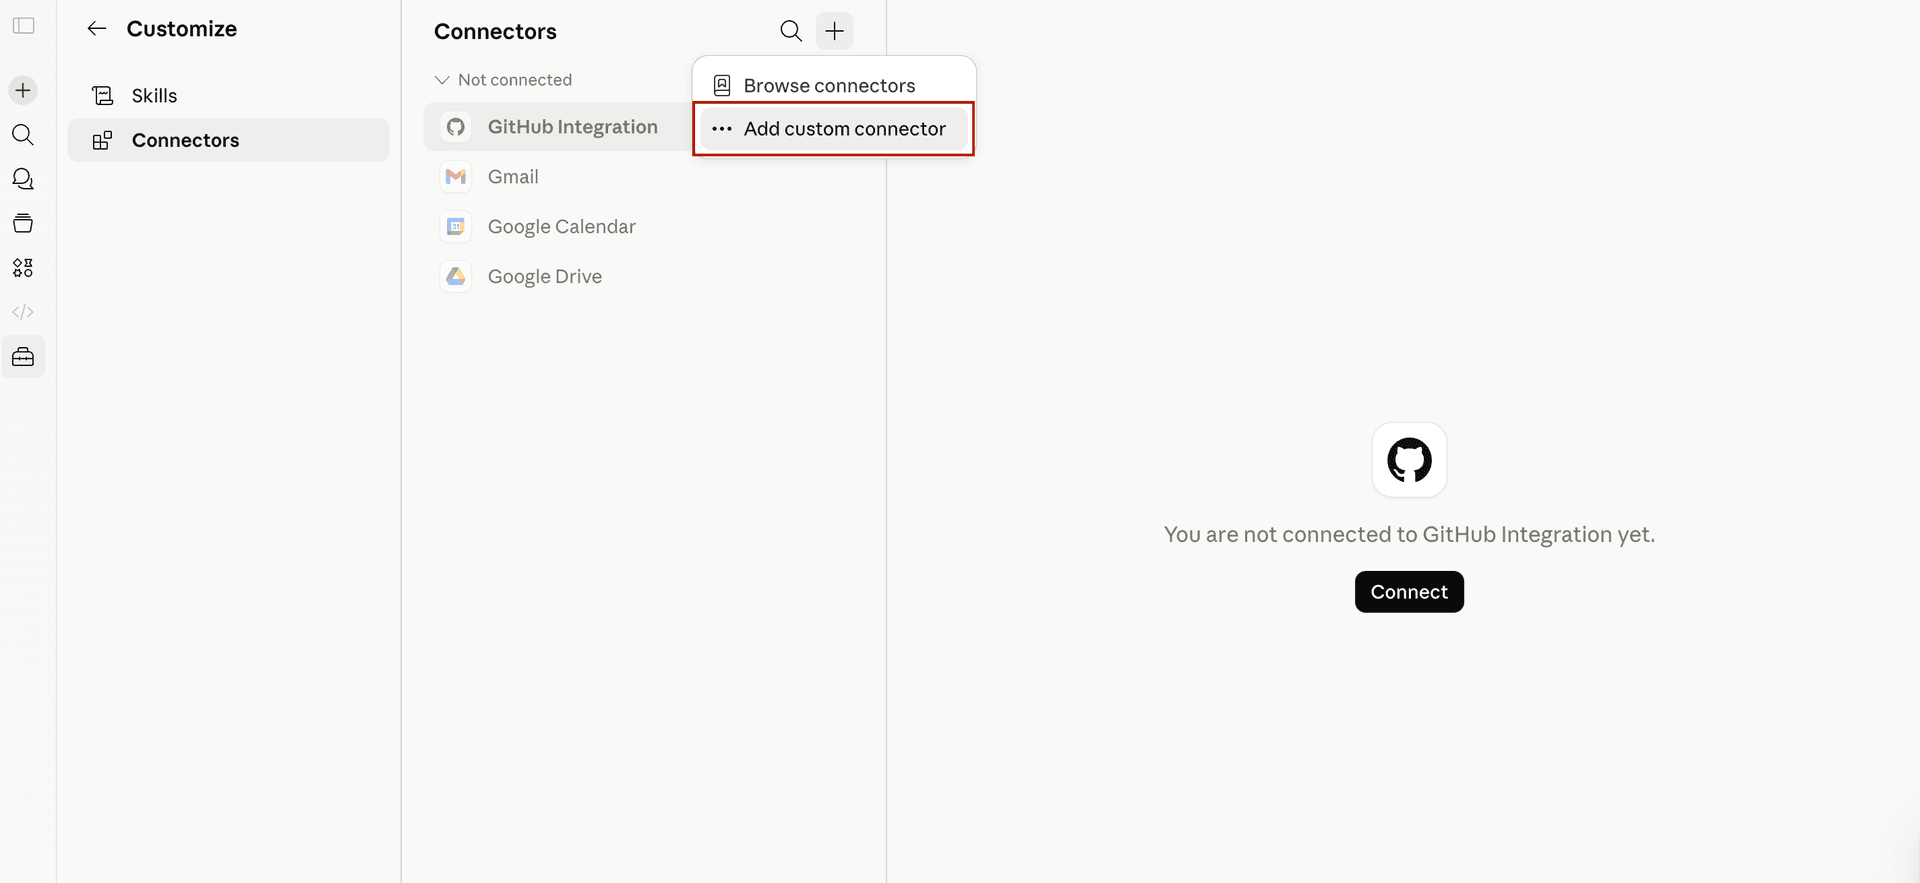
1. Open Claude: Go to Customize → Connectors, click the + icon, then select Add custom connector.

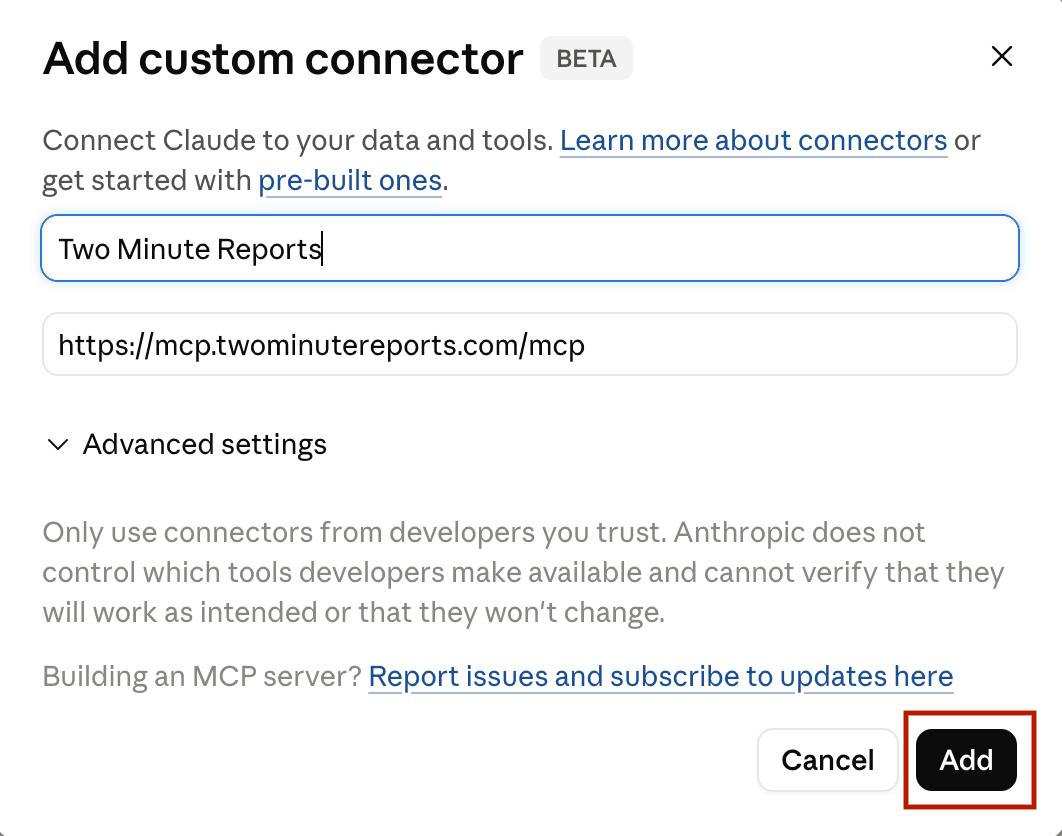
2. Add the TMR MCP URL: Enter a name (Two Minute Reports) and paste this URL (https://mcp.twominutereports.com/mcp), then click Add.

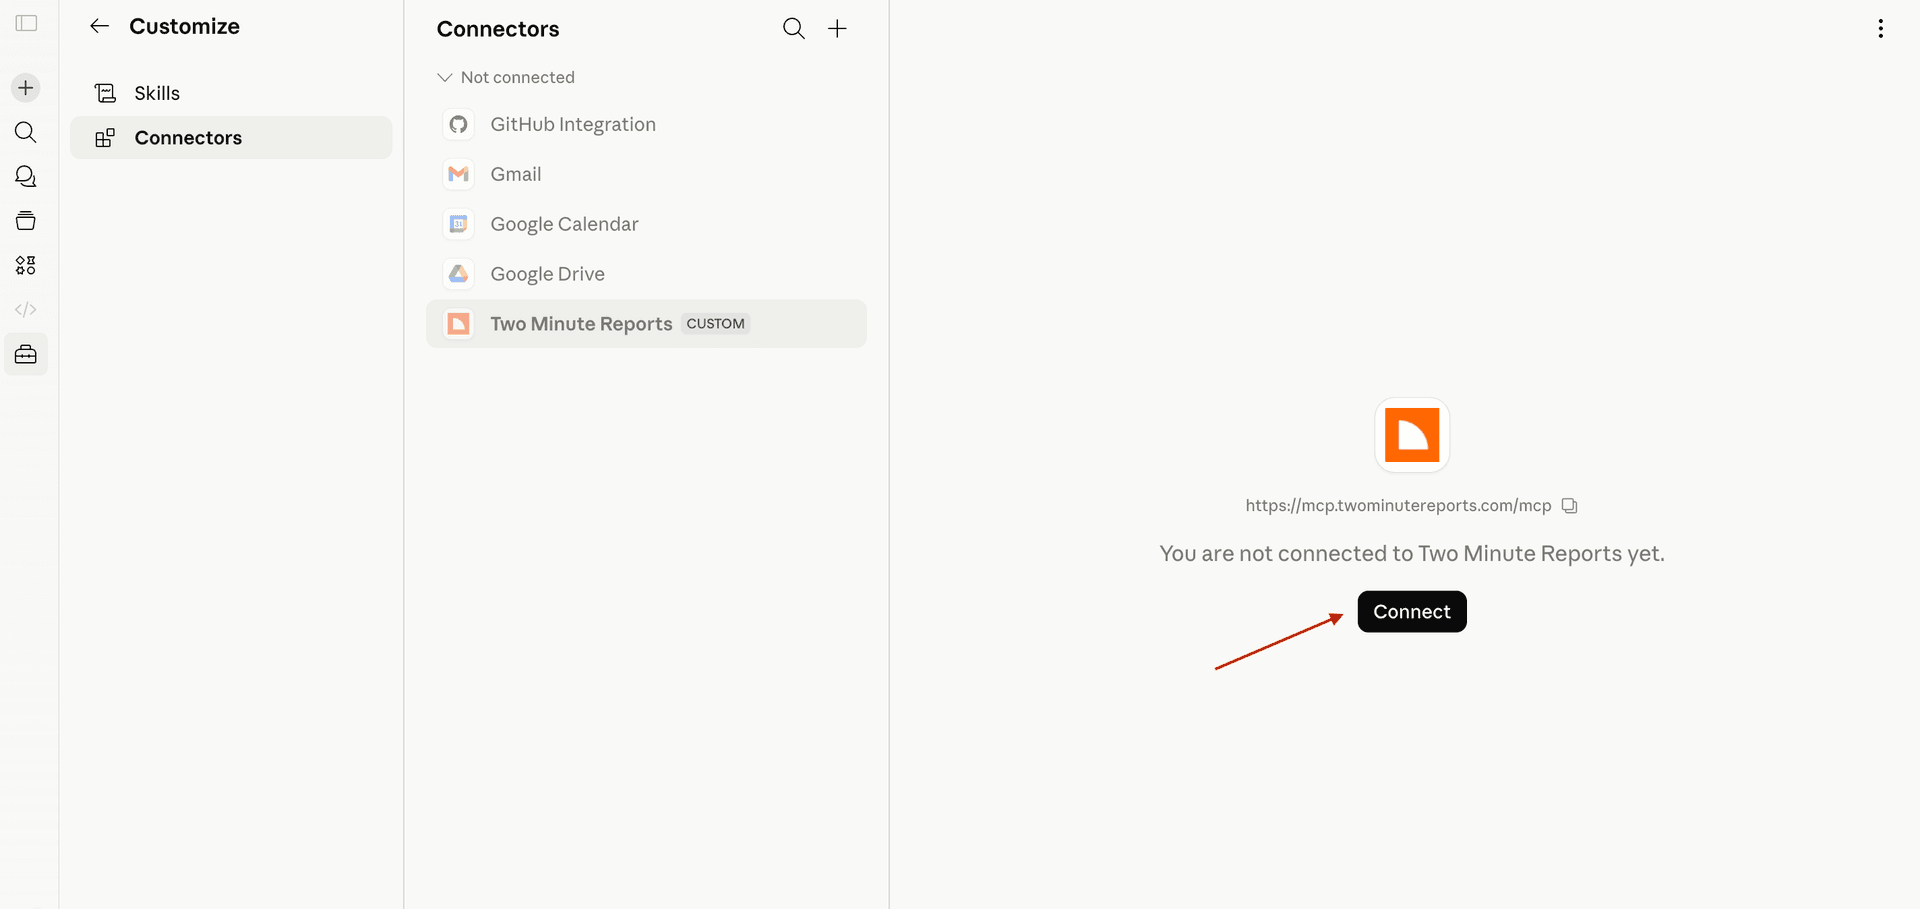
3. Connect and authorize: Click Connect and sign in with the email linked to your Two Minute Reports account.

4. Grant tool permission: Choose the level of access you would like to grant Claude for each tool.


You’re set when Two Minute Reports appears in your connector list.
Phase 4: Upload and Run Your Skill in Claude
Goal: Upload the skill in Claude and run it in your chat.
Our marketing skills cover the work you do every day – measuring SEO performance, finding low-ranking pages, and auditing your PPC accounts to see where you’re losing money.
1. Download the skill from GitHub: Visit the repo below and download the ZIP file.
GitHub Repo: https://github.com/twominutereports/marketing-skills.git


2. Open Claude: Go to Customize → Skills, click the + icon, then choose Create skill → Upload a skill.

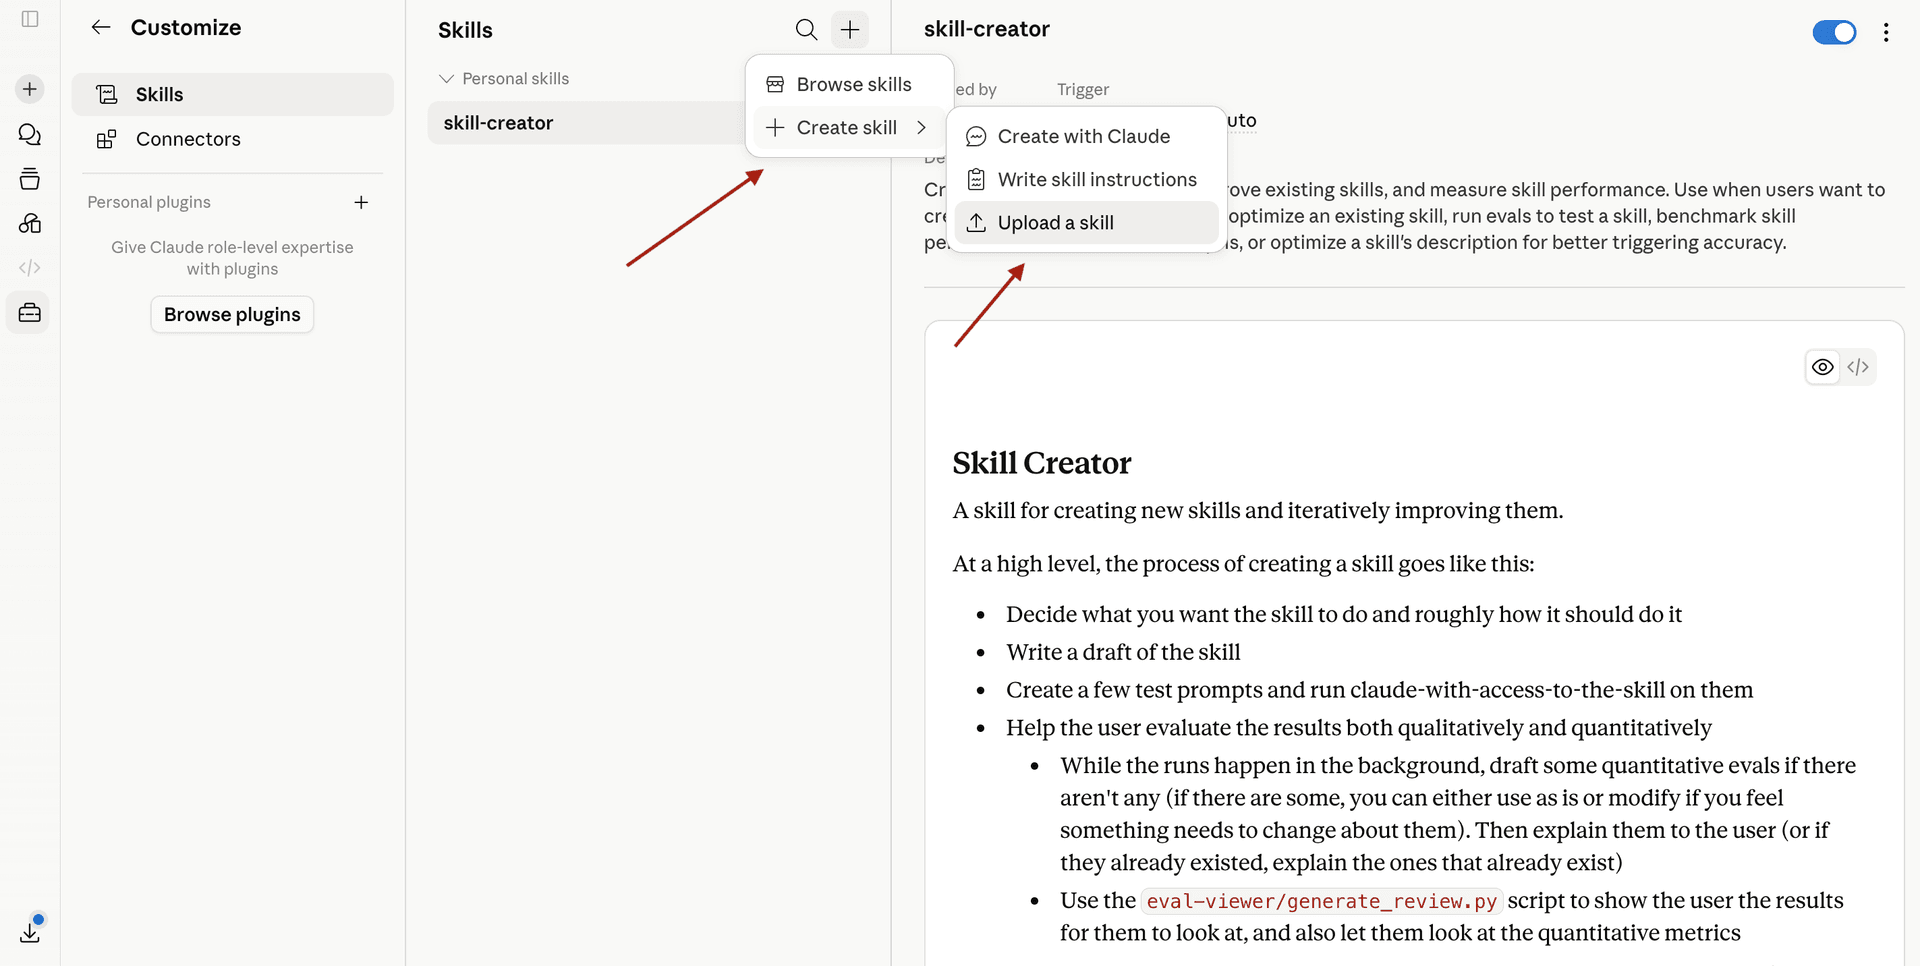
3. Upload the file: Unzip and open the folder for your chosen skill (eg: tmr-meta-ads-audit). Upload the Skill.md file from that folder in Claude. The skill will appear in your skills list, ready to use.

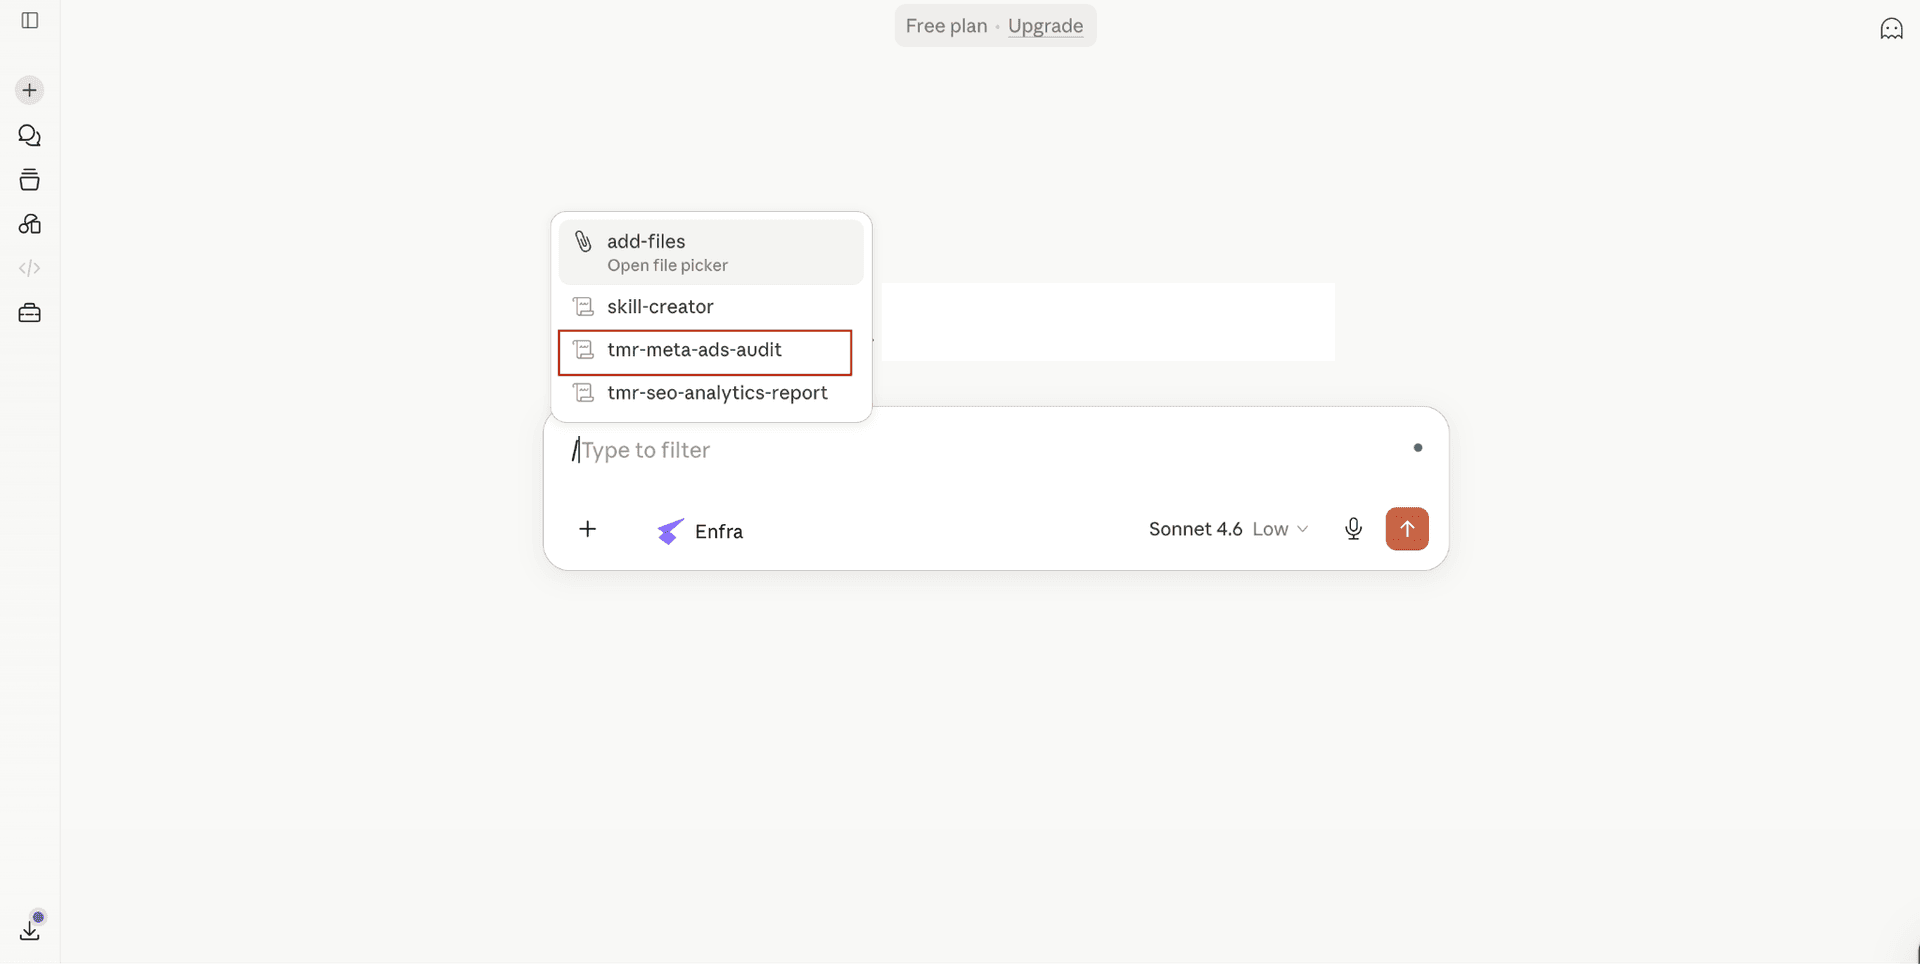
4. Run your skill: Open a new Claude chat, click the + icon, choose Skills, and select your uploaded (eg: tmr-meta-ads-audit) skill. Enter the prompt and start auditing your ad accounts.
You’re set when: the skill is selected in your chat and ready to run.
You’re All Set!
Your skill now pulls the latest Meta Ads data from Two Minute Reports. To run your first audit, just ask in chat as follows:
“Run a Meta Ads Audit on my account for the last 30 days.”

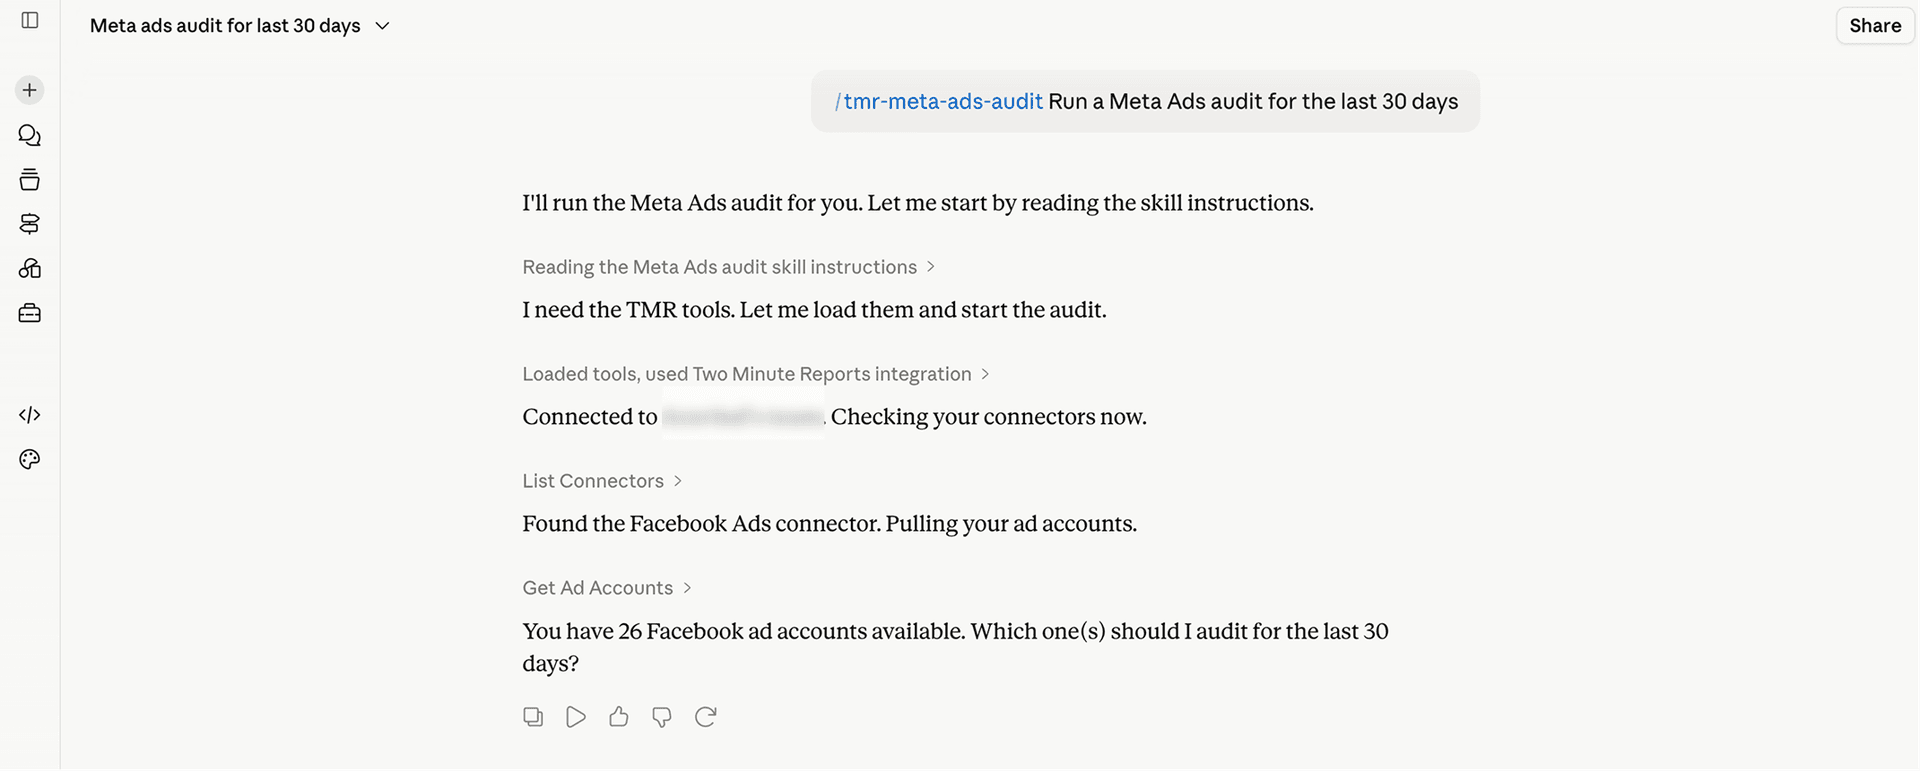
Claude runs a Meta Ads audit for you by reading the skill instructions, followed by loading Two Minute Reports to pull your Meta ad accounts.
Troubleshooting
Here are the most common issues you might encounter when setting up or running Claude Skills, with a quick fix for each.
1. The skill doesn’t appear in my chat: Refresh Claude and confirm the skill uploaded under Customize → Skills. Make sure “Code execution and file creation” and “Inline visualisations” are turned on under Settings → Capabilities. Skills that create dashboards and visualizations might not run without these settings turned on.
2. The connector didn’t authorize: Navigate to Customize → Connectors and check whether the Two Minute Reports MCP is connected using the “https://mcp.twominutereports.com/mcp” URL. If it is not connected, click Connect and sign in with the same email address you used to link your Two Minute Reports account.
3. Claude keeps asking permission to use tools: Ensure that the tool permission is set to ‘Always Allow’. Go to Customize → Connectors → Two Minute Reports → Always Allow.
If you have any questions or need further assistance, please send an email to [email protected]. Our team is here to guide you every step of the way.