Before connecting Facebook Ads to Looker Studio and building real-time campaign dashboards or visual reports, ensure the following permissions are in place:
Required permissions to access Facebook Ads data
- Your Facebook account must have Employee access with the View Performance permission enabled, or Ad Account Analyst access to the ad account.
- If you’re using the new Pages experience, your account must have partial access to the linked Facebook account. This is required because Meta separates personal profiles from page management, and partial access ensures the account can connect properly with the linked Facebook page.
Now that you understand the prerequisites, follow the steps below to move your Facebook Ads data into Looker Studio using Two Minute Reports.
Step 1: Streamline your Facebook Ads account in Looker Studio
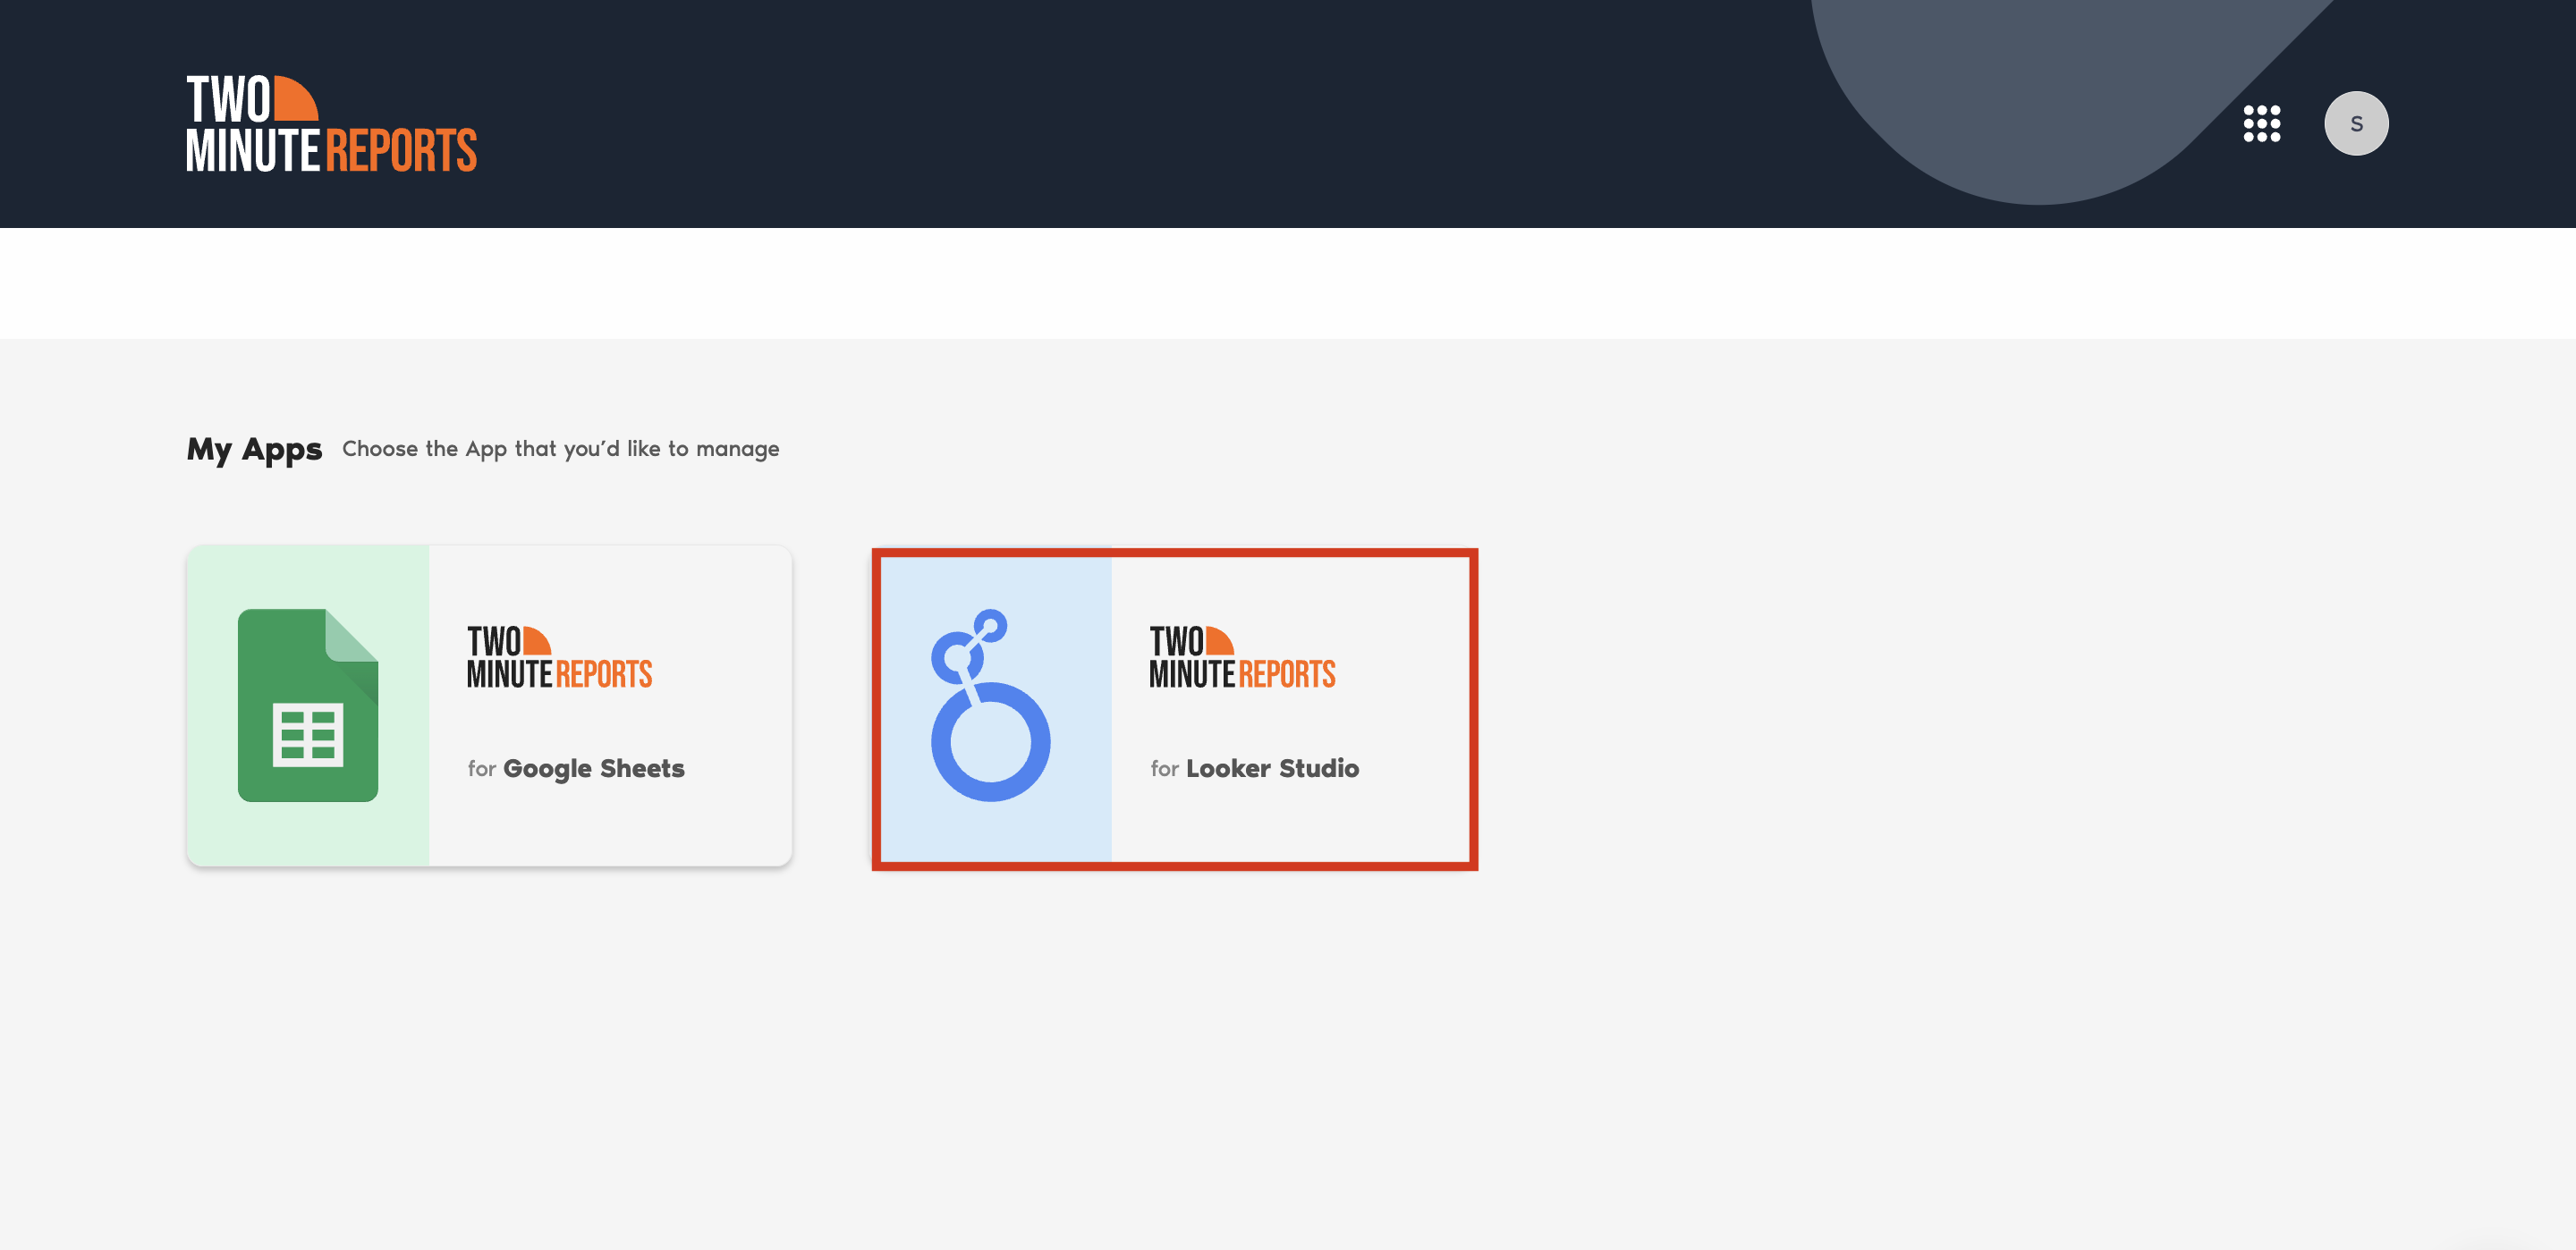
- Go to https://hub.twominutereports.com. Choose Two Minute Reports for Looker Studio.
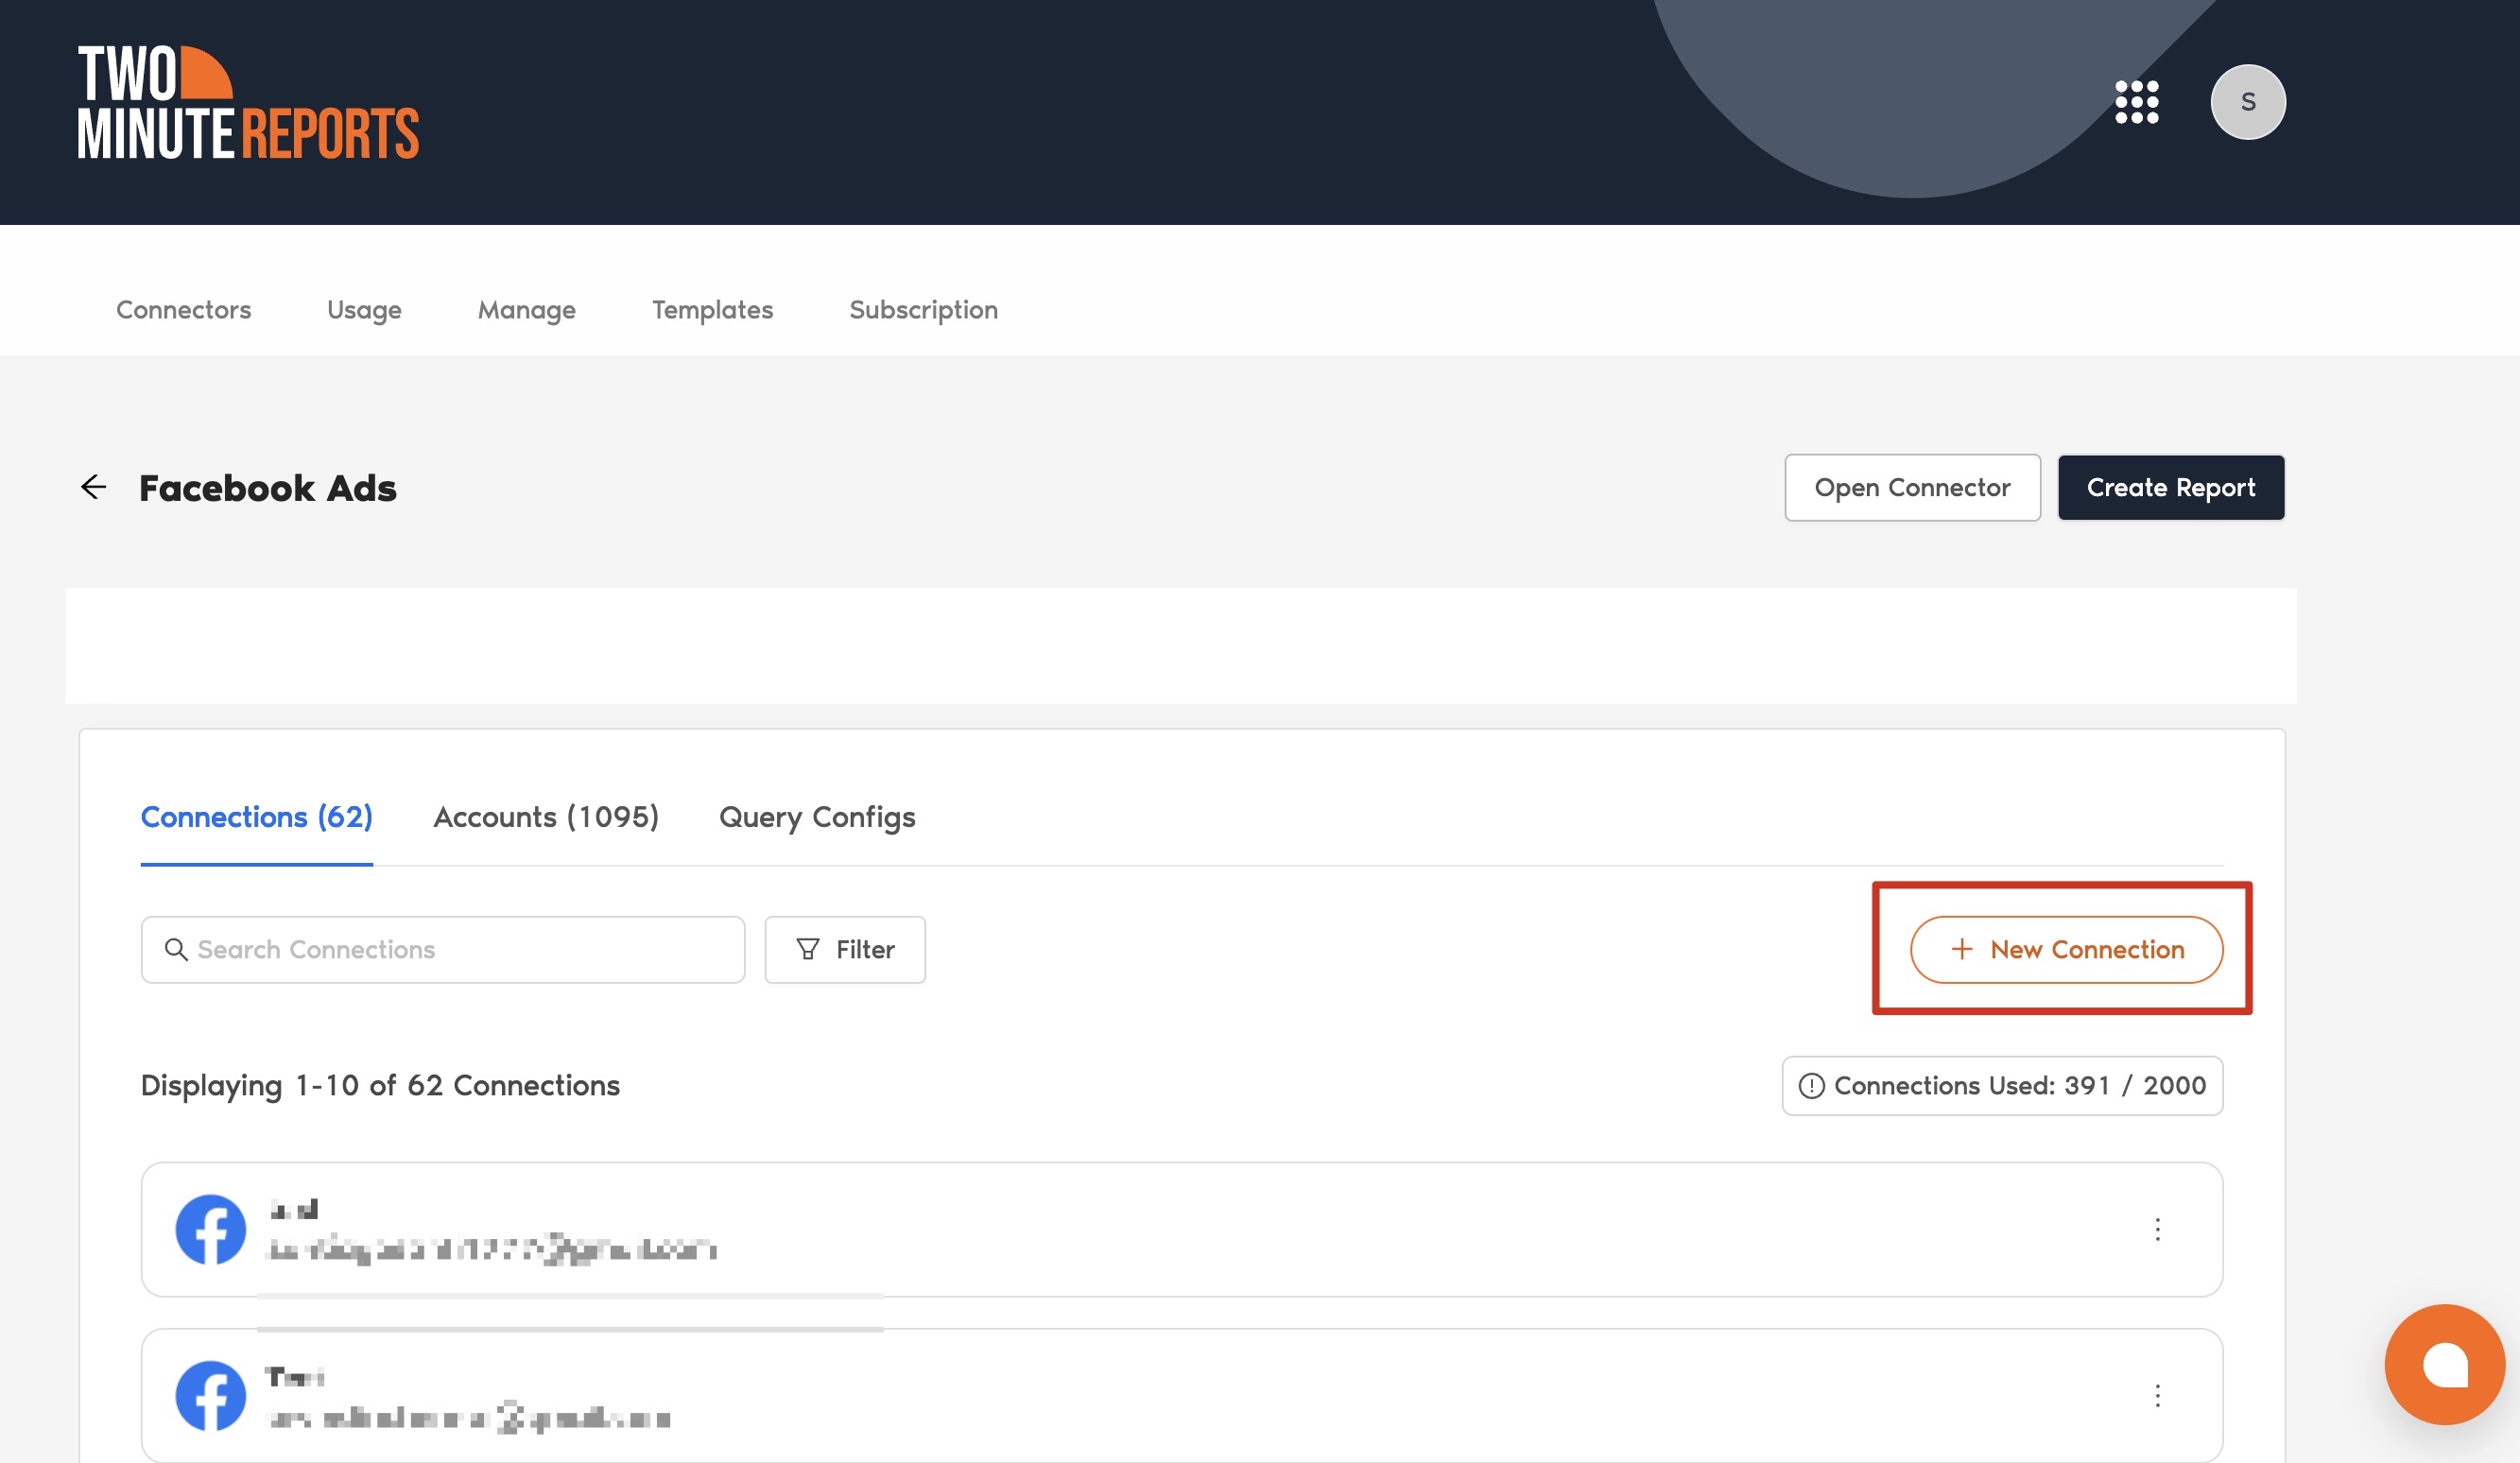
- Select Facebook Ads from the list of connectors.

- Next, connect your Facebook Ads data. Click “New Connection” to begin setting up your Looker Studio connection.
| A Connection links your data source to the Connector. For example, to pull your Facebook Ads data, you’ll need to use the Facebook Ads Connector to create a Connection with your Facebook Ads account. |
- The Adding new connection modal appears. Where you can connect the required Facebook Ads account in two steps:
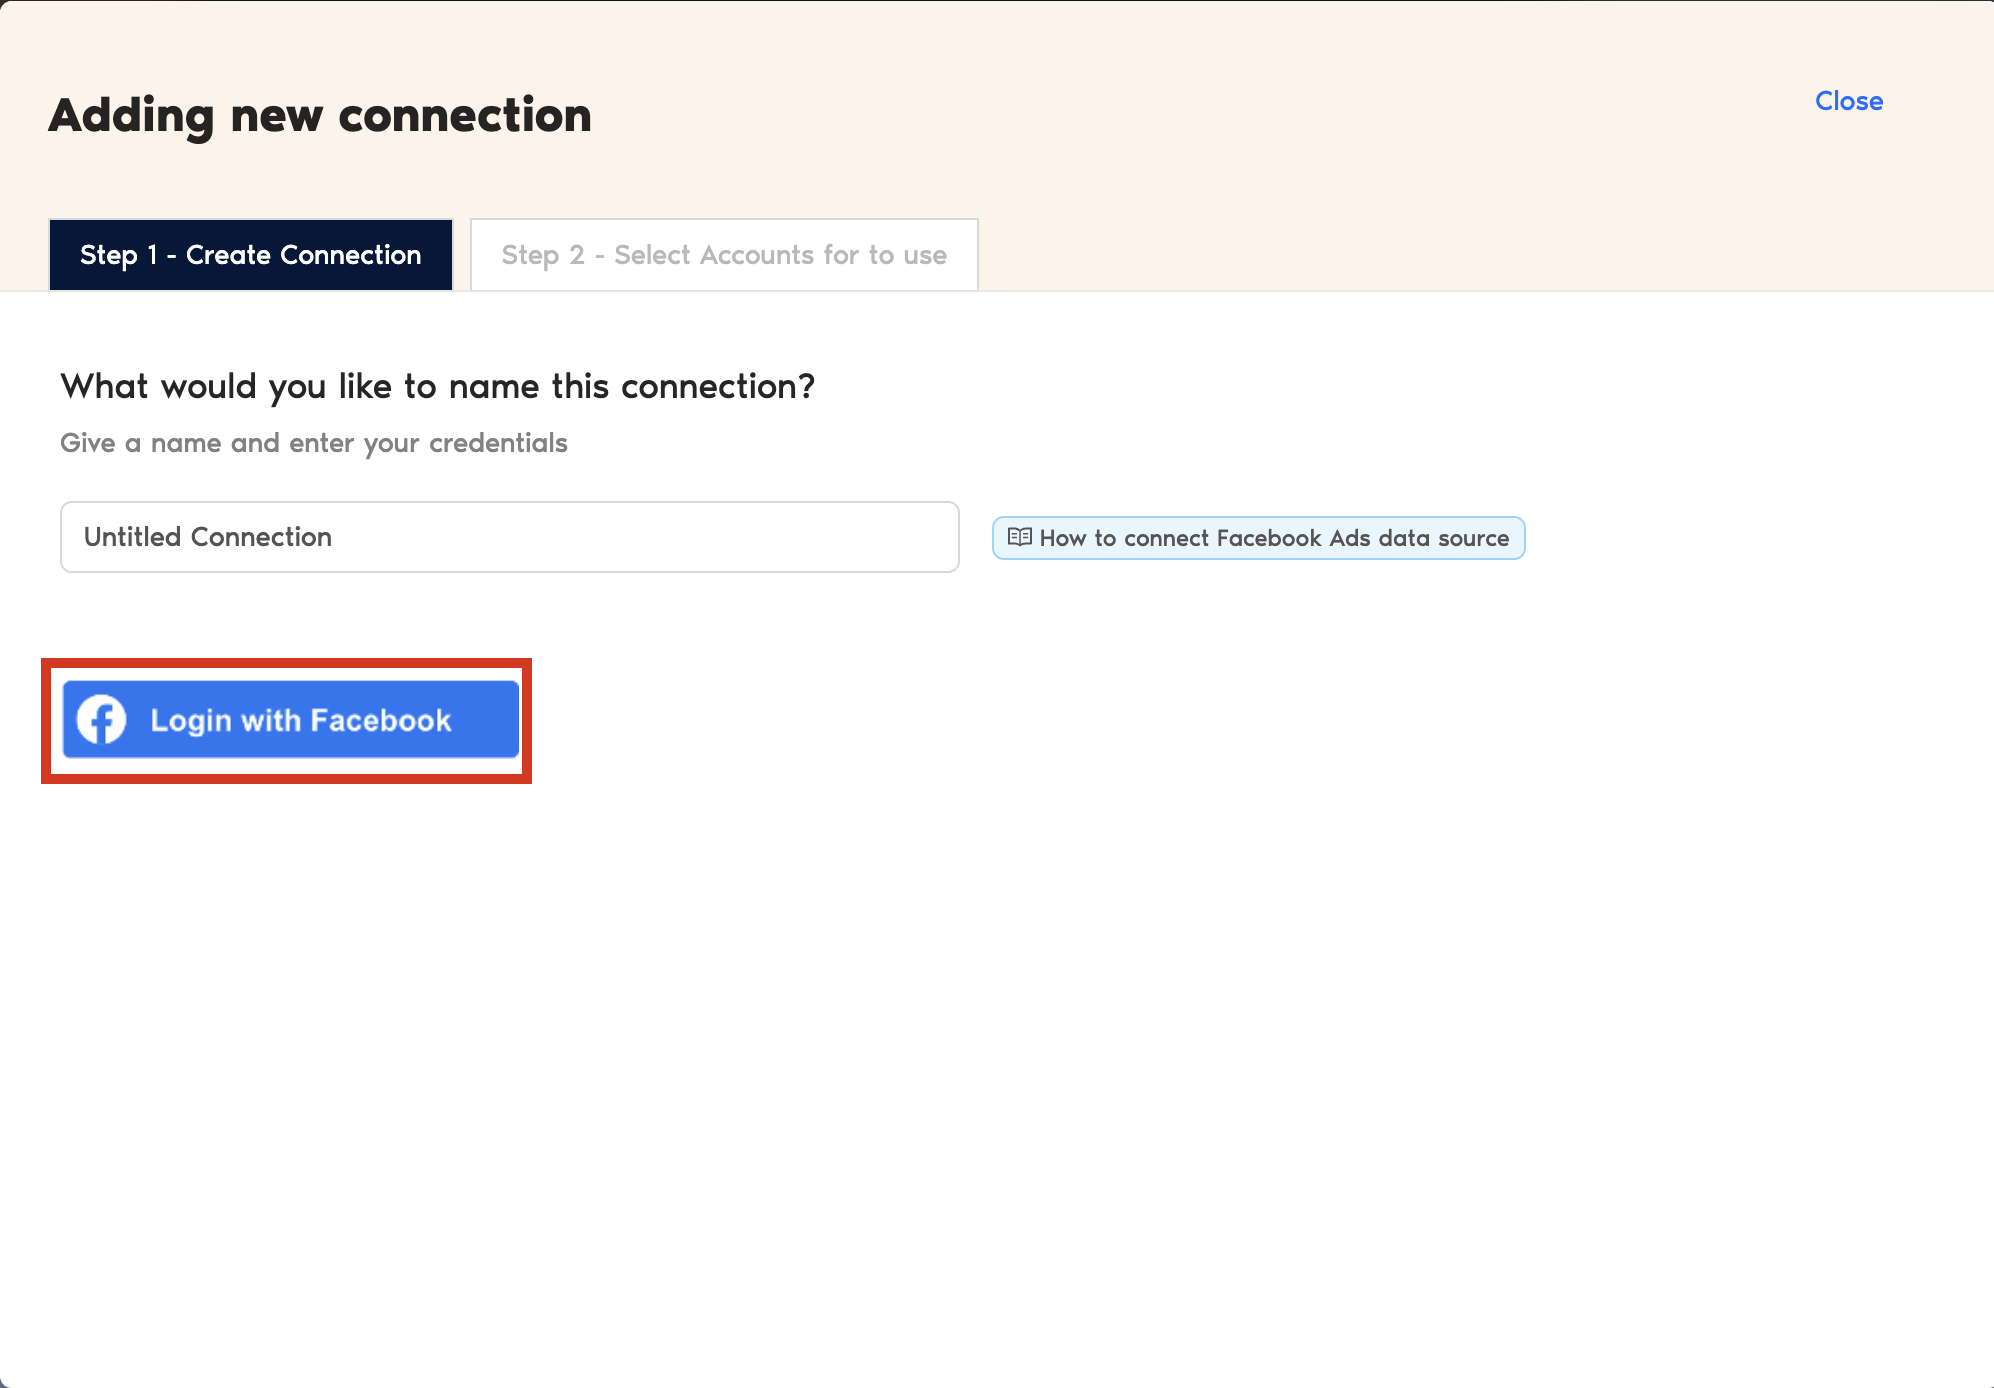
- Creating a Connection: Name your Connection and authorize the email account associated with your Facebook Ads account.
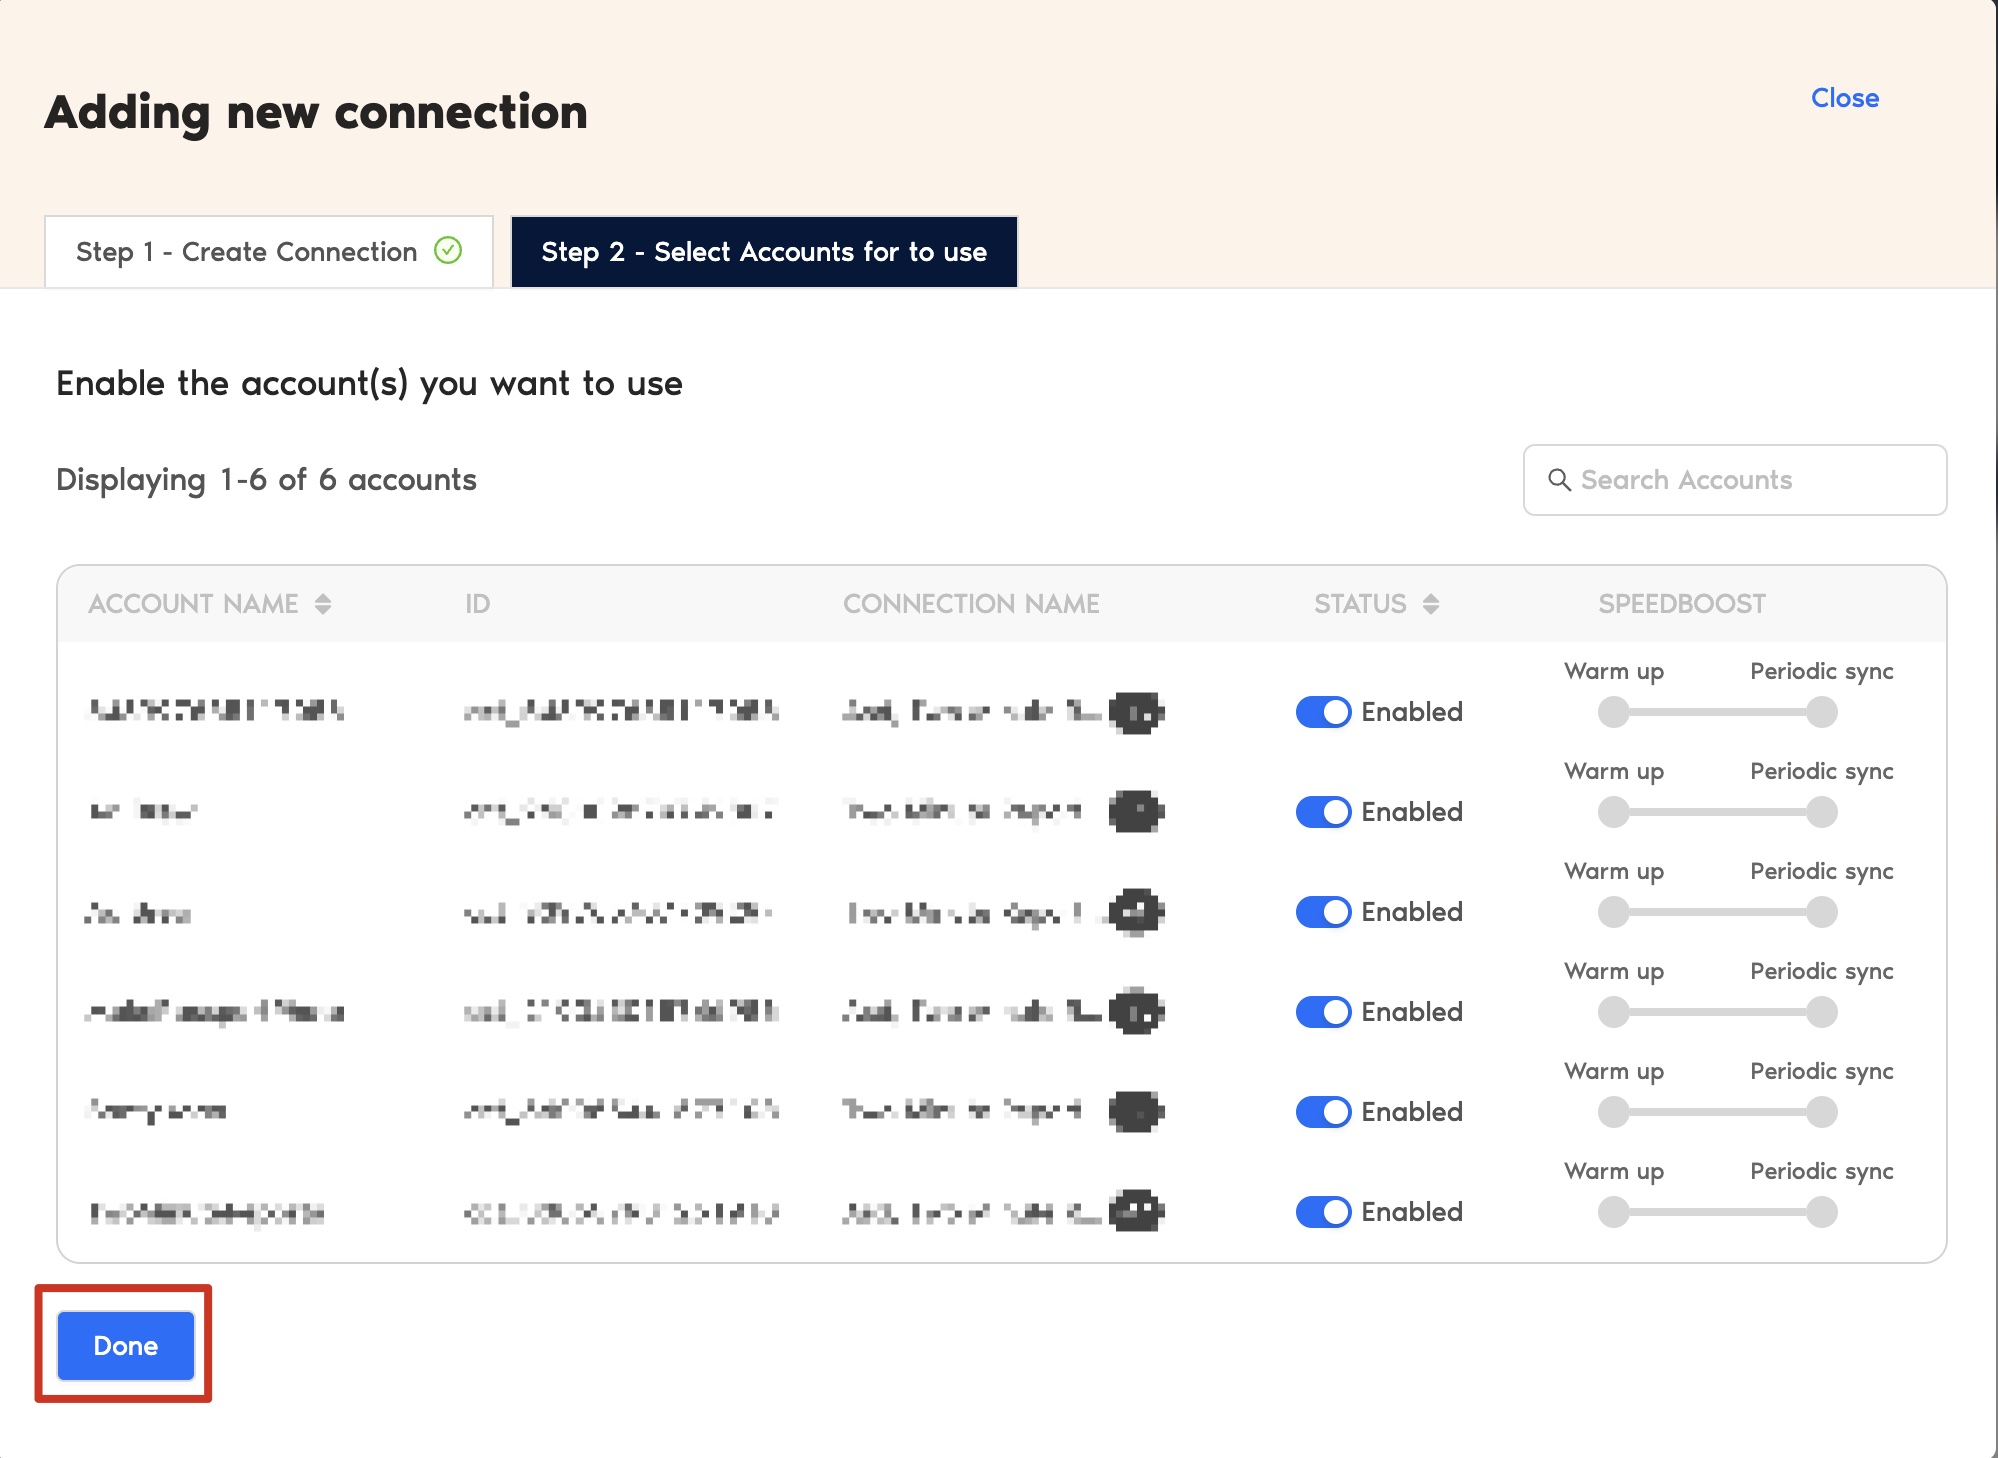
- Select the accounts you want to use and enable them. Once enabled, Speedboost will activate automatically, allowing you to fetch Facebook Ads data within seconds. Queries cannot be run for any accounts that remain disabled.
Once an account is enabled, Speedboost performs two key functions:
- Warm-up – Prepares your account for faster data retrieval by caching your historical data.
- Periodic sync – Ensures your data stays updated automatically at regular intervals.
Note: You can only fetch Facebook Ads data up to one year.
Step 2: Configure your Facebook Ads account with TMR
- In the Query Configs section, click + Add New.
| Query Config allows you to group multiple accounts together, making it easier to access centralized insights in your Looker Studio dashboard. |
- The “Adding New Query Configuration” dialog box will appear. Give your query config a name, choose the accounts you want from the enabled list in the dropdown, and set up your Facebook Ads report. Once you’re done, Click Save.
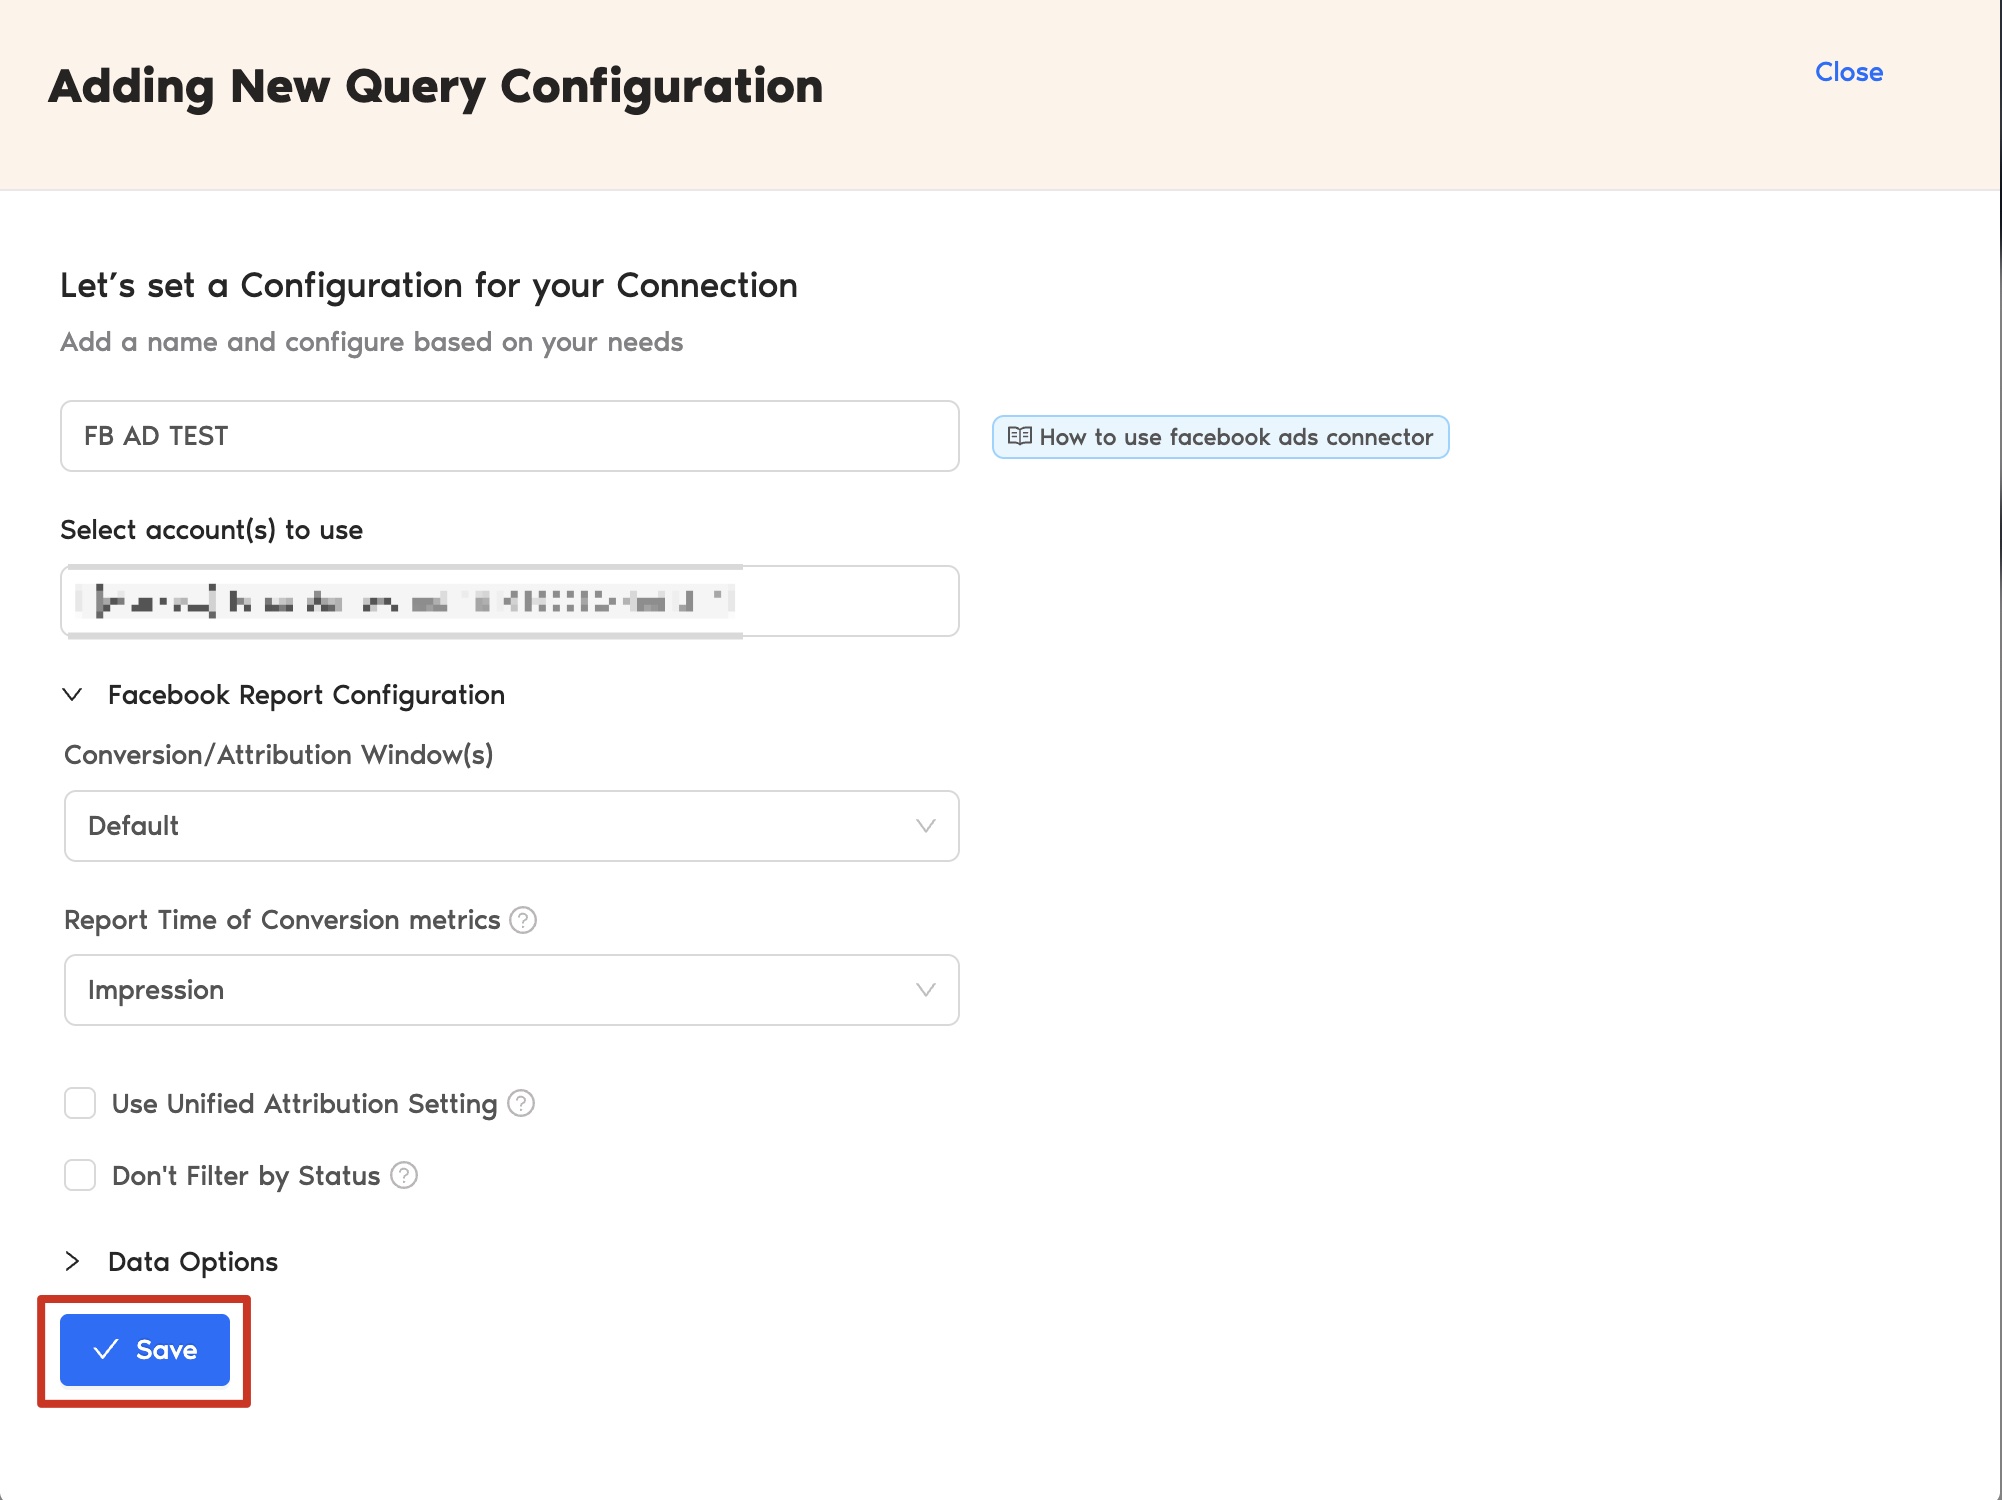
- You’ve successfully created a new configuration. You can now use this Query Config to pull data into your Looker Studio reports.
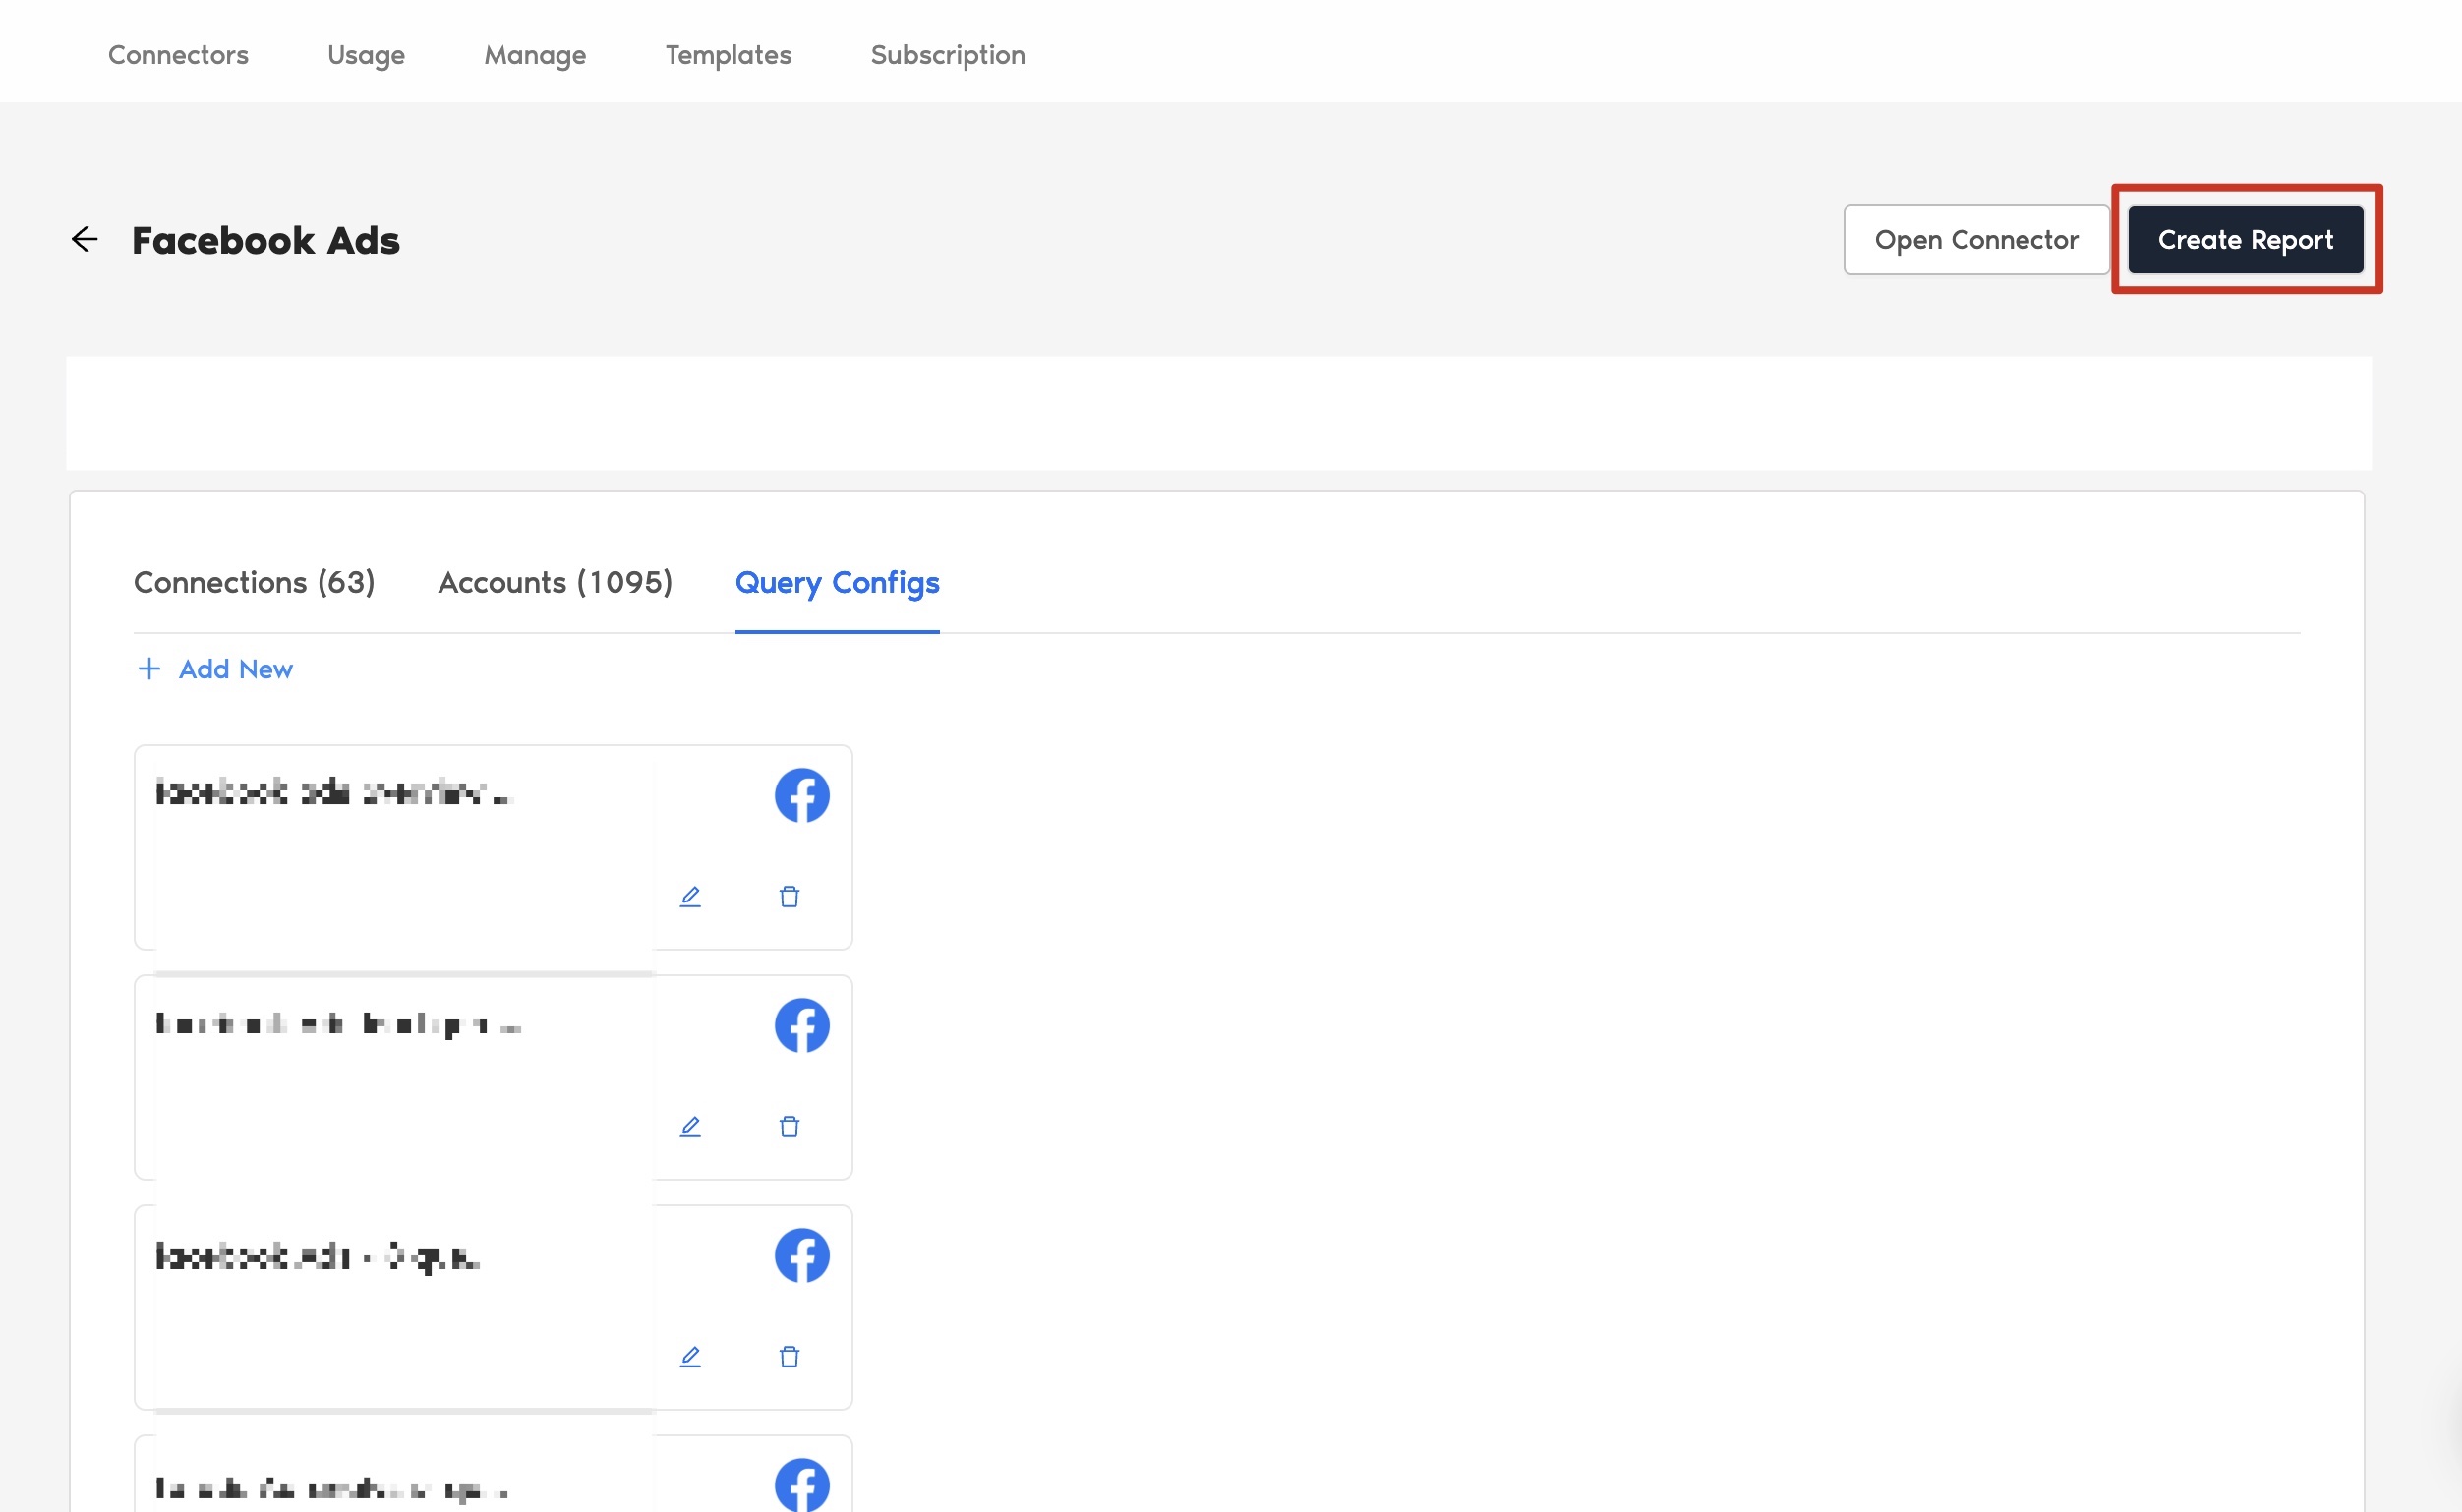
Step 3: Create a Facebook Ads report with TMR in Looker Studio
- After creating the Query Config, click Create Report at the top-right corner as shown below:
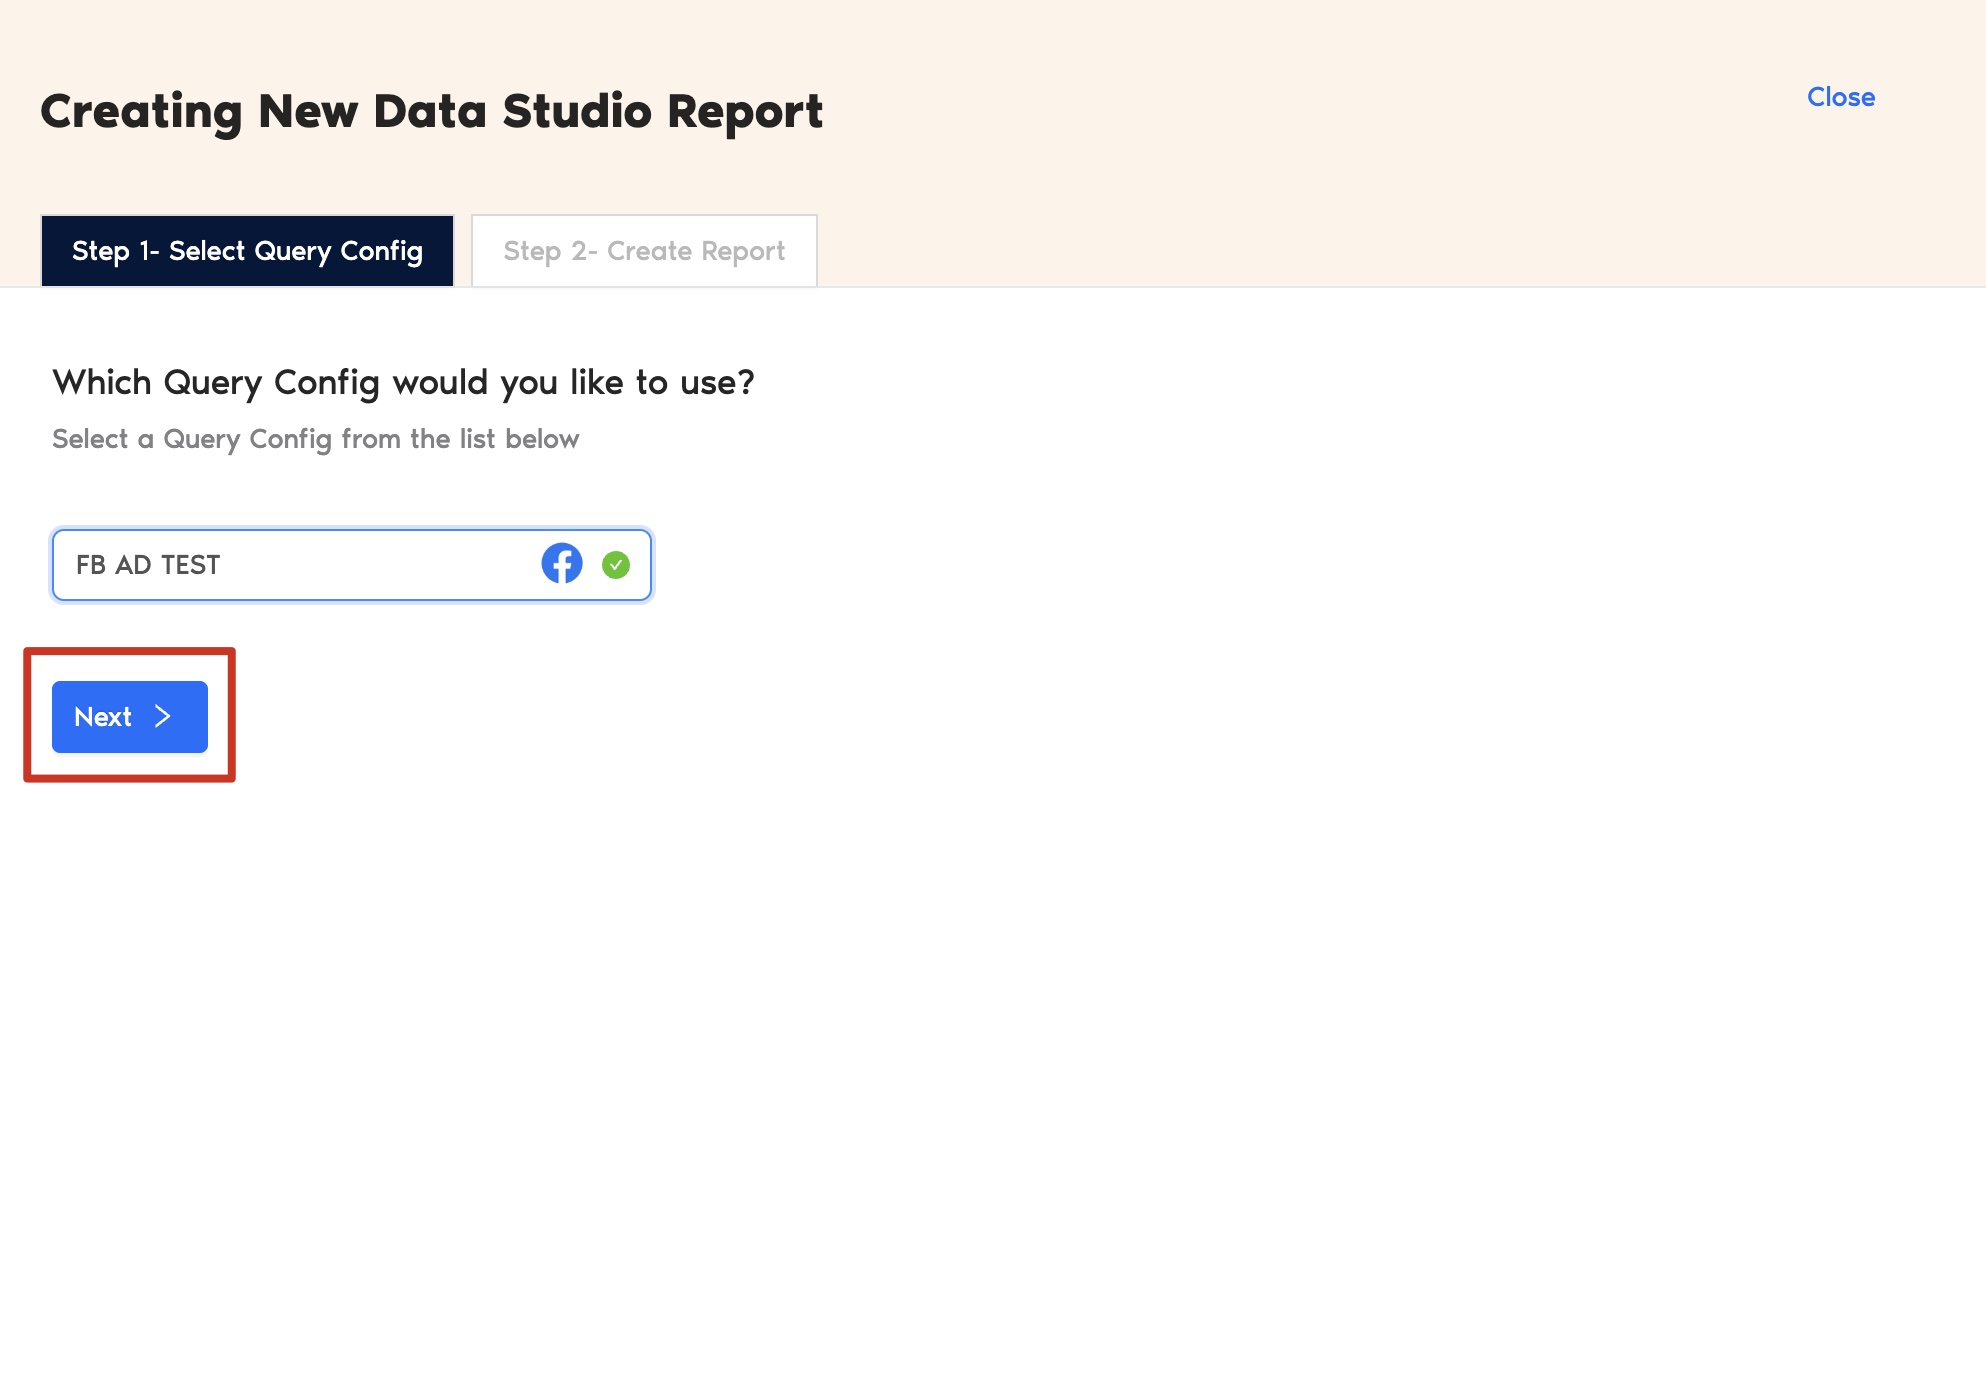
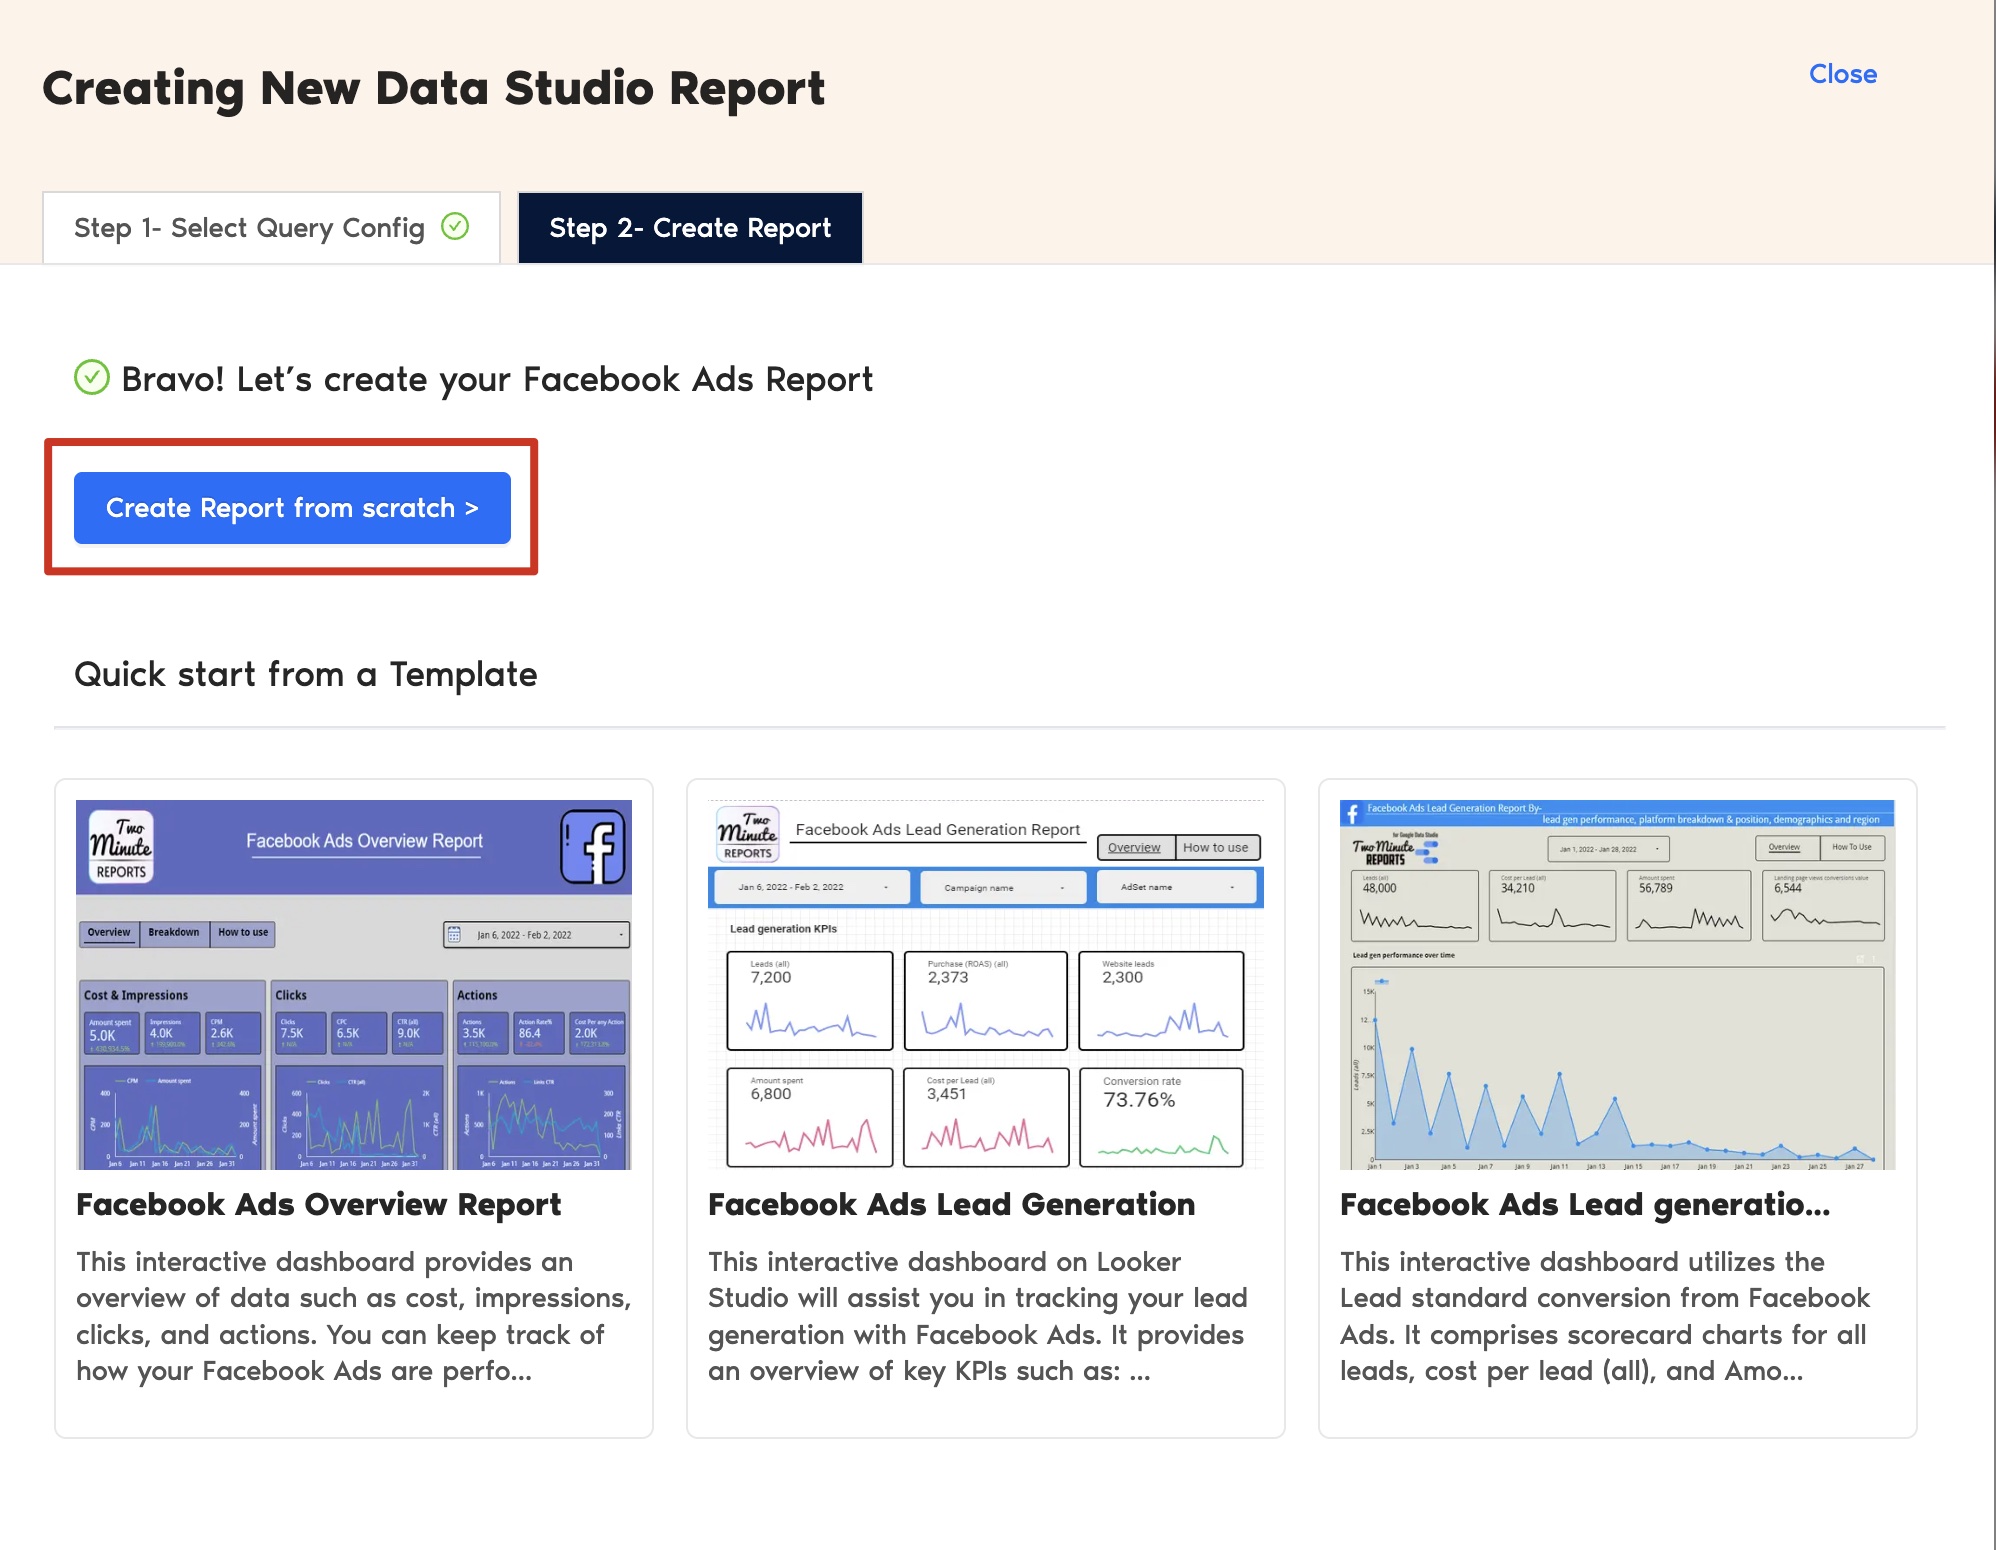
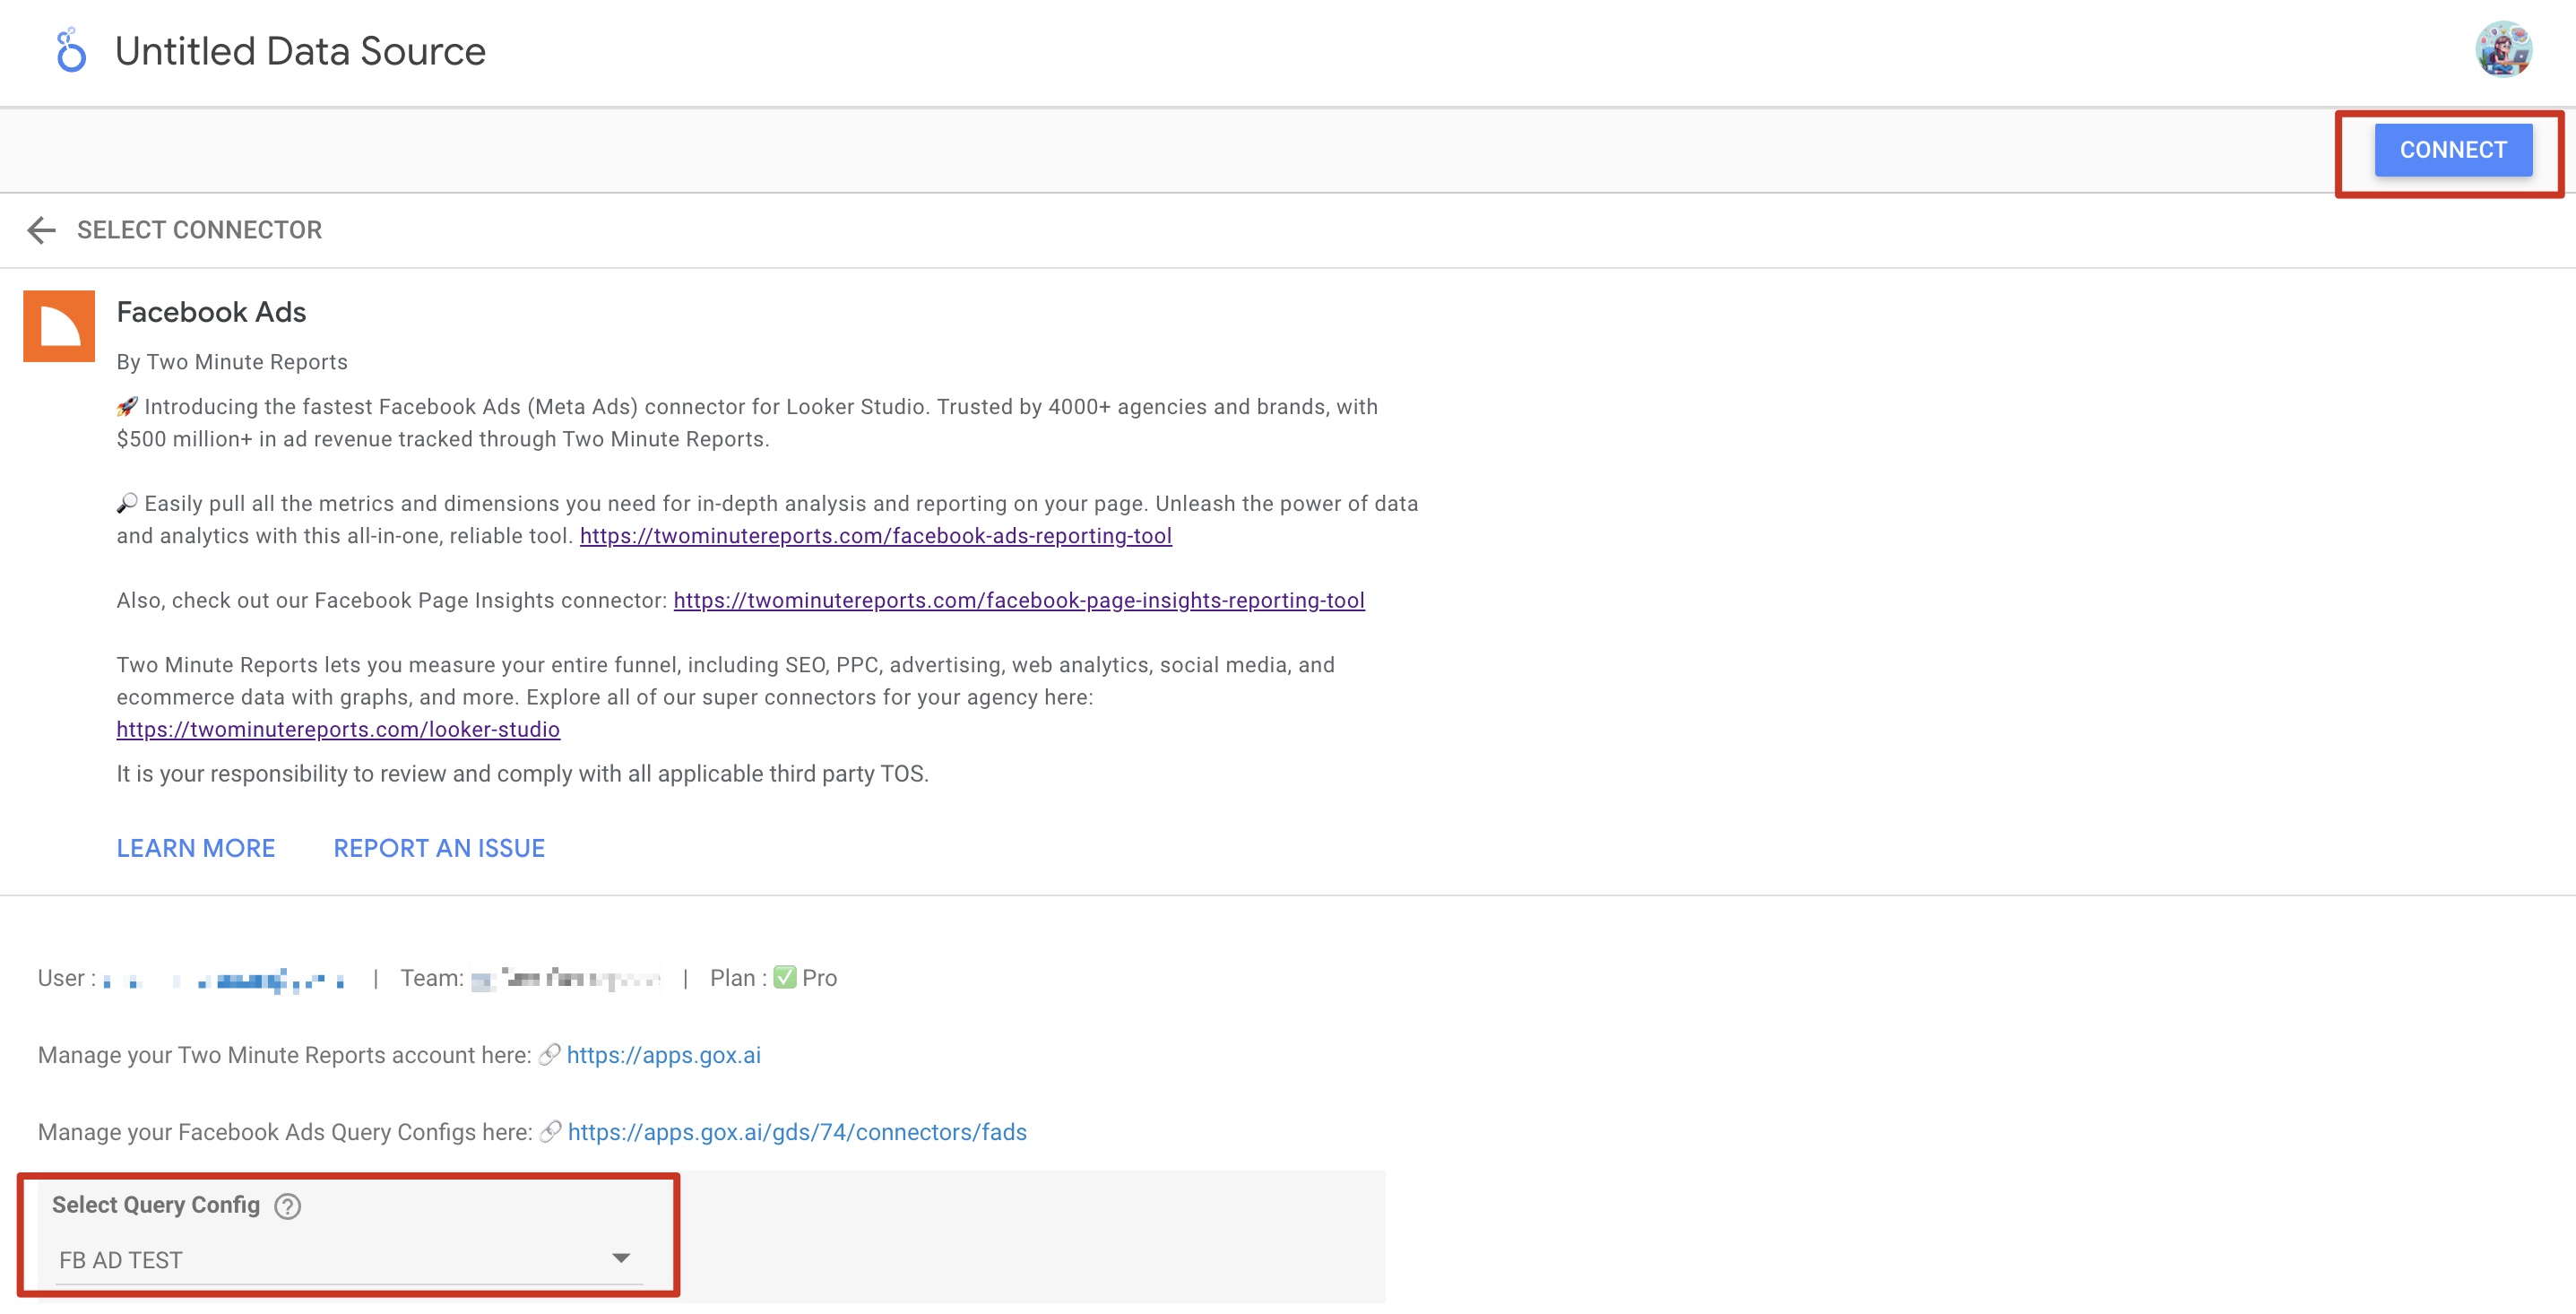
- Select the Query Config you created (in this example, ‘FB AD TEST’) from the list. Click Next, then choose ‘Create report from scratch’ to open your Looker Studio dashboard.
- Once the Looker Studio dashboard opens, select your team and the required Query Config from the dropdown list. Next, click Connect at the top-right corner.
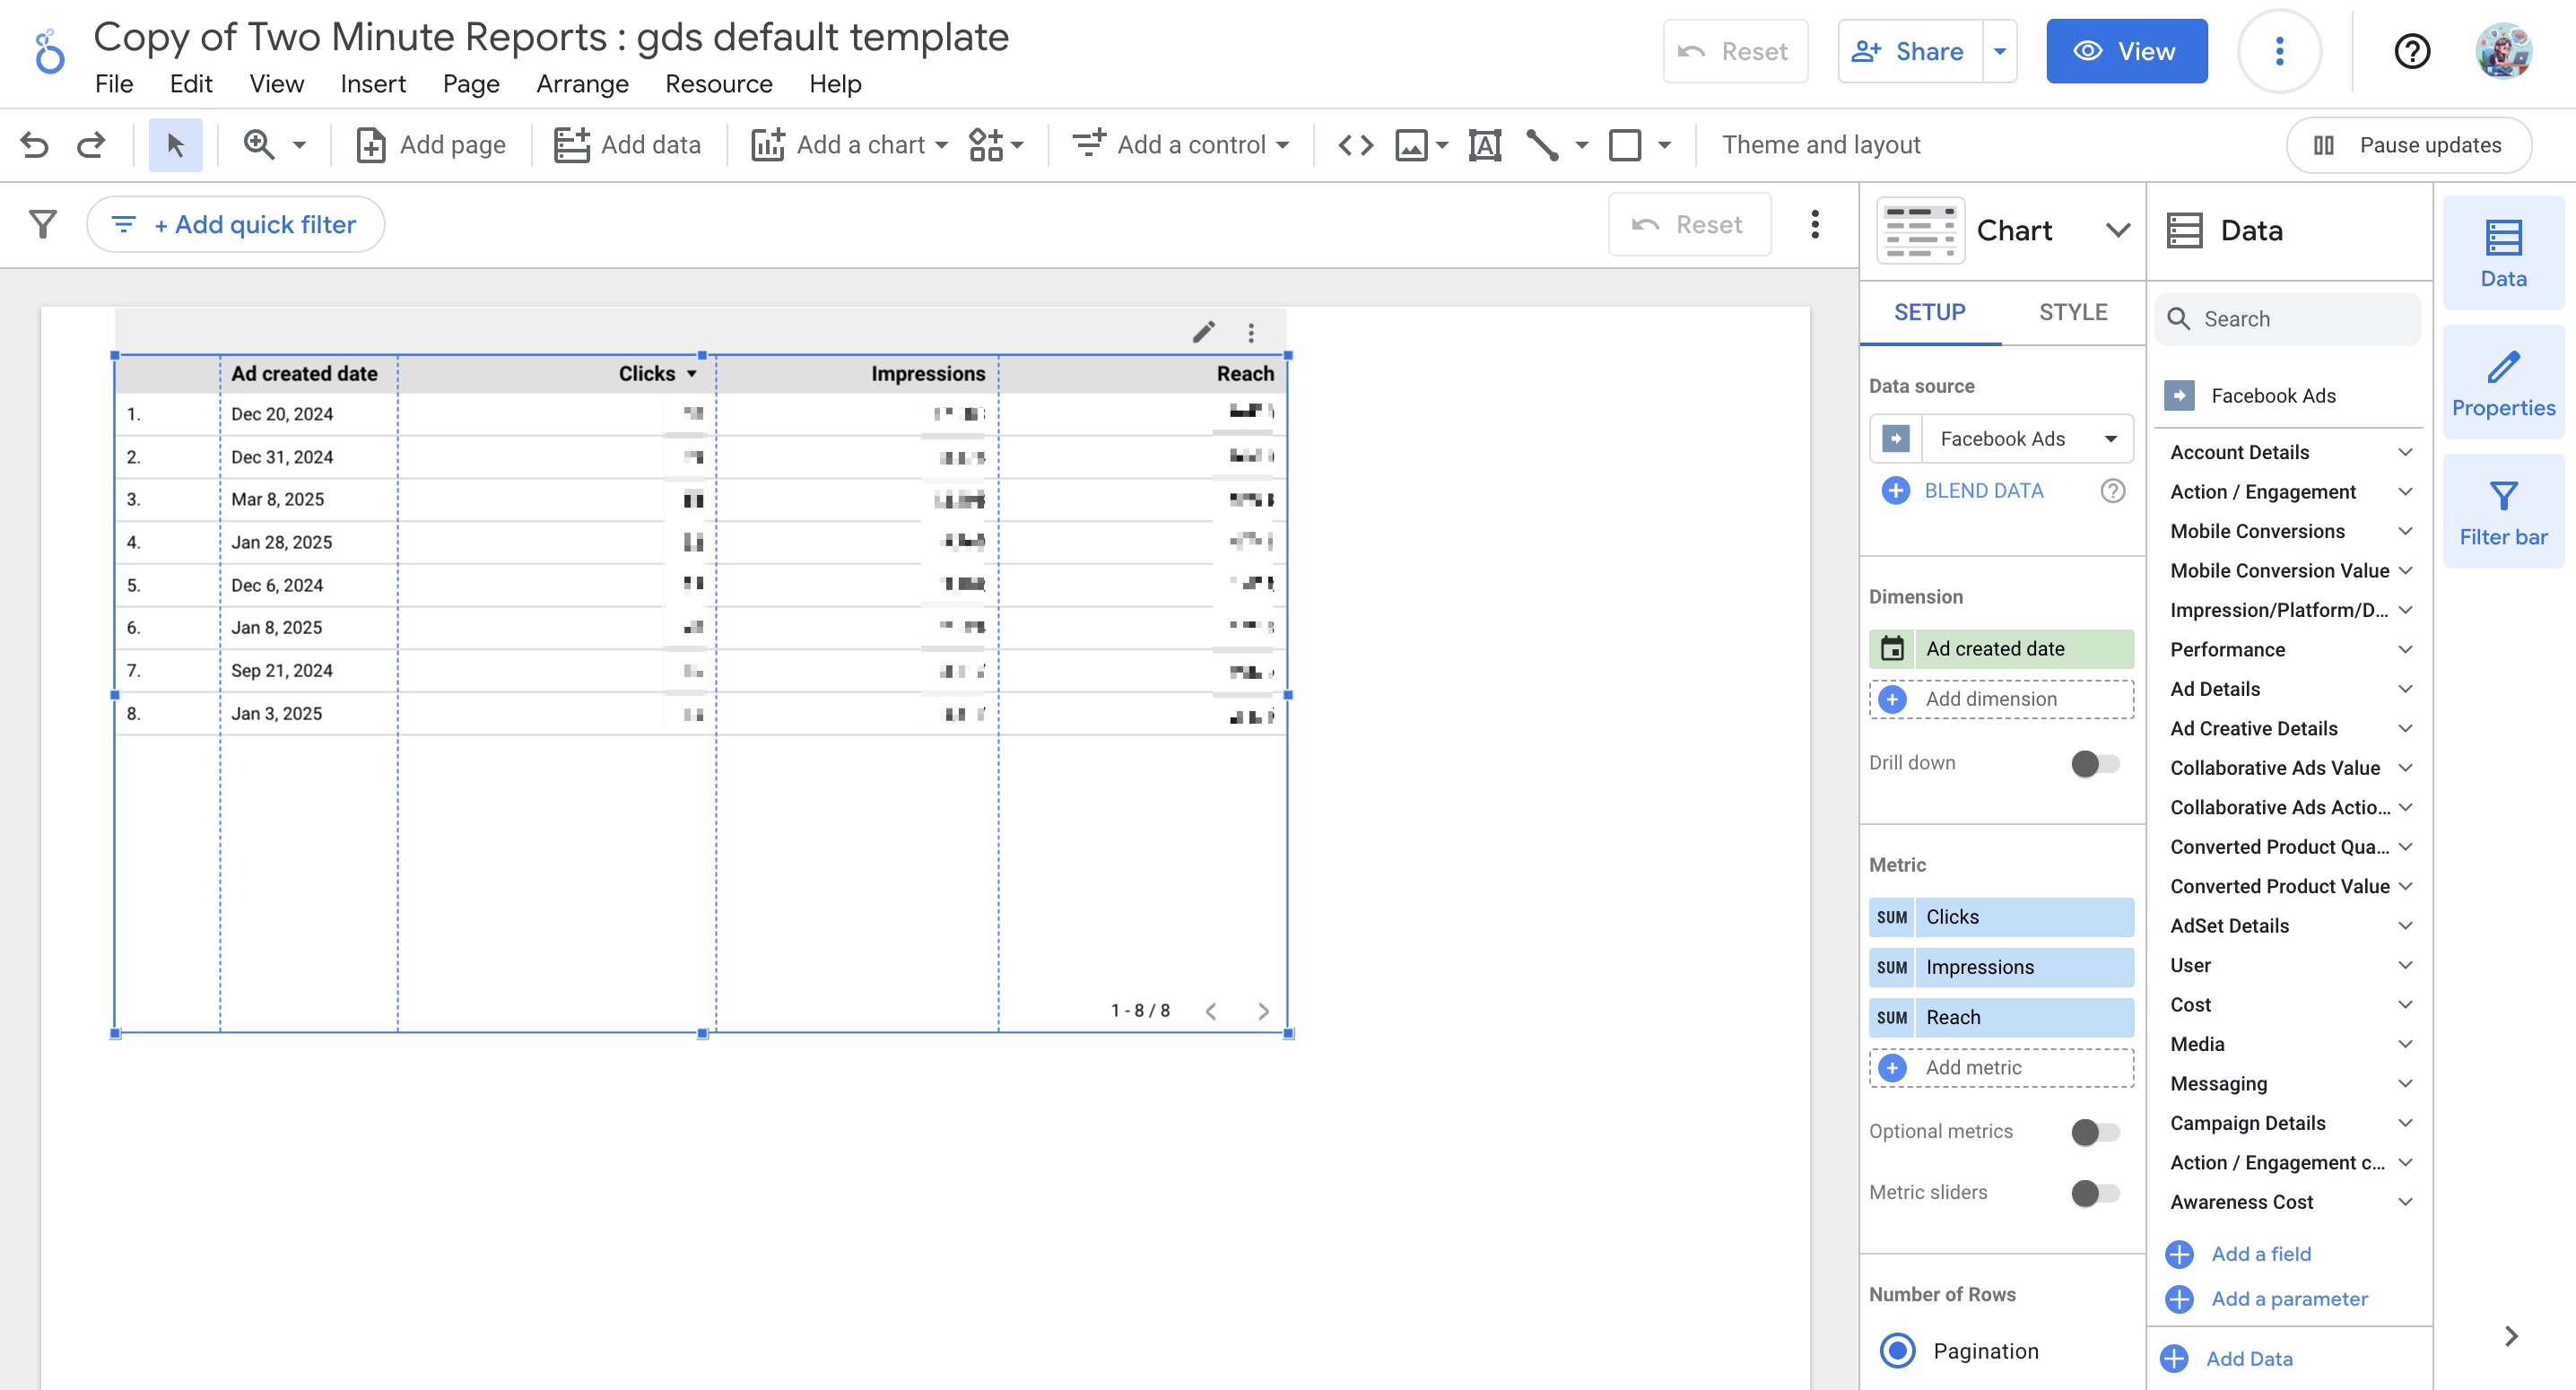
- Once you click Create Report, you’ll be directed to the Looker Studio dashboard. Here you can drag and drop the associated Facebook Ads metrics and dimensions to analyze your campaign insights faster.
- To make your Looker Studio report more engaging, use charts and visualizations. Click “Add a chart” and select the chart types that best fit your dashboard.
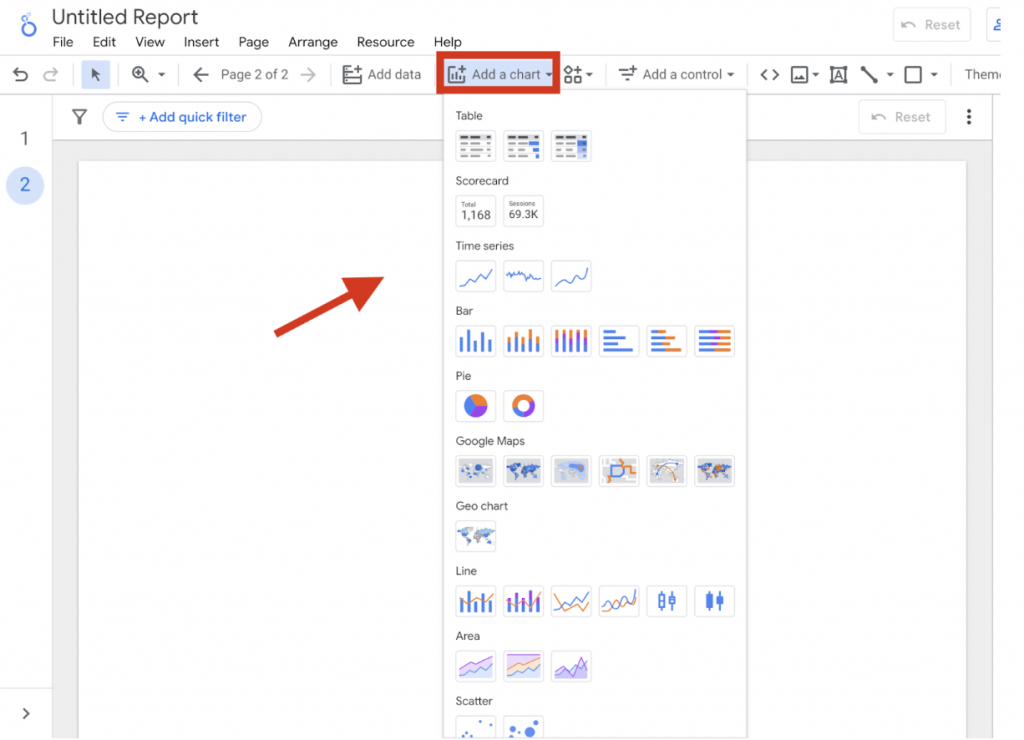
For example, you can use bar charts to show how your Facebook campaigns are trending and add scorecards to highlight key KPIs. You can also include a date-range control to analyze campaign performance for any specific period.
Note: When using excessive charts and other visualizations, your Looker Studio dashboard might slow down in execution. Try our five tips to increase the speed of your Looker Studio reports to optimize the performance of your Looker Studio dashboard.
We hope you found this article helpful. If you have any questions, please contact our support team via [email protected].