By integrating Shopify store data with Looker Studio, you can visualize store insights via engaging dashboards, enabling faster decision-making. However, as a store admin, you’ll need to create a custom app in your Shopify store and input app credentials into TMR to connect your store accounts.
Before connecting your Shopify store data to Looker Studio, ensure you have the following permissions:
Required permissions
You must have the store owner access or staff access with all permissions to establish a connection and access the Shopify store data.
How to grant permission?
- Go to Shopify Admin > Settings > Users and permissions.
- Select the user you want to update.
- Click on the Staff member’s name (or “Add Staff” to create a new one).
- Scroll to the Permissions section.
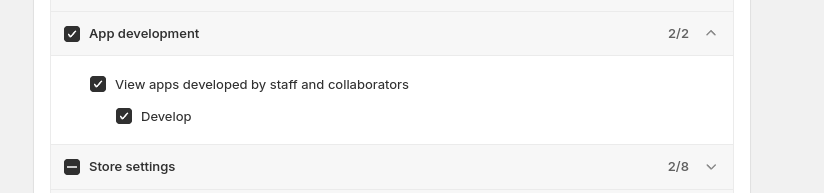
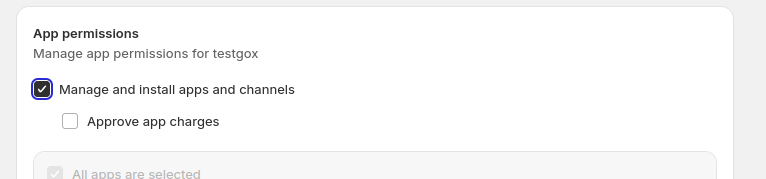
- Check the following boxes:
- App development
- Manage and install apps and channels
Permissions needed:
1. App development
2. Manage and install apps and channels
Once you confirm these prerequisites, follow the steps below to connect your Shopify store with Looker Studio through TMR.
Step 1: Streamline your Shopify store accounts in Looker Studio
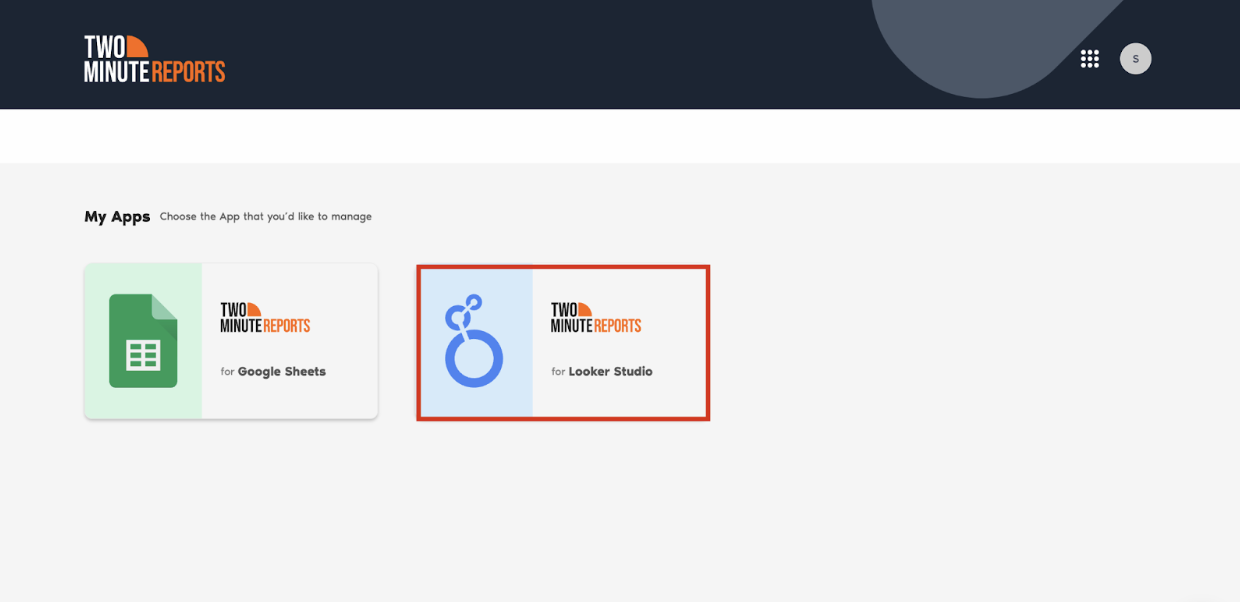
- Go to https://apps.gox.ai/. Choose Two Minute Reports for Looker Studio.
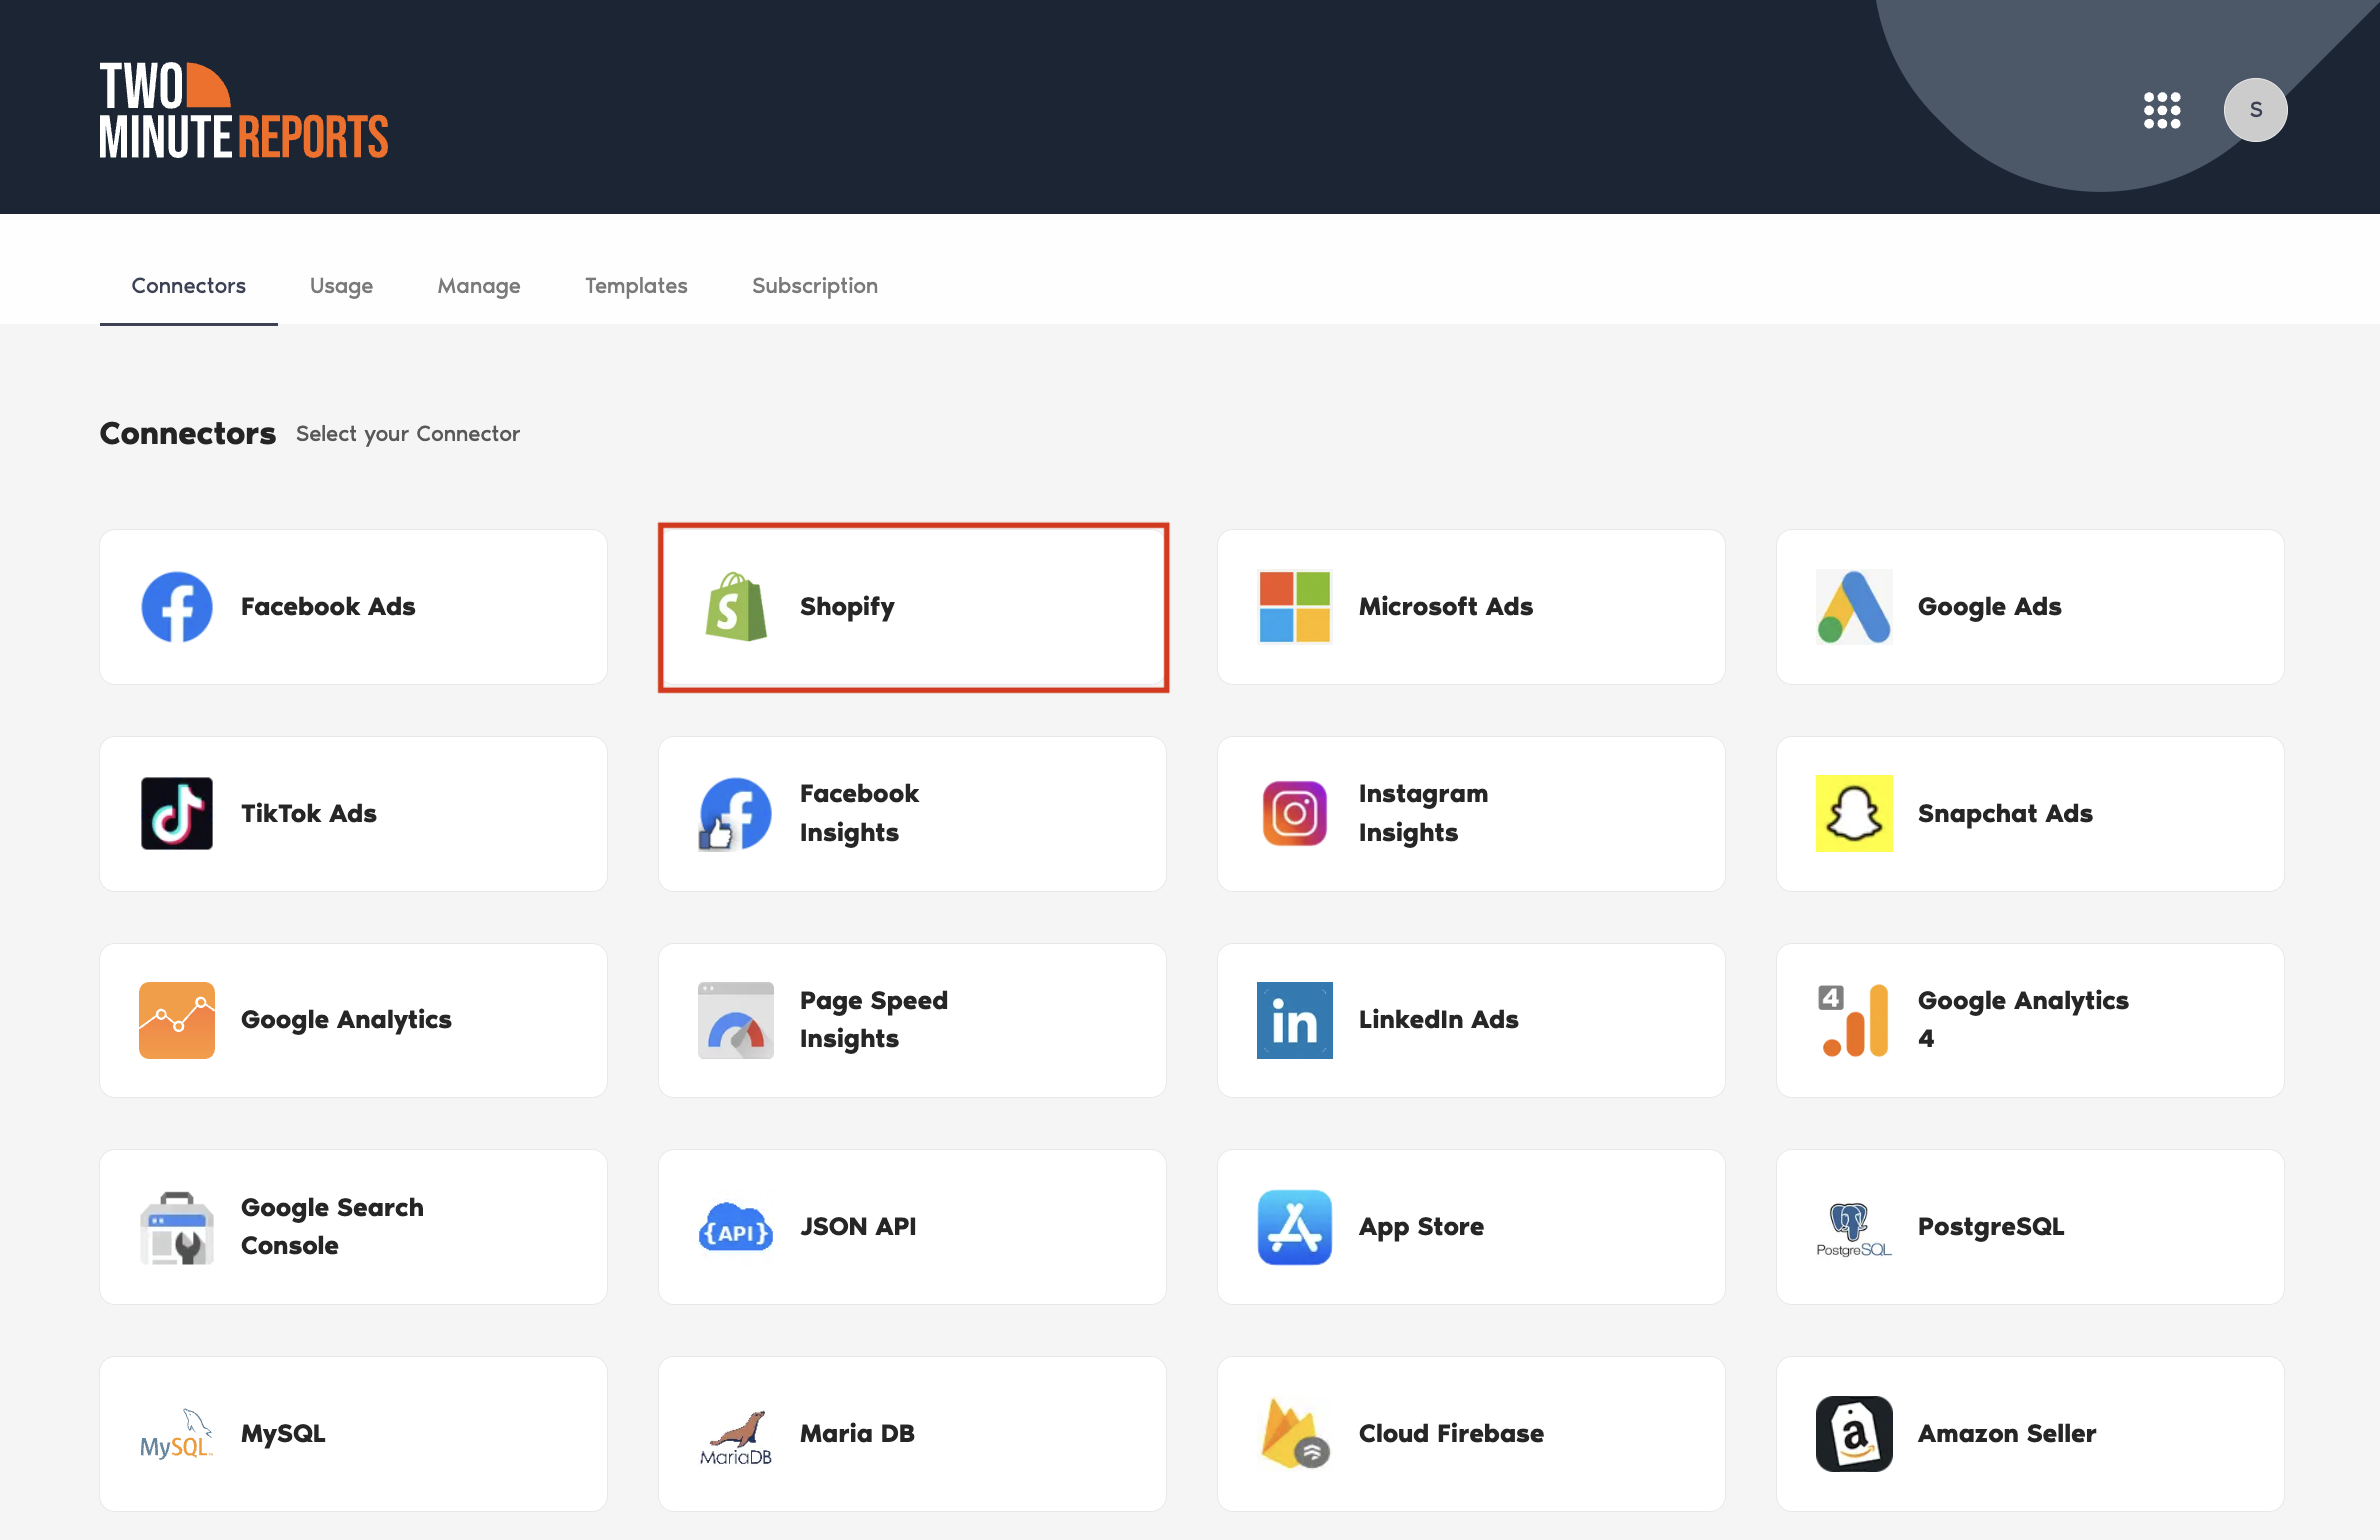
- Select Shopify from the list of connectors.
- Next, connect your Shopify store data. Click New Connection to start creating your Connection in Looker Studio.

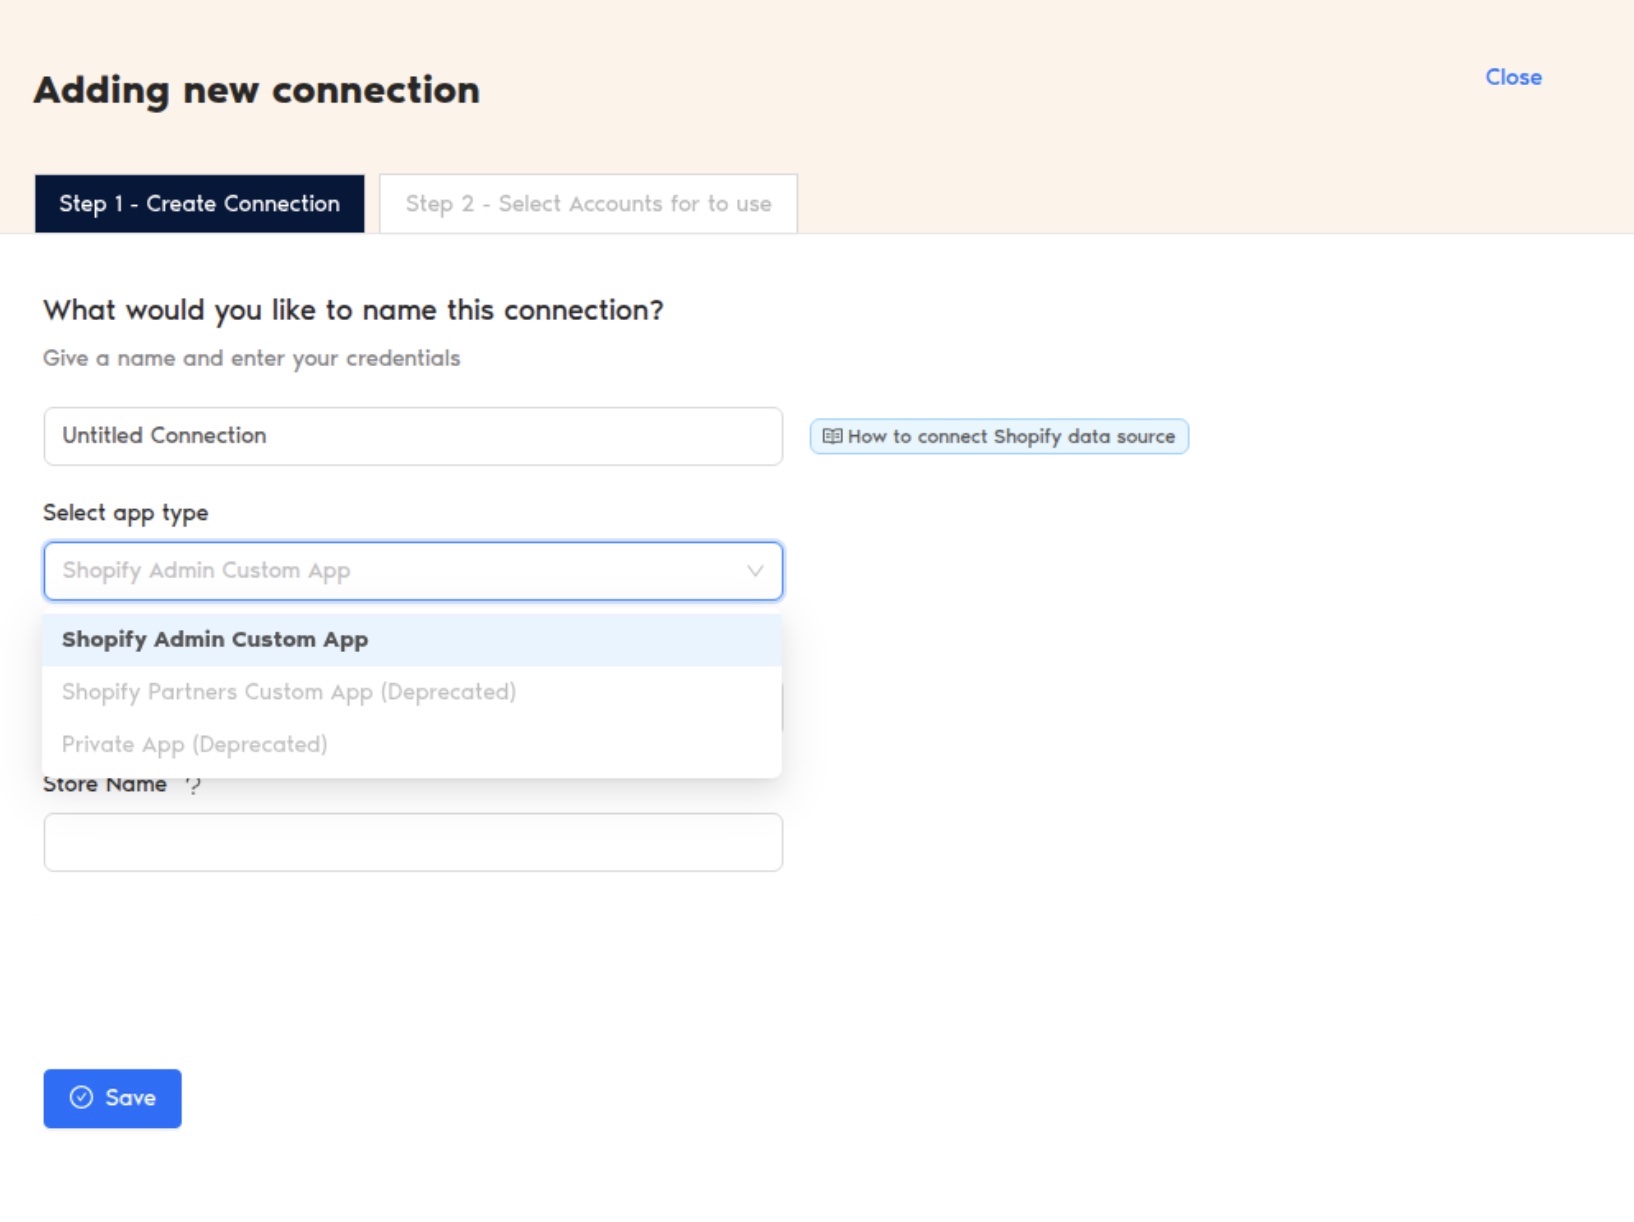
The Adding new connection dialog box appears. Here, you can connect your Shopify store to Looker Studio using the API credentials generated from your Shopify Admin portal.
Next, let me take you through the steps to create your custom app from the Shopify Admin portal.
Creating the app from the Shopify Admin portal
Step 1: Go to the Shopify Admin portal.
Step 2: Click the Apps section in the sidebar.
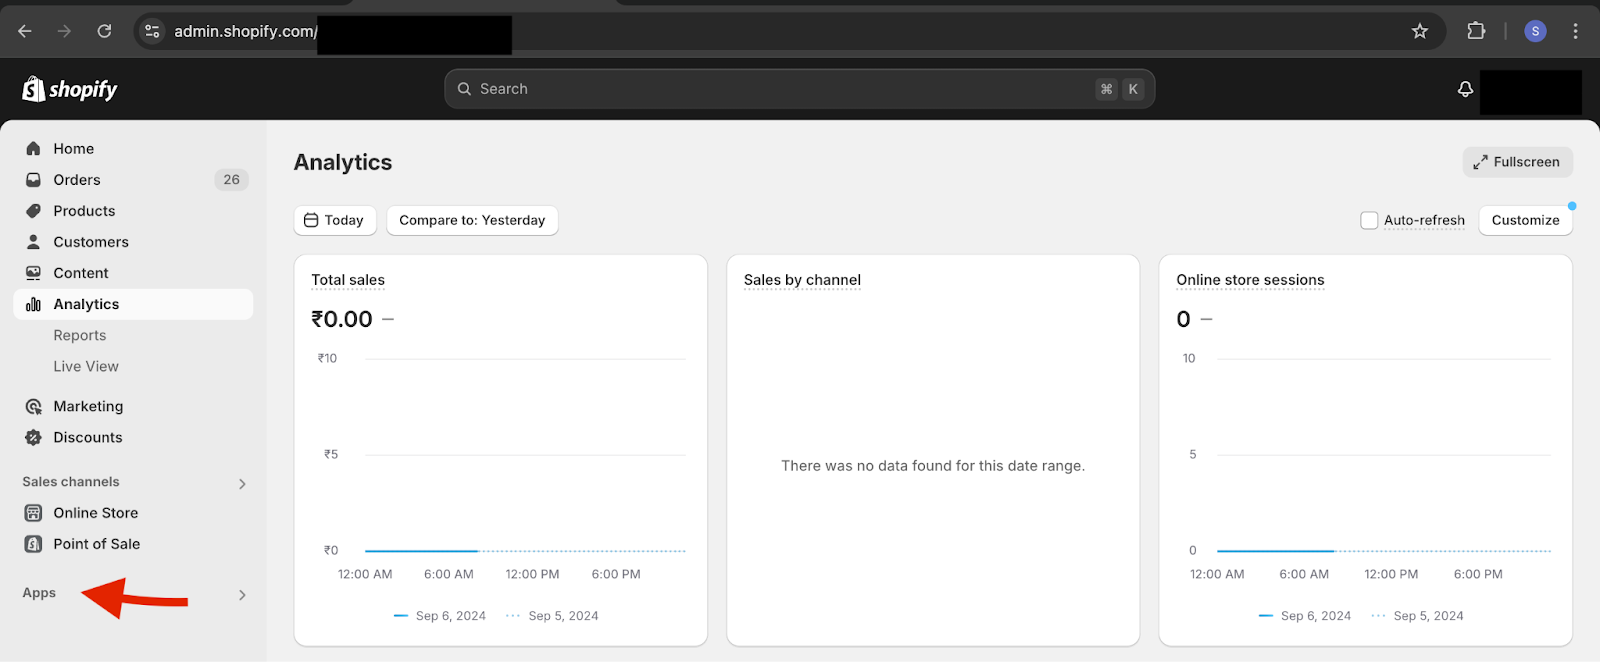
Once you click Apps, the previously installed apps will be listed. Below the app names, click App and sales channel settings.
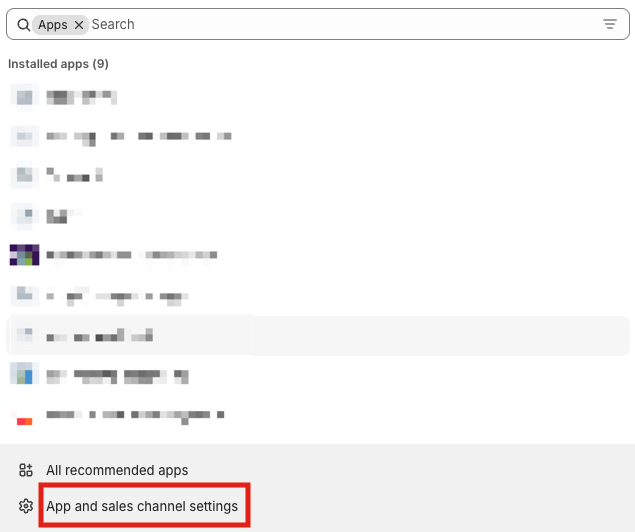
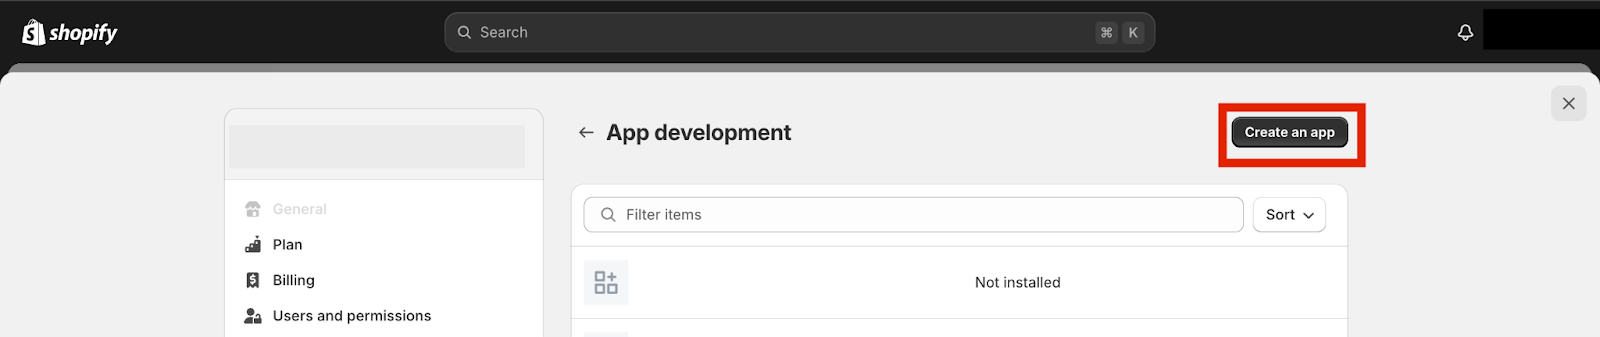
Step 3: On the next page, select the ‘Develop apps’ option.

Then, click the Create an app option to create a new admin app.
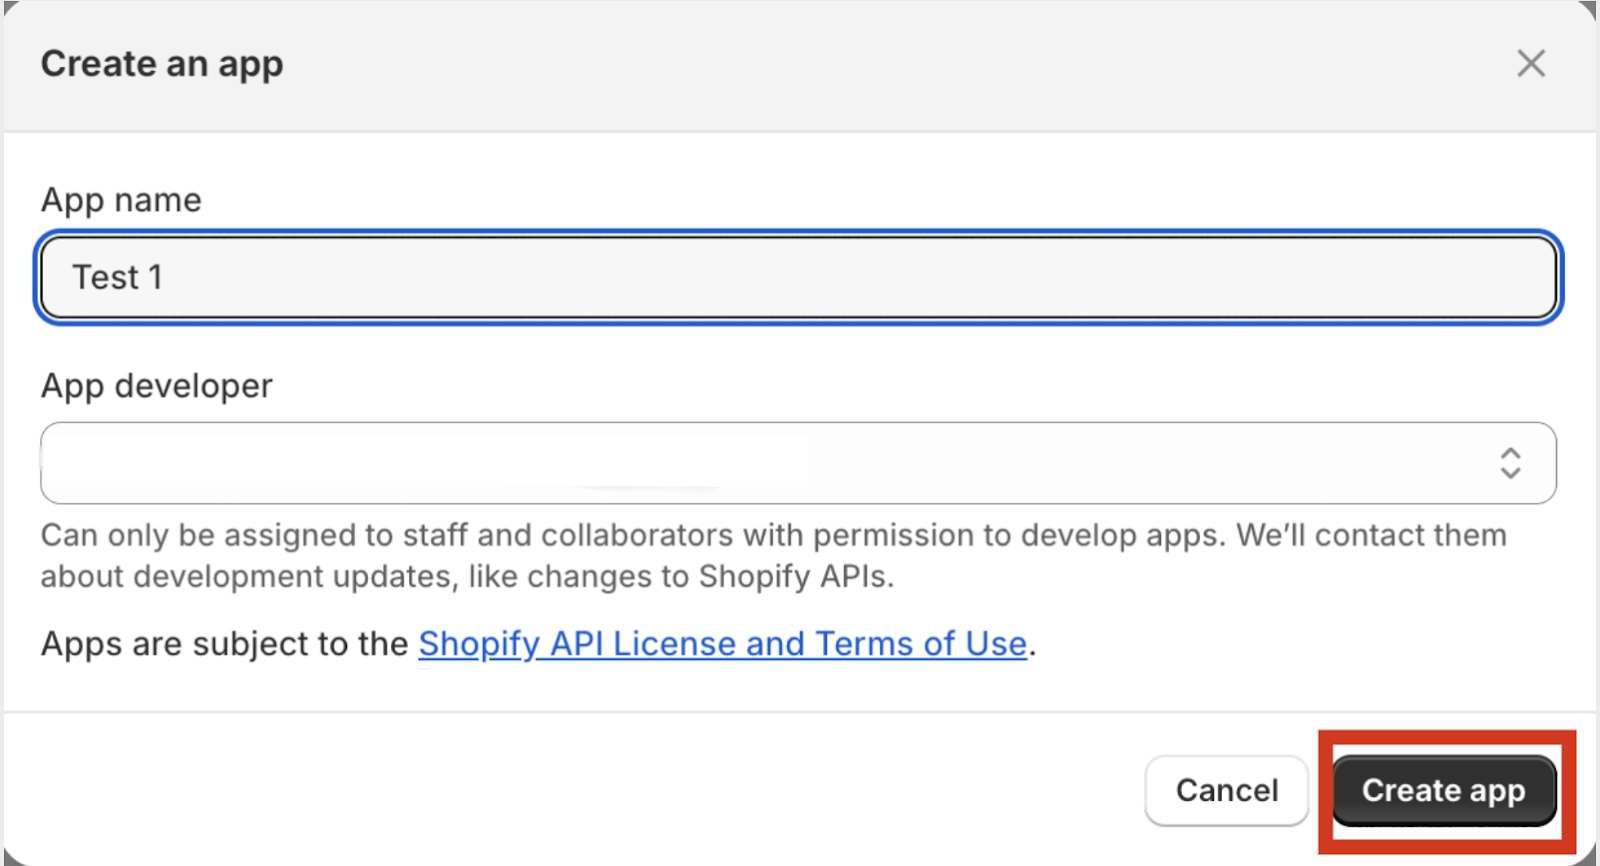
Once you click that option, a pop-up will appear. Enter the relevant details (app name and developer) and click the ‘Create app’ button.
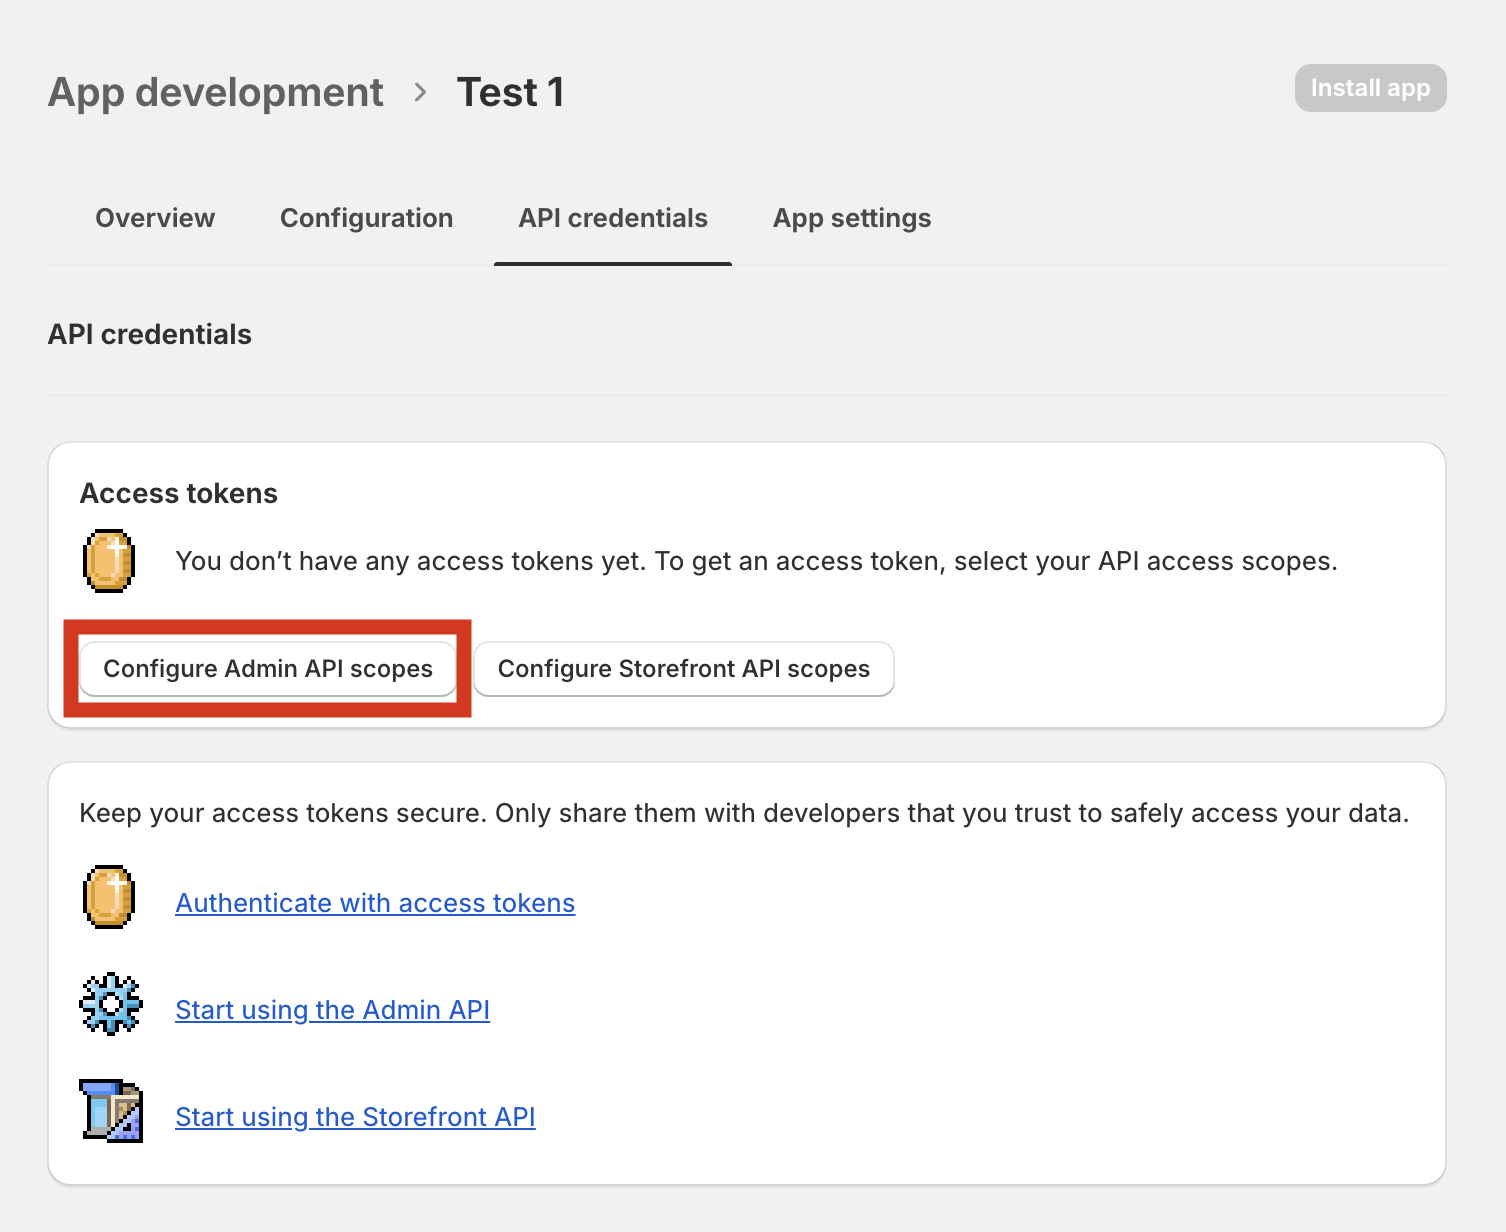
Step 4: Once the app has been created, click ‘Configure Admin API scopes’ to access API credentials.
Step 5: Select the following scopes:
- read_analytics
- read_customers
- read_draft_orders
- read_fulfillments
- read_inventory
- read_marketing_events
- read_orders
- read_products
- read_reports
- read_locations
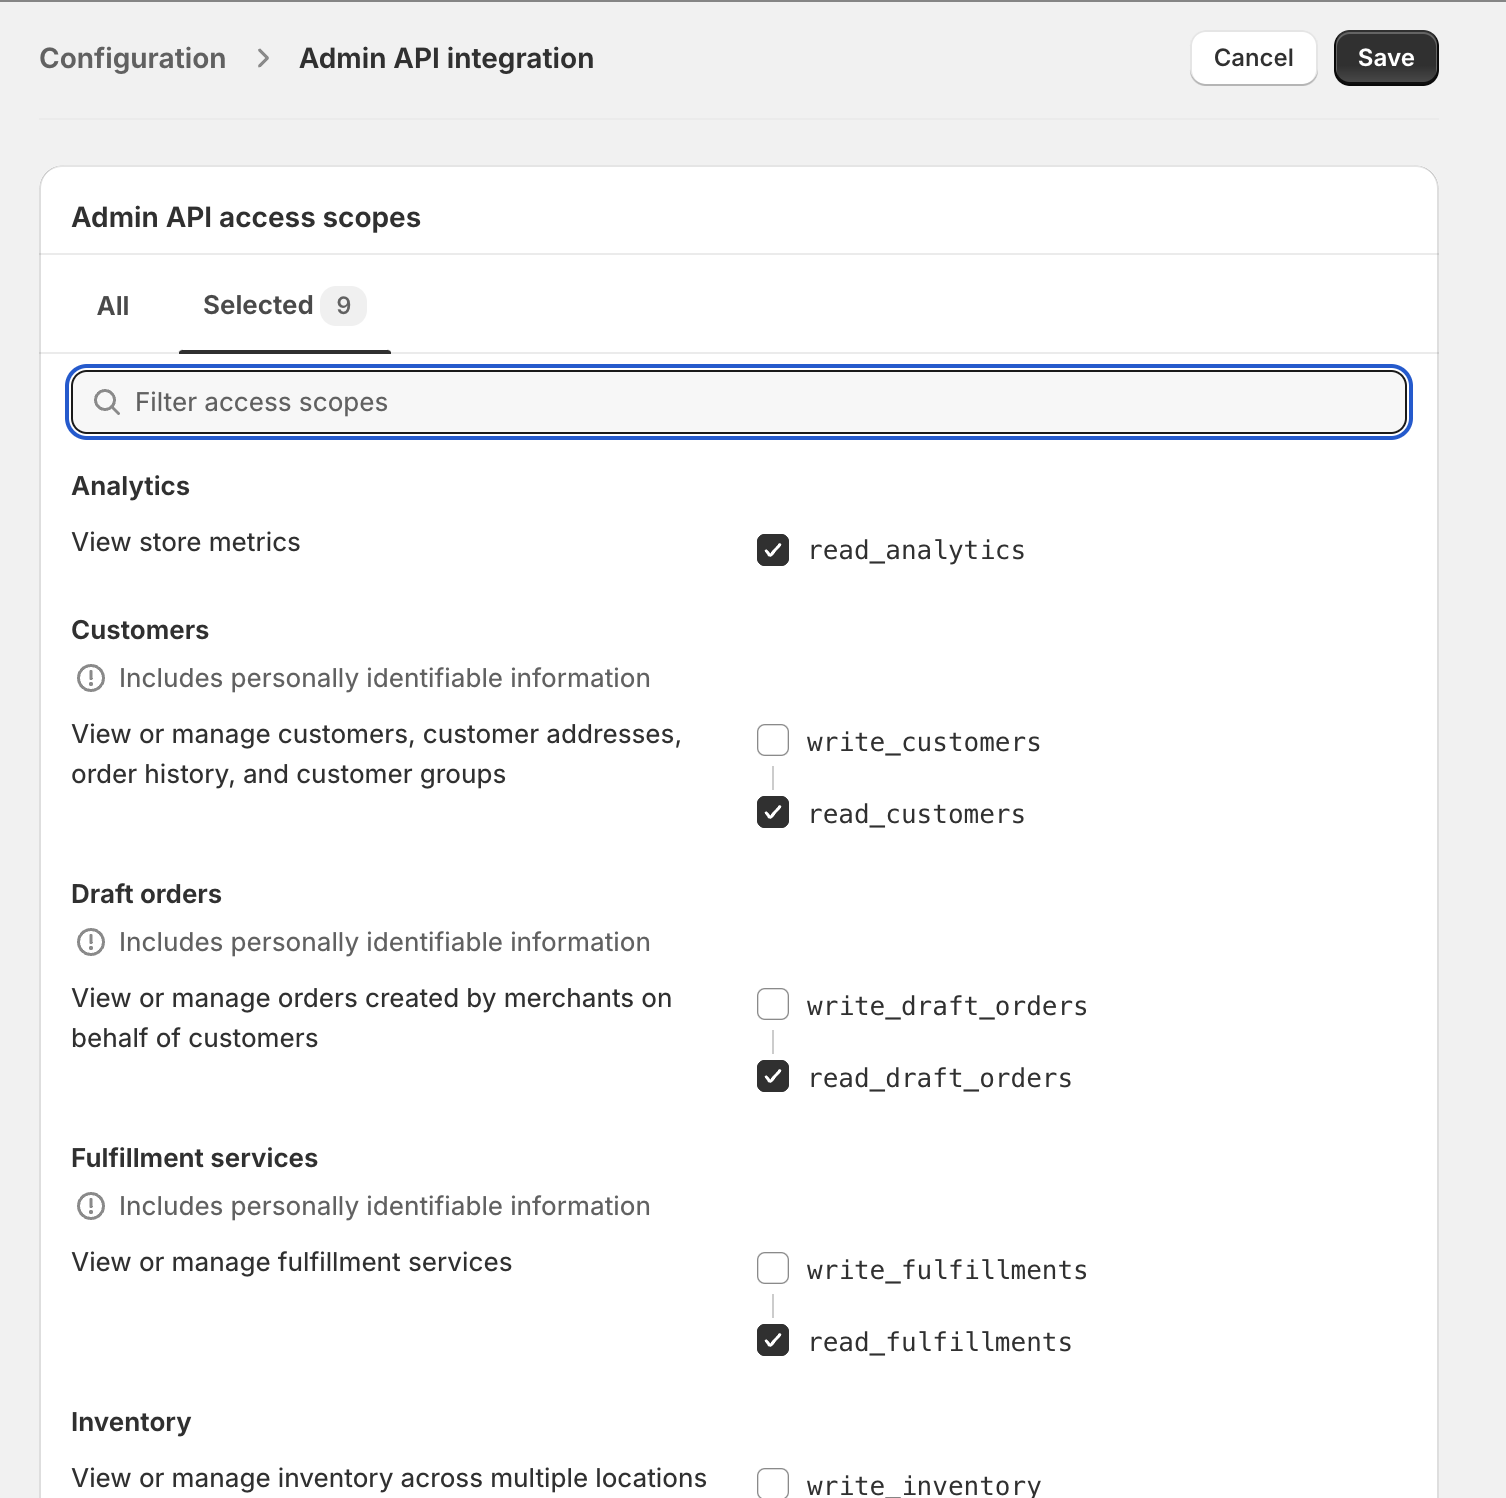
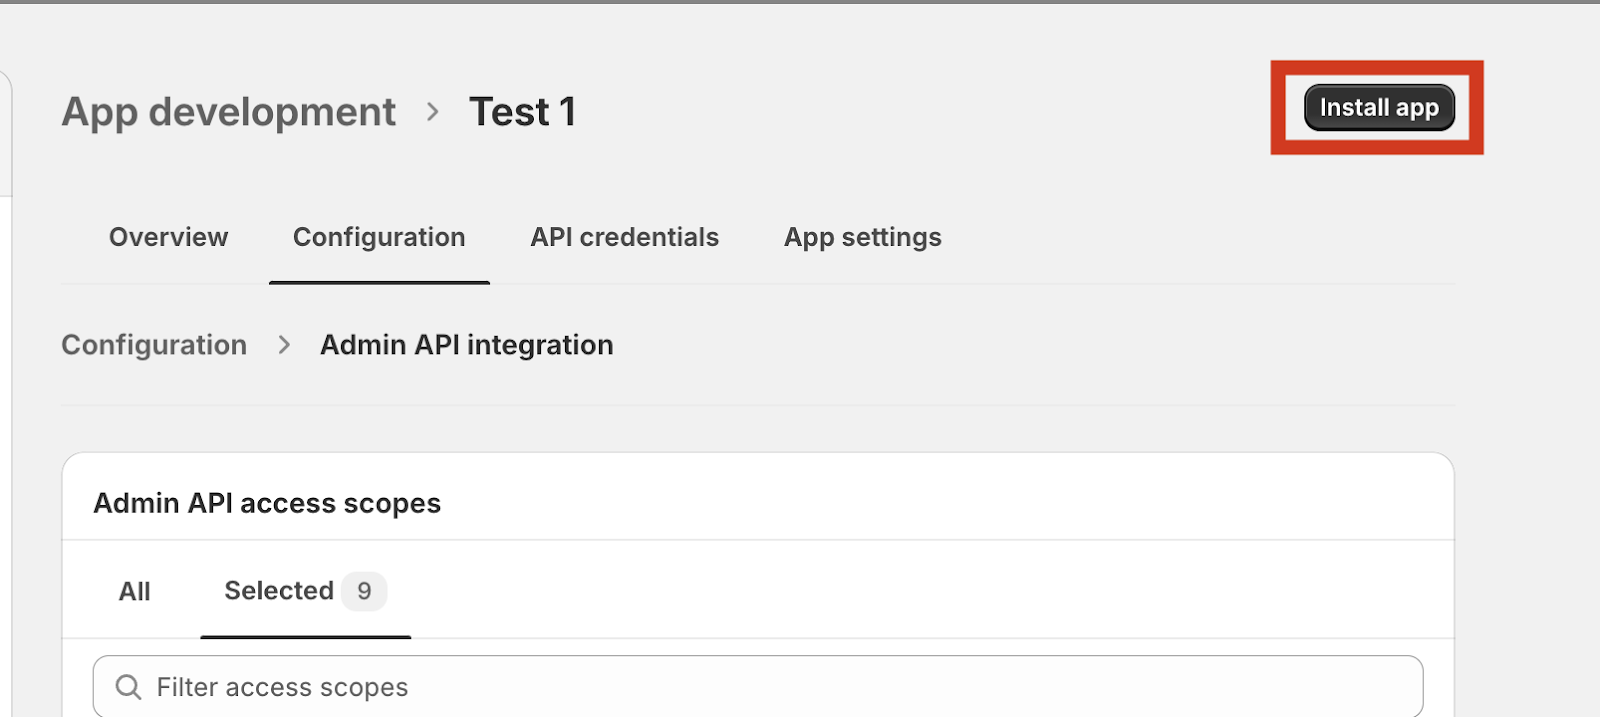
Step 6: After selecting the required scopes, click Save. The Install App button will be enabled. Click it.
Step 7: Once installed, you will be given an Admin API access token. Copy that token.
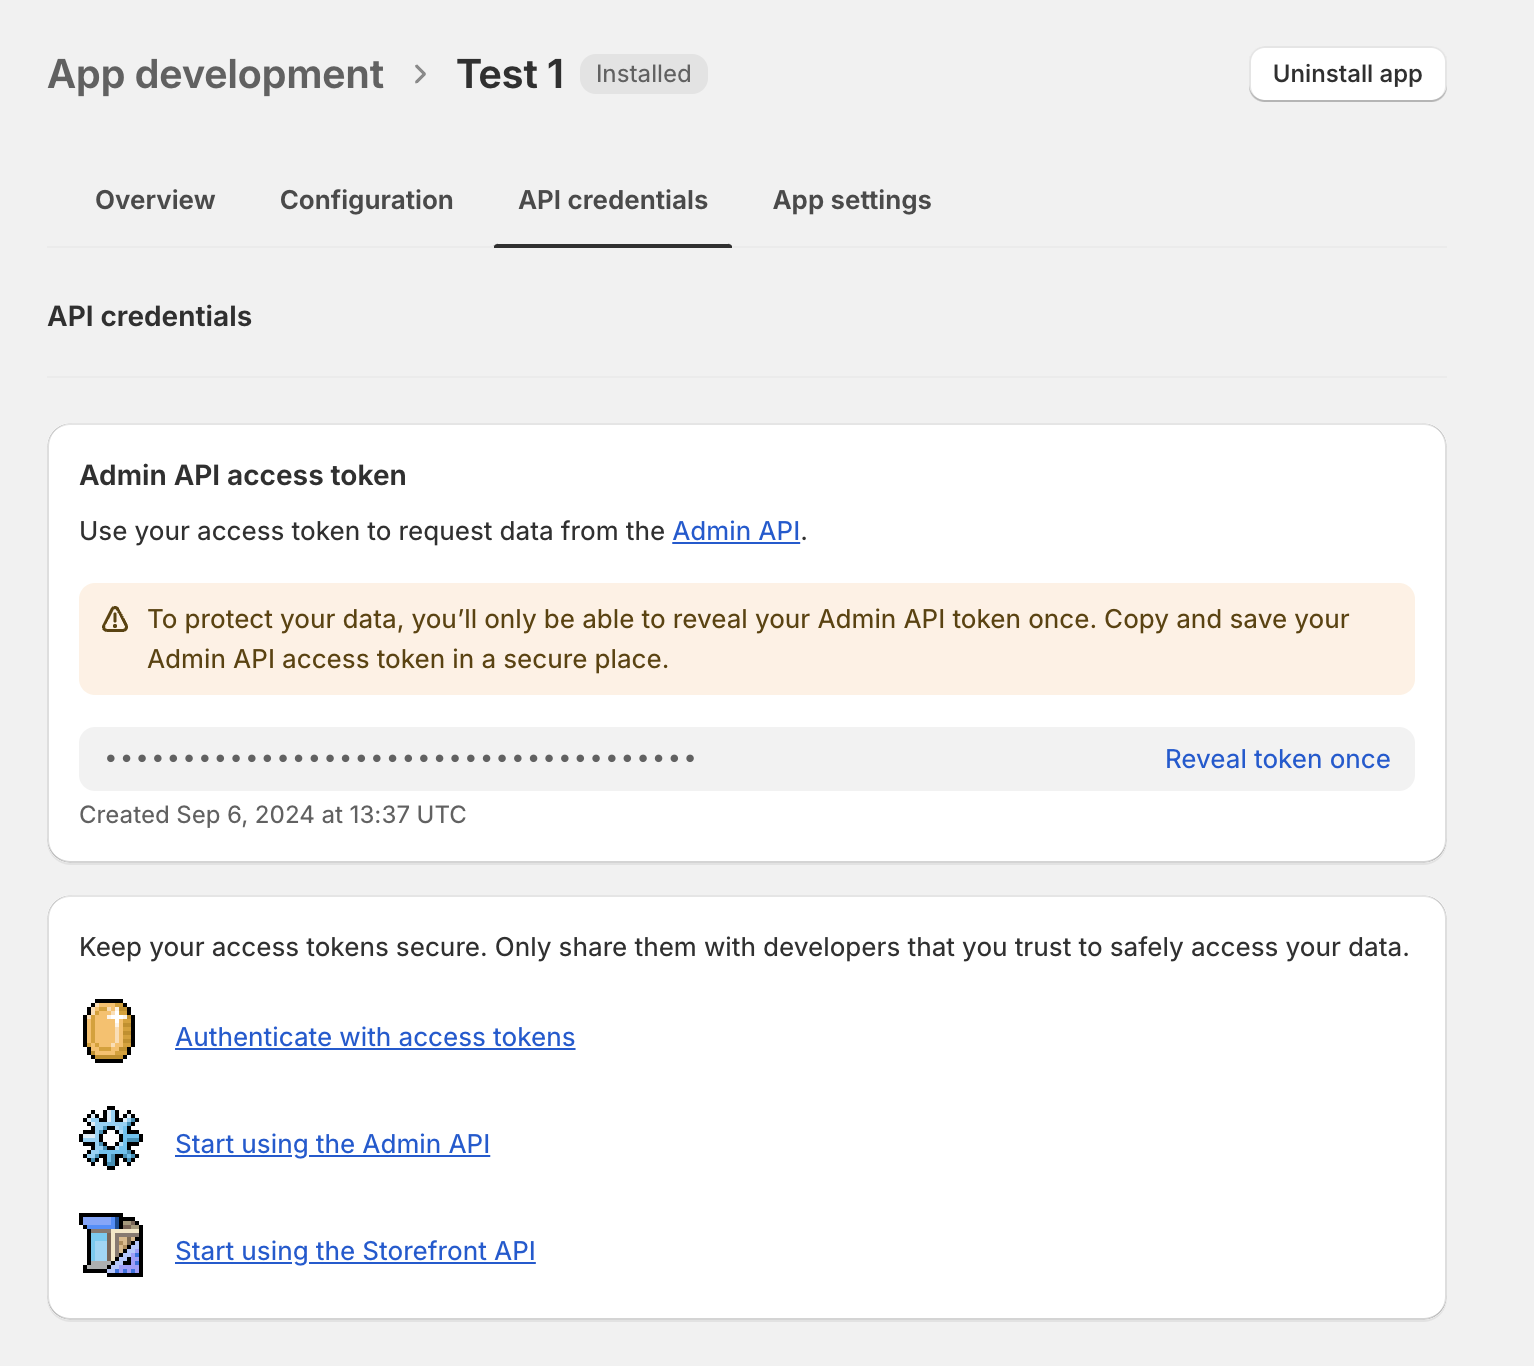
Note: If you click “Reveal token once,” you can view the hidden API token only once. So, ensure that you copy and store the API token in a secure place.
And that’s it. You’ve configured the credentials in the Shopify Admin portal. Next, copy and paste those credentials into Step 1 – Create Connection in the Adding new connection window.
Enter your Connection name and choose the app type as Shopify Admin Custom App. Paste the API admin access token in the Access token field. Lastly, specify your shop name.
Note: Your shop name is the subtext in your Shopify URL. For example, in the following URL, “https://thisismyshop.myshopify.com,” the shop name is “thisismyshop.”
Once done, click Save.
Your Shopify store will now be authenticated. As shown below, you can proceed with selecting the respective store accounts to analyze performance data.
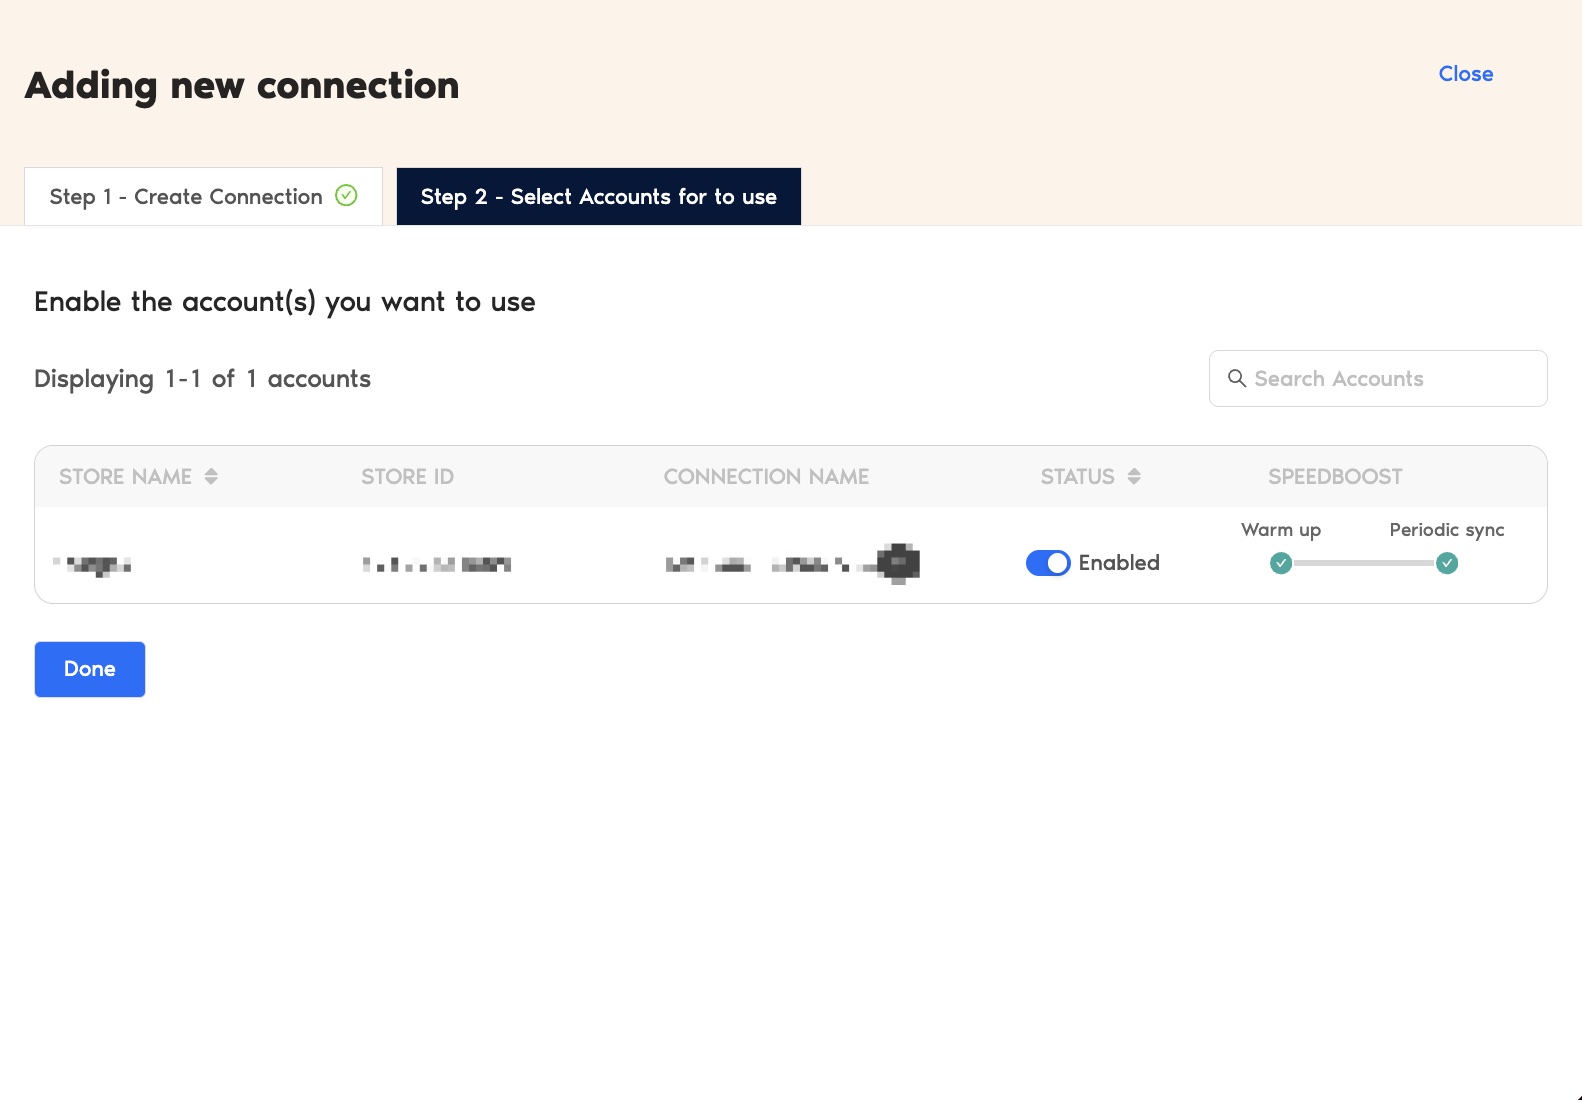
Enable the accounts for which you want to run queries. Once enabled, Speedboost will be automatically activated, performing two critical functions:
- Warm up – Prepares your account for faster data retrieval by caching your historical data.
- Periodic sync – Ensures your data stays updated automatically at regular intervals.
Please note that you can extract data from relevant store accounts only after the warm-up (approx. 2 to 24 hours). Additionally, you cannot run queries for disabled accounts.
Step 2: Configure your Shopify store account with TMR
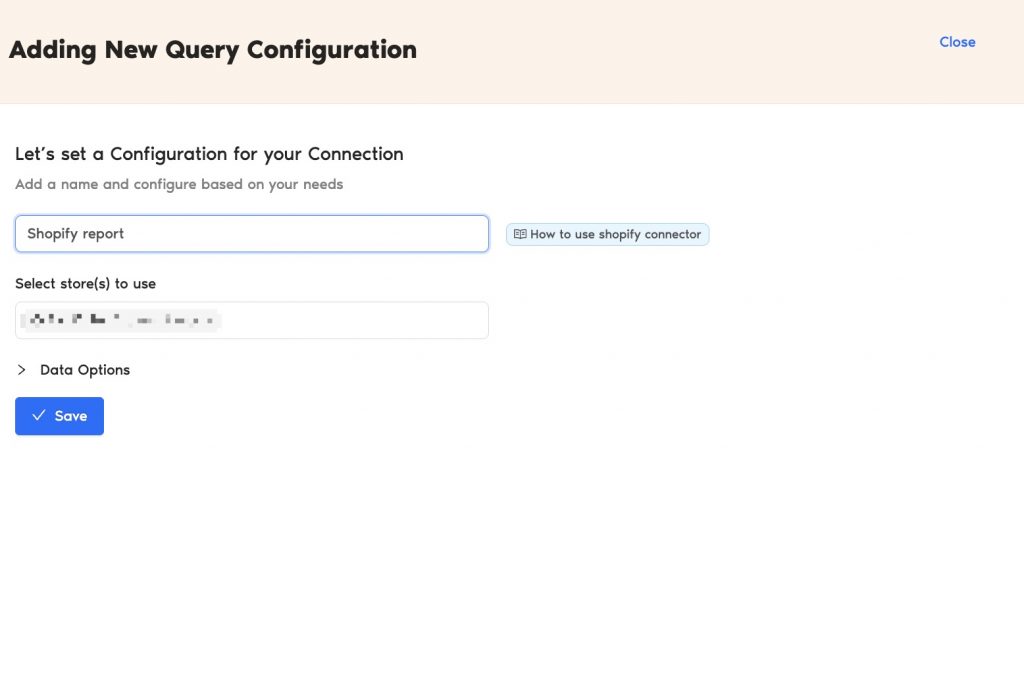
- In the Query Configs section, click + Add New.
| Query Config lets you group multiple accounts, making it easier to view centralized insights in your Looker Studio dashboard. |
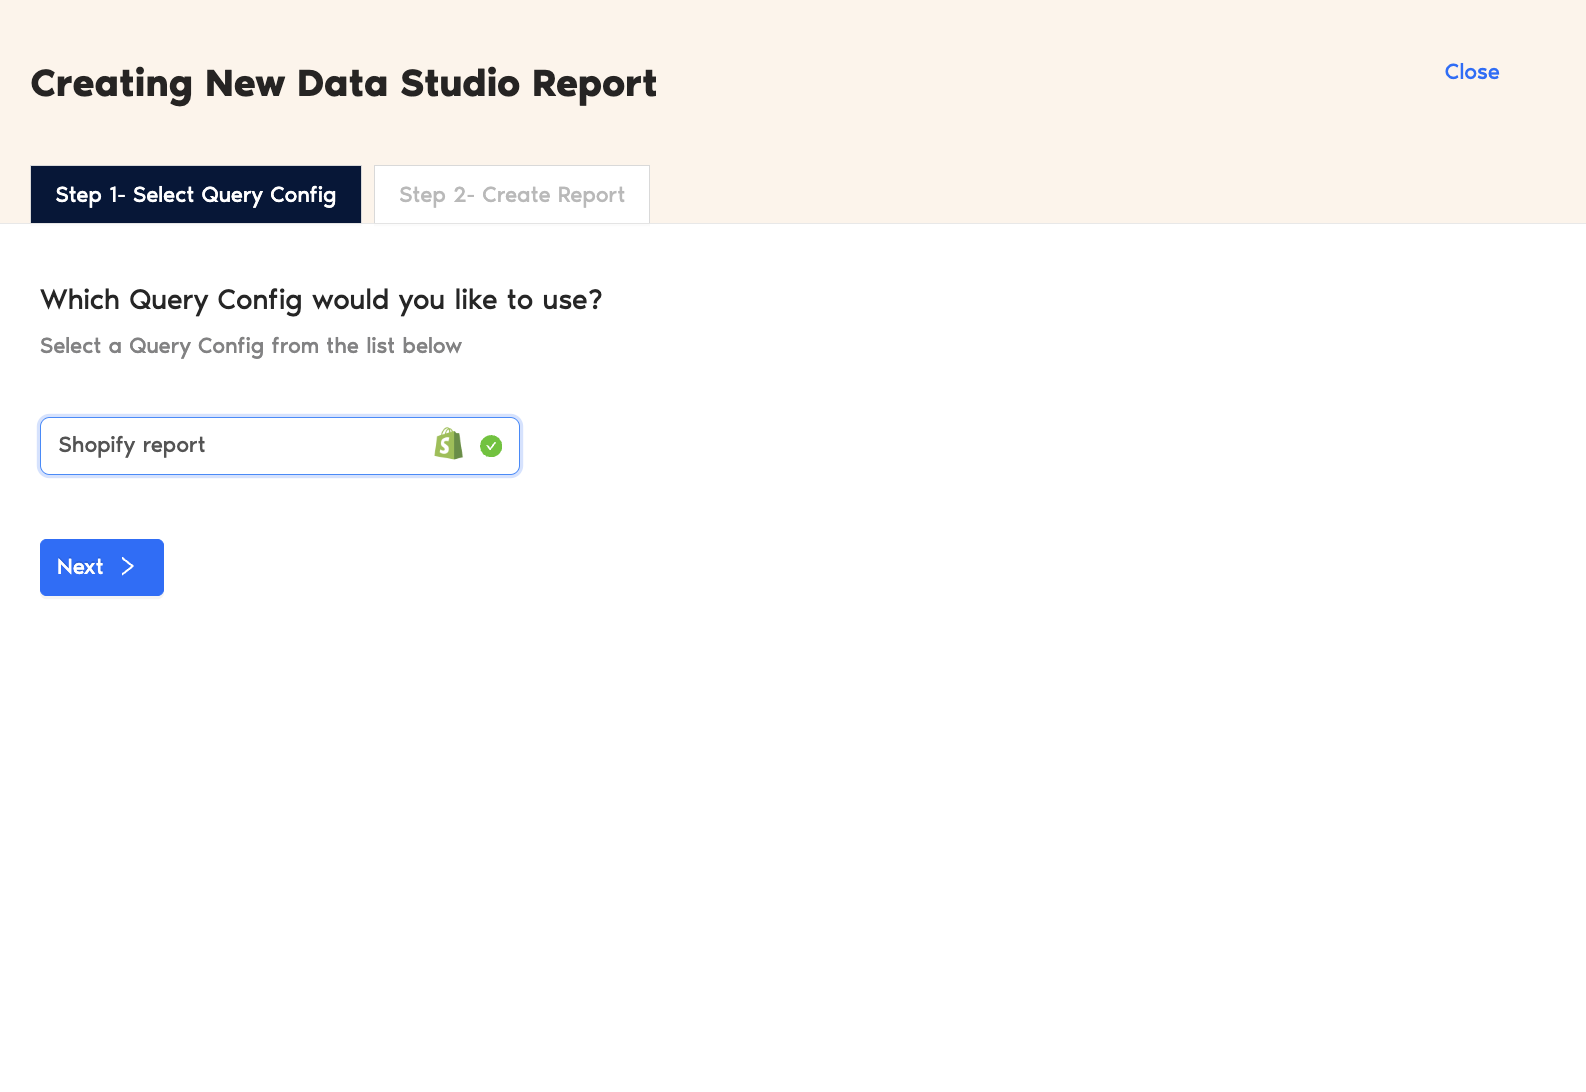
- The Adding New Query Configuration dialog box appears. Name the query config, select (from the list of enabled) store accounts from the dropdown, and configure your Shopify store report. Once done, click Save.
You’ve successfully created a new configuration. Now you can use this Query Config to extract data from your Looker Studio reports.
Step 3: Create Shopify reports with TMR in Looker Studio
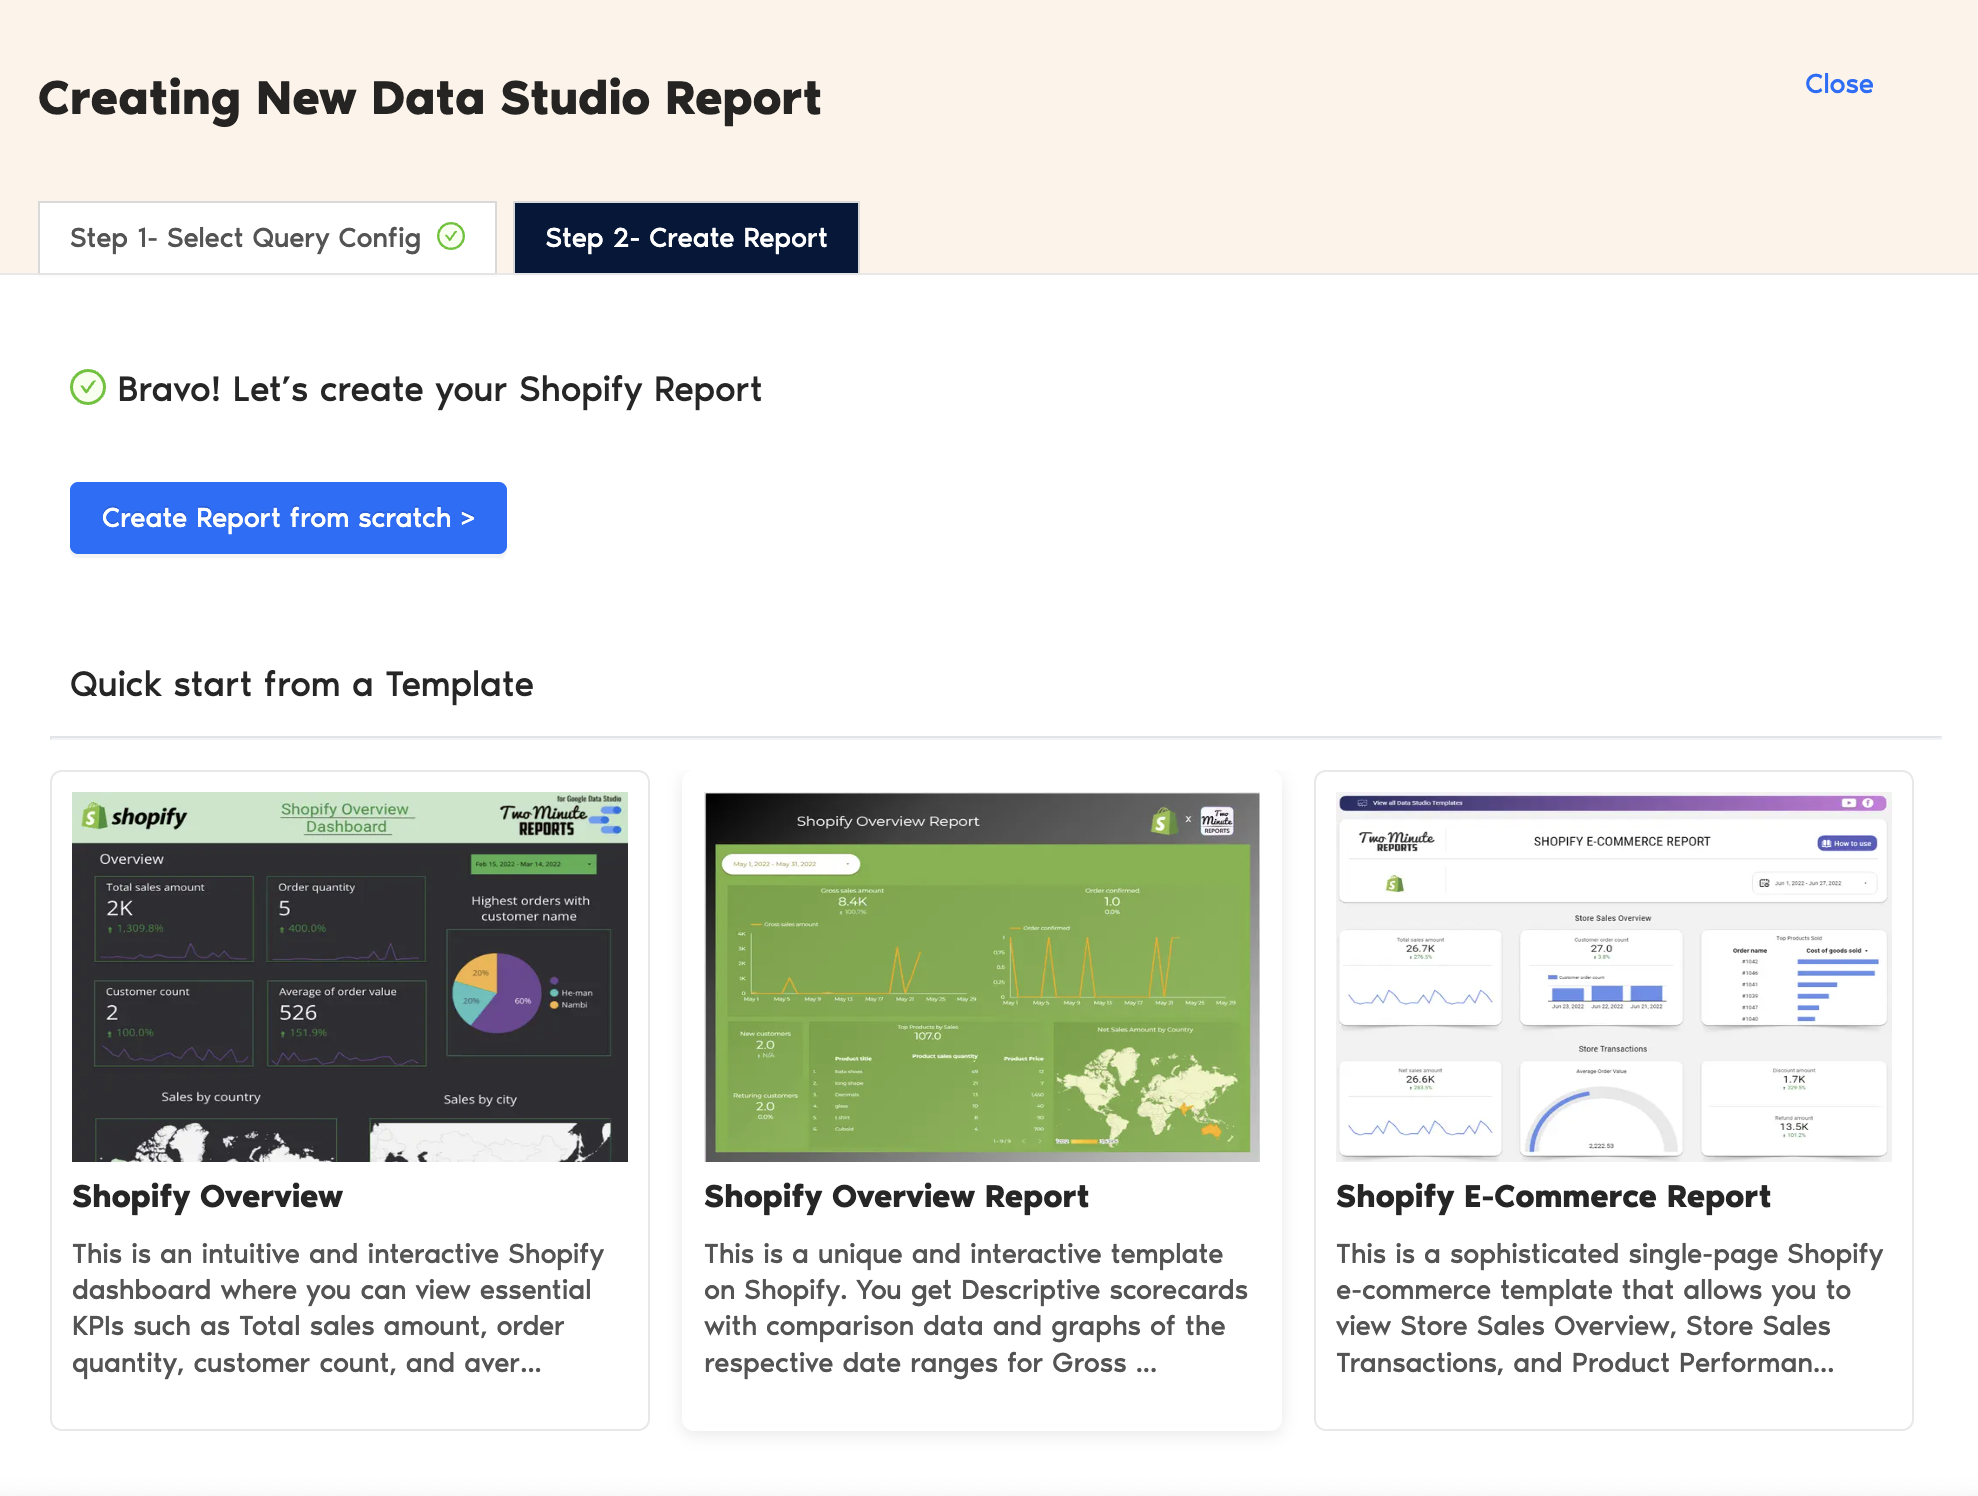
After creating the Query Config, click Create Report at the top-right corner, as shown below:
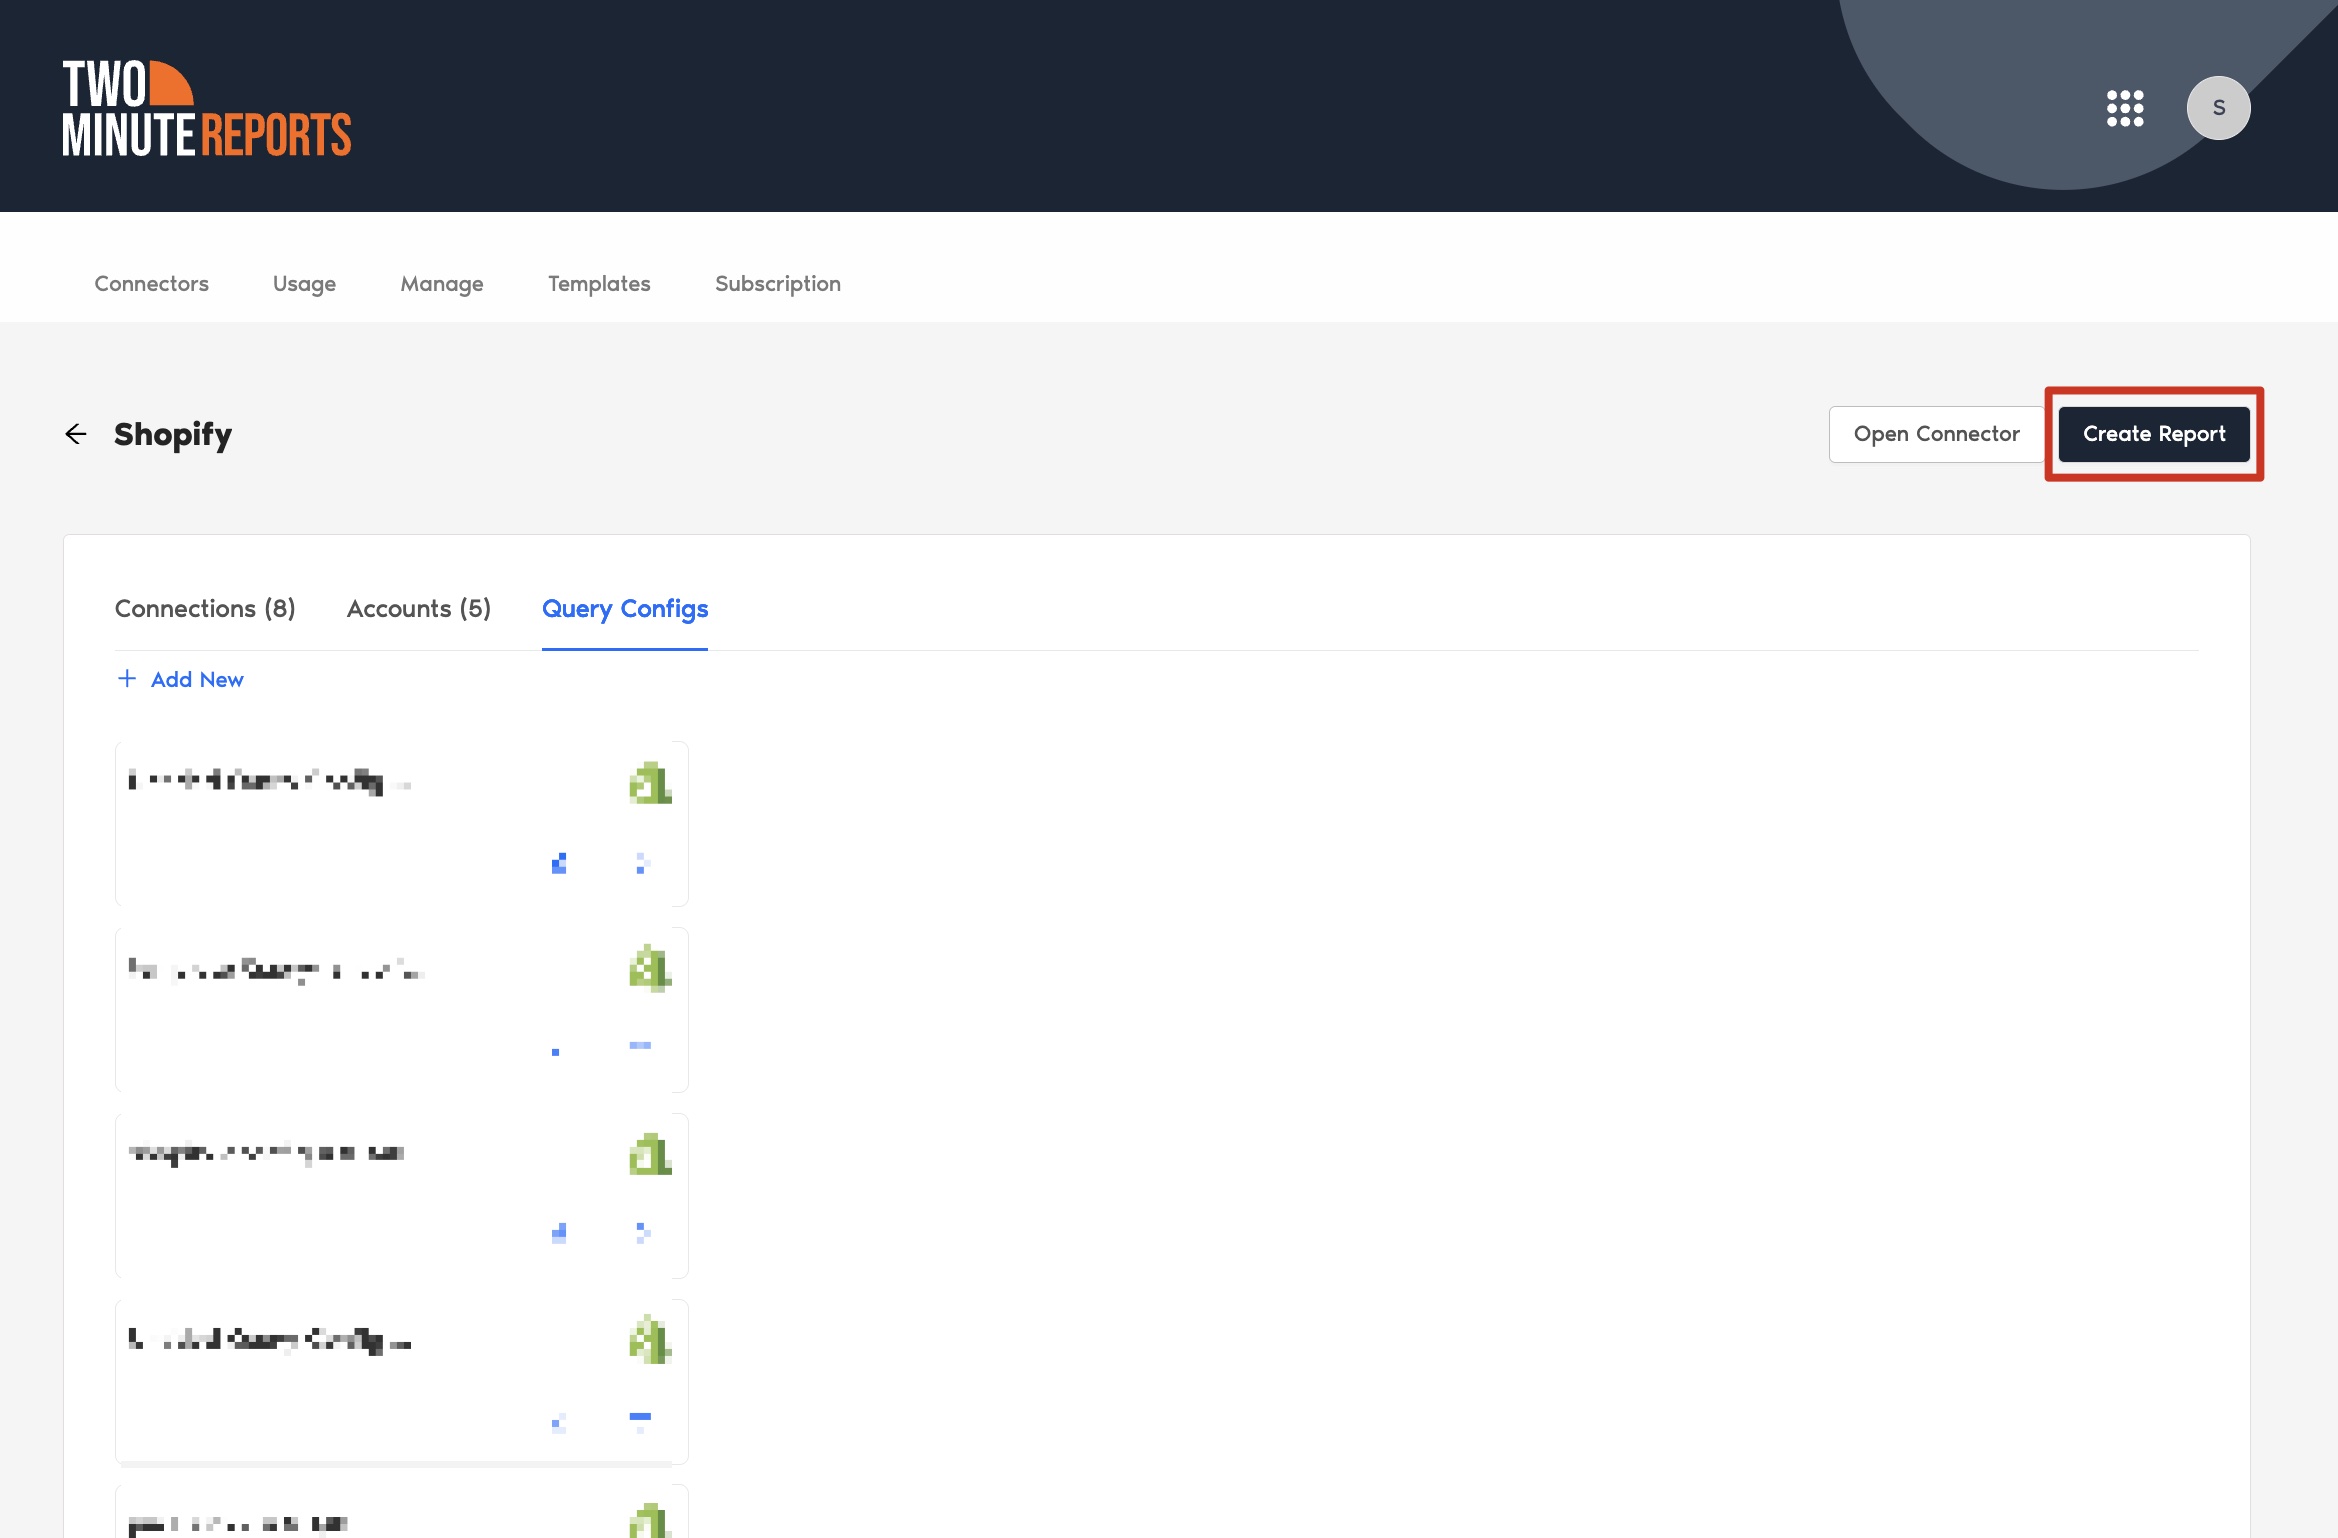
Select the Query Config that you’ve created (in our case, “Shopify report”) from the list of options. Click Next and choose ‘Create report from scratch’ to open the Looker Studio dashboard.
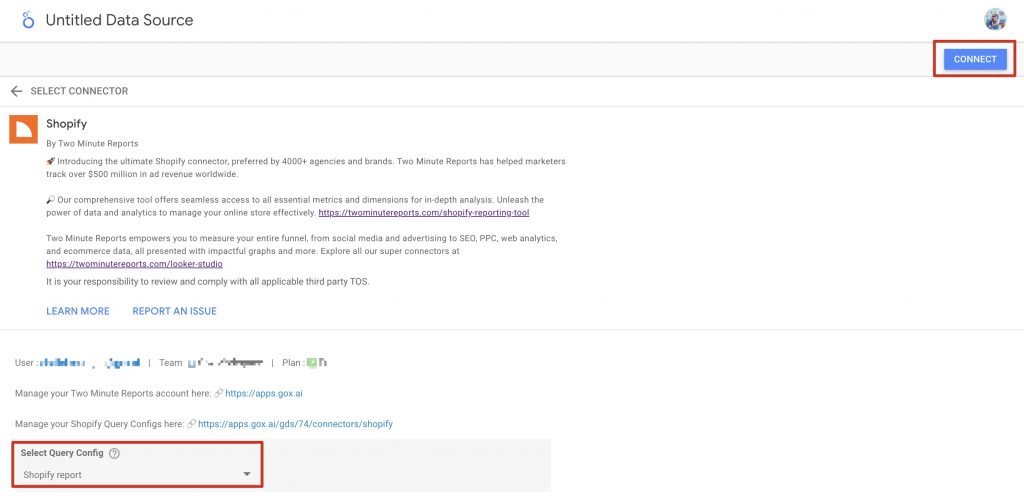
- Once the Looker Studio dashboard opens, select your team and the required Query Config from the dropdown. Next, click Connect at the top-right corner.
- Once you click Create Report, you’ll be directed to the Looker Studio dashboard. Here, you can drag and drop the associated Shopify metrics and dimensions to analyze store performance insights faster.
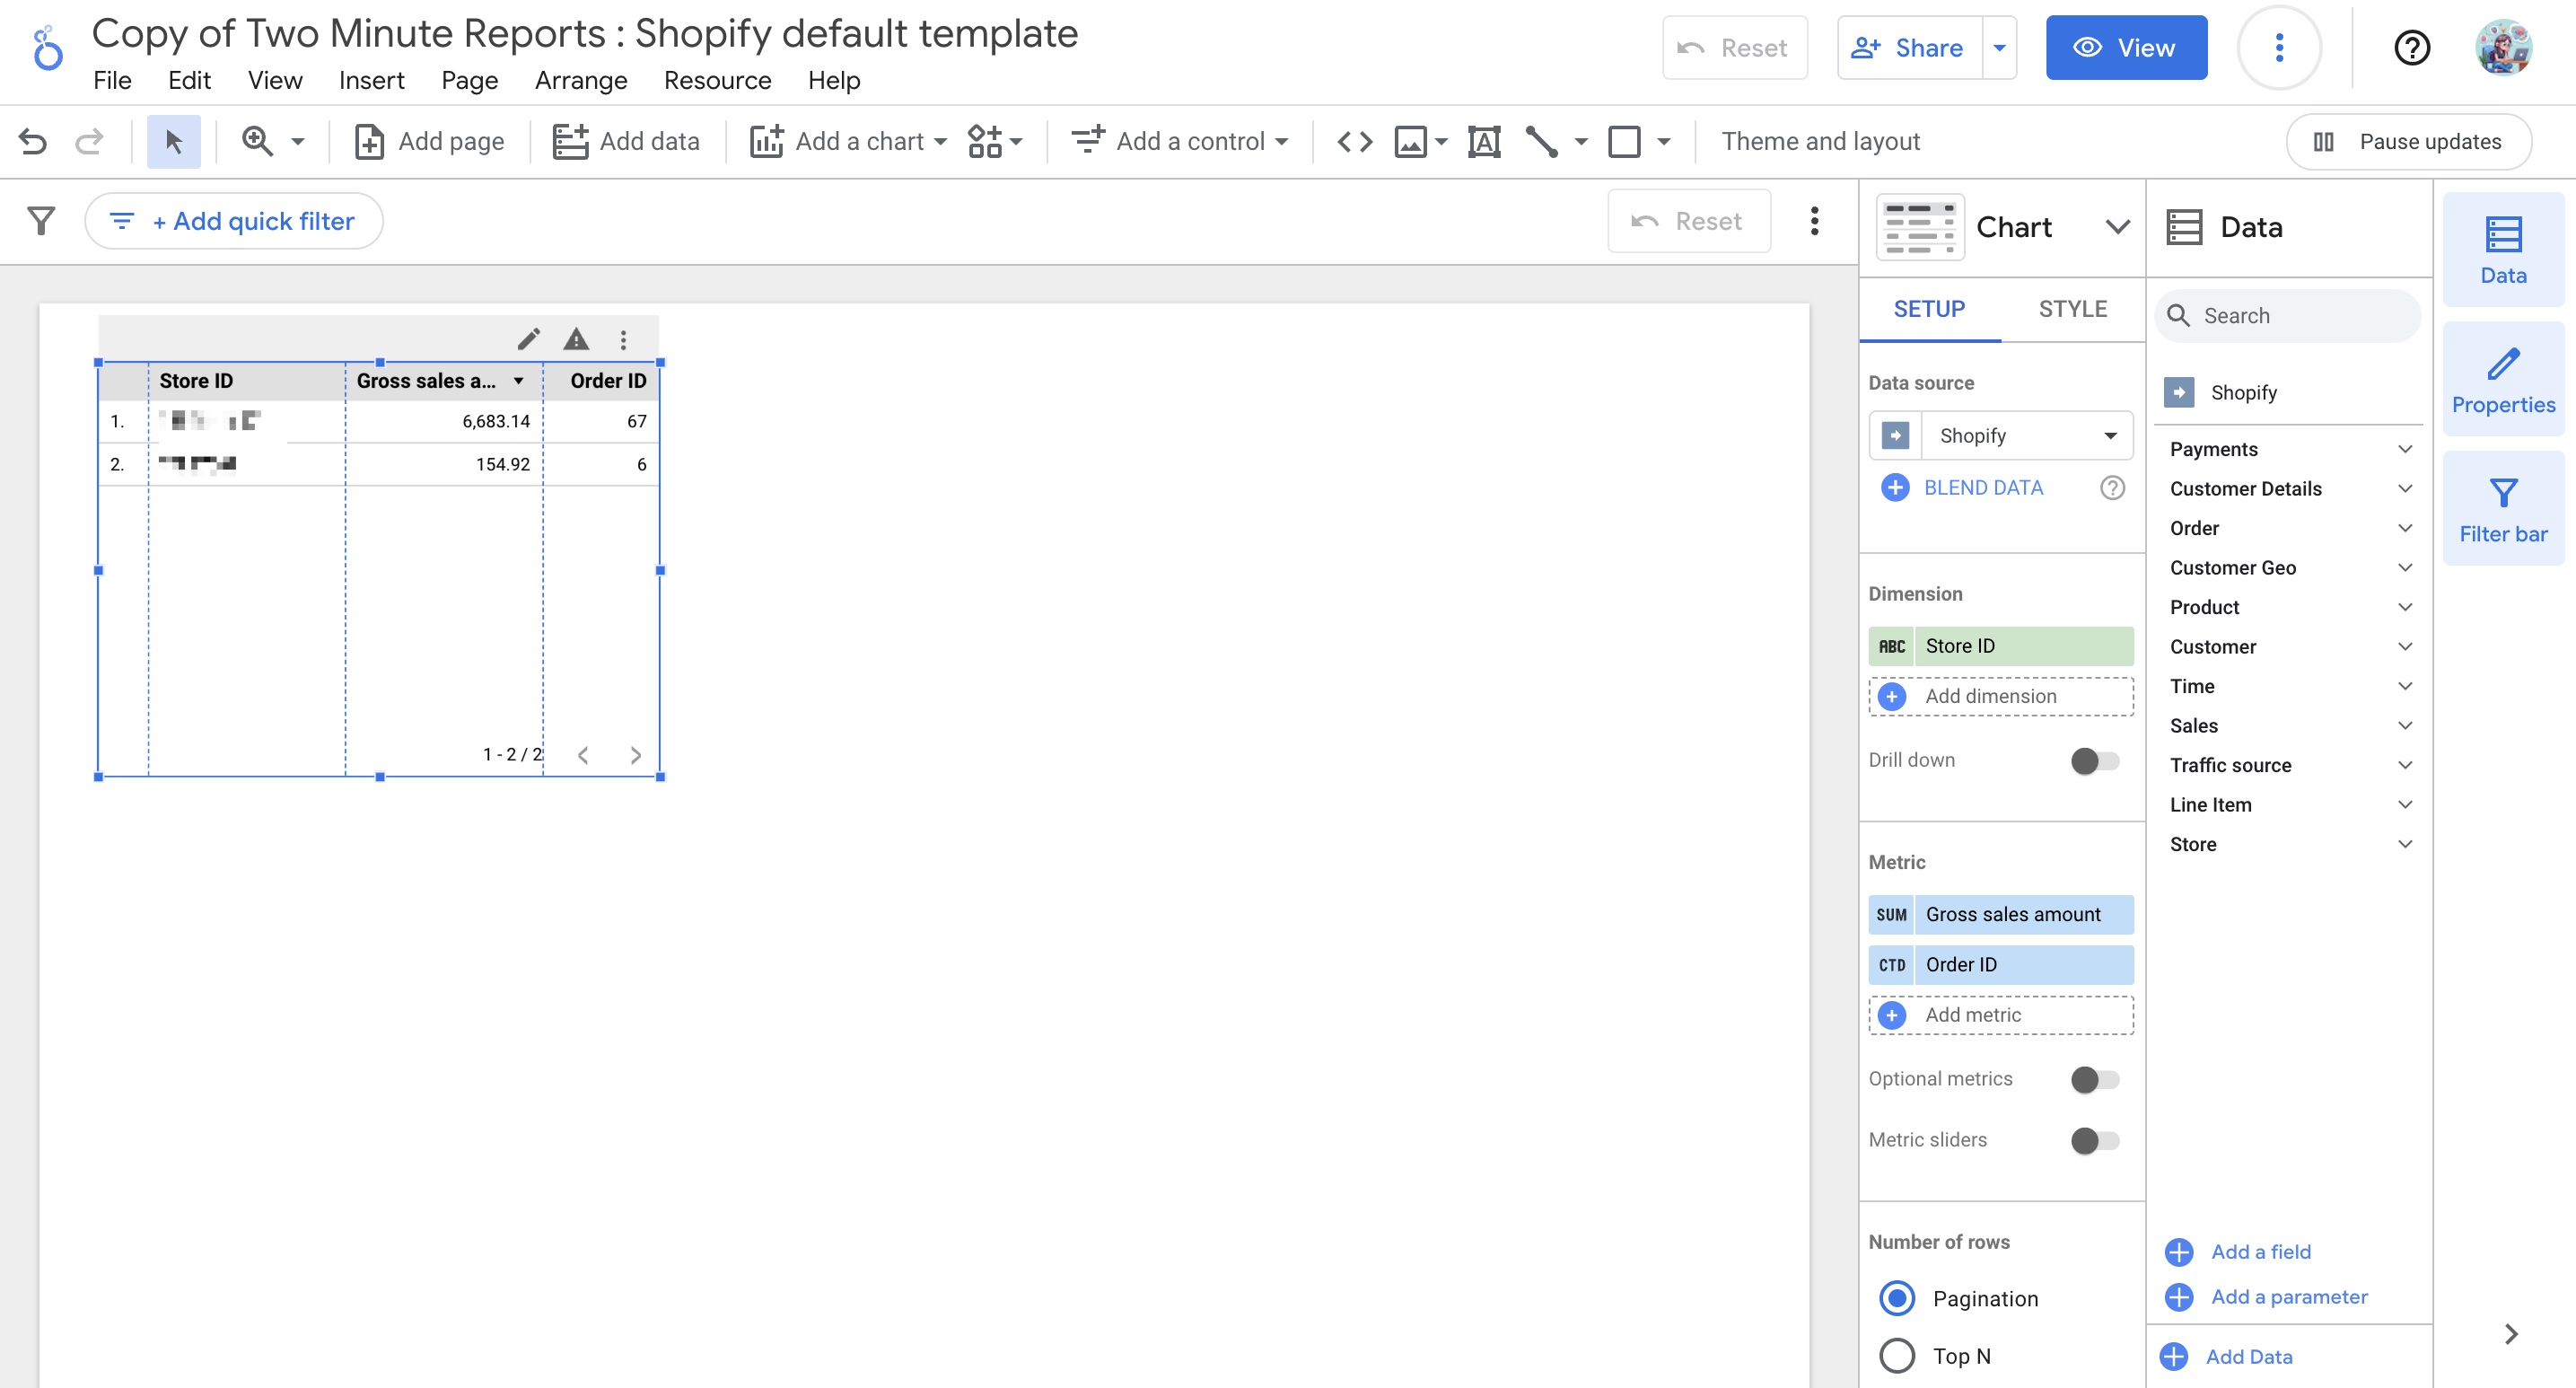
- To make your Looker Studio report compelling, use charts and visualizations. Click Add a chart and choose relevant chart types to configure your dashboard.
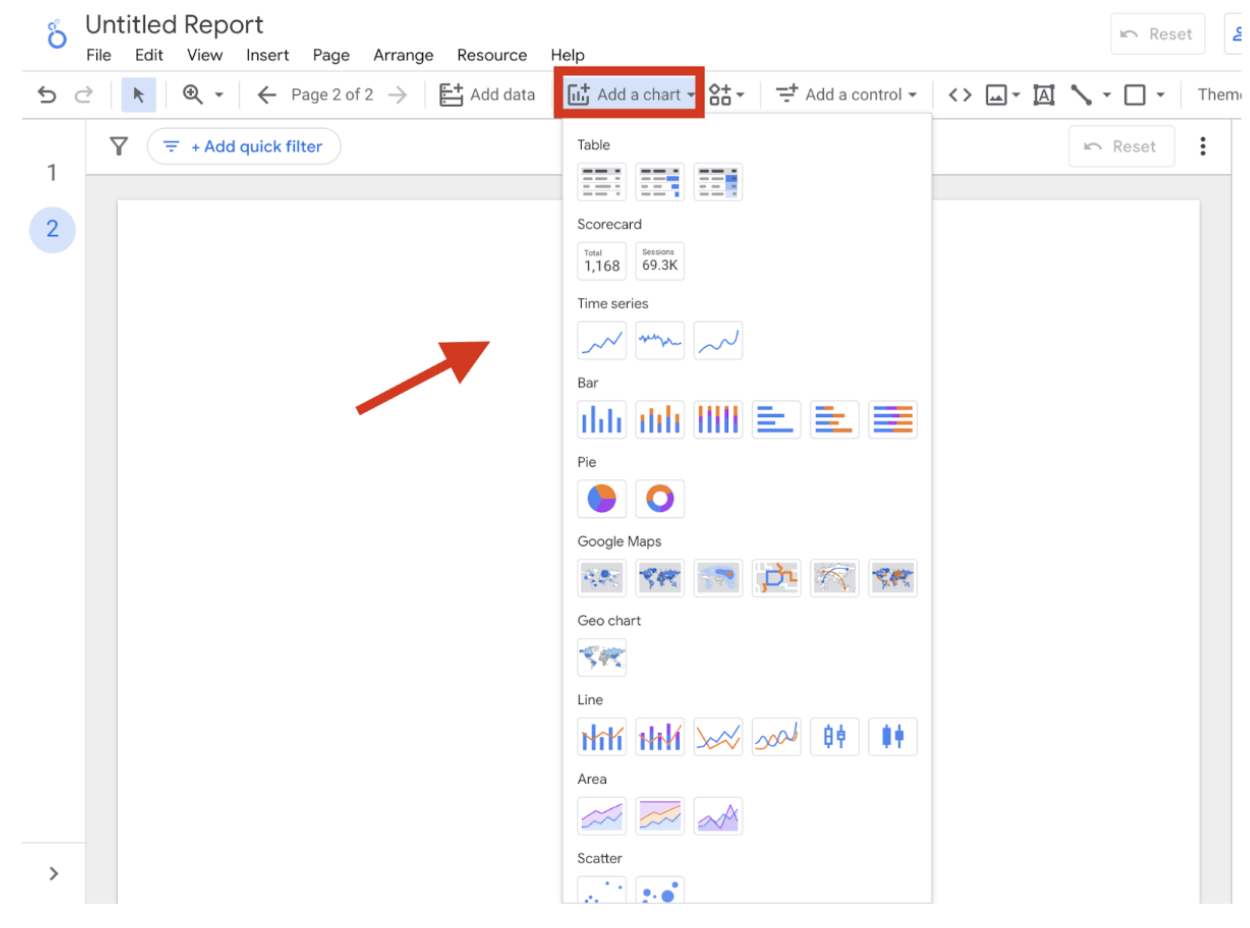
For example, you can use bar charts to showcase your store’s sales trends and scorecards to highlight crucial KPIs. You can also add a date range control to visualize the performance of your Shopify campaigns for a specific period.
Note: We’ve also listed some common issues marketers face while running reports on Looker Studio and practical solutions to fix them. Read the full article here.
We hope you found this article helpful. If you have any questions, please contact our support team via [email protected].