Shopify

With Two Minute Reports, you can connect your Shopify store and fetch performance data directly into Google Sheets for reporting and analysis.
Required Permissions
You must have store owner access or staff access with all permissions to establish a connection and access Shopify store data.
How to Grant Permission
To grant access in Shopify Admin:
- Go to Settings -> Users and permissions.
- Select the user you want to update.
- Click the staff member's name (or Add staff to create a new one).
- Scroll to the Permissions section.
- Enable the following:
- App development
- Manage and install apps and channels
Permissions Needed
- App development
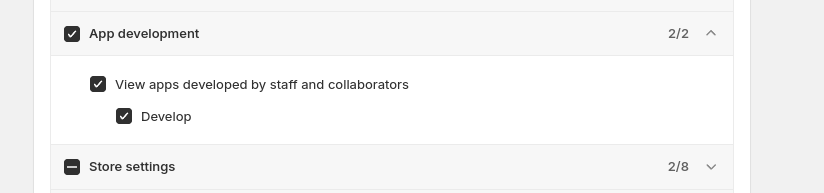
- Manage and install apps and channels

Once you confirm these prerequisites, follow the steps below to connect your Shopify store with Google Sheets through Two Minute Reports.
Step 1: Install and Launch Two Minute Reports
Install the add-on first if you have not already:
Once installed, open your spreadsheet and launch TMR from the Extensions menu.
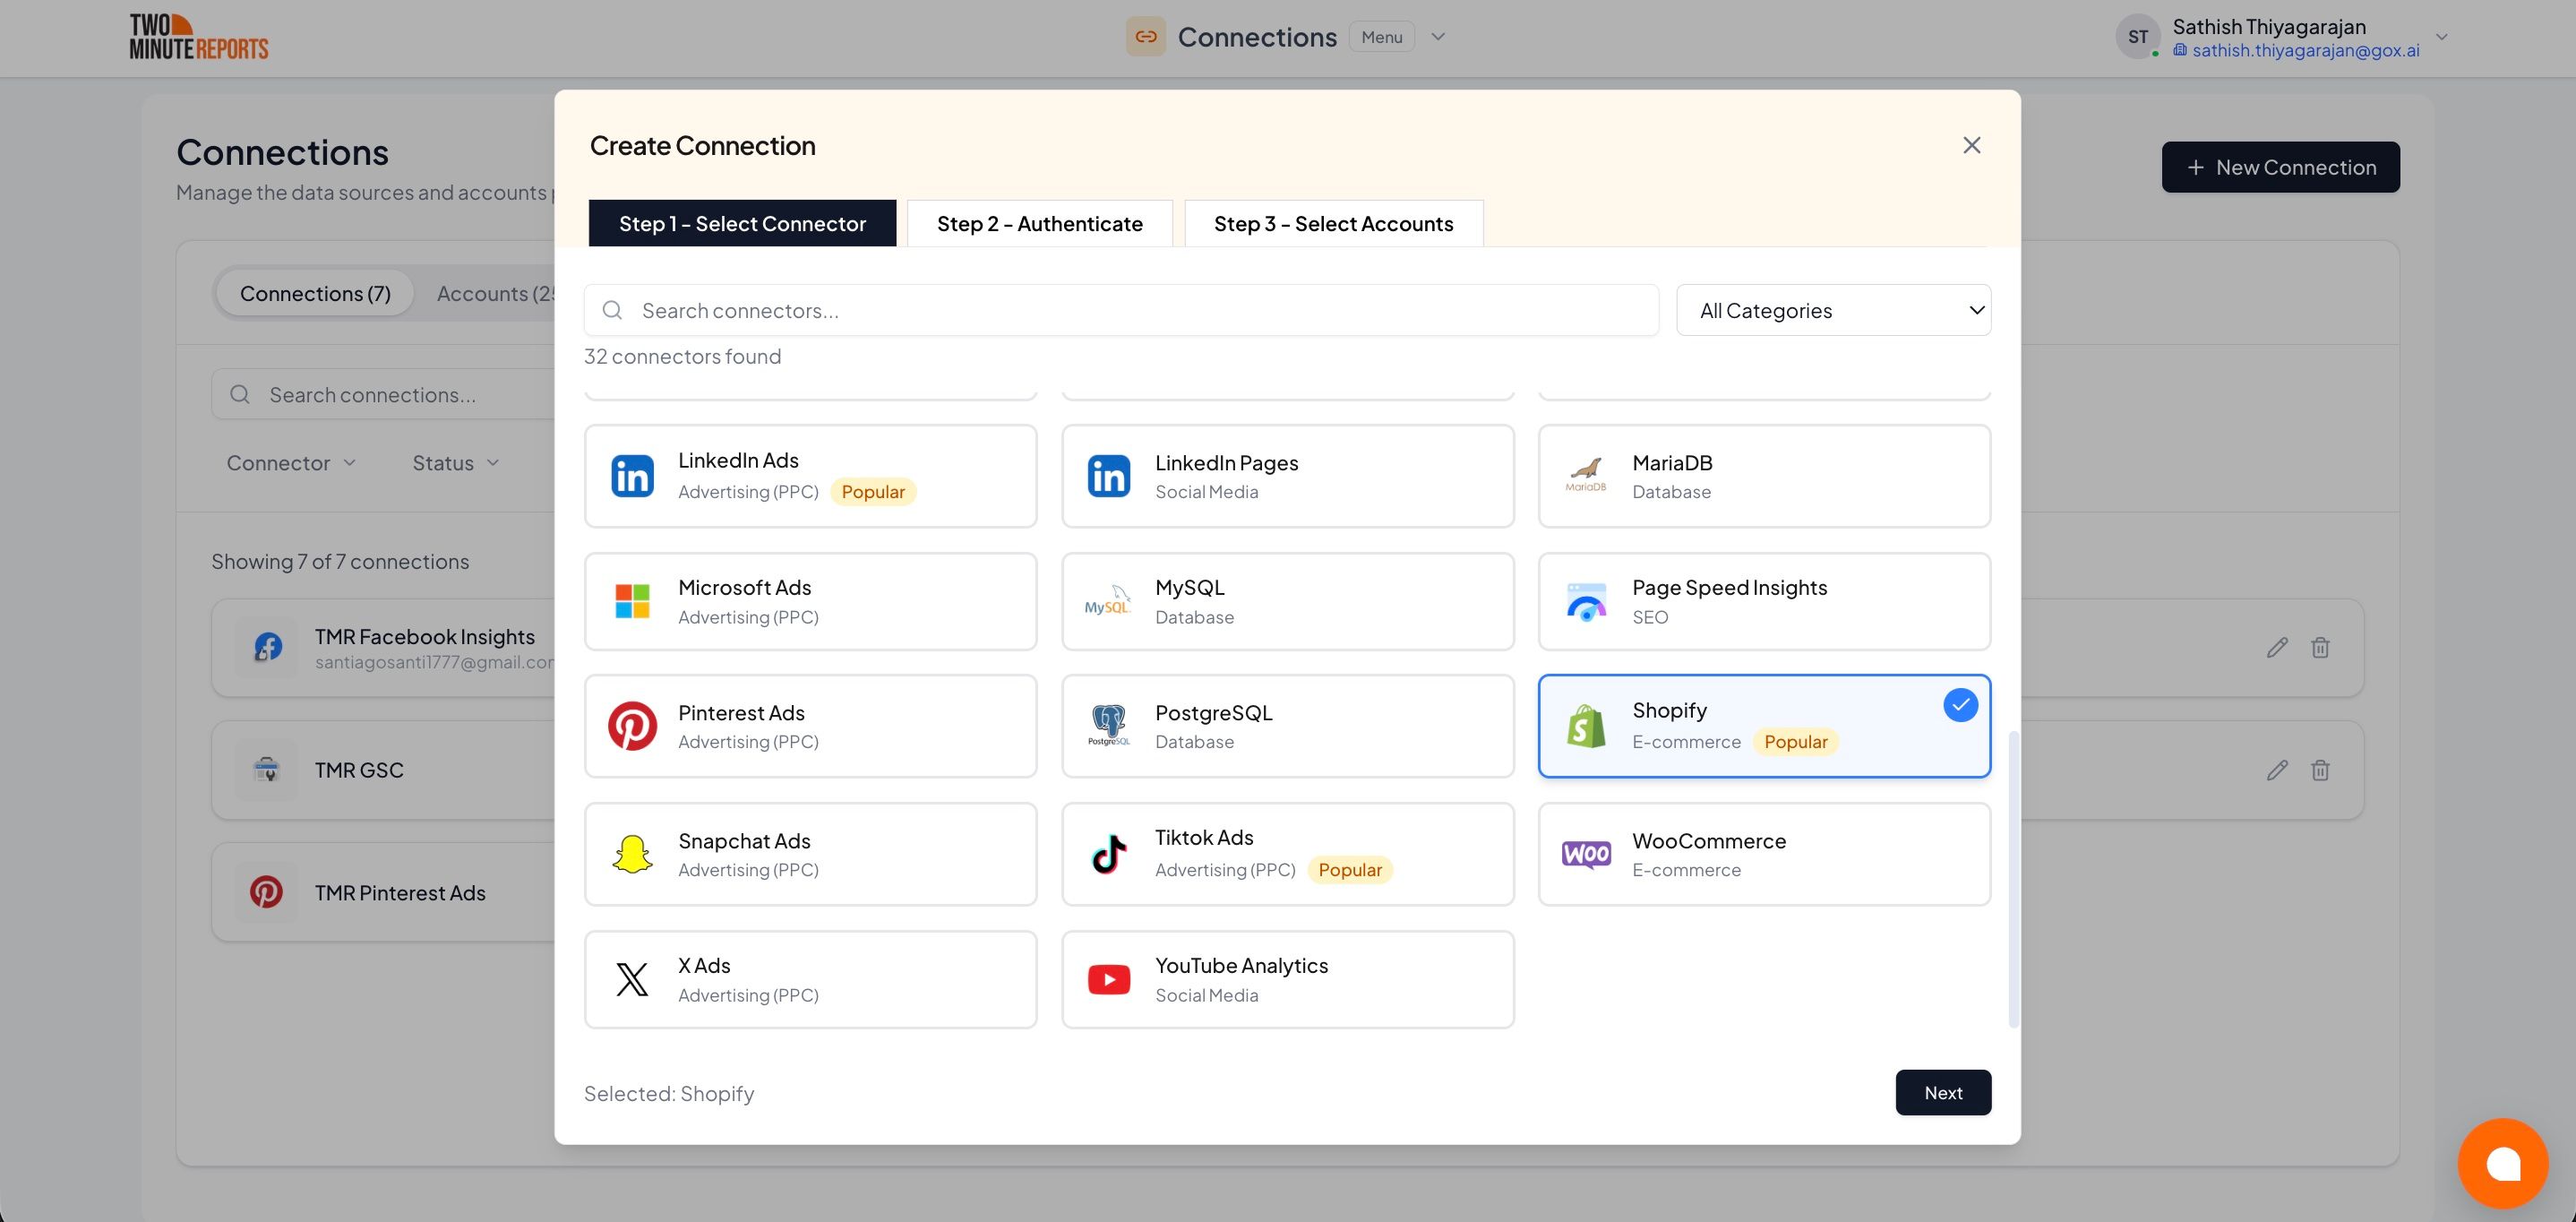
Step 2: Create a New Shopify Connection
In the TMR sidebar:
- Click Menu and go to Connections.
- Click Add to create a new connection.
- Select Shopify from the list of options to connect your Shopify store to Google Sheets.
In the authentication step:
- Enter a name for your connection.
- Select Shopify Public App as the app type.
- Provide your Shopify store name.
https://thisismyshop.myshopify.com, the shop name is thisismyshop.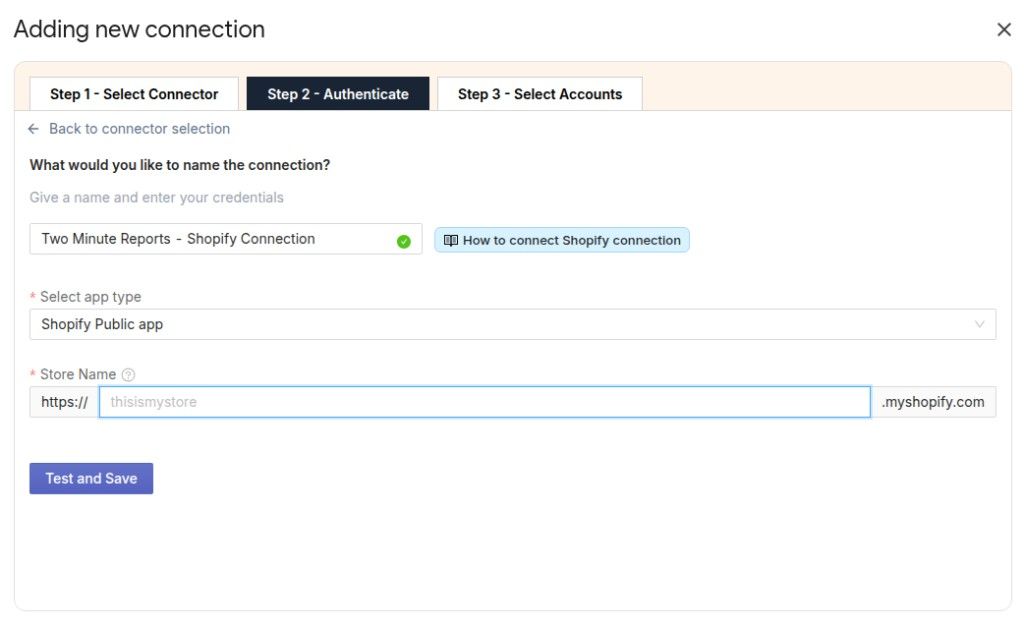
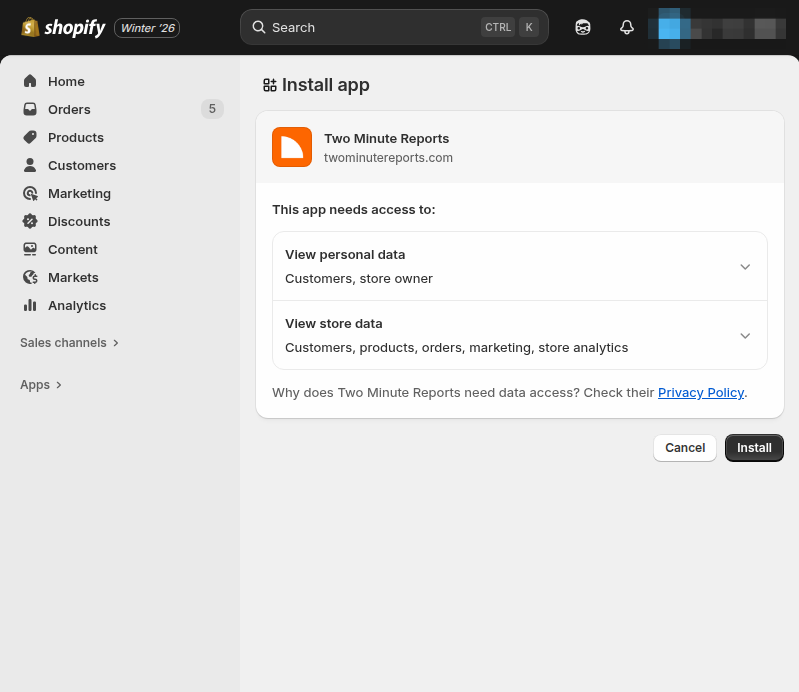
Then: 4. Click Test and Save. A new window opens asking you to authorize and install the Two Minute Reports app. 5. Review permissions and click Install to continue. 6. After authorization is complete, you can safely close the window.
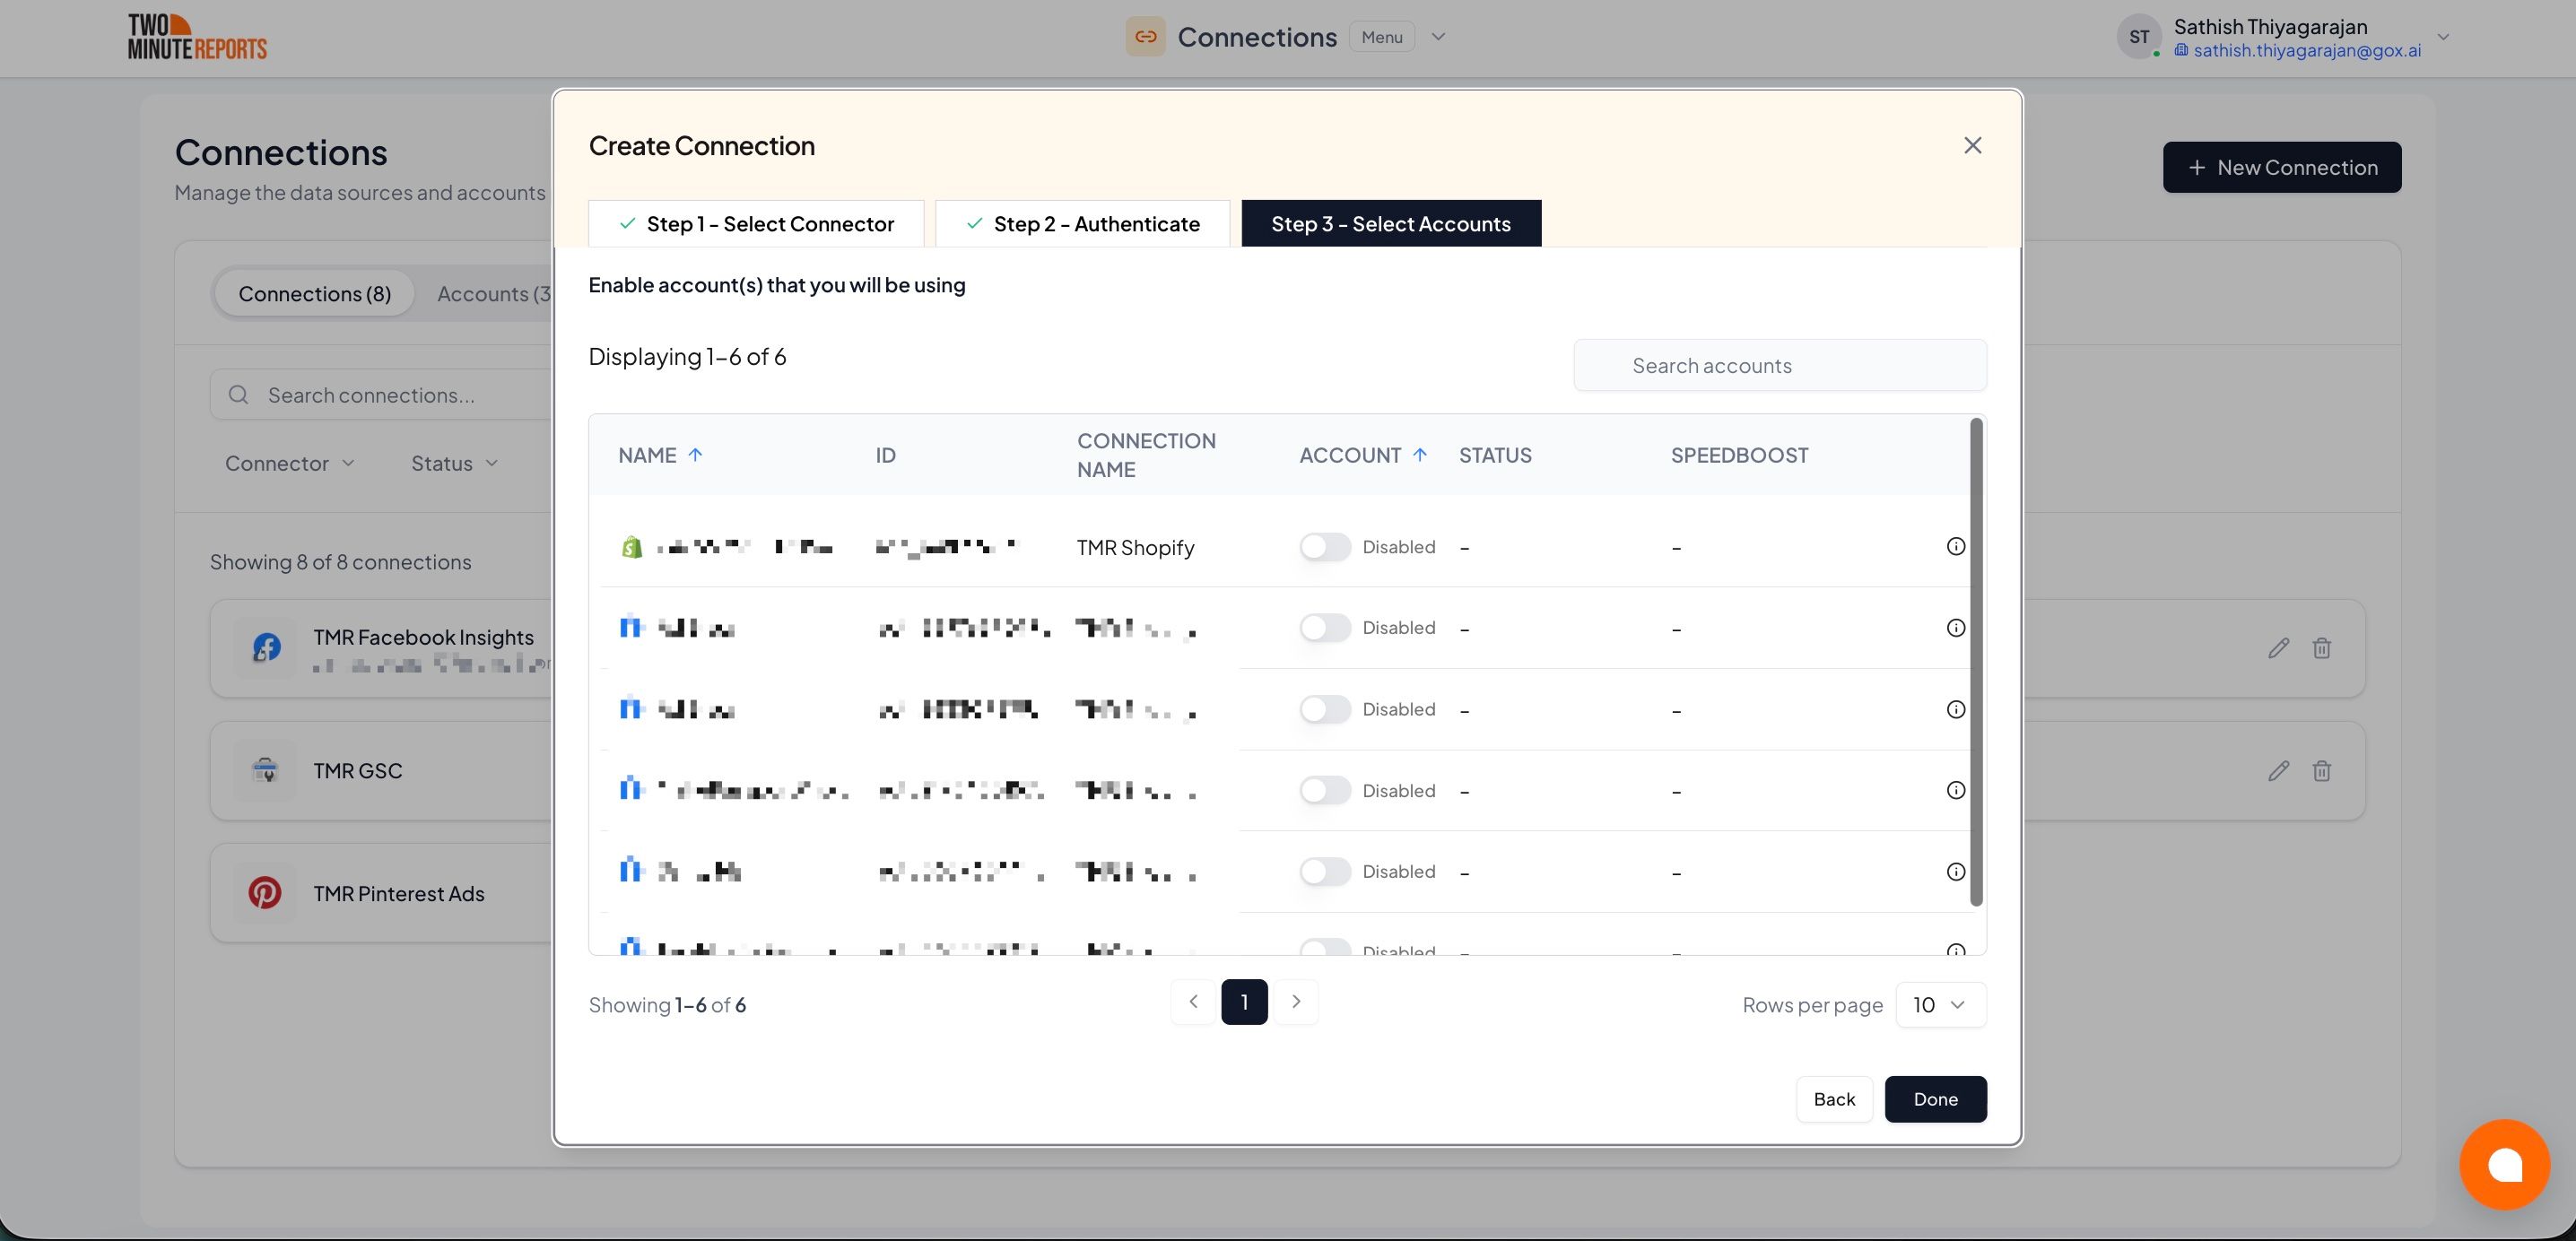
After authentication:
- Enable the store accounts you want to use.
- Click Refresh Connections so enabled accounts appear in the sidebar.
Step 3: Fetch Shopify Data into Google Sheets
To pull Shopify data:
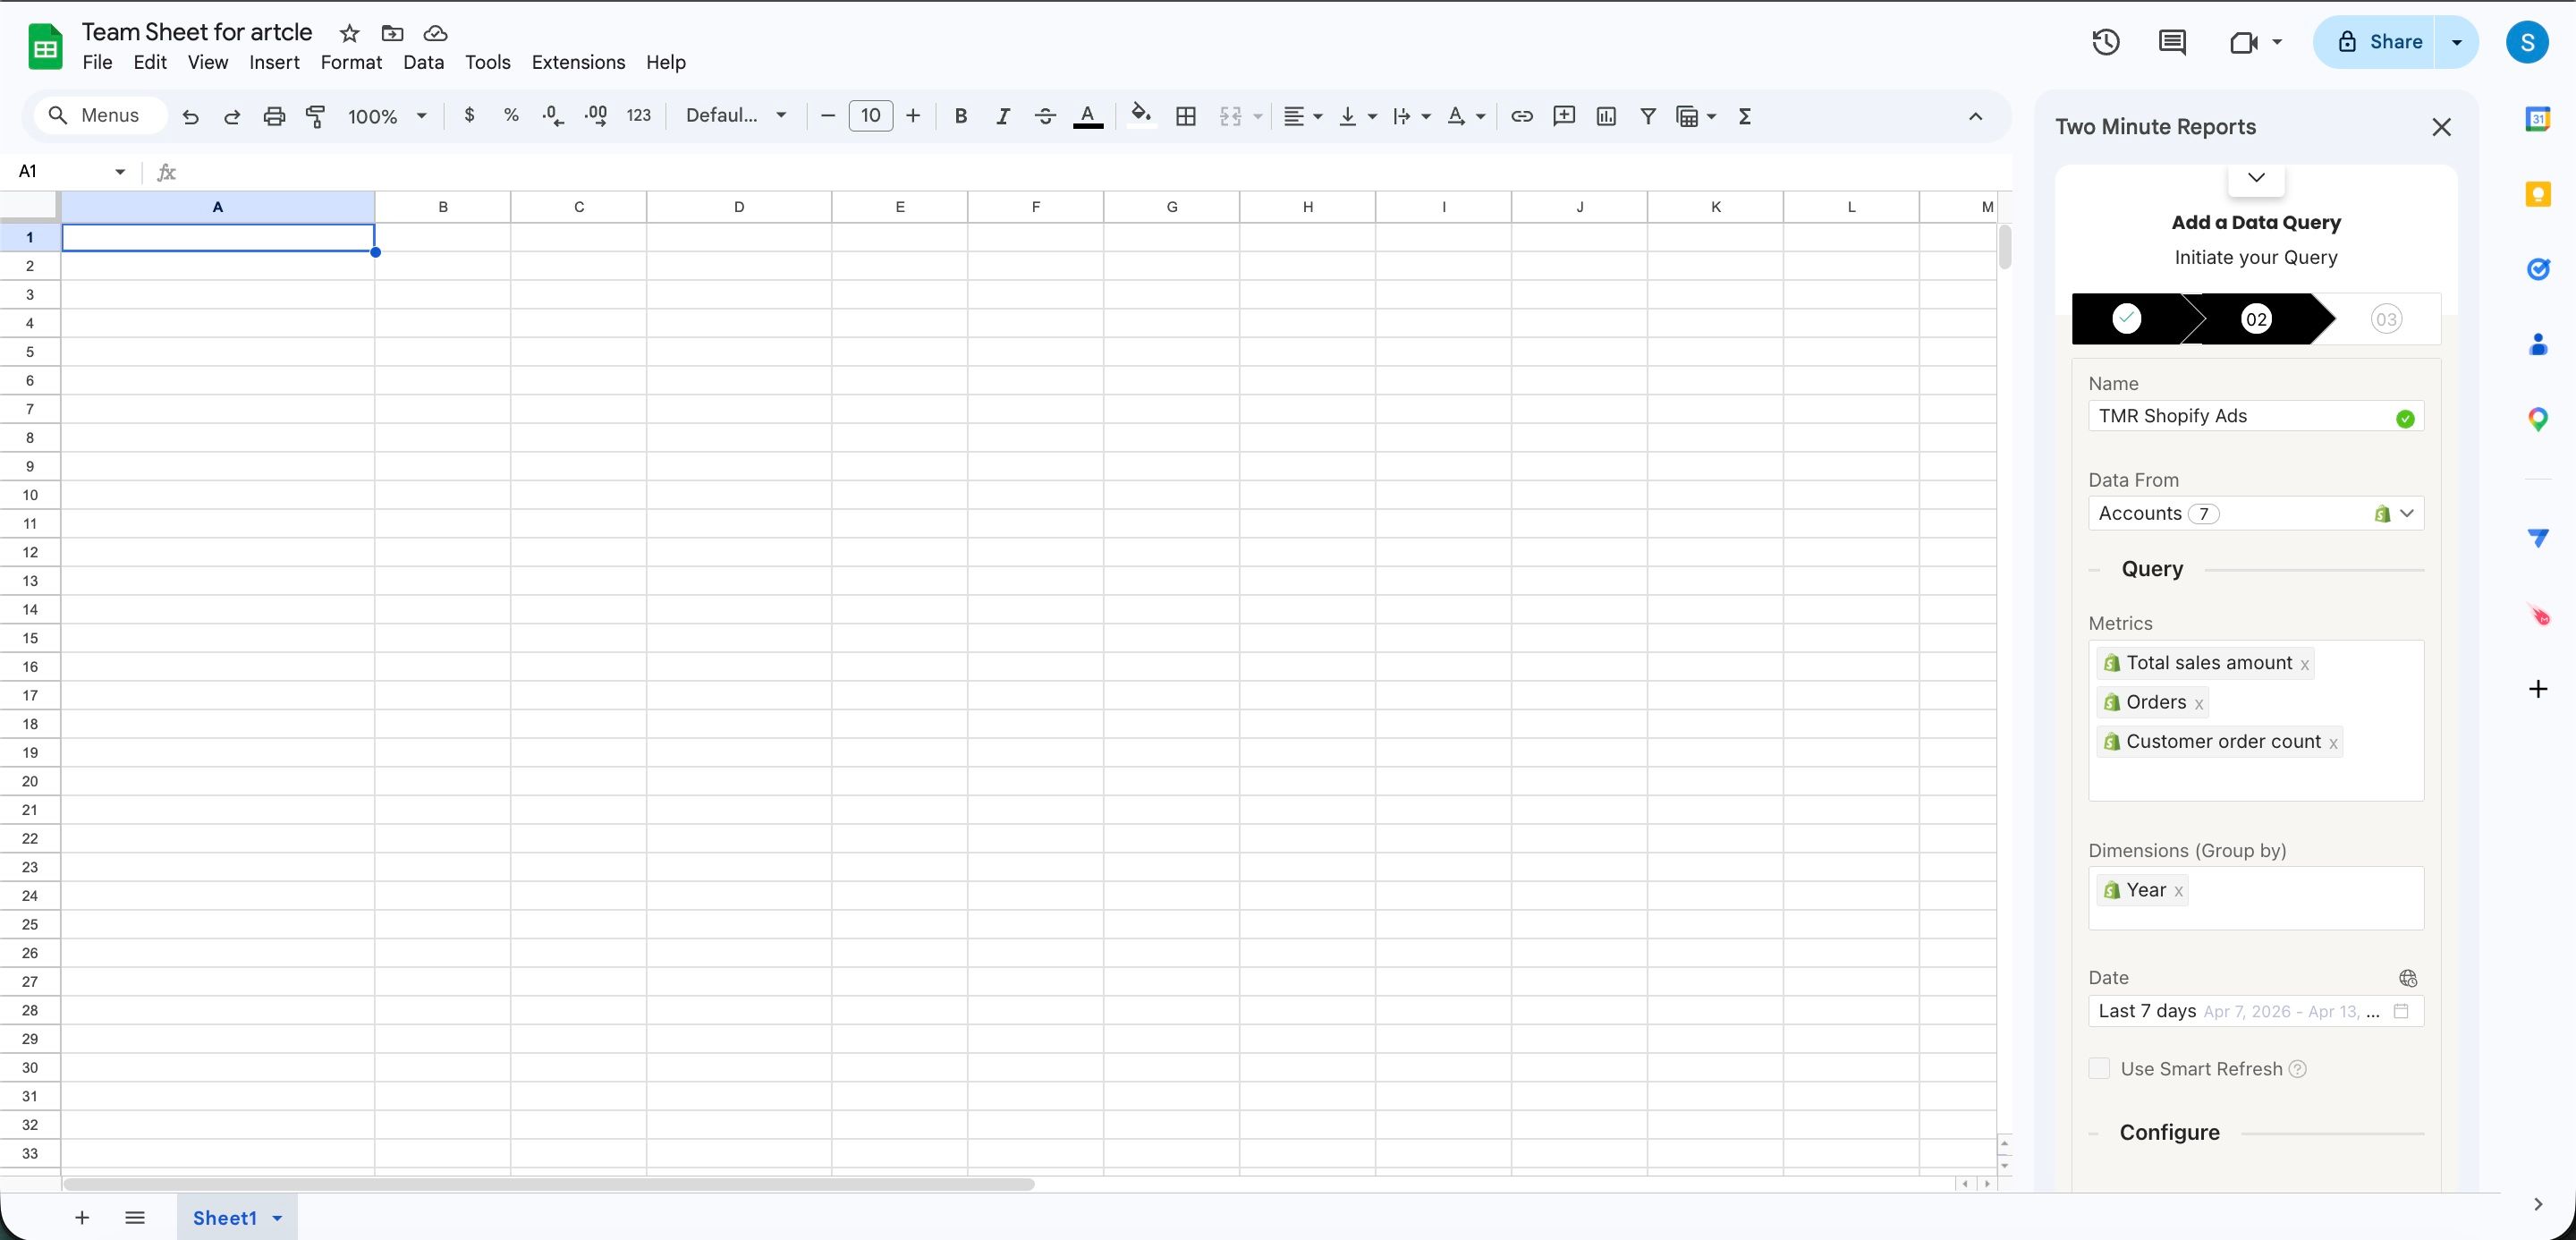
- Go to Data Queries and click Add.
- Select one or more Shopify accounts.
- Choose the metrics and dimensions you want to analyze.
- Set your date range.
- Configure sorting and filters.
- Click Run Query.
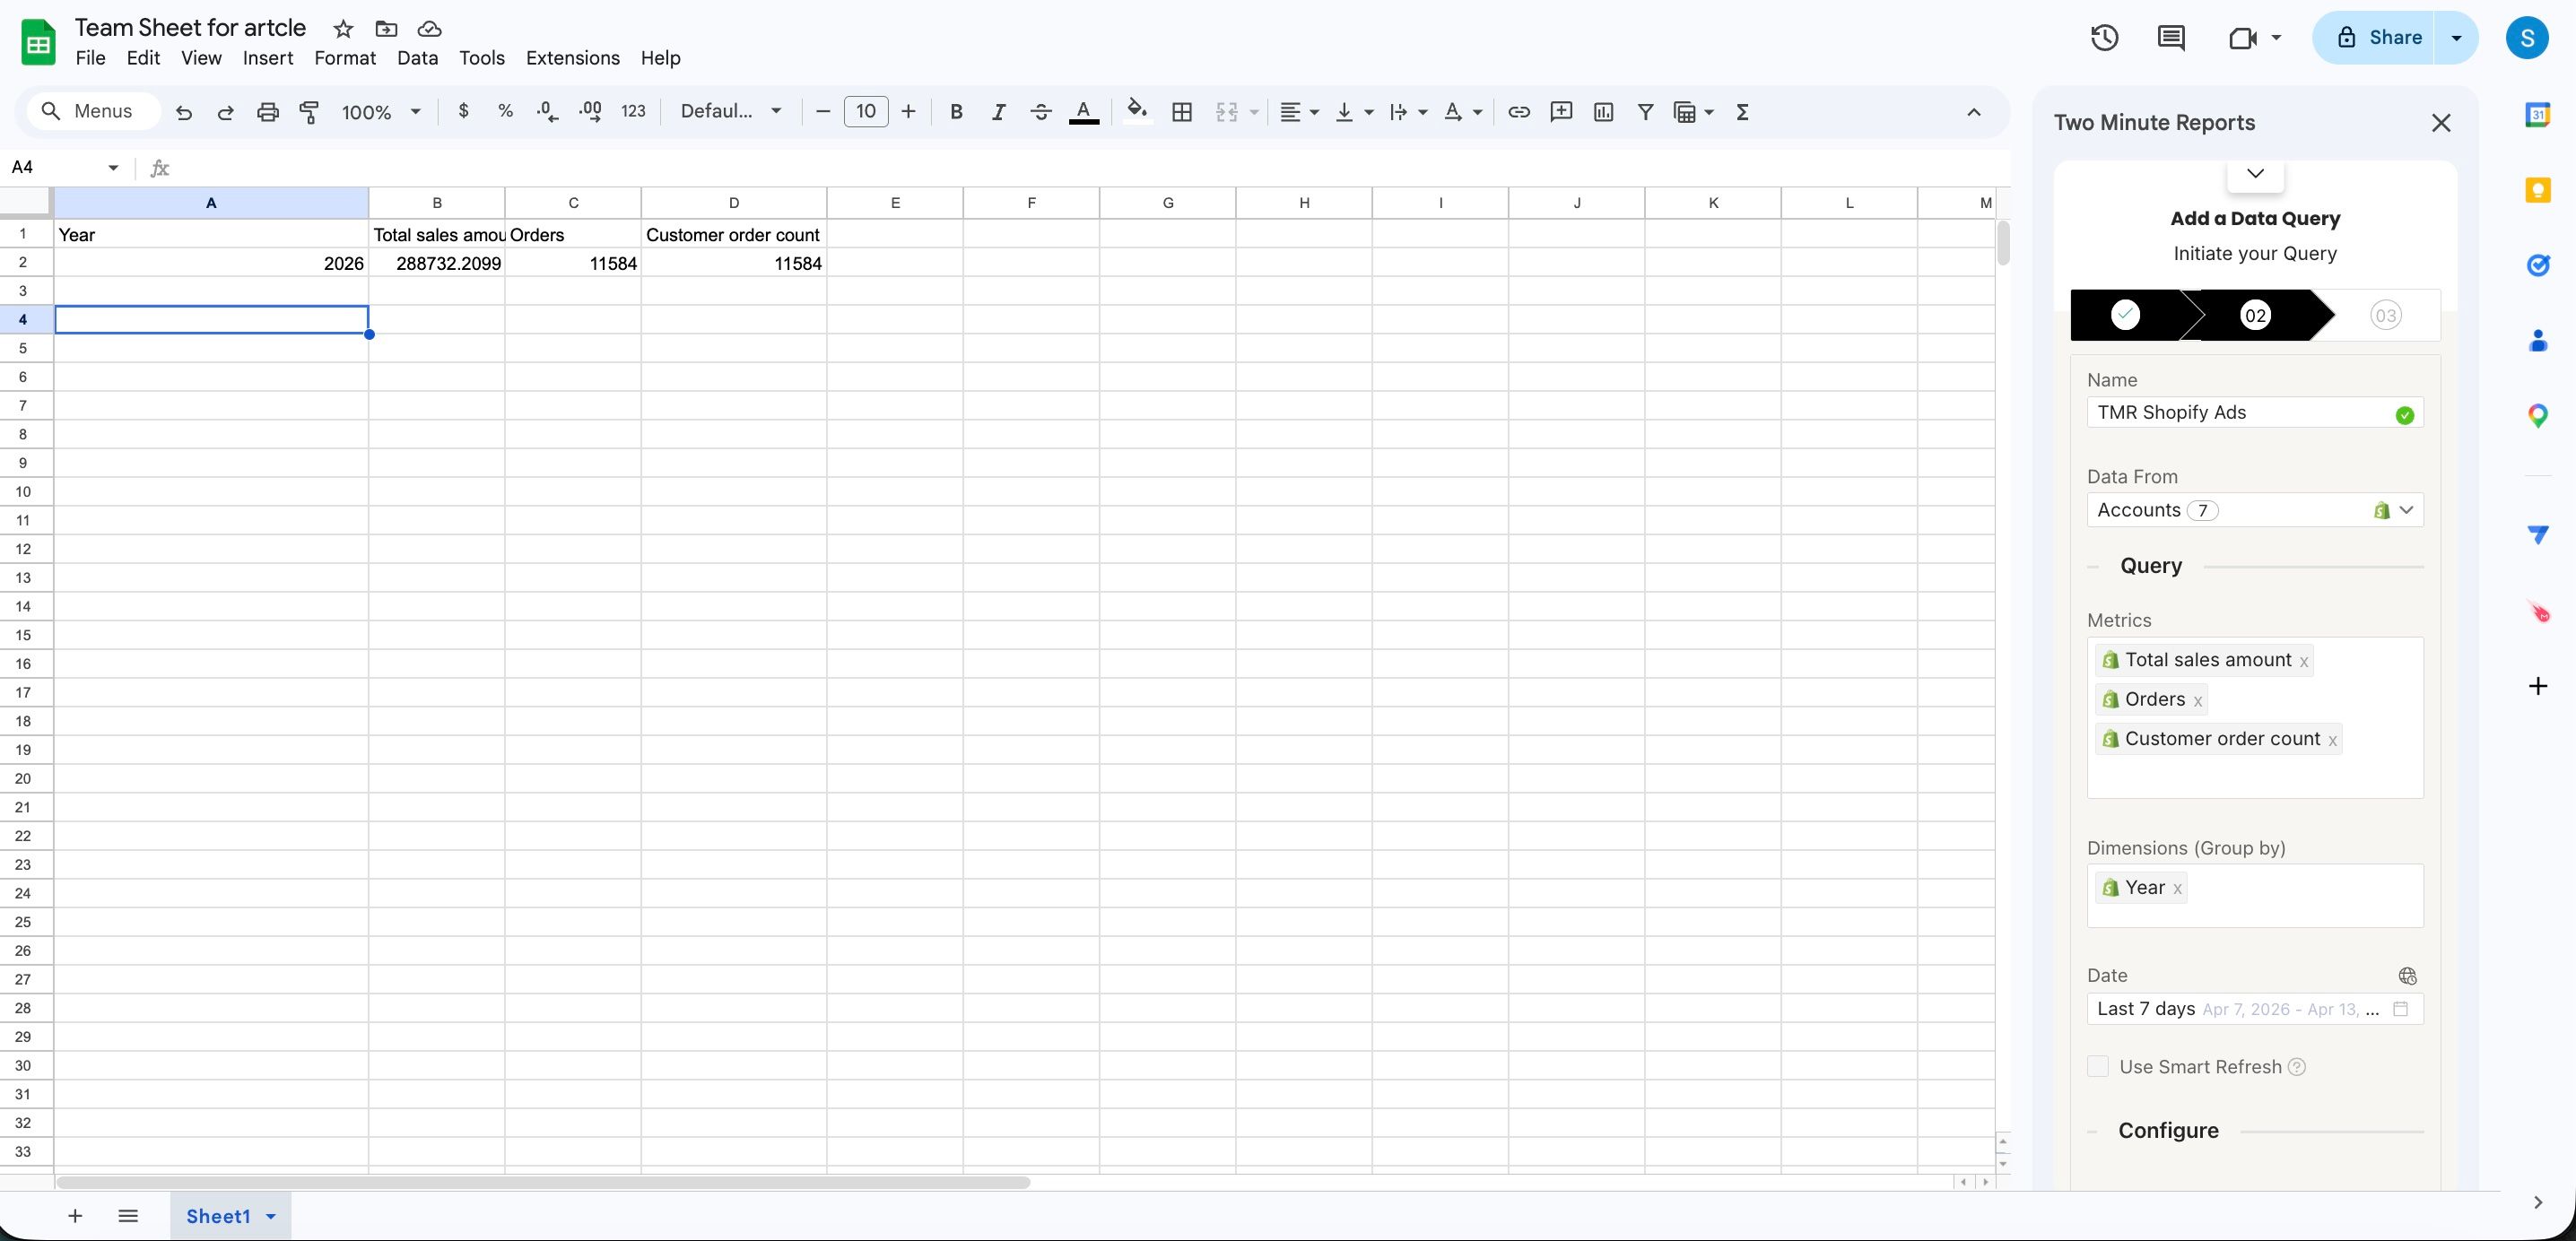
Once your data is in Sheets, you can build dashboards using pivots, formulas, and charts.
Step 4 (Optional): Schedule Automatic Data Refresh
After creating your report, you can schedule refreshes to keep data up to date and share reports by email.
Use the scheduling workflow here:
Next Steps
If you need help, contact [email protected].