Amazon Seller Central helps you manage everything from your product catalog to inventory, pricing, and orders all in one place. But when it comes to tracking performance or building dashboards, you often need your data in Google Sheets.
The problem? Amazon Seller Central doesn’t directly integrate with Google Sheets.
That’s where Two Minute Reports (TMR) comes in. TMR makes it simple to bring your Amazon performance data straight into Google Sheets, no coding, no hassle.In this guide, we’ll walk you through how to connect Amazon Seller Central to Google Sheets using TMR.
Step 1: Install and Launch Two Minute Reports
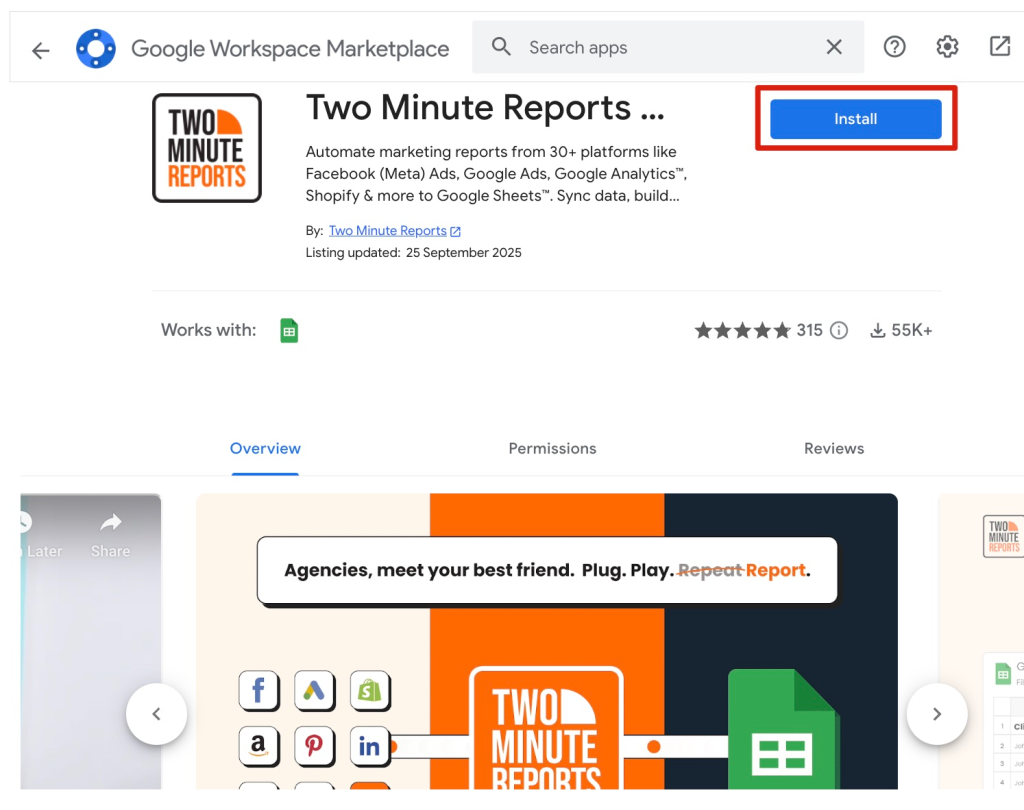
Search for Two Minute Reports and select Install.
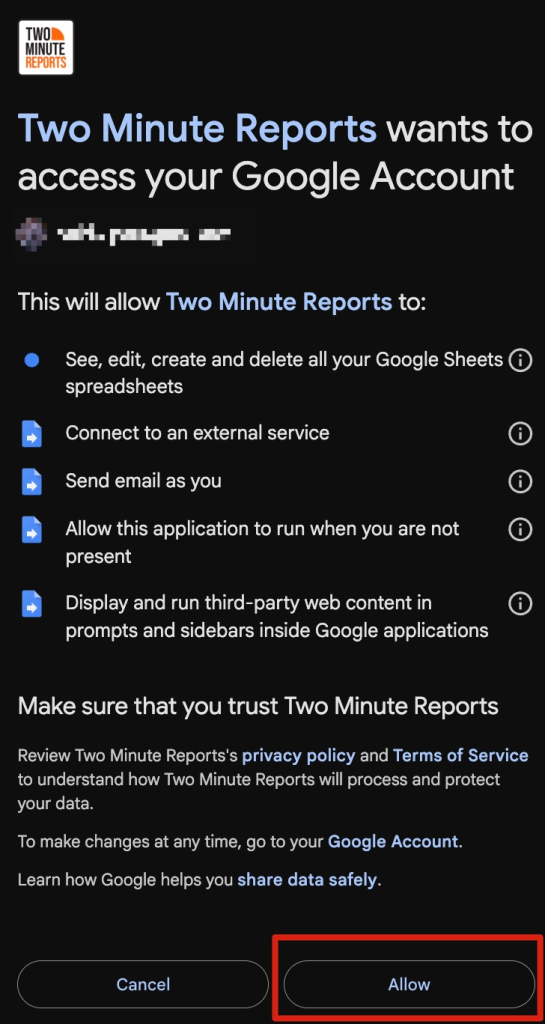
Review and accept the necessary permissions to run Two Minute Reports. Two Minute Reports will be installed for you with the e-mail you sign in to Google Sheets.
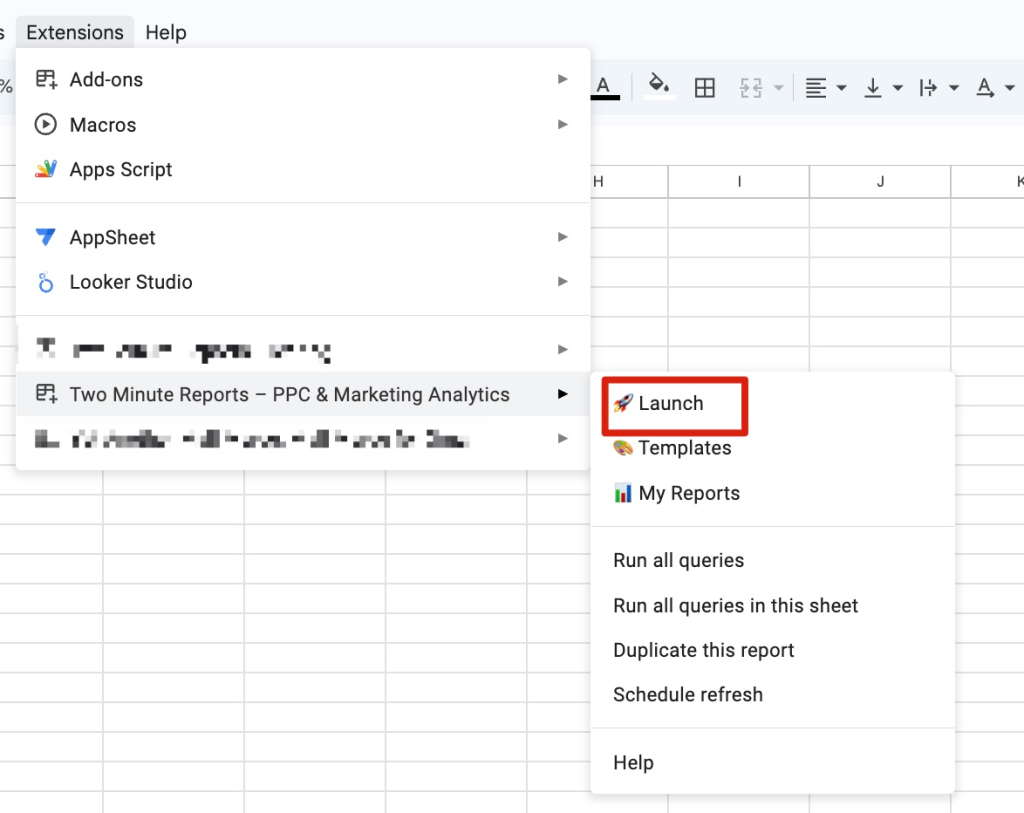
Open Google Sheets and go to Extensions -> Two Minute Reports -> Launch.
Step 2: Connect Amazon Seller to Google Sheets
Click Menu at the top left of the sidebar to navigate to the Connections section. Next, click Add to create a new Connection.
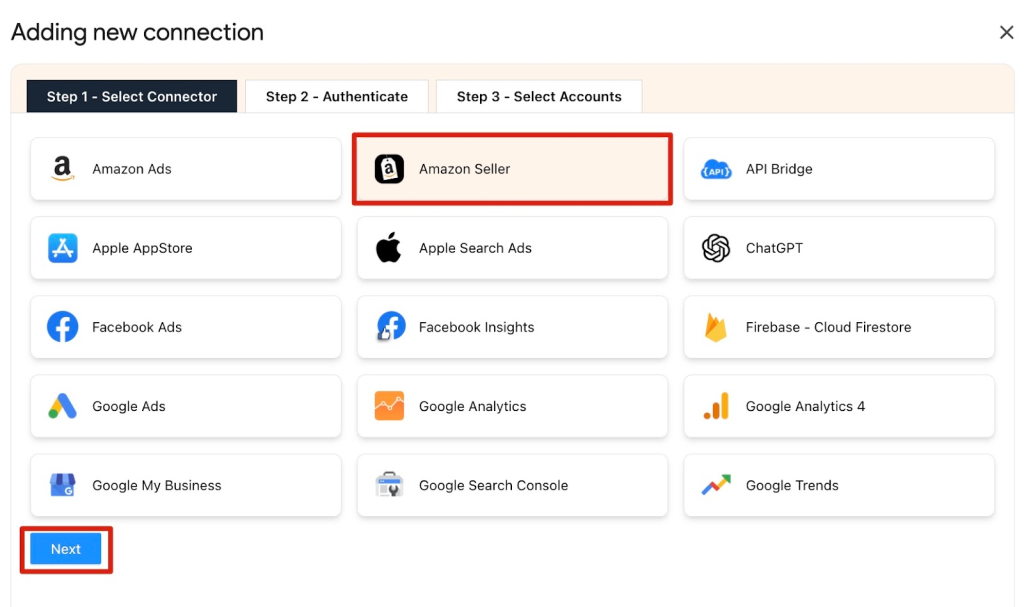
The Adding New Connection modal will open. Select Amazon Seller and click Next to continue.
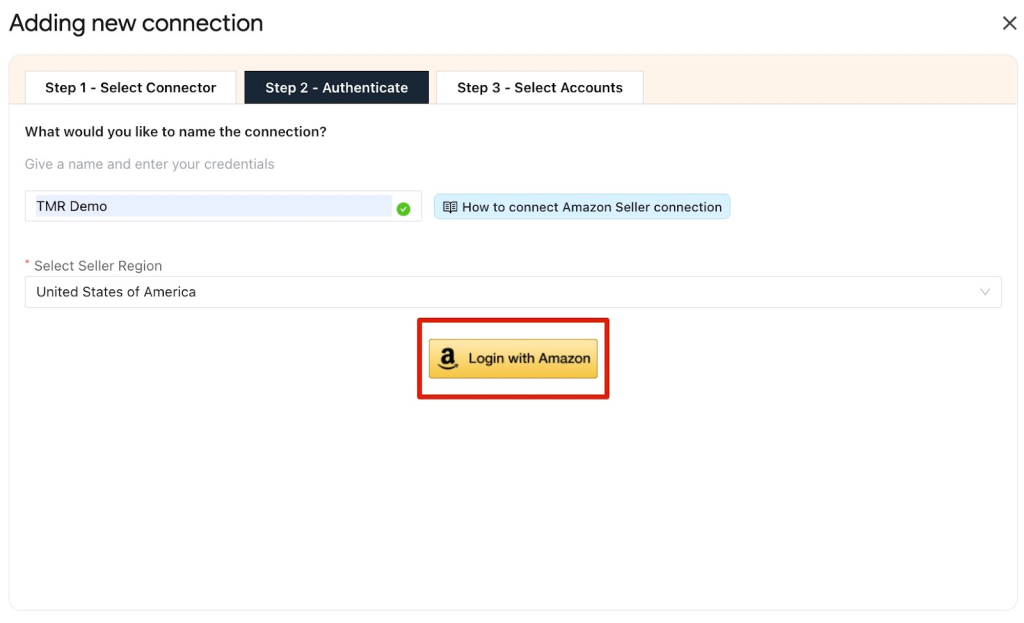
Enter a name for your connection, select the Seller Region, and then click Log in with Amazon.
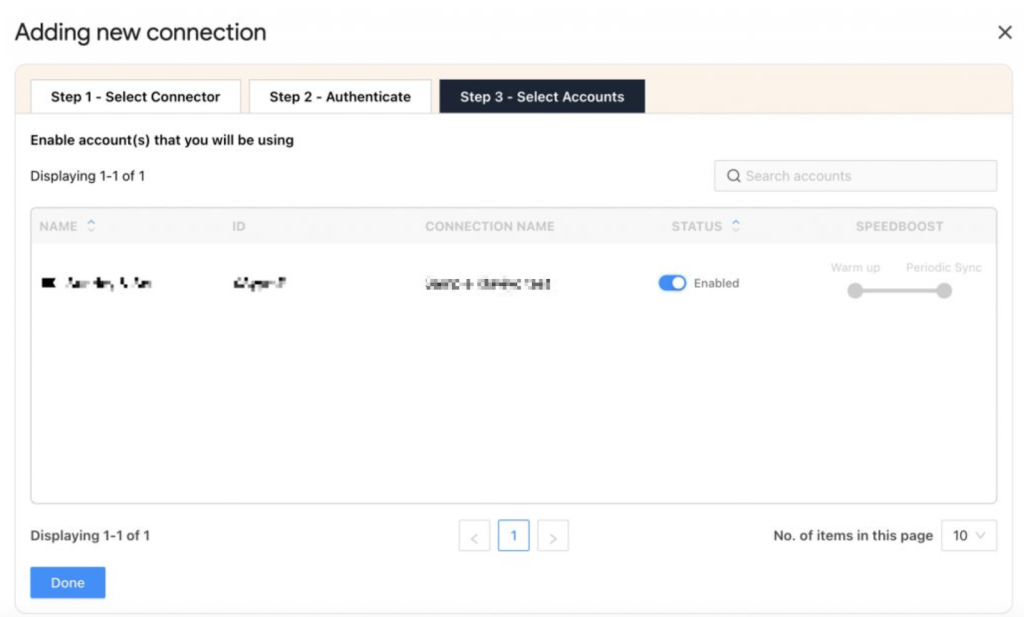
Once you’ve successfully authenticated, you’ll see a screen displaying your Account name, ID, Connection name, and Status as shown below
Enable the toggle for the accounts for which you want to run queries. Please note that you cannot extract data from the disabled accounts.
| Once you’ve enabled the associated accounts, you can hit “Refresh Connections” to ensure the connected accounts are reflected in the TMR sidebar. |
Step 3: Getting Amazon Seller data in Google Sheets
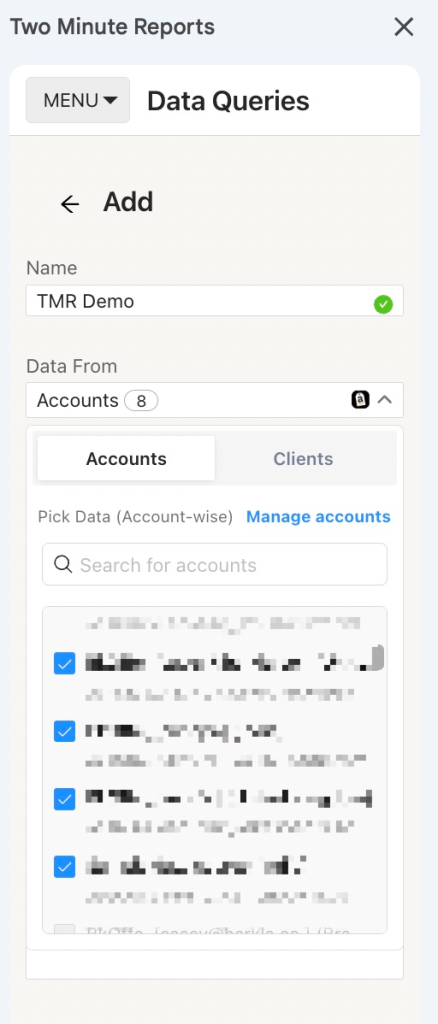
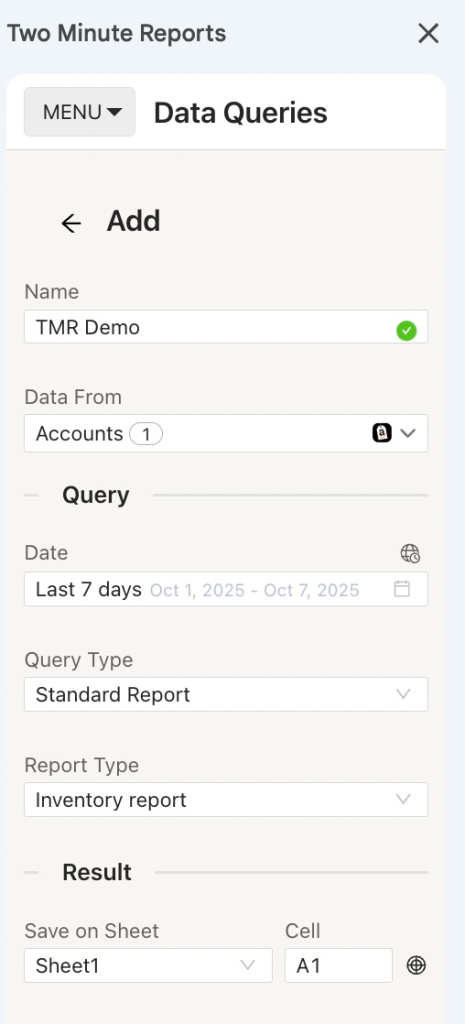
The next step is to add queries to extract insights from the Amazon Seller connection you just created. Go to the Data Queries section and click Add +.
Name your query and choose the Amazon Seller connection you created earlier.
Then, select the Google Sheet where you want to save the data, and pick the Marketplace you want to pull data from.
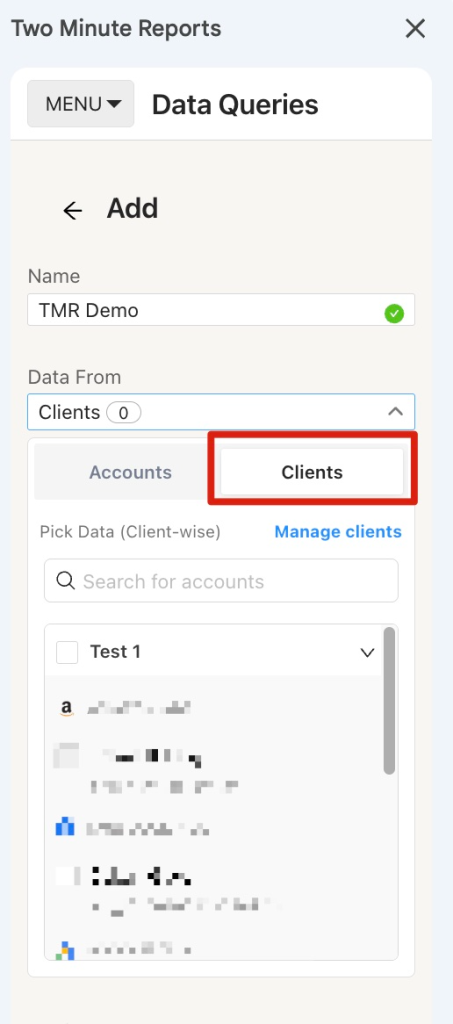
Alternatively, navigate to the Clients section. Add your client and map their corresponding seller account.
Click on “Manage Clients” and map the necessary account details. Once done, click “Save & Close” to save your client’s details for future reference.
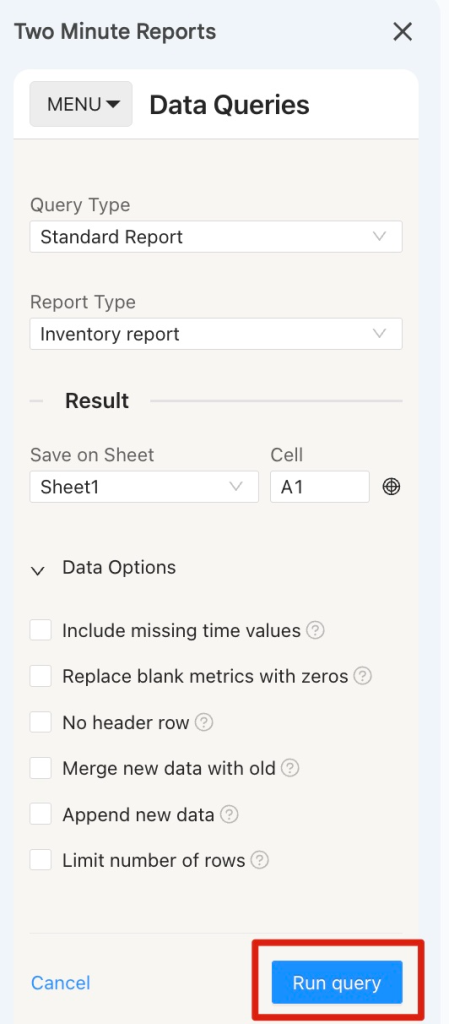
Once you’ve selected the required connection, you can choose the Query Type and Report Type.
Under the Query Type you can choose Metrics & Dimensions and Under the Report type you can choose from various options.
Configure your data reporting by selecting relevant fields and choosing whether to sort them in ascending or descending order. You can also apply custom filters to display only the information that is necessary.
You can also select Data Options whether you want to Include missing time values or Replace blank metrics with zeros. This means metrics are still being reported as zero values. No header row is selected whether you want to have a header for the report or not. Selecting Append new data means that the old data will not be replaced.
Select the required fields and press Run query. Data will be pulled from Amazon Seller and populated in the Sheet that you selected.
You may also select the Two Minute Reports template if you prefer to use ready-made reports with your data. If you want to learn more about Two Minute Report’s templates, you can read How to use templates for Google Sheets. Once a query is added, you can make it refresh the latest data automatically by going to the Schedule Refresh section and adding a schedule.
Step 4: (Optional) Schedule Automatic data Refresh and email
Once you create a report in Google Sheets, you can schedule automatic updates to get real-time data. This feature is convenient for sending emails or refreshing your spreadsheets with live data and using them as a dashboard.
Under the email section, you can enter the recipient’s email ID and save the new schedule.
You can also choose to specify the reporting format. You can insert the sheet content in the email body, attach the selected sheet as a PDF or Excel, or attach the spreadsheet as an Excel file.
Two Minute Reports’ Schedule Refresh feature has further capabilities. Continue reading about this feature: “How to Refresh Data Automatically in Google Sheets.”
We hope you found this guide helpful. If you have any questions, please contact our support team at [email protected].

