Klaviyo

Two Minute Reports' Klaviyo connector lets you access and analyze your data directly in Google Sheets or Looker Studio. Build custom reports, monitor key metrics, and make data-driven decisions — all without writing any code.
What you can report on
- Email campaign performance: opens, clicks, and bounces
- Flow analytics and automated message performance
- Revenue attributed to email and SMS campaigns
- List growth, unsubscribes, and subscriber churn
- Segment performance and A/B test results
How to get Klaviyo data into your reports
With TMR's Klaviyo connector, you can track email performance, optimize campaigns, and build data-driven reports — all directly in Google Sheets.
Before connecting your Klaviyo account, confirm you have the required permissions in place.
Required permissions
To connect your Klaviyo account with Two Minute Reports, ensure the following:
- Your Klaviyo user role must be Admin, Owner, or Manager.
- You need a private API key with read-only scope to enable the connection (see Step 3 below).
- Keep your API key safe and secure to avoid unauthorized access or data loss.
Learn more about user roles and privileges in Klaviyo's help article.
Once you confirm these prerequisites, follow the steps below to connect Klaviyo data to Google Sheets through Two Minute Reports.
Step 1: Install and launch Two Minute Reports
Install the add-on first if you have not already:
When installation is complete, open your spreadsheet and launch TMR from Extensions → Two Minute Reports → Launch. You can then connect your Klaviyo data to Google Sheets.
Step 2: Create a new connection for your Klaviyo account
In the TMR sidebar:
- Click Menu at the top left and go to Connections.
- Click Add to create a new connection.
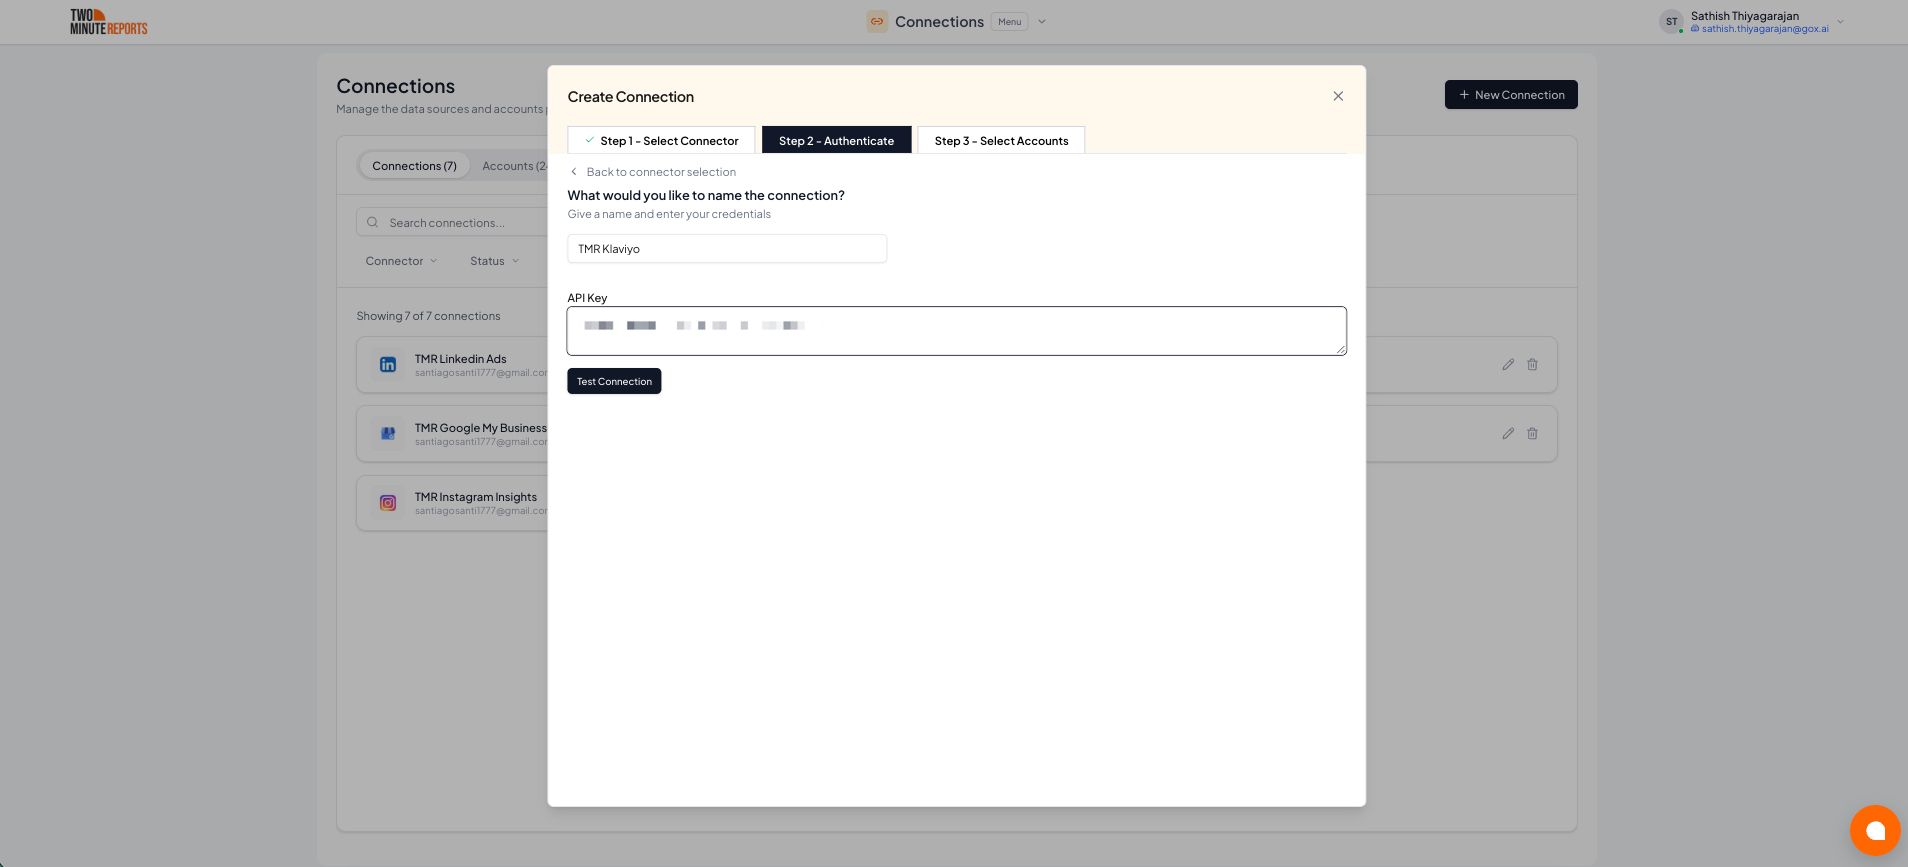
When the Adding New Connection dialog appears, complete these steps:
- Select the Klaviyo connector from the list.
- Authenticate by entering the API key from your Klaviyo dashboard (see Step 3).
- Enable the Klaviyo accounts you want to use with this connection.

Choose Klaviyo from the connector list, then continue with API key authentication.
Step 3: Generate the API key from the Klaviyo dashboard
Open profile settings
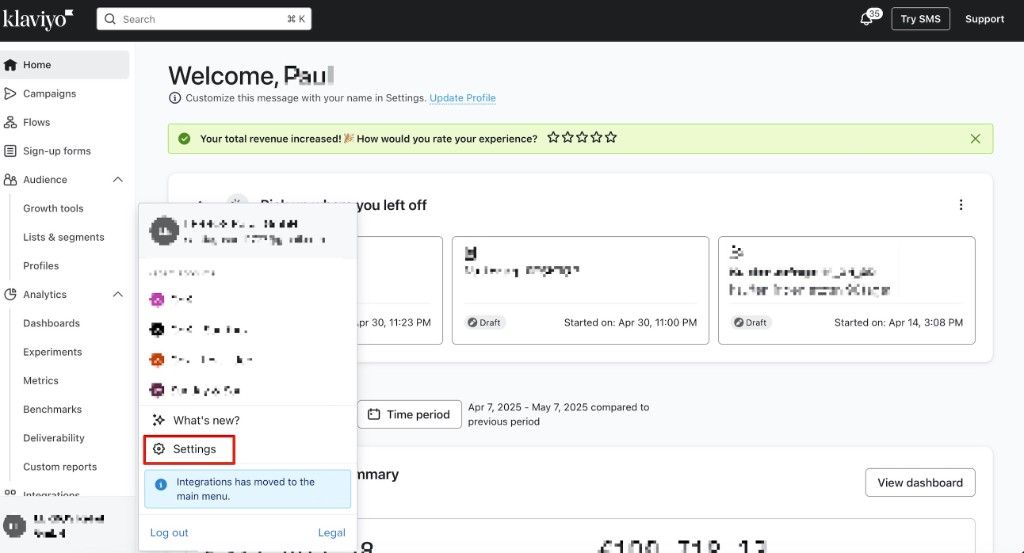
In your Klaviyo dashboard, open your Profile menu, then choose Settings.
Open API keys
Under the Account menu, select API keys. You can view previously created keys or create a new one.

Create a private API key
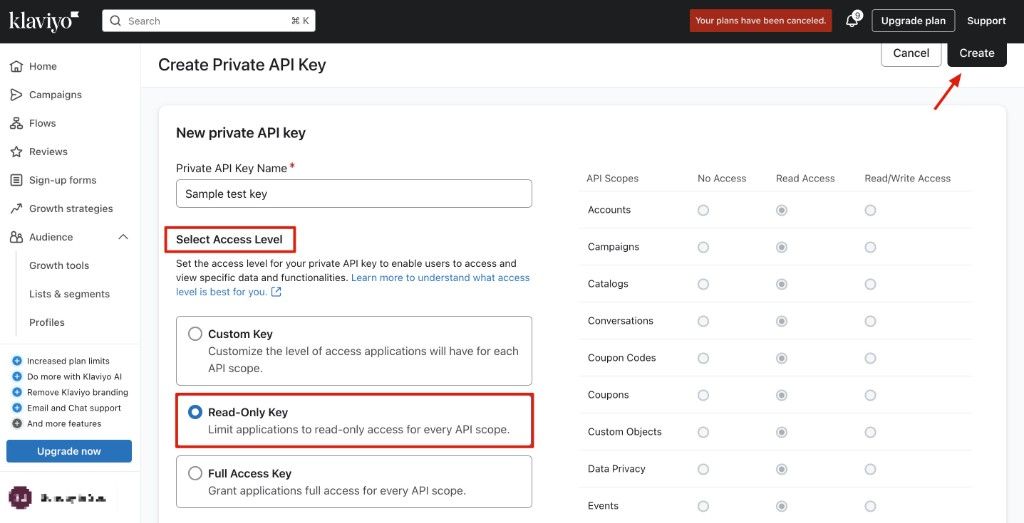
Click Create Private API Key. Enter a name for the key. Under Select Access Level, choose Read-Only Key (read-only access for every API scope), then click Create.
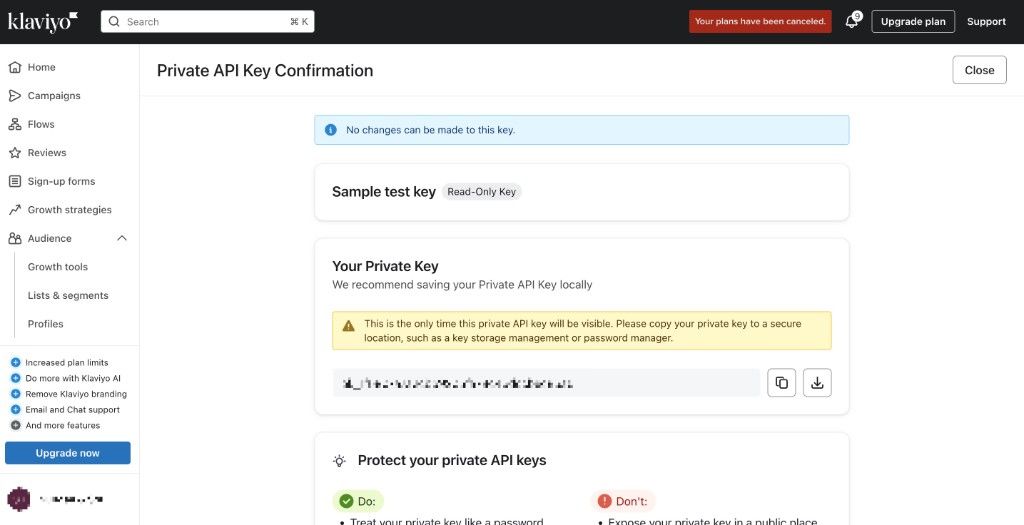
Copy your private API key
On the confirmation screen, copy or download your private API key.
Authenticate in Two Minute Reports
Paste the API key into the Authenticate step in the TMR connection dialog. Click Test Connection.
When authentication succeeds, you will see your account name, ID, connection name, and status.
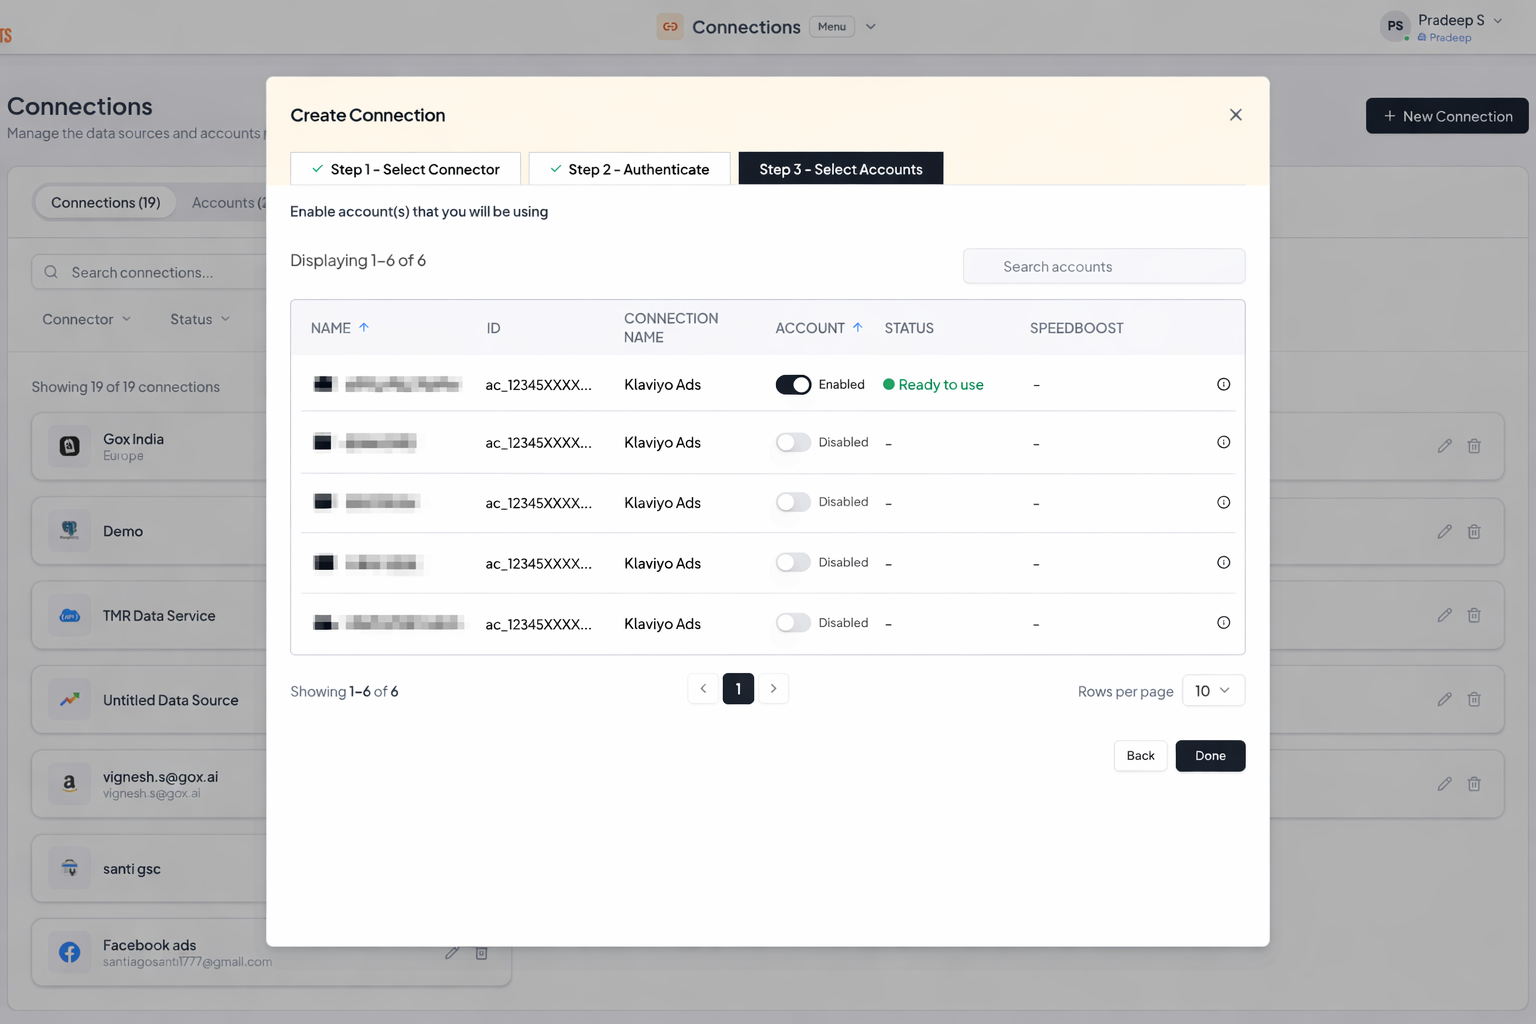
Enable accounts
Enable the toggle for each Klaviyo account you want to query. You cannot extract data from disabled accounts.
Click Refresh Connections so enabled accounts appear in the TMR sidebar.
You can now extract email marketing KPIs in Google Sheets for actionable campaign insights.
Step 4: Fetch Klaviyo data in Google Sheets
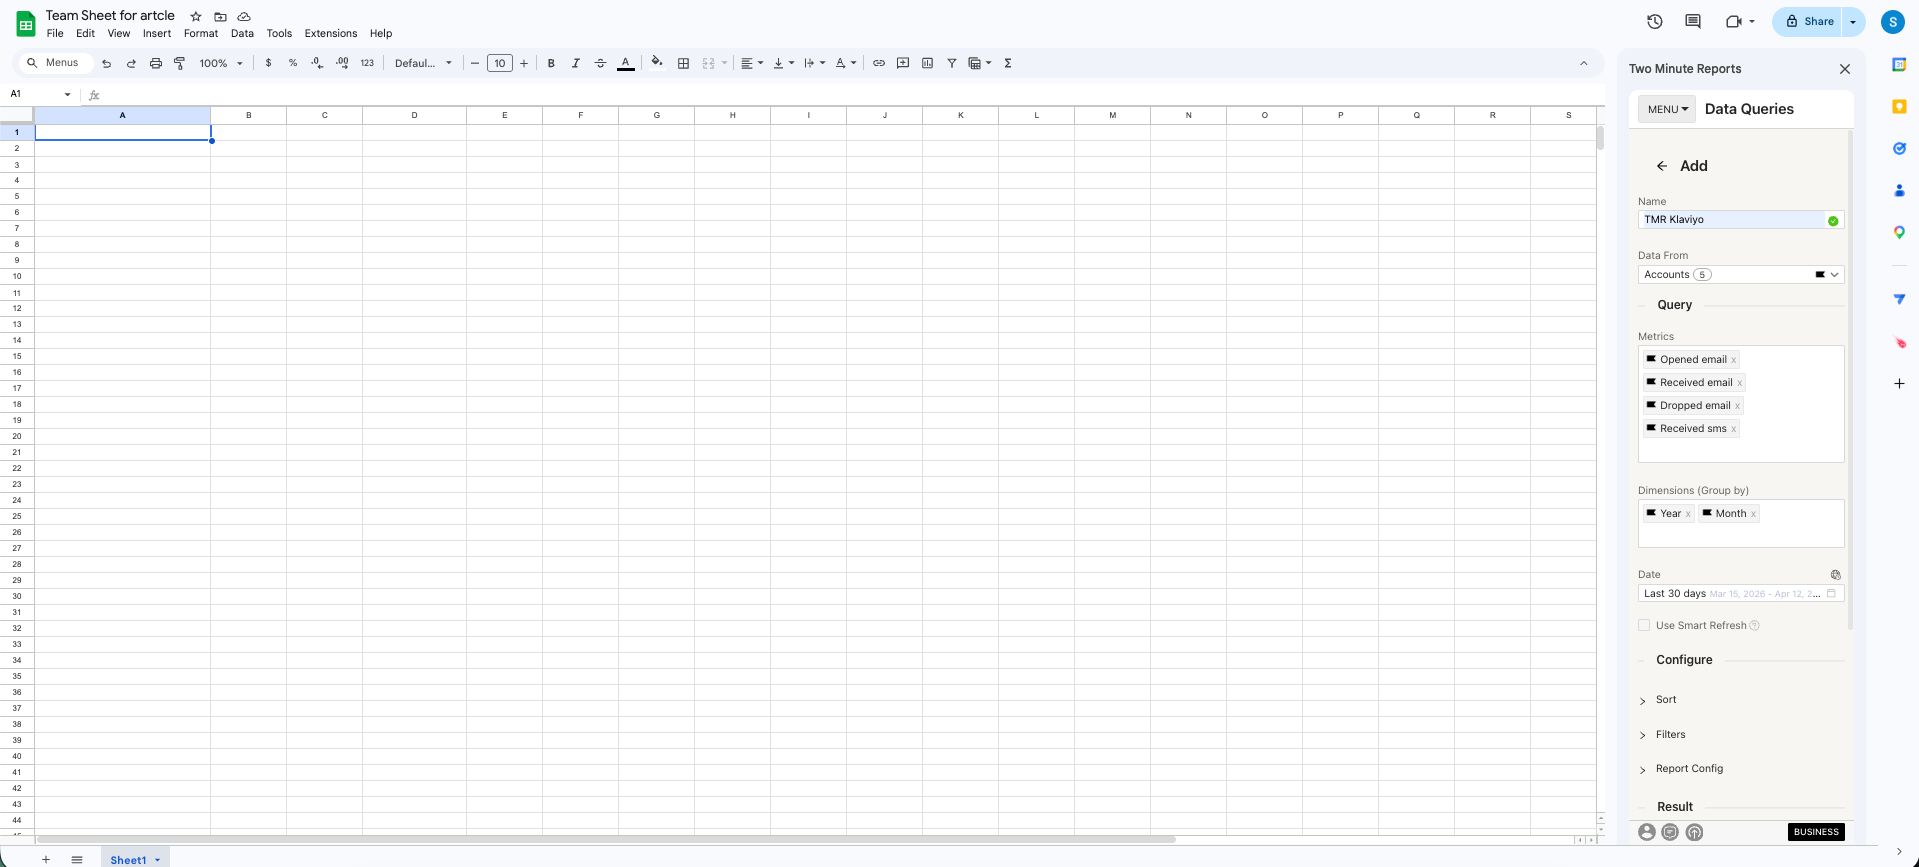
To pull specific campaign data, create a query in Data Queries:
- Click Add and select the Klaviyo account(s) to analyze.
- Choose metrics and dimensions that match your campaign goals.
- Pick a date range for the period you want to track.
- Configure sorting and filters to focus on the data that matters.
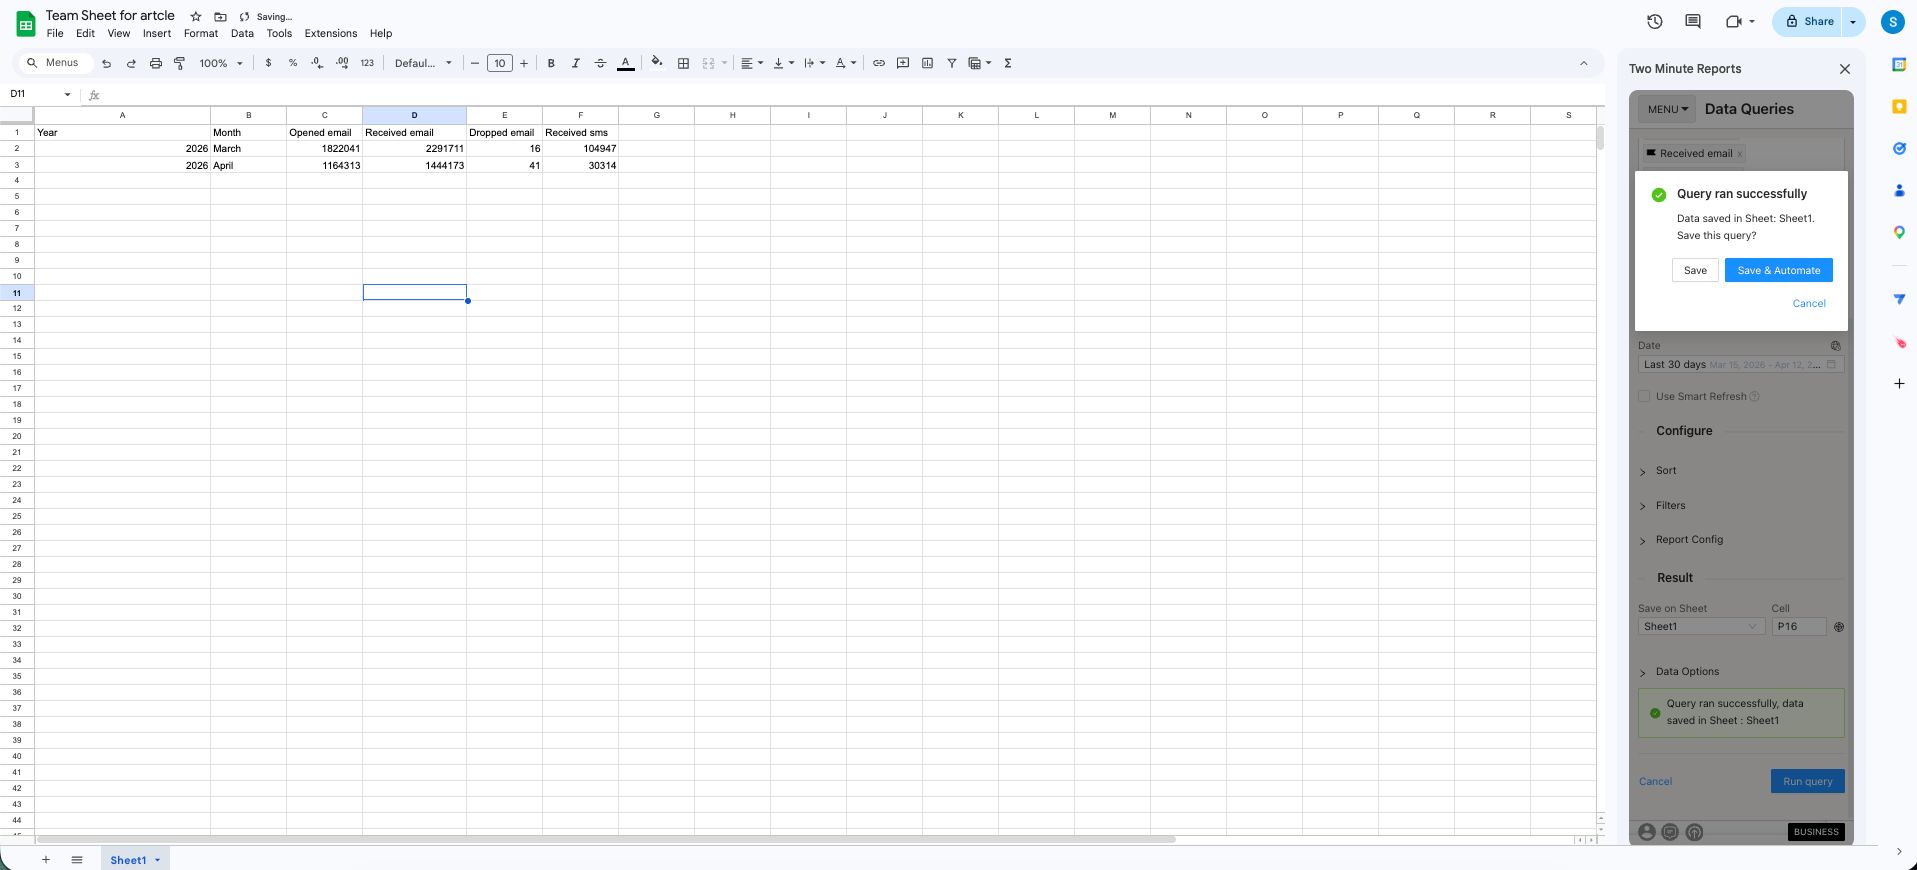
- Click Run Query to load results into your sheet.
Manage multiple Klaviyo accounts
You can manage multiple Klaviyo client accounts in one place. Select one or more accounts when creating a query.
Alternatively, go to the Clients section: add a client, map their Klaviyo account(s), then click Save & Close so the mapping is available for future queries.
Once data is in Google Sheets, use pivot tables, VLOOKUP(), and charts to analyze and visualize email marketing performance.
Step 5 (Optional): Schedule automatic data refresh
Keep reports up to date and share them on a schedule:
Next steps
Before connecting your Klaviyo account, confirm you have the required permissions in place.
Required permissions
To connect your Klaviyo account with Two Minute Reports, ensure the following:
- Your Klaviyo user role must be Admin, Owner, or Manager.
- You need a private API key with read-only scope. You will enter this key when creating the connection in the TMR hub (see the Google Sheets tab above for step-by-step instructions on generating the API key from the Klaviyo dashboard).
- Keep your API key safe and secure to avoid unauthorized access or data loss.
Learn more about user roles and privileges in Klaviyo's help article.
Connect Klaviyo to Looker Studio
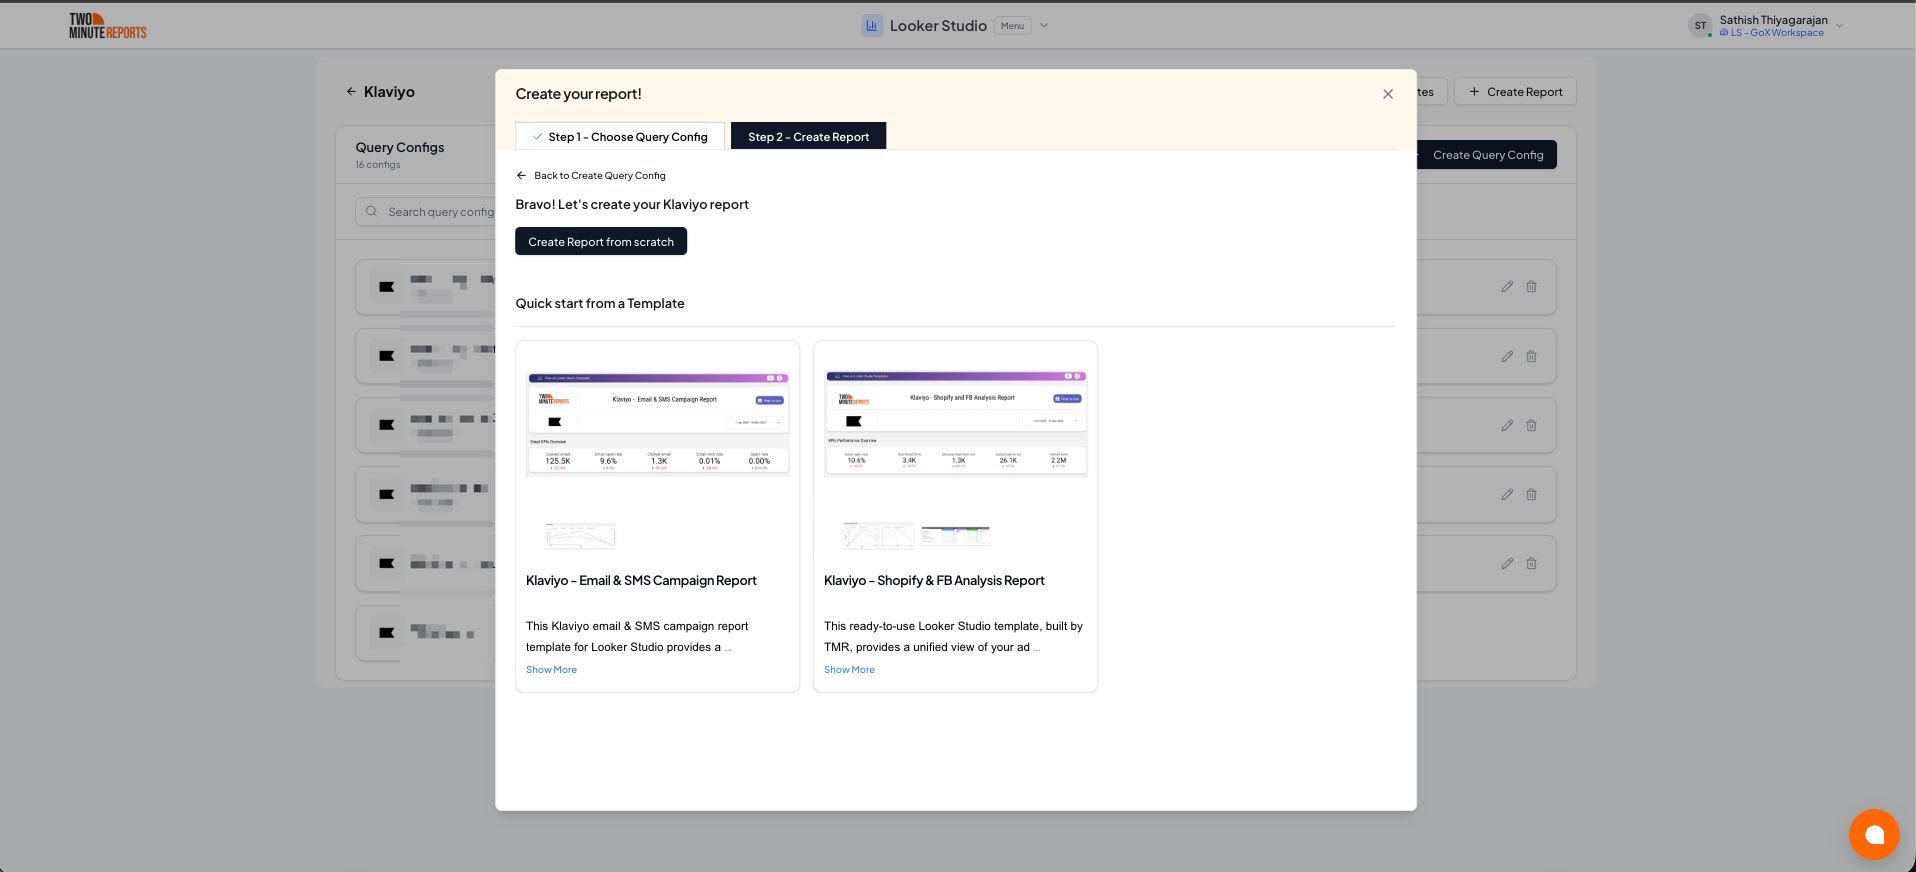
- Click Open in Looker Studio, then click + Create Report.

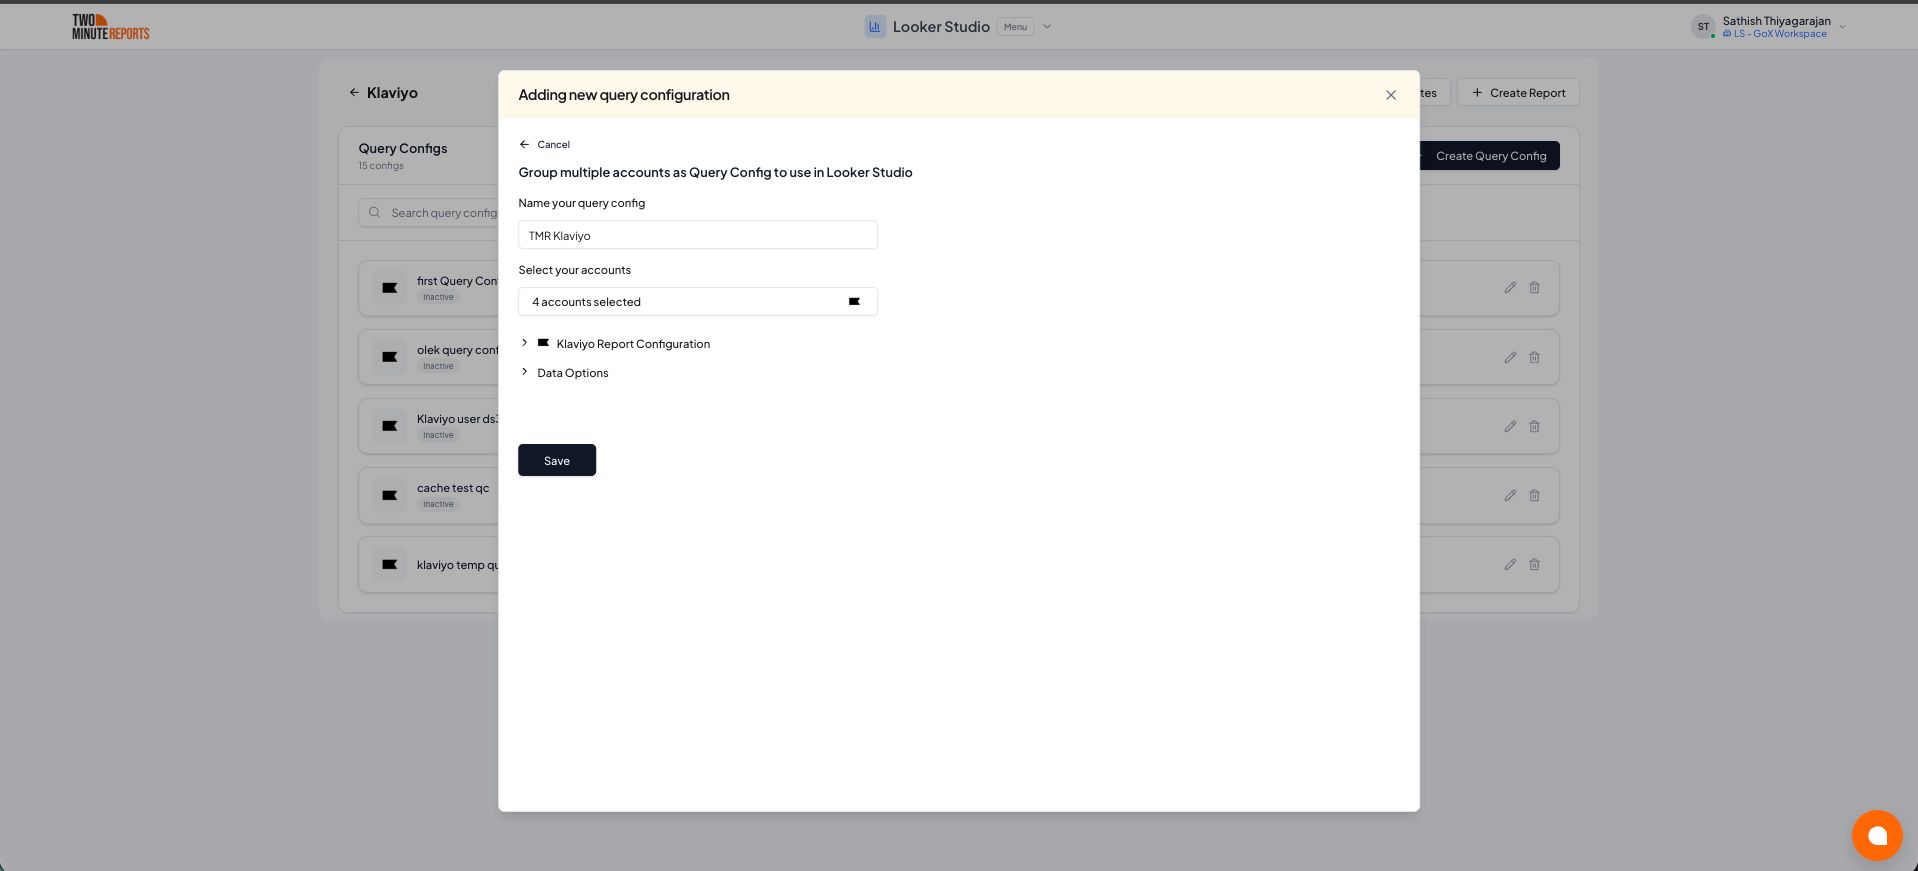
- A query config panel will appear. Do one of the following:
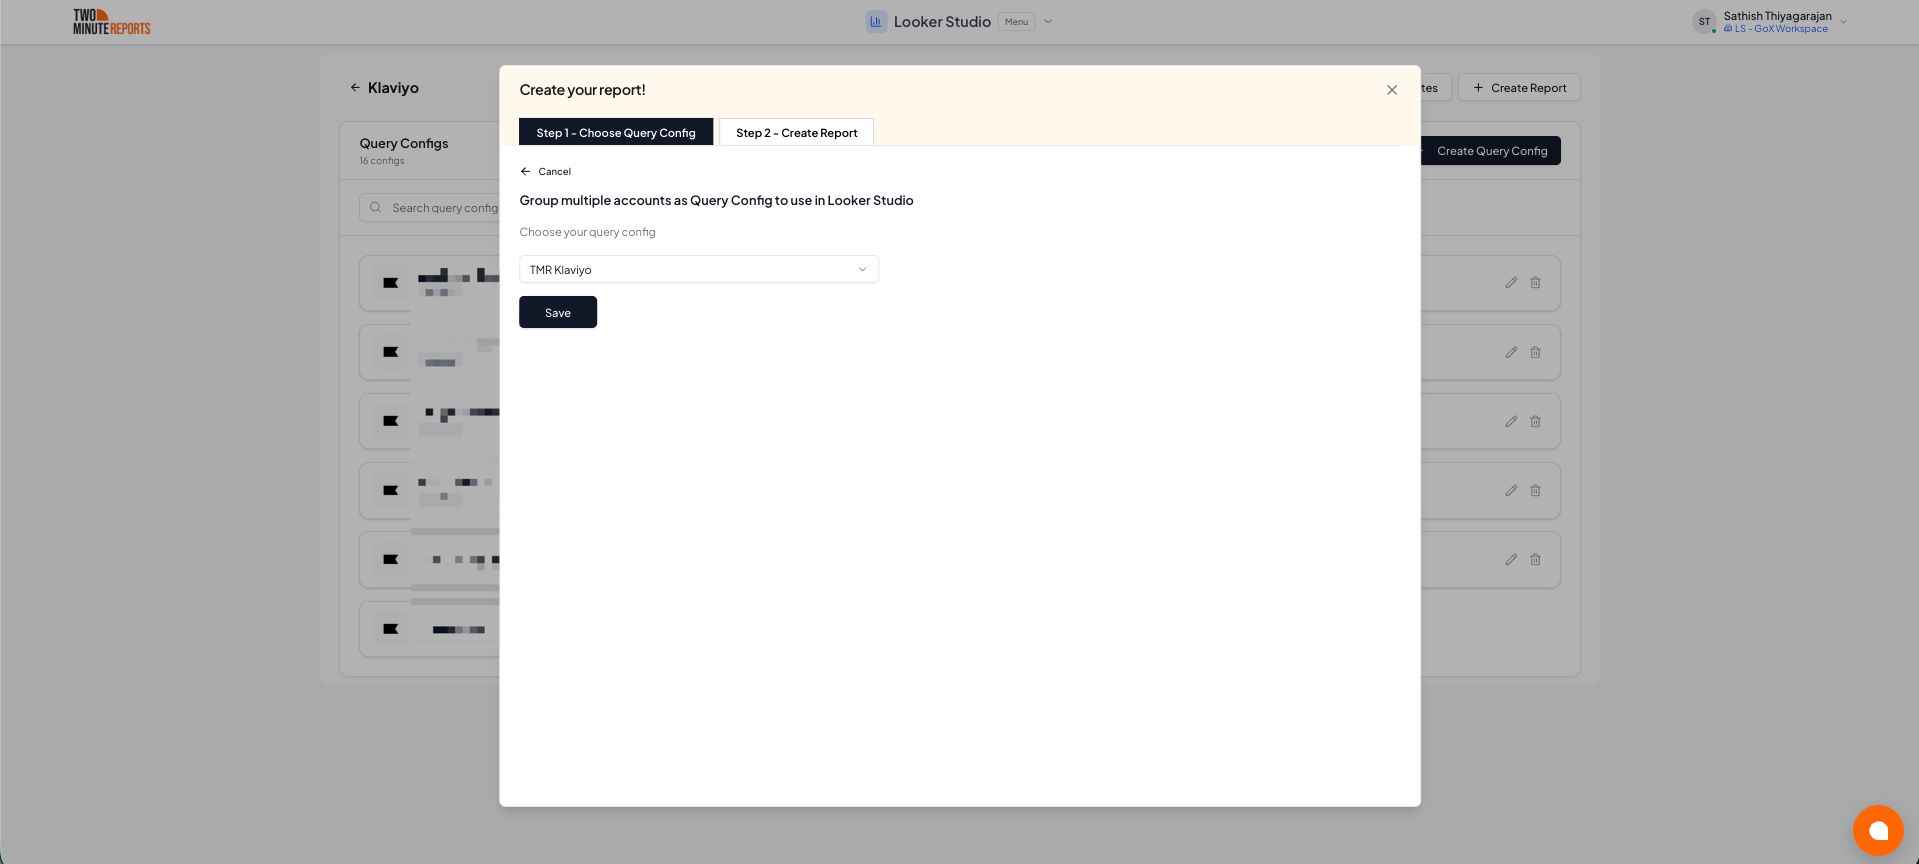
Creating a new query config: Enter a name, select the accounts you want to include from the dropdown, then click Save.
- Choose Create report from scratch to build a custom report, or select one of the pre-built templates to get started quickly.
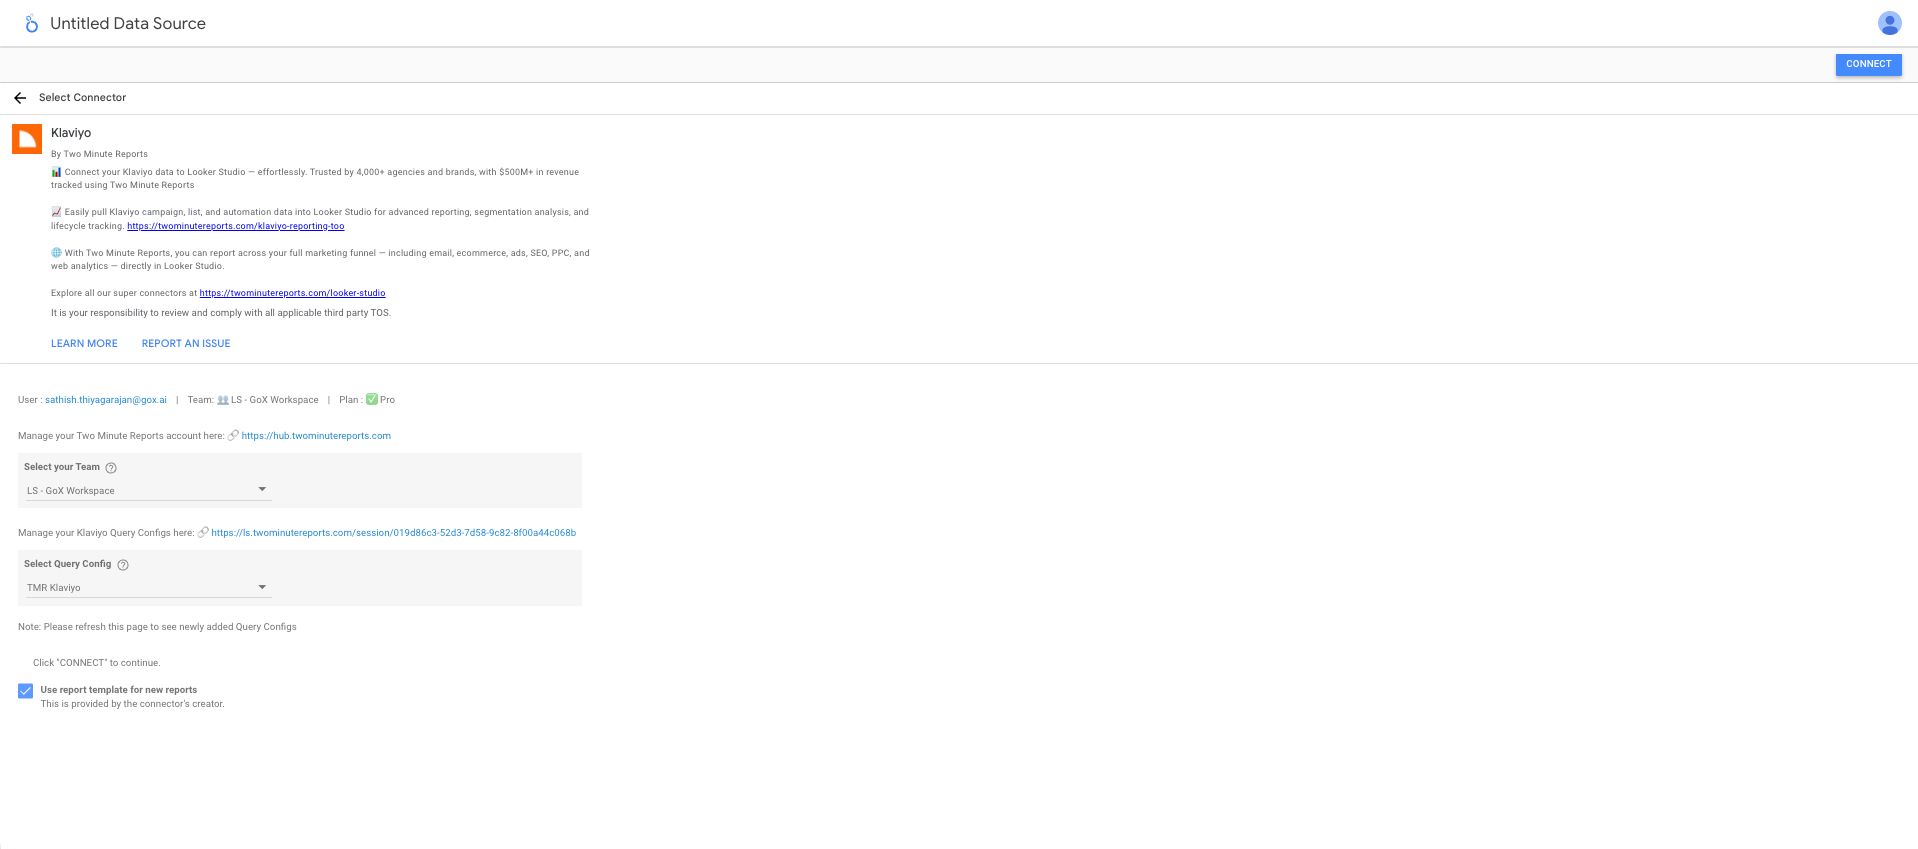
- In the Looker Studio connector panel, select your team and choose the required query config from the dropdown. Click Connect in the top-right corner.
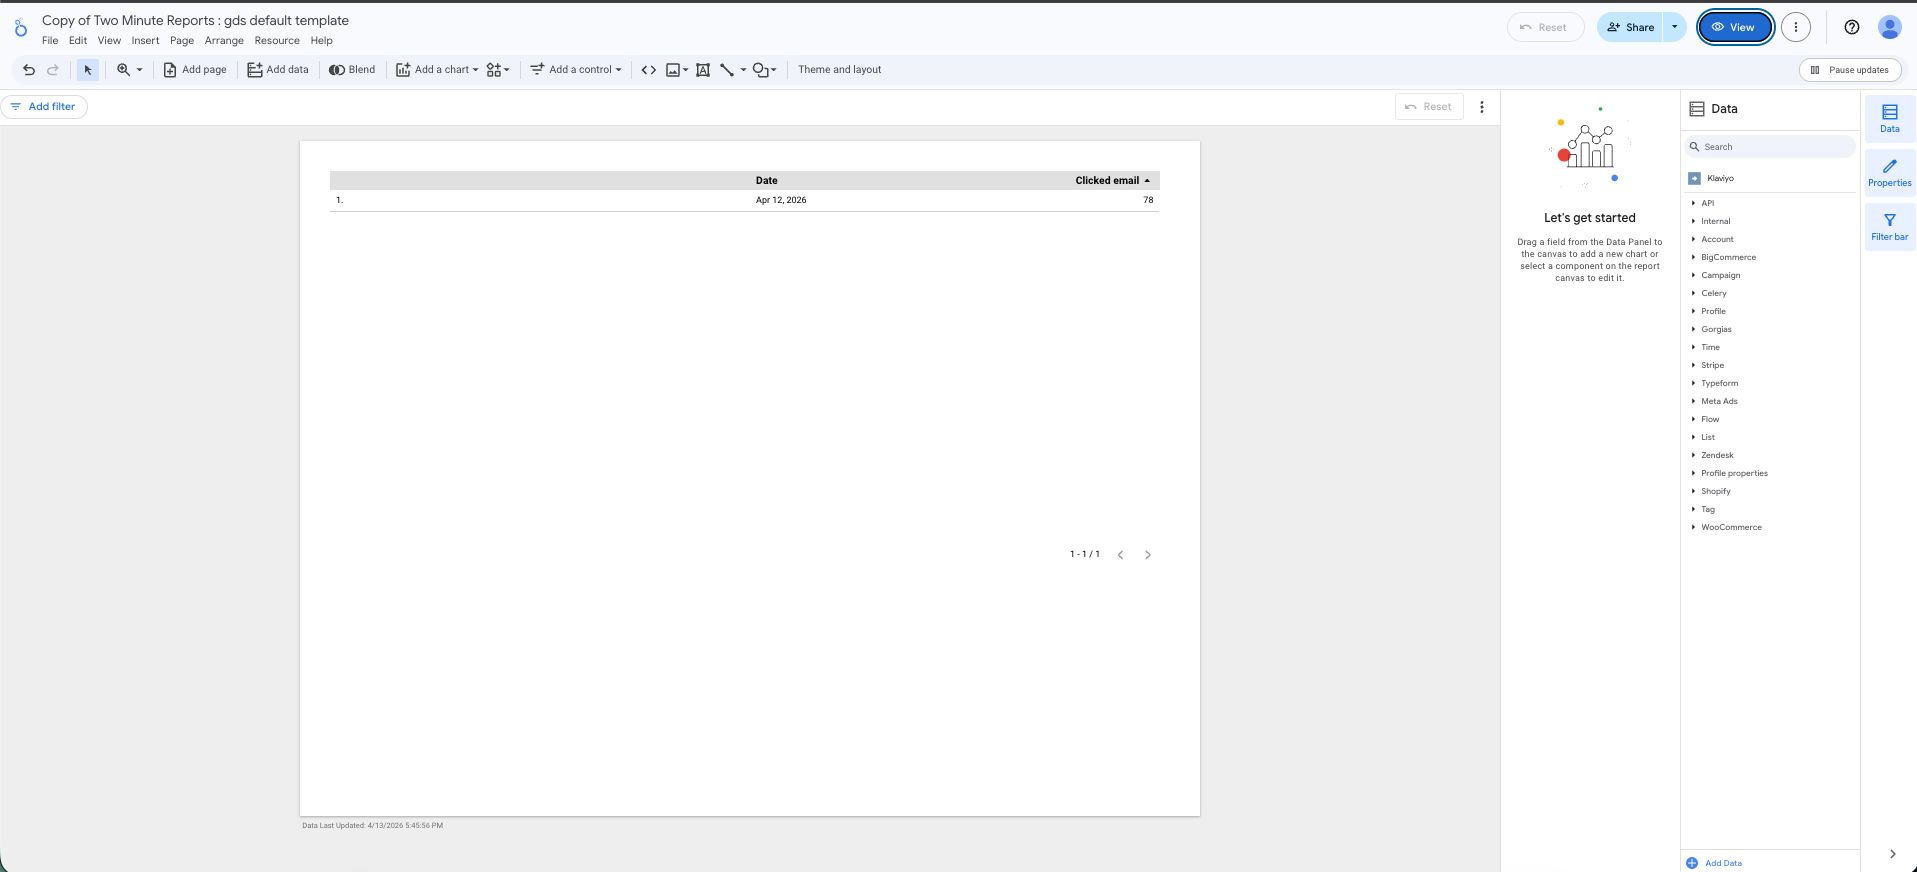
- You'll land on the Looker Studio dashboard. Drag and drop the available Klaviyo metrics and dimensions onto your canvas to start analyzing your data.
If you need help, contact [email protected] or submit a support ticket.
Understanding and resolving data discrepancies
You might encounter discrepancies between data in Two Minute Reports and what you see in the Klaviyo dashboard. Below are the common causes and how to resolve each one.
Flow emails displayed as campaigns
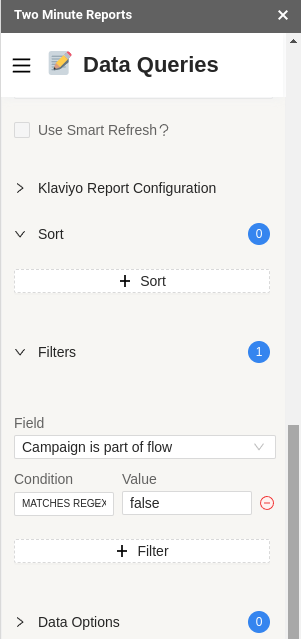
In Two Minute Reports, all email types — campaigns and flows — are listed under campaigns. To separate them, use a filter on the Campaign is part of a flow dimension.
Filter for campaigns only:
| Setting | Value |
|---|---|
| Field | Campaign is part of a flow |
| Condition | MATCHES REGEX |
| Value | false |
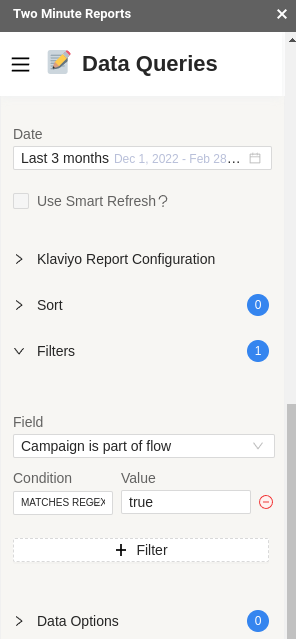
Filter for flows only:
| Setting | Value |
|---|---|
| Field | Campaign is part of a flow |
| Condition | MATCHES REGEX |
| Value | true |
Discrepancies in metrics
Klaviyo attributes email and sales events differently in its dashboard vs. its API.
- In the dashboard, events are assigned to the date the user received the email.
- In the API, events are assigned to the date they actually occurred.
Two Minute Reports uses the API, so results may differ from the Klaviyo dashboard. Using longer date ranges in your queries reduces the impact of this difference.
Discrepancies in open and click rate data
Two Minute Reports calculates open and click rates by dividing unique opens or clicks by total emails delivered. When a query uses an incomplete time frame, multiple API requests may run and count unique values more than once.
For best accuracy, use these date ranges:
- A complete week (Monday to Sunday)
- A full calendar month
- The current month (for month-to-date performance)
Open rate or click rate exceeding 100%
When breaking down rates by date, values can exceed 100% because opens don't always happen on the same day emails are received. Metrics are attributed to the day the event occurred, not the send date.
Example: 40 emails sent Monday, 20 on Tuesday. 5 opened Monday, 30 opened Tuesday.
- Monday open rate = (5 ÷ 40) × 100% = 12.5%
- Tuesday open rate = (30 ÷ 20) × 100% = 150%
To avoid this, pull rates by campaign or over a longer time frame (a full month) rather than a daily breakdown.
Total integration value instead of Klaviyo attributed value
By default, Two Minute Reports may show total integration value. To show only Klaviyo-attributed value, enable Filter insights, only attributed to Klaviyo Campaigns and Flows in your query configuration.
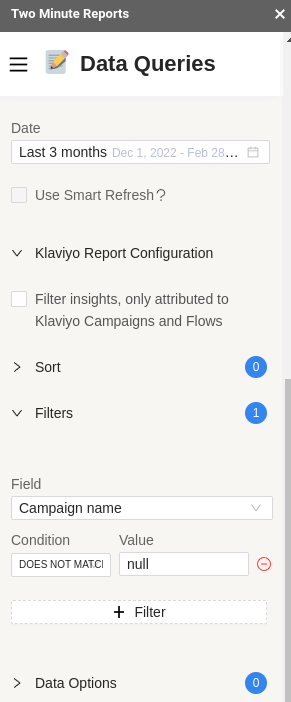
Alternatively, apply this filter:
| Setting | Value |
|---|---|
| Field | Campaign name |
| Operator | DOES NOT MATCH REGEX |
| Value | null |