With TMR’s Google Ads Connector, you can bring all your advertising data directly into Google Sheets. This allows you to centralize key metrics, build fully customizable campaign reports, and keep everything secure with encrypted data transfers.
Required permissions
- You must have a Google Ads account or a manager account with Read Only access. If your ad account is not visible after connecting to Google Ads, grant access to the manager account again.
- For detailed steps, see the guide on granting access to a Google Ads account or managing accounts.
Once the prerequisites are met, proceed with the steps below to link your Google Ads data to Google Sheets through TMR.
Step 1: Install and Launch Two Minute Reports
Step-by-Step Tutorial: Installing TMR in Google Sheets
Follow the steps below to install and set up TMR in your Google Sheets.
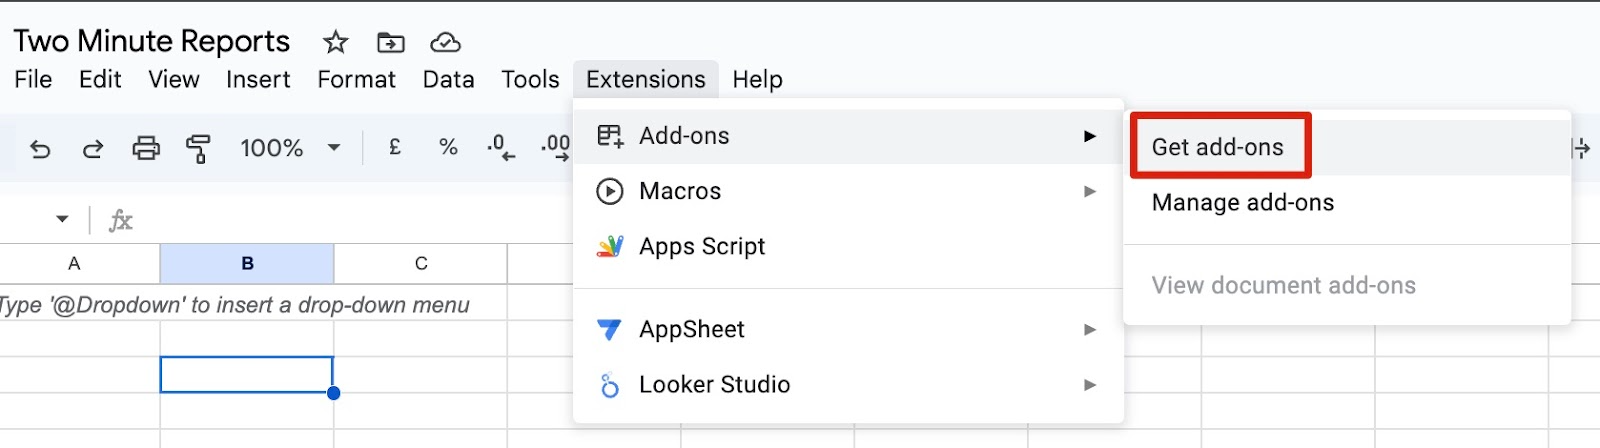
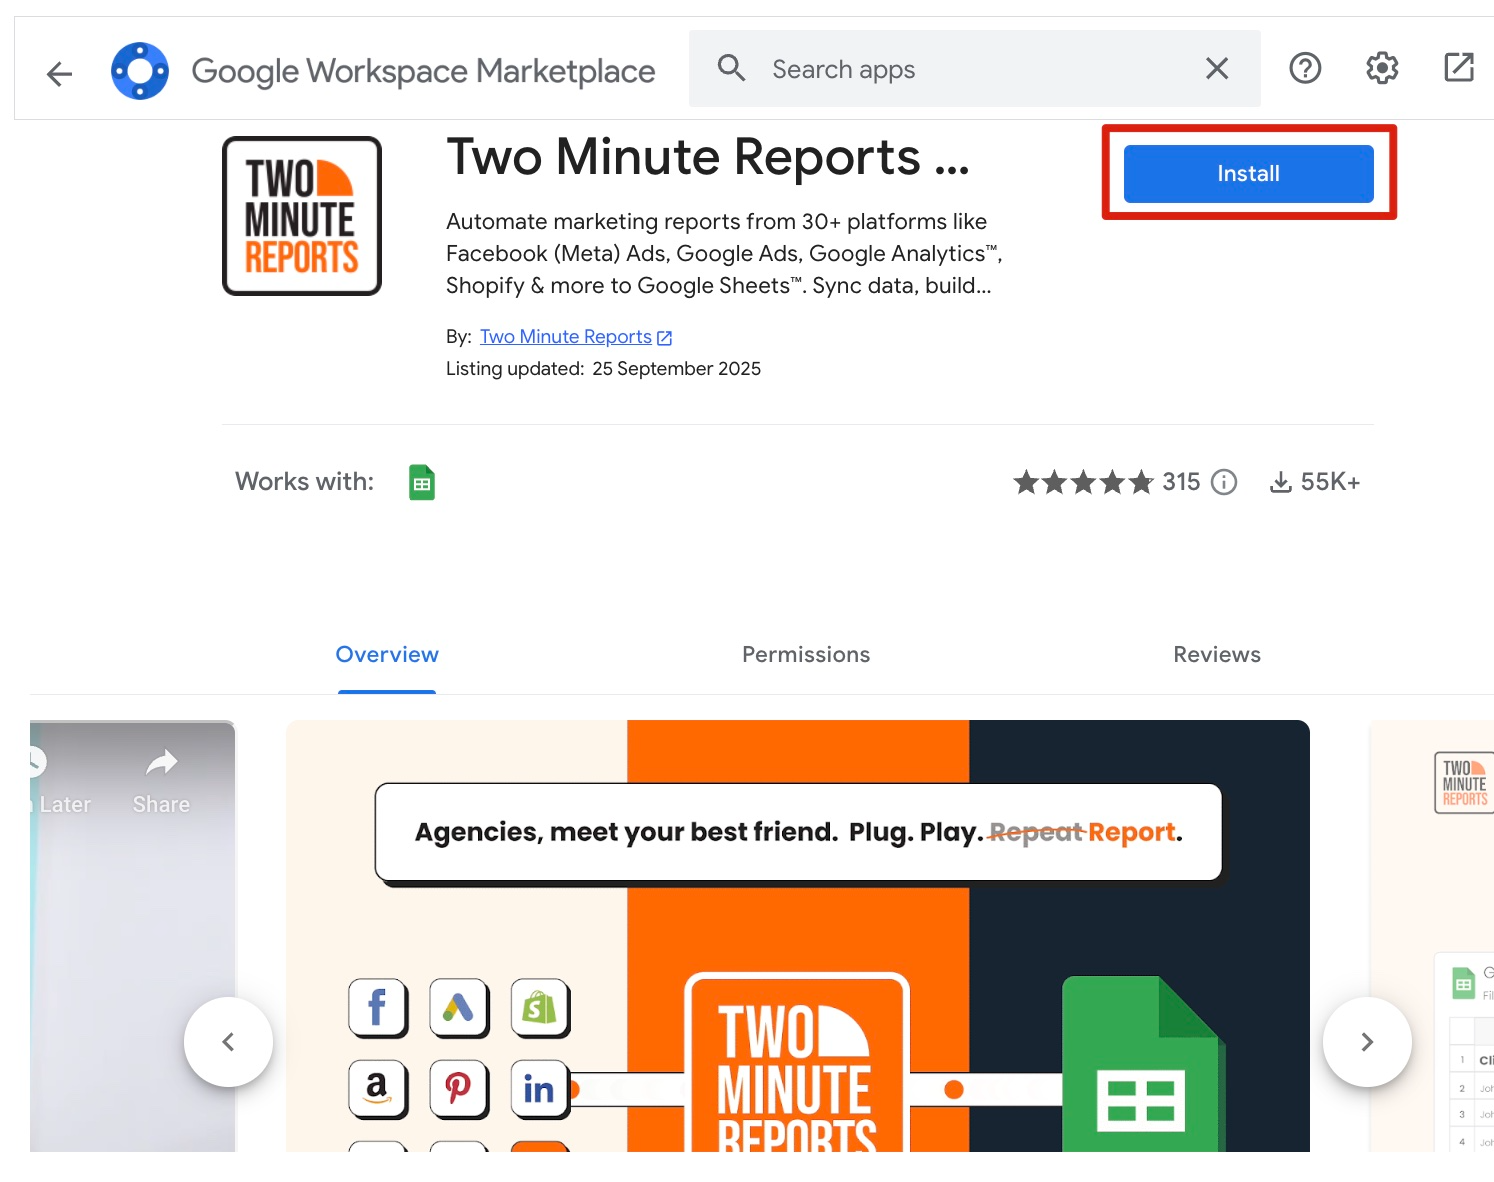
Search for Two Minute Reports and select Install.
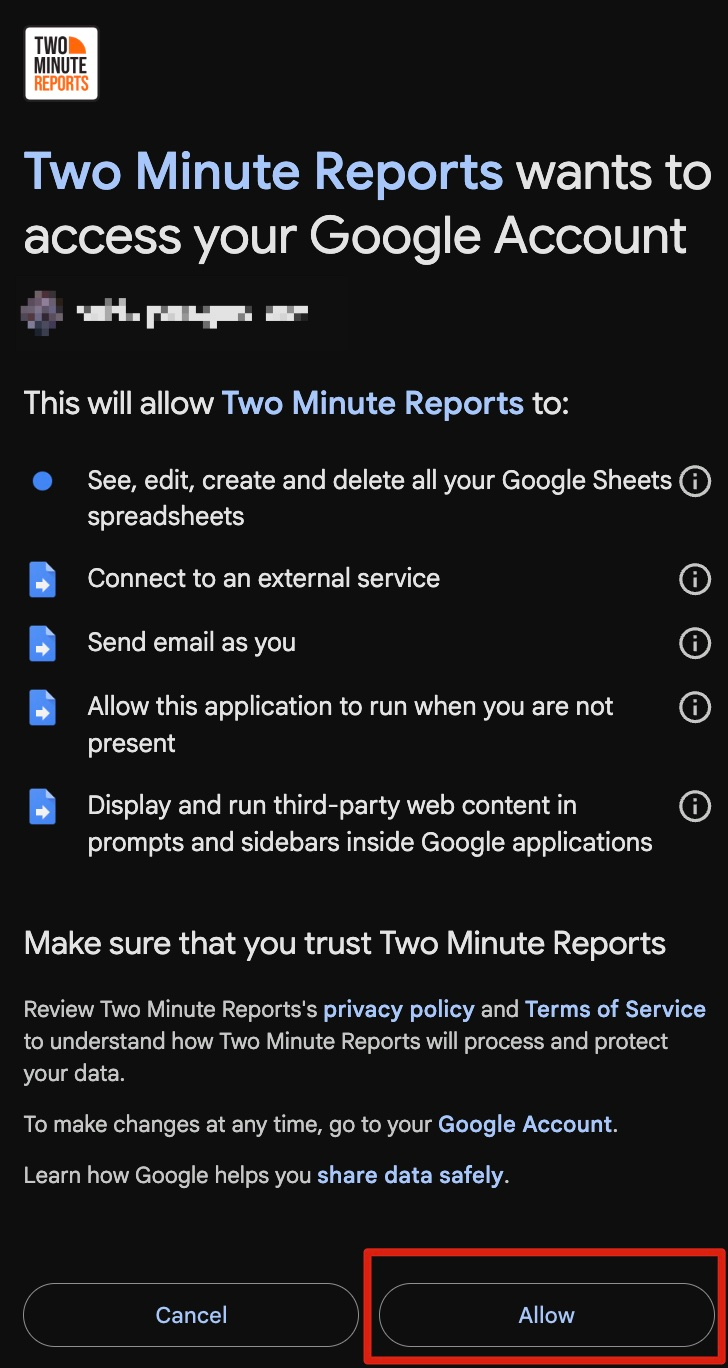
Review the required permissions for Two Minute Reports. After accepting the terms and conditions, click Allow to grant access so the add-on can manage and work with your data.
Note: Allow access is mandatory for Two Minute Reports to function properly and analyze your data efficiently.
Next, open Google Sheets, then go to Extensions > Two Minute Reports > Launch to start the add-on
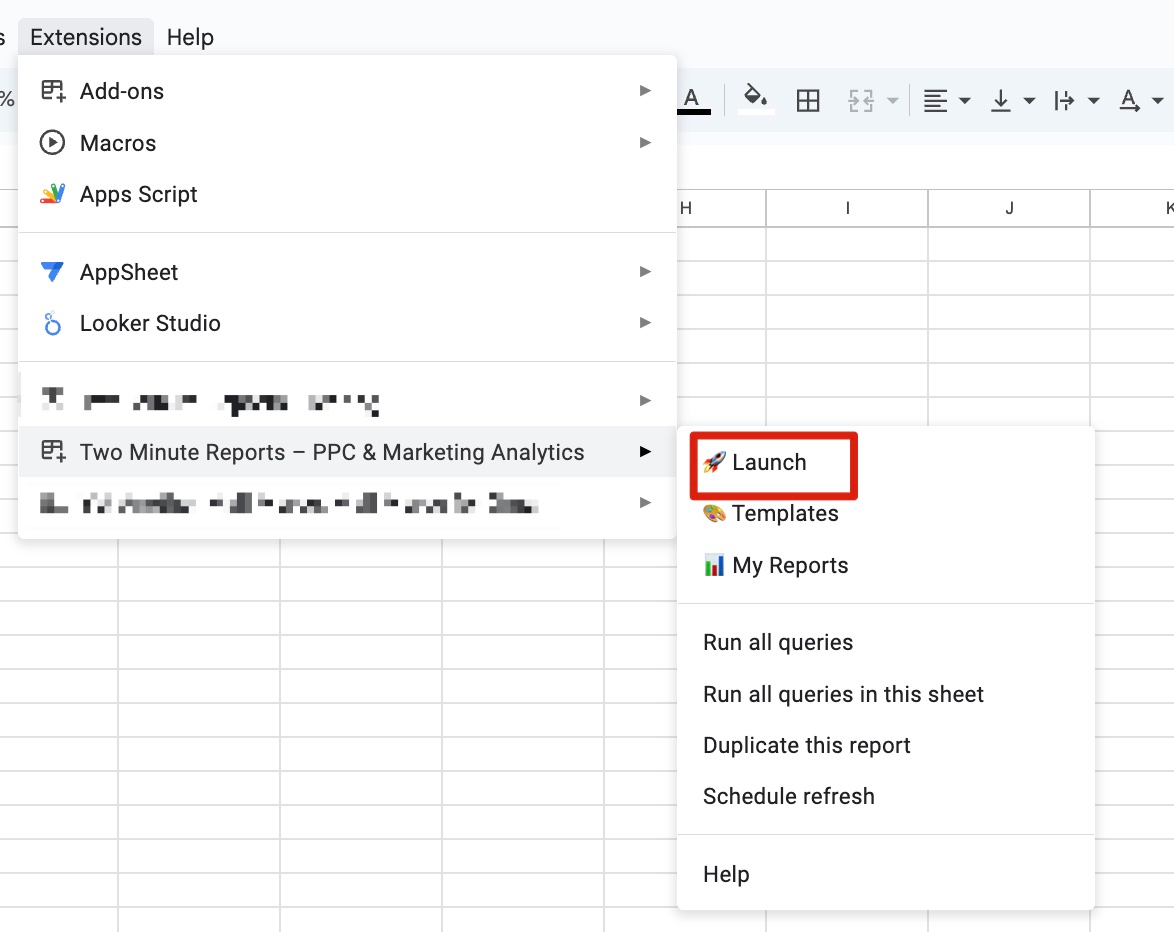
Once done, you can connect your Google Ads account with Two Minute Reports to access your campaign performance insights.
Step 2: Create a new Connection to your Google Ads account
| A Connection is a link between the data source and the Connector. For example, you must use the Google Ads Connector to create a new Connection with your Google Ads account to get your ads data. |
- Click the Menu at the top-left of the sidebar to open the Connections section.
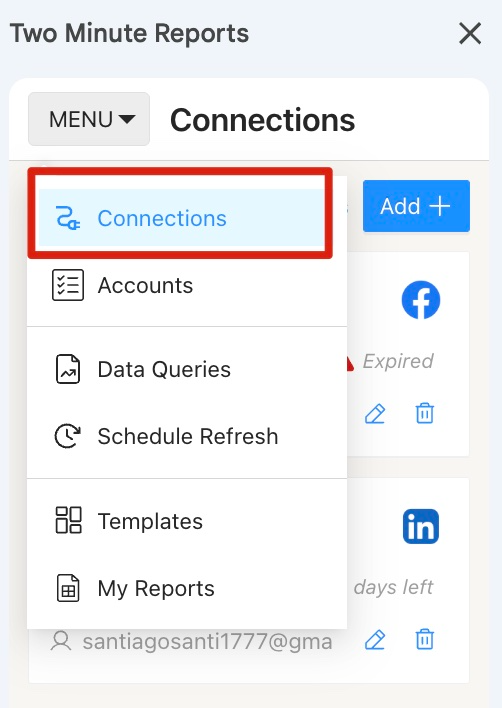
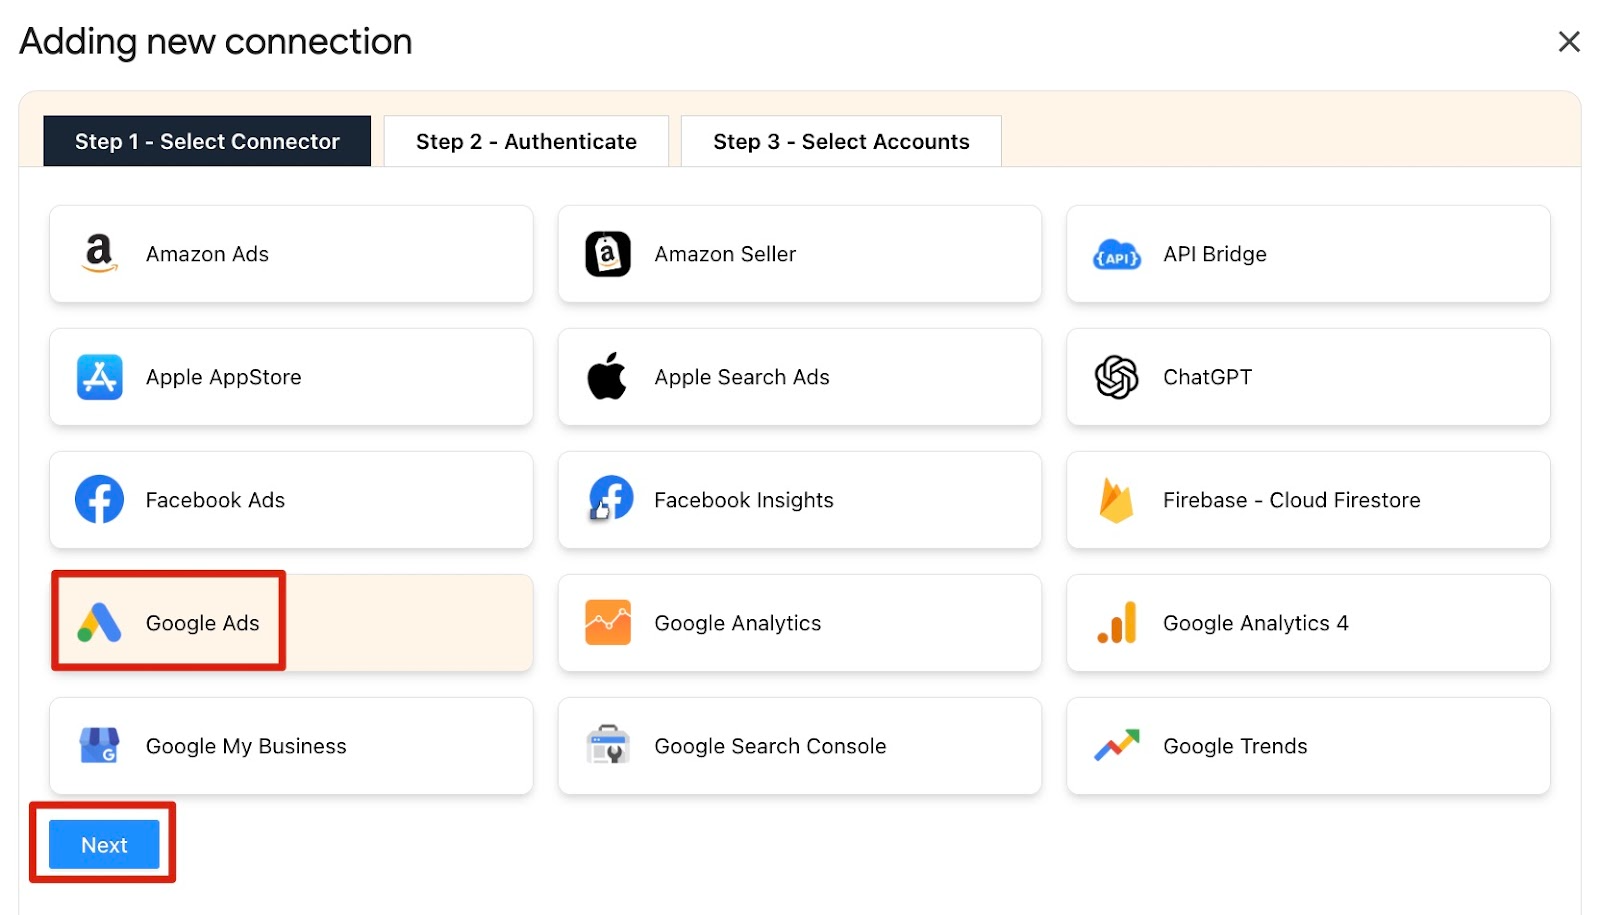
Click Add to create a new connection. A modal will open where you can select Google Ads as your connection type and click Next
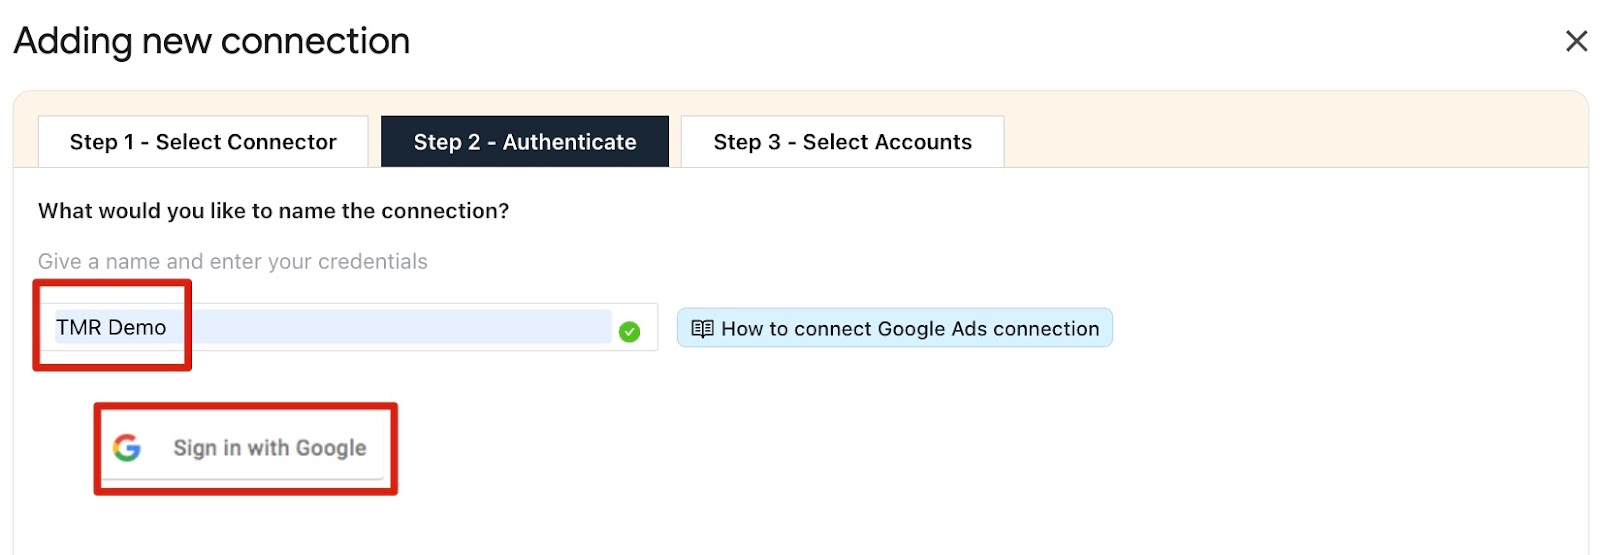
Enter a name for your connection and click Sign in with Google. After connecting your LinkedIn account, click Yes to authenticate the login.
- After successful authentication, a screen will appear showing your Account Name, ID, Connection Name, and Status, as illustrated below:
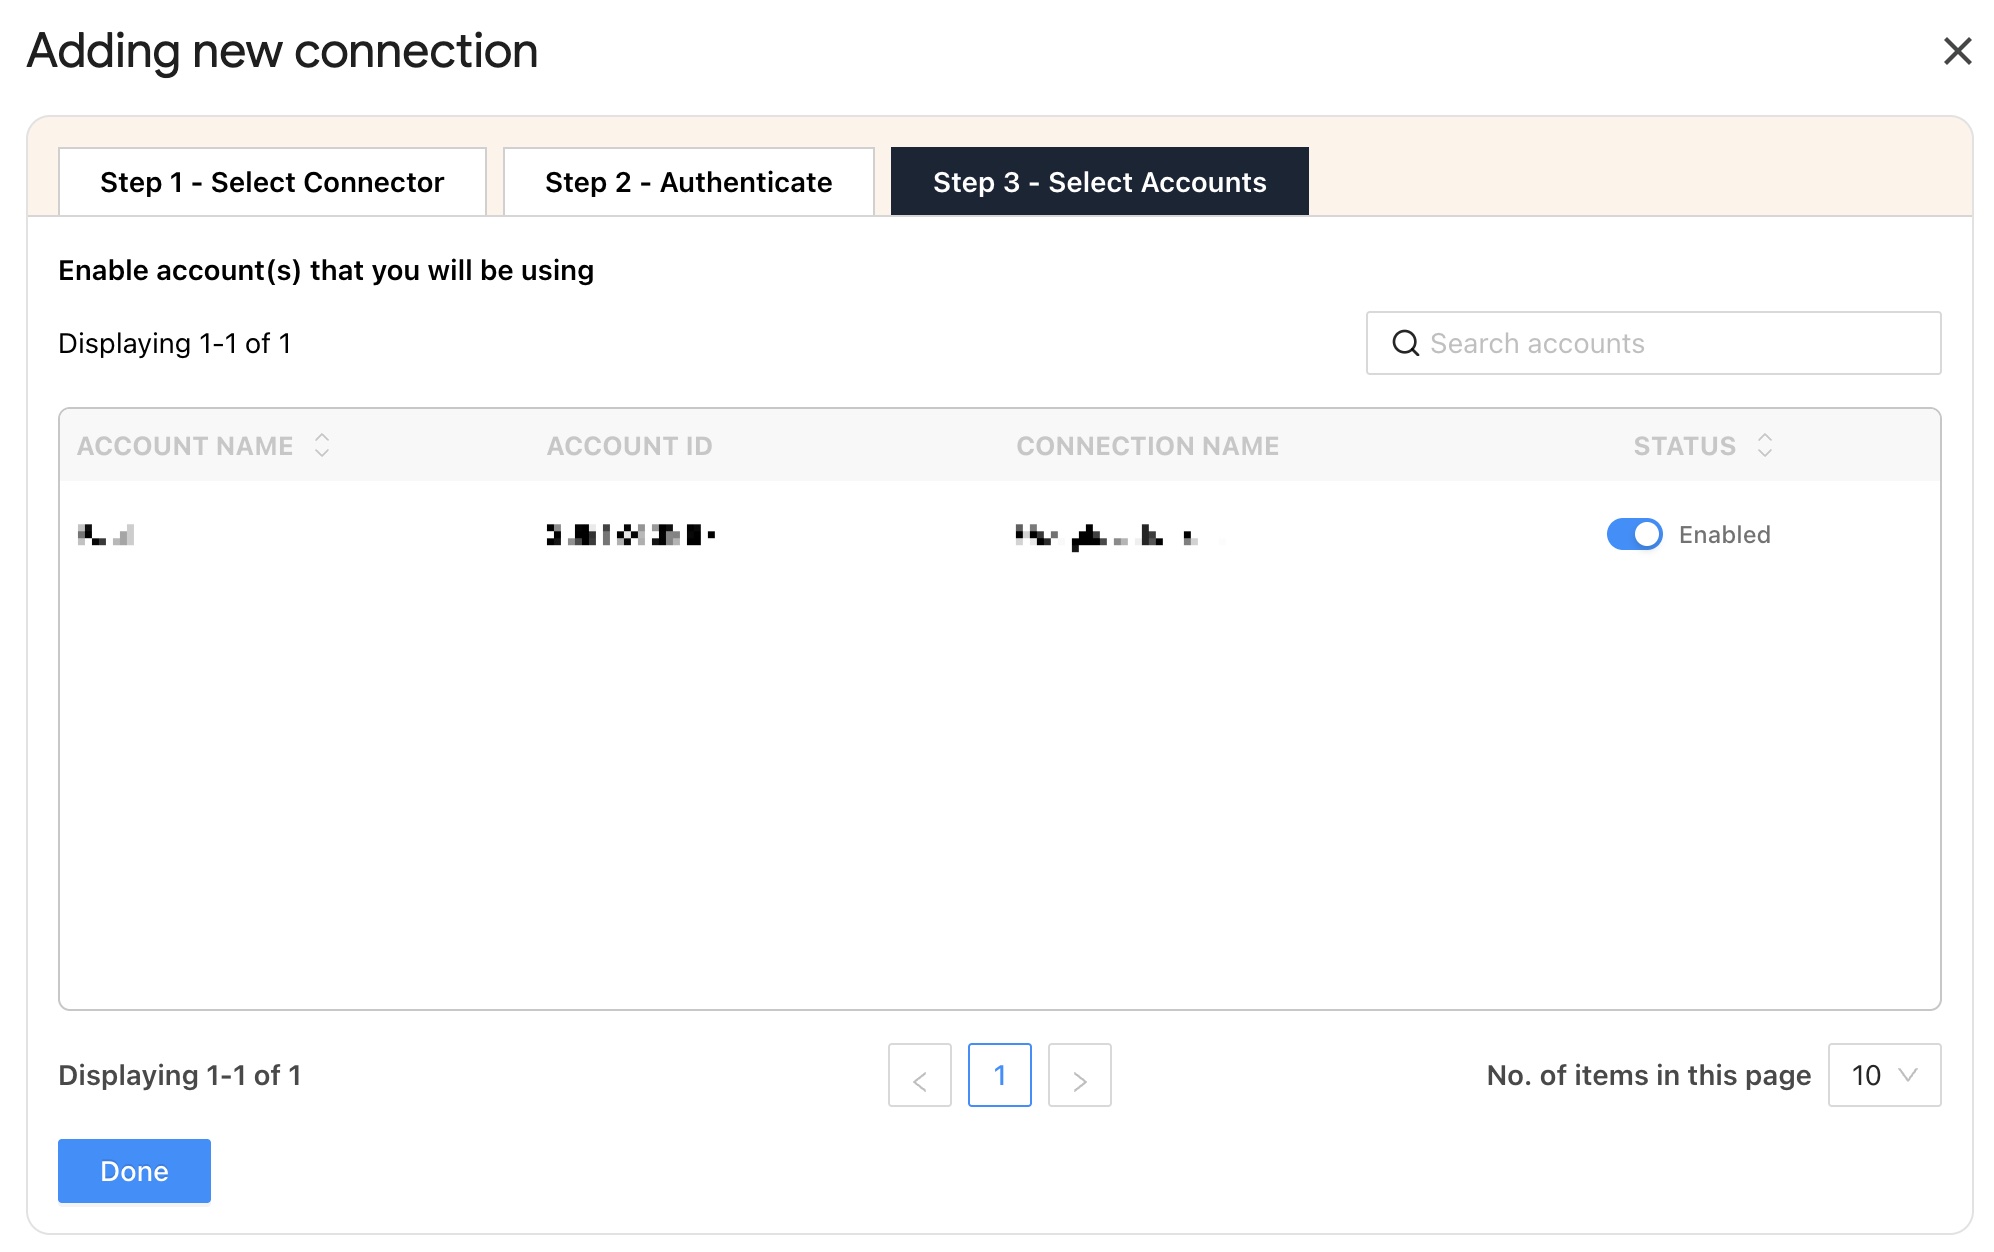
Enable the toggle for the ad accounts you want to include in your queries.
Note: Data cannot be extracted from disabled accounts.
| Once you’ve enabled the associated accounts, you can hit “Refresh Connections” to ensure the connected accounts are reflected in the TMR sidebar. |
And that’s it! Your Google Ads KPIs are now available in Google Sheets, giving you instant, actionable insights to optimize your campaigns.
Step 3: Fetching Google Ads data to Google Sheets
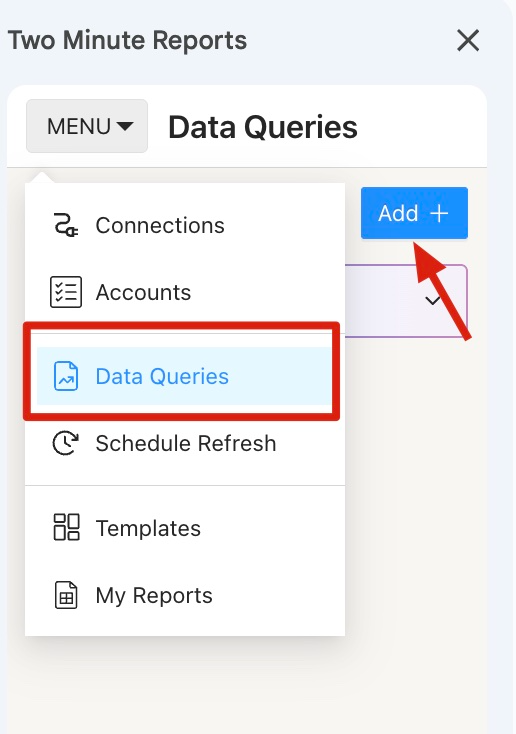
To pull specific Google Ads performance data, create a new query by going to the Data Queries section.
Click Add and select the Google Ads accounts you want to analyze. You can manage multiple clients’ accounts in one place, just choose one or more accounts to extract actionable campaign insights.

Alternatively, you can navigate to the Clients section. Add your client and map their corresponding LinkedIn Pages account.
Click “Manage Clients” and enter the necessary account details. Once done, click “Save & Close” to save your client’s details for future reference.
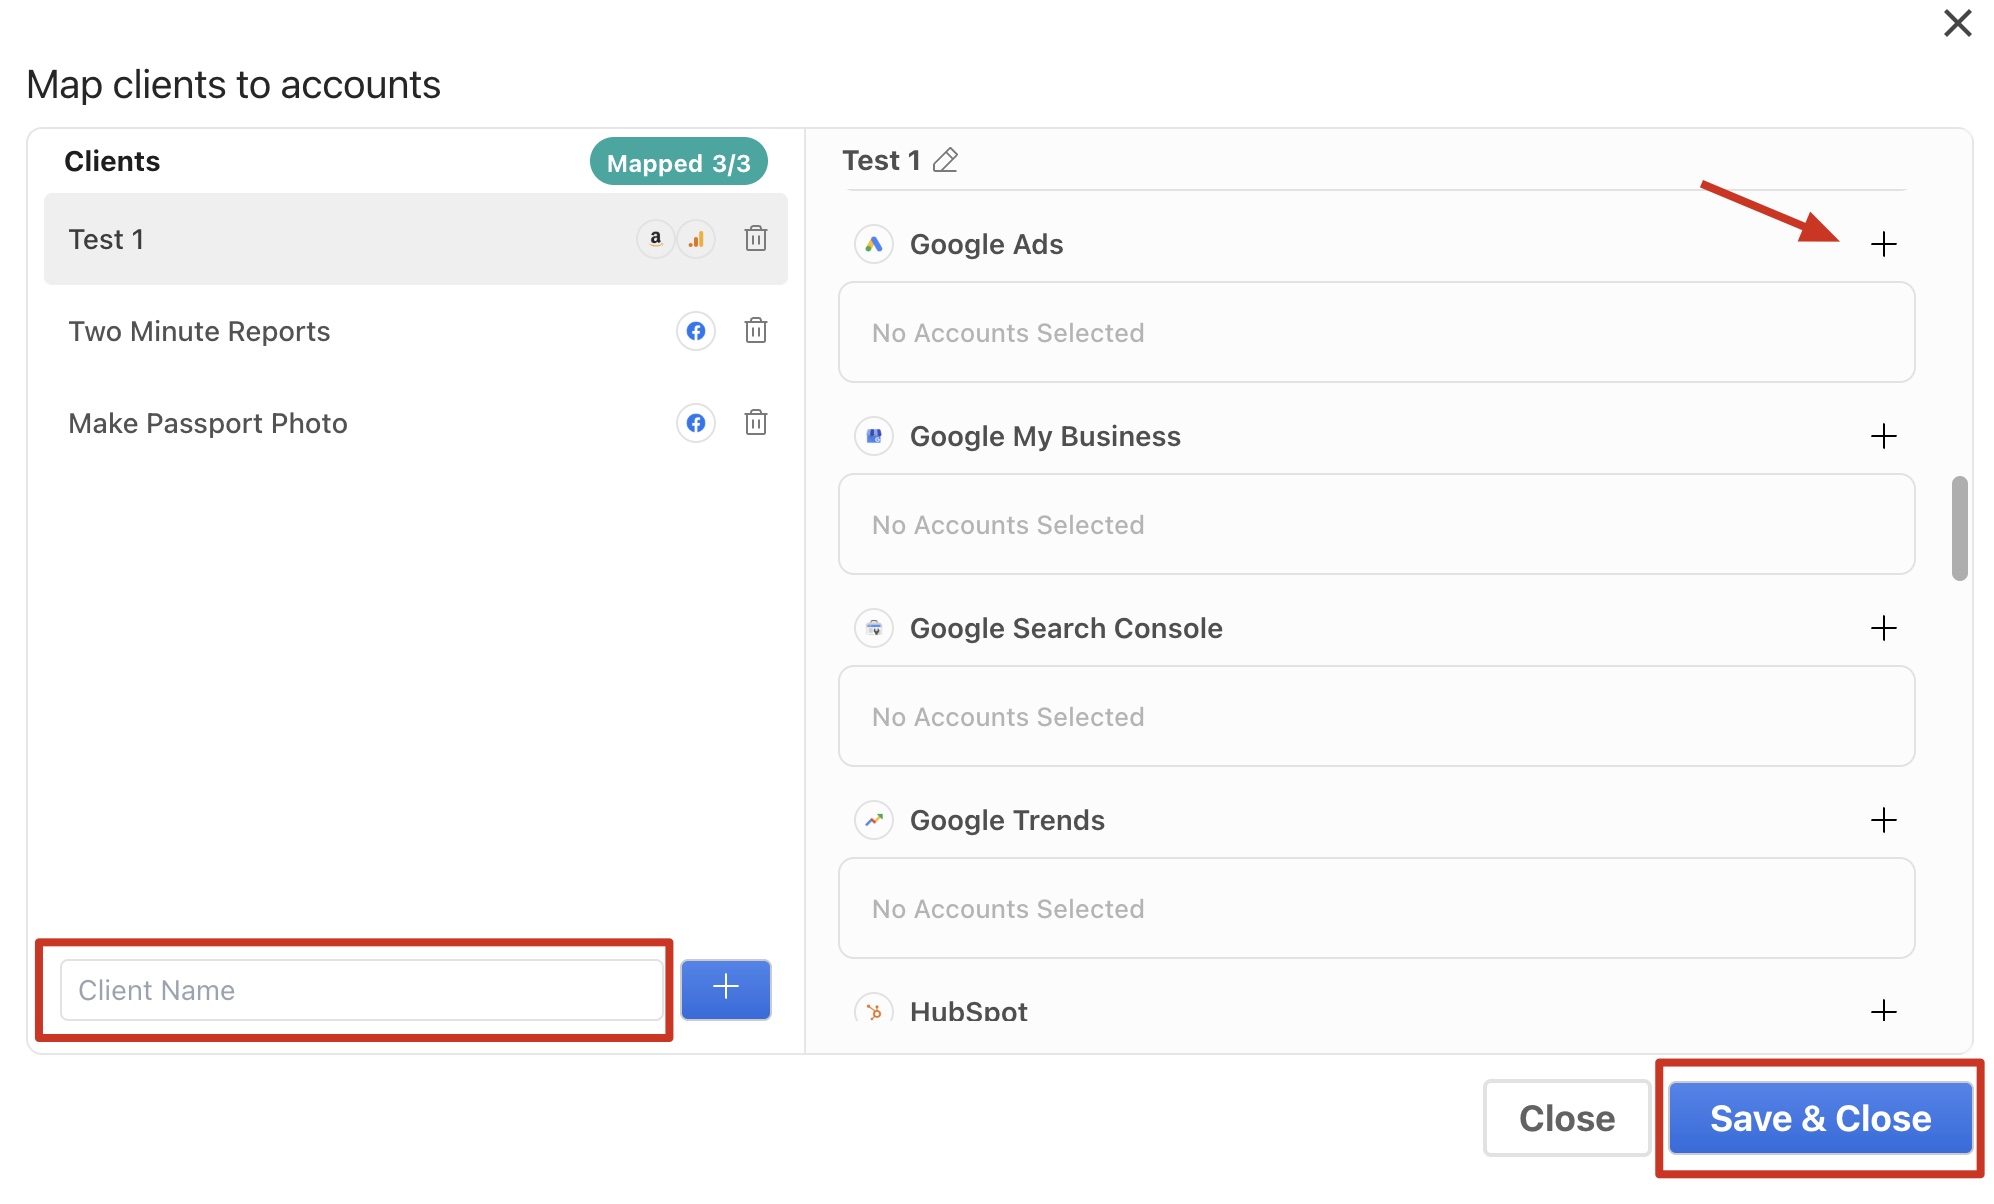
Note: You can add multiple clients and map their respective ad accounts. Doing so saves you tons of wasted hours from manually juggling numerous data sets. You can get a unified view of your client campaigns and track key metrics in a centralized dashboard. For further information, please read our guide – How to Create Queries Using Clients?
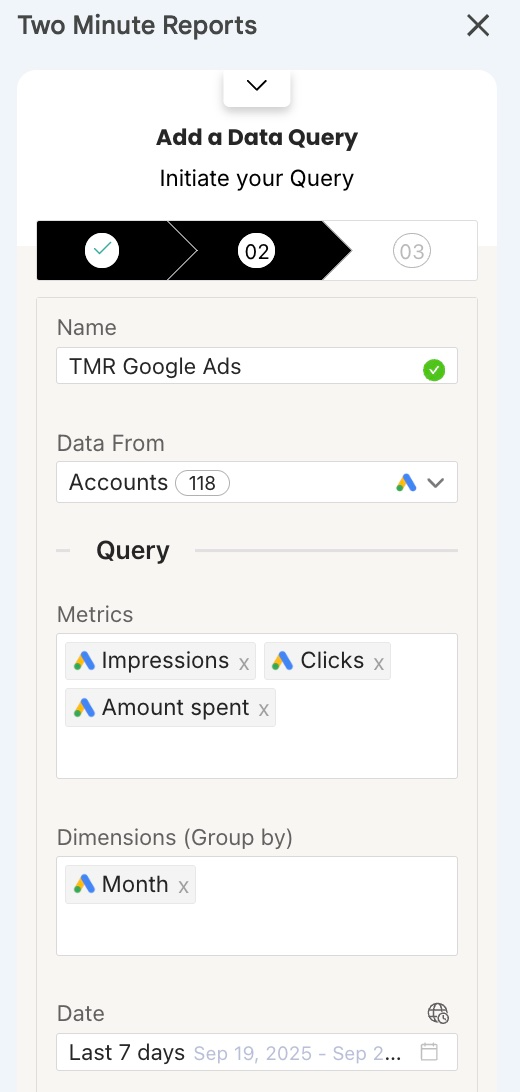
Next, add the metrics and dimensions to assess your Google Ads Insights. For a better understanding, refer to the screenshot below.
Next, configure your data reporting by selecting your preferred customization options.
Customize your data reporting by selecting the relevant fields and choosing whether to sort them in ascending or descending order. You can also apply custom filters to display only the information you need.
.
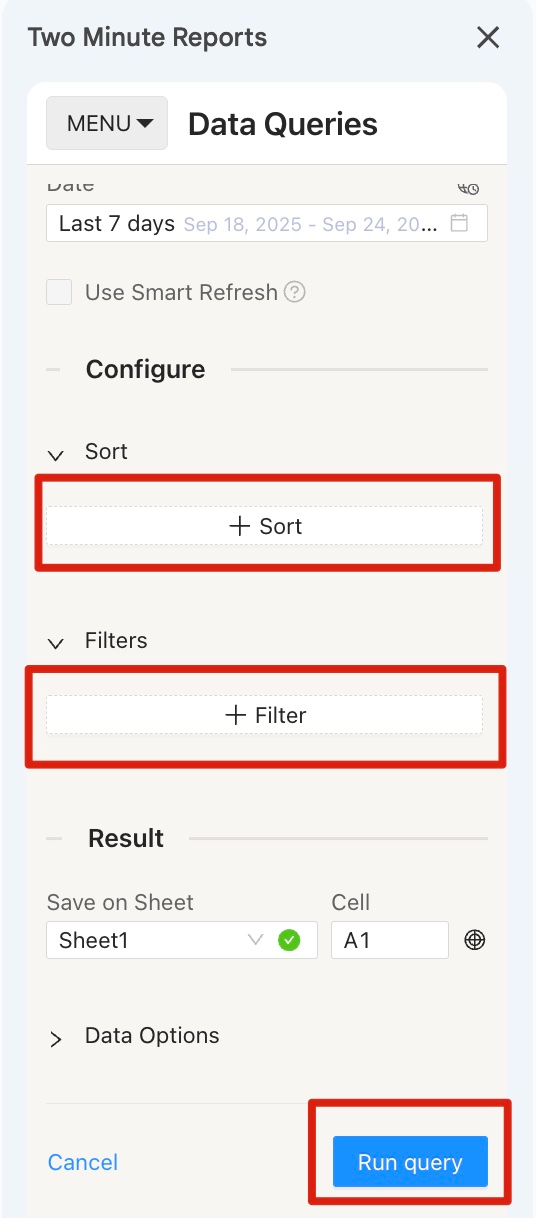
After completing the above steps, click Run Query to visualize the final output.
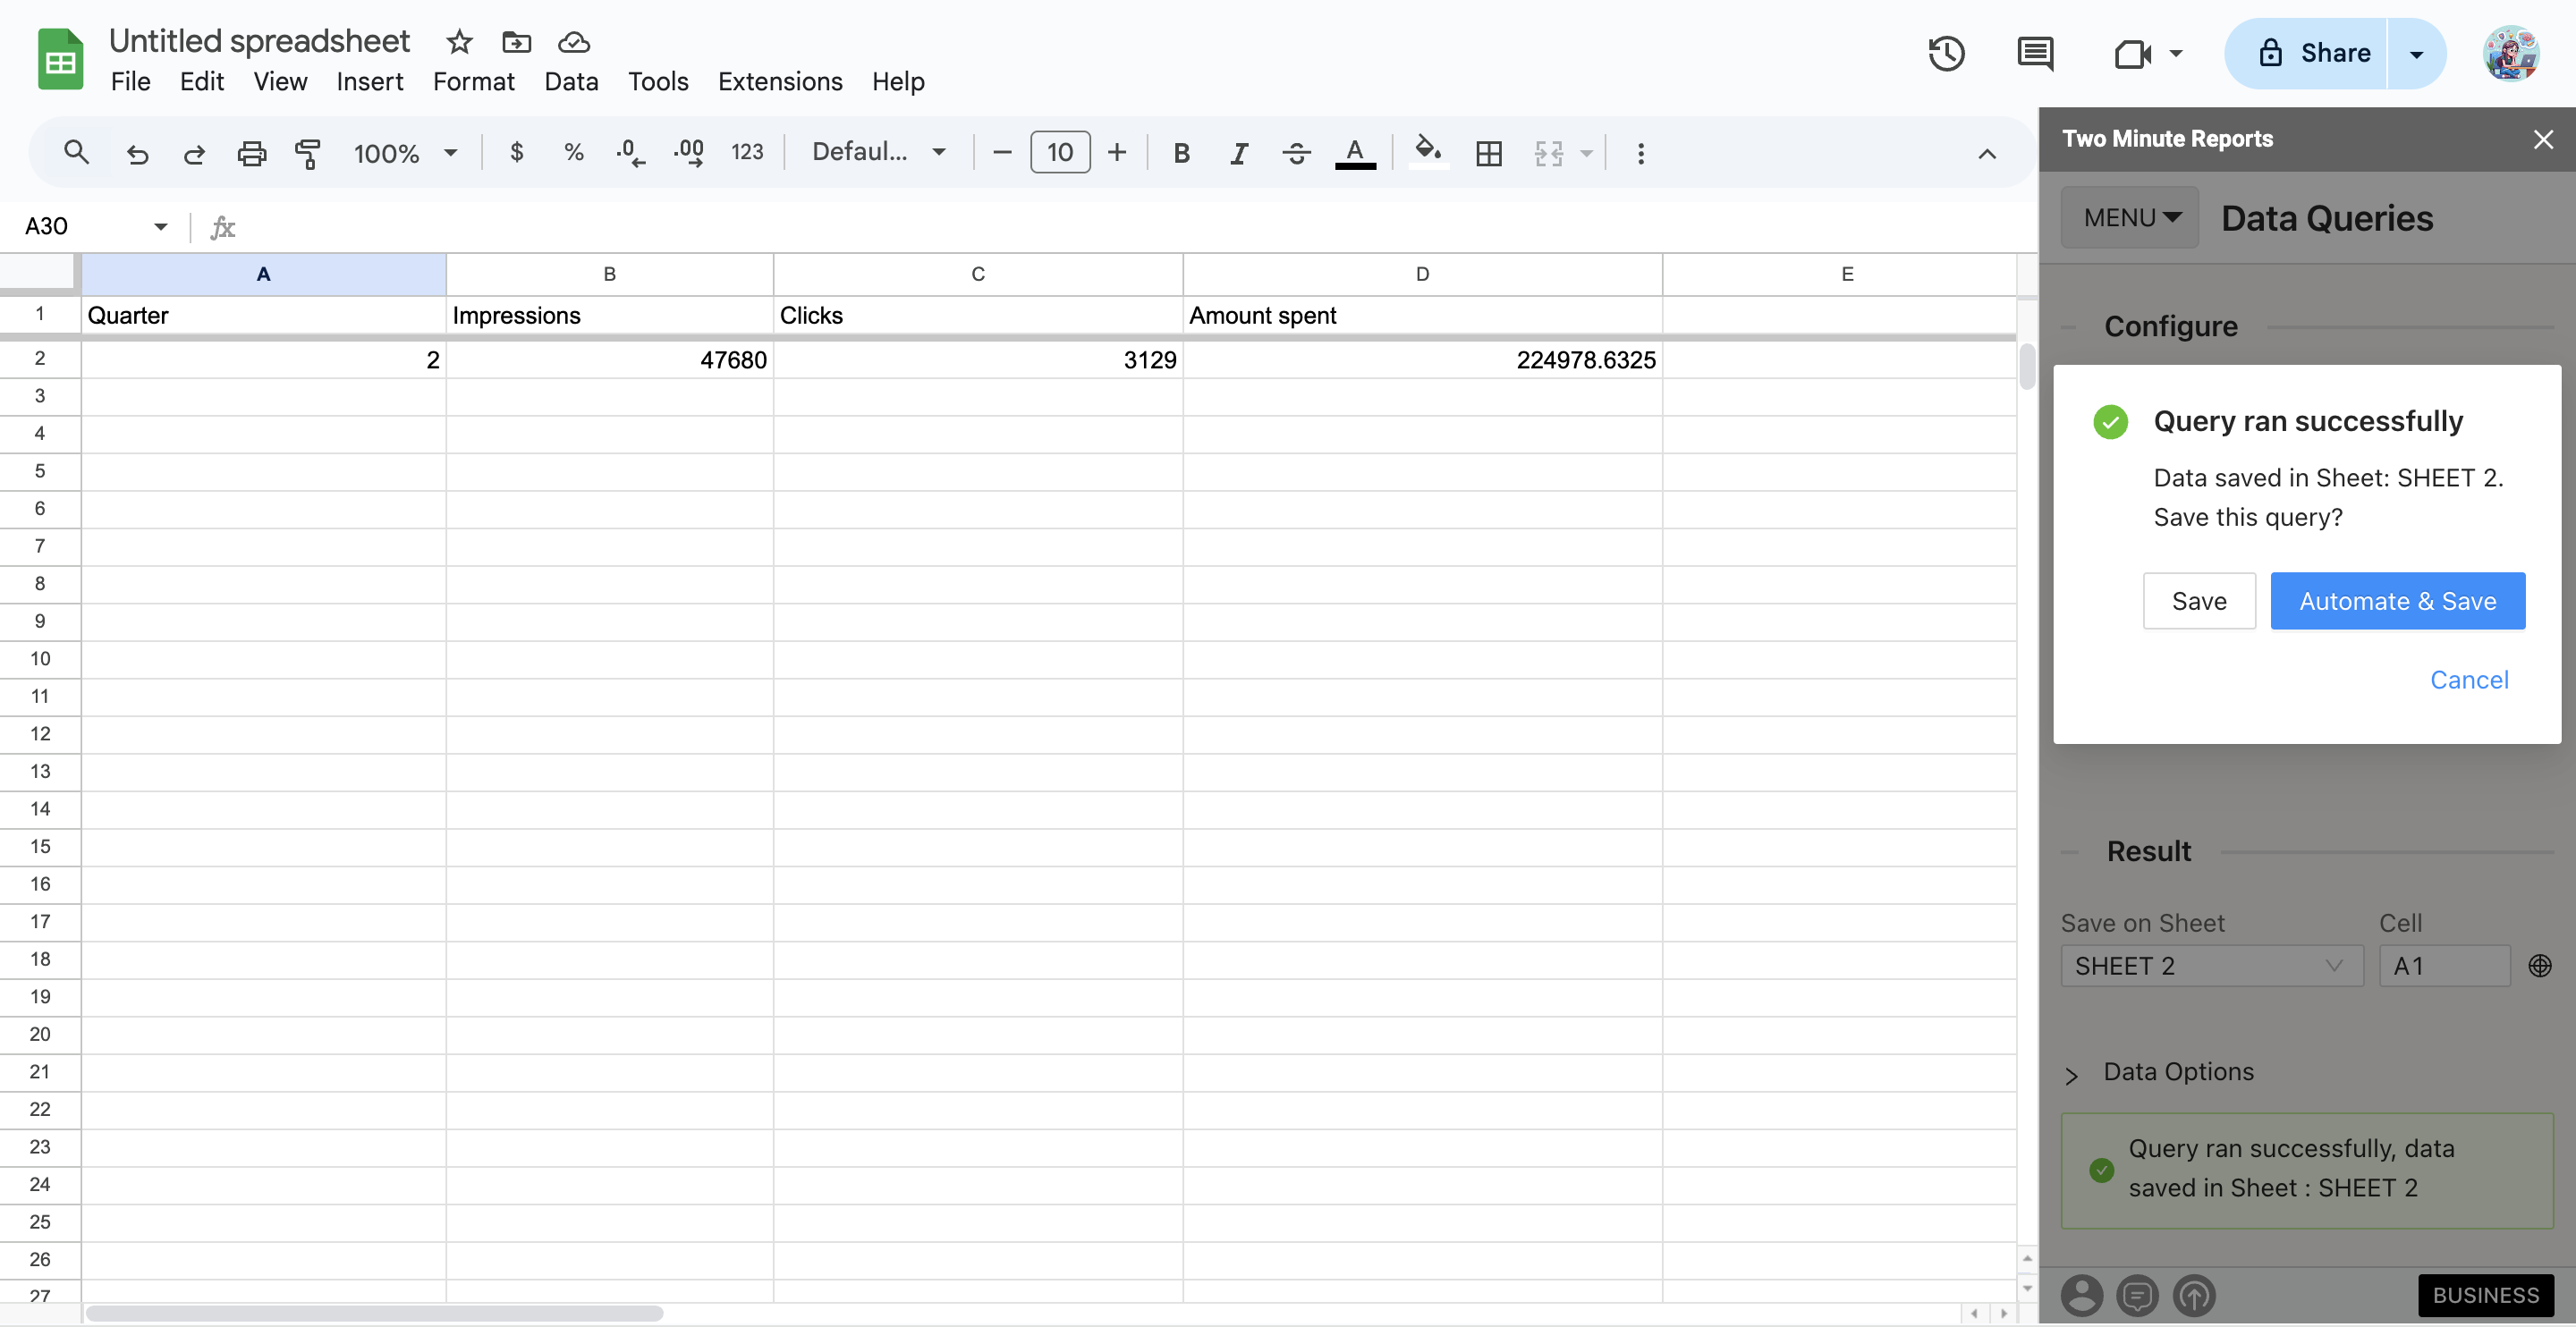
You can now use various Google Sheets features, such as Pivot Tables and VLOOKUP(), to extract key insights and create charts to visualize your campaign performance.
Pro TMR Tip: Run all your queries directly from the Extensions menu in Google Sheets. Go to Extensions > Two Minute Reports and select your desired quick action.
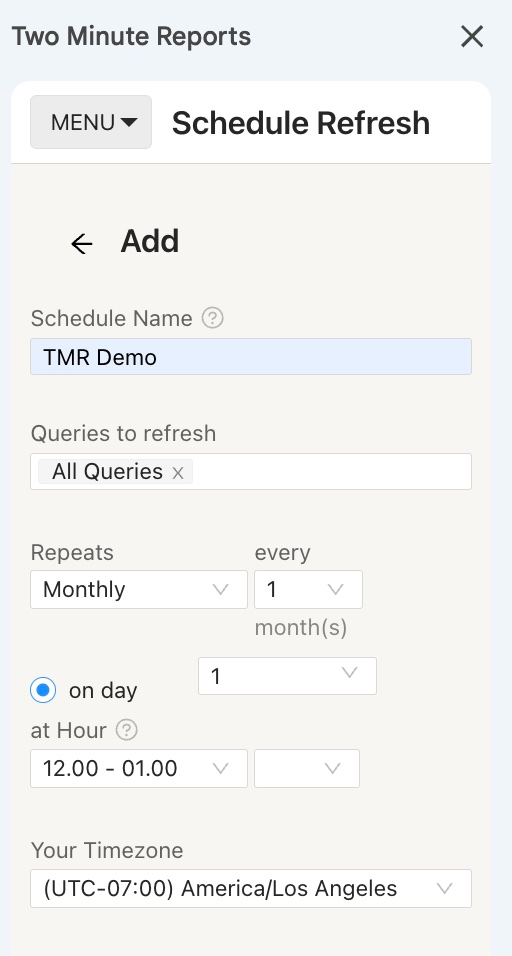
Step 4: (Optional) Get automatic data updates via Schedule Refresh
After running a query in a Google Sheets report, you can schedule automatic updates to receive refreshed data. This feature is ideal for sending automated emails, keeping your spreadsheets up-to-date with live data, and using them as a dashboard.
Click Schedule Refresh, give your schedule a name, select the queries you want to include, and choose the refresh time along with your preferred timezone.
In the Email section, enter the recipient(s)’ email address(es) and save the new schedule.

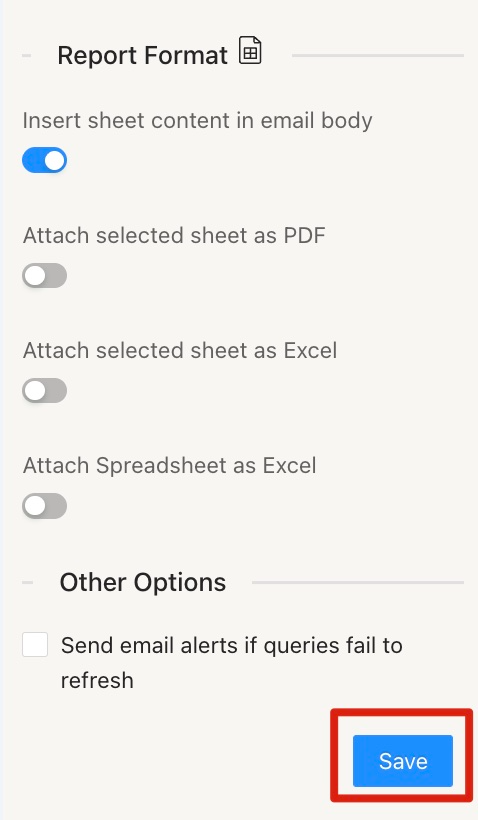
You can also specify the reporting format. Options include inserting the sheet content directly into the email body, attaching the selected sheet as a PDF or Excel file, or attaching the entire spreadsheet as an Excel file.
Two Minute Reports’s schedule refresh or data refresh feature has other capabilities. For more information, please read our guide, “How to Refresh Data Automatically in Google Sheets.”
We hope you found this guide helpful. If you have any questions, please get in touch with our support team via chat or [email protected]