With Two Minute Reports’ Shopify Connector, you can extract your Shopify store data 10x faster and optimize performance. However, as a store admin, you’ll need to create a custom app in your Shopify store and input the app’s credentials into TMR to connect your Shopify store.
Before connecting your Shopify store data to Google Sheets, ensure you have the following permissions:
Required permissions
You must have the store owner access or staff access with all permissions to establish a connection and access the Shopify store data.
How to grant permission?
- Go to Shopify Admin > Settings > Users and permissions.
- Select the user you want to update.
- Click on the Staff member’s name (or “Add Staff” to create a new one).
- Scroll to the Permissions section.
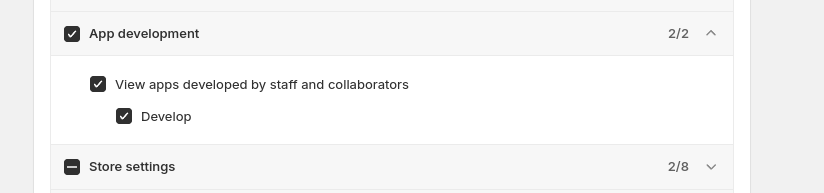
- Check the following boxes:
- App development
- Manage and install apps and channels
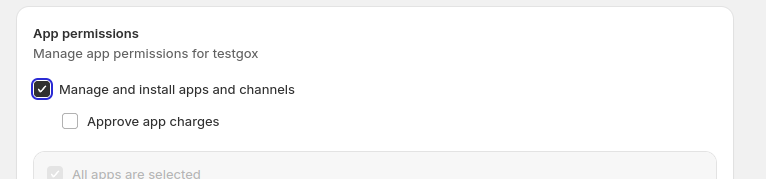
Permissions needed:
1. App development
2. Manage and install apps and channels
Once you confirm these prerequisites, follow the steps below to connect your Shopify store with Google Sheets through TMR.
Step 1: Install and Launch Two Minute Reports
Here’s a step-by-step tutorial on how to install TMR in Google Sheets: How to install TMR in Google Sheets?
Once done, you can connect your Shopify store account with Two Minute Reports.
Step 2: Create a new Connection to streamline your Shopify store accounts
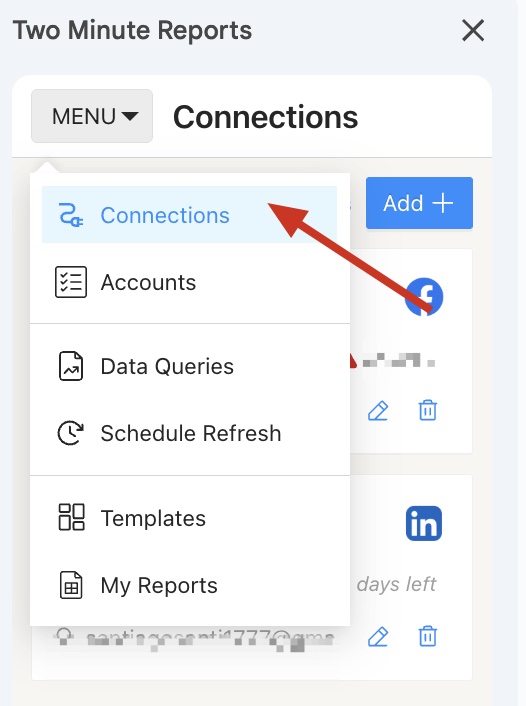
Click Menu at the top left of the sidebar to navigate to the Connections section. Next, click Add to create a new Connection.
The “Adding new connection” dialog box appears. Here, you can perform three key steps to access your Shopify store accounts:
- Selecting the Shopify connector
- Authentication
- Enabling respective accounts with the Shopify connector
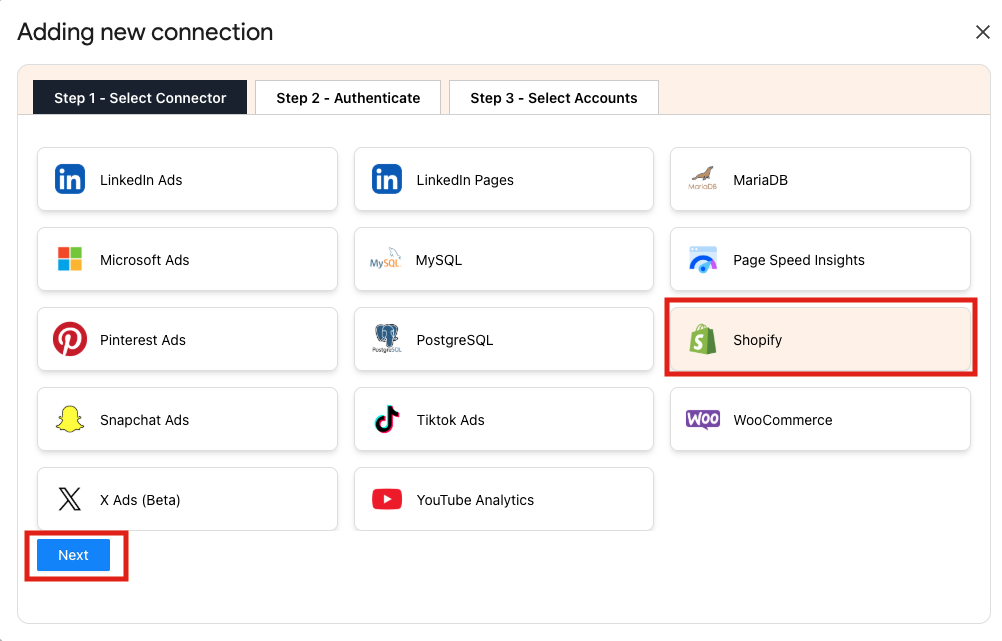
Select Shopify from the list of options to connect your Shopify store to Google Sheets.
In the authentication step,
- Enter a name for your connection
- Select Shopify Public App as the app type
- Provide your Shopify store name
Note: Your shop name is the subtext in your Shopify URL. For example, in the following URL, “https://thisismyshop.myshopify.com,” the shop name is “thisismyshop.”
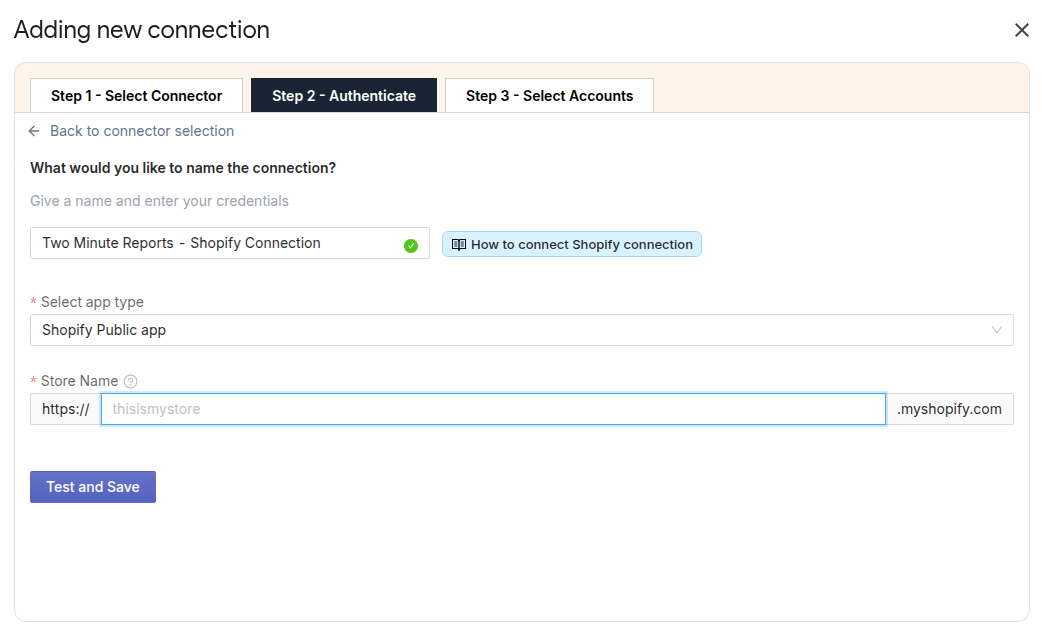
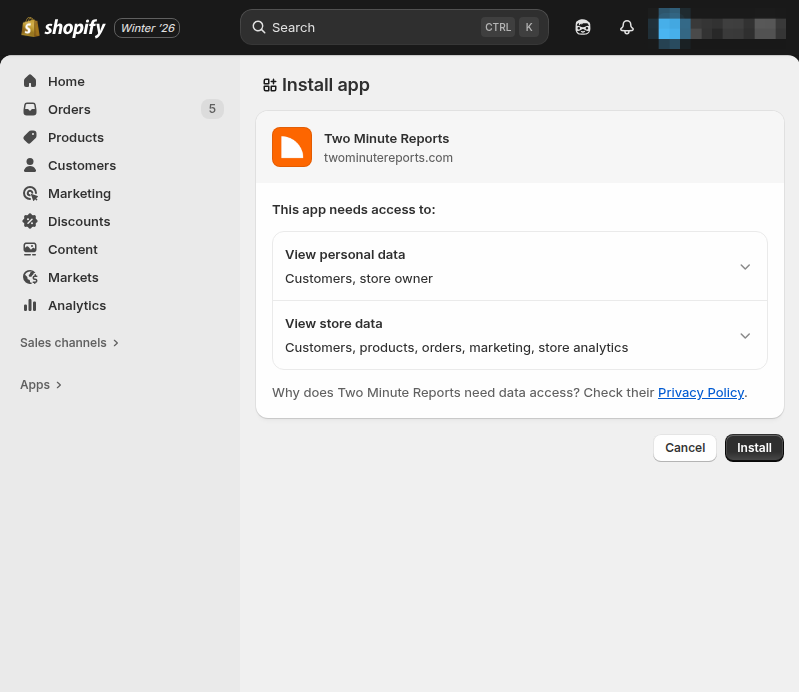
Once you have filled in these details, click Test and Save. A new window will open asking you to authorize and install the Two Minute Reports app. Review the permissions and click Install to continue. After authorization is complete, you can safely close the window.
Your Shopify store will now be authenticated. As shown below, you can proceed with selecting the respective store accounts to analyze performance data.
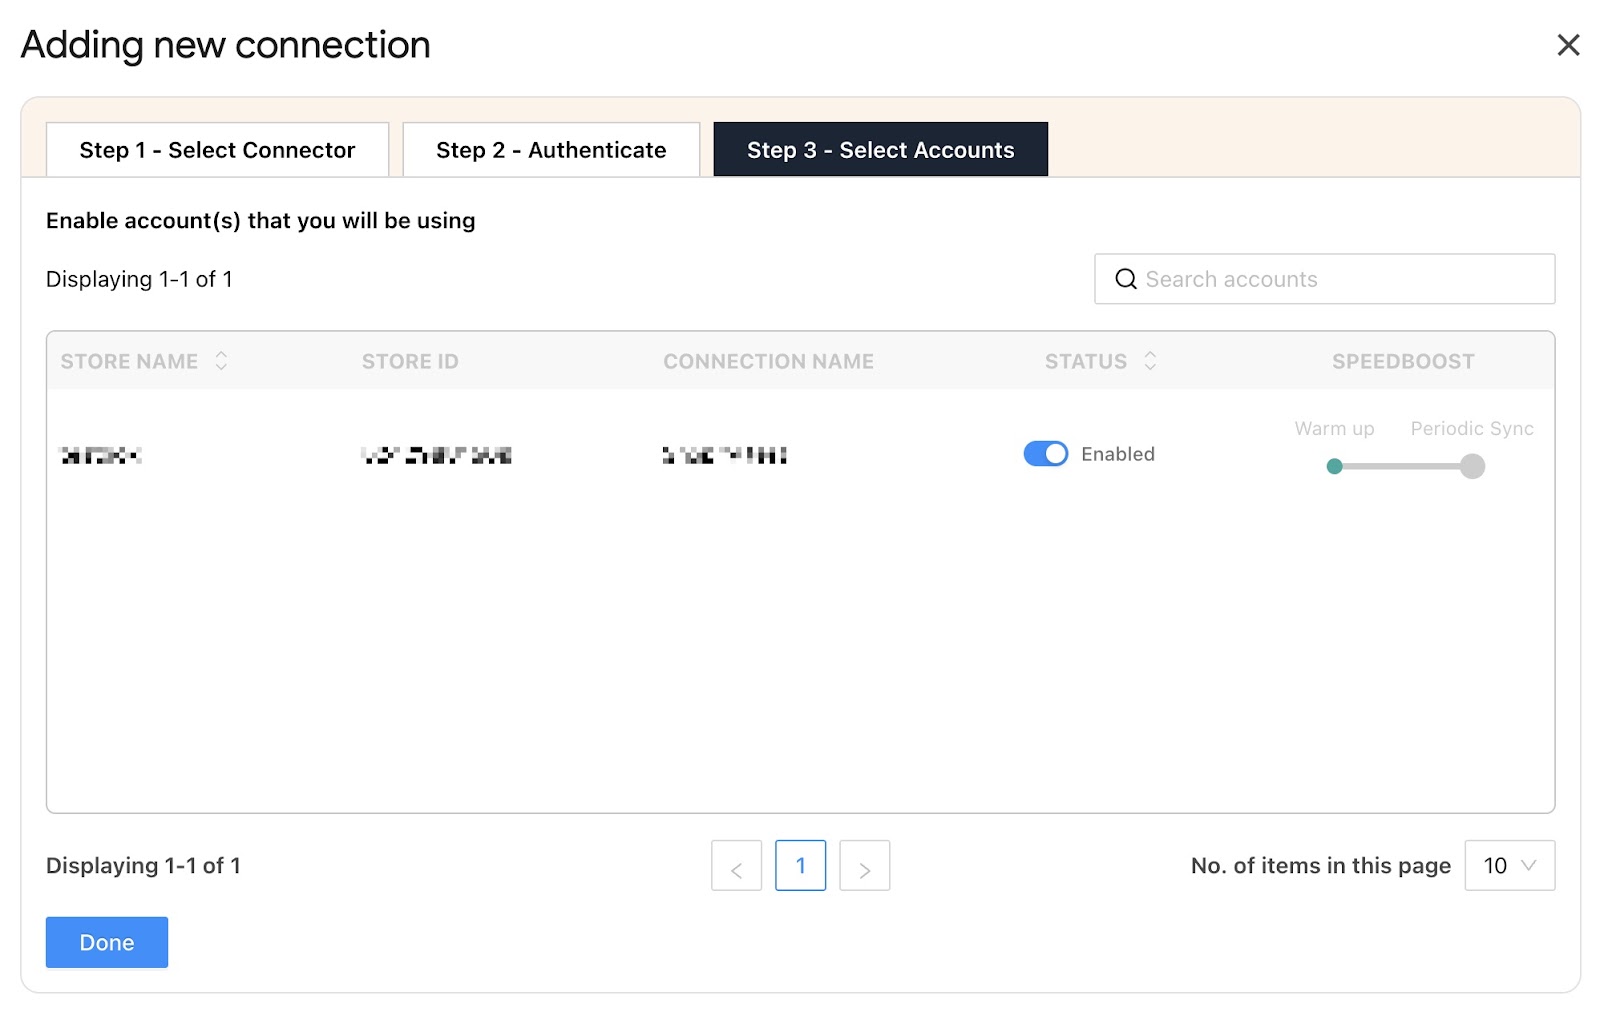
Enable the accounts for which you want to run queries. Once enabled, Speedboost will be automatically activated, performing two critical functions:
- Warm up – Prepares your account for faster data retrieval by caching your historical data.
- Periodic sync – Ensures your data stays updated automatically at regular intervals.
Please note that you can extract data from relevant store accounts only after the warm up (approx. 2 to 24 hours) process is completed. Additionally, you cannot run queries for disabled accounts.
| Once you’ve enabled the associated accounts, you can hit “Refresh Connections” to ensure the connected accounts are reflected in the TMR sidebar. |
And that’s it. You can now extract Shopify store KPIs in Google Sheets to gain actionable insights.
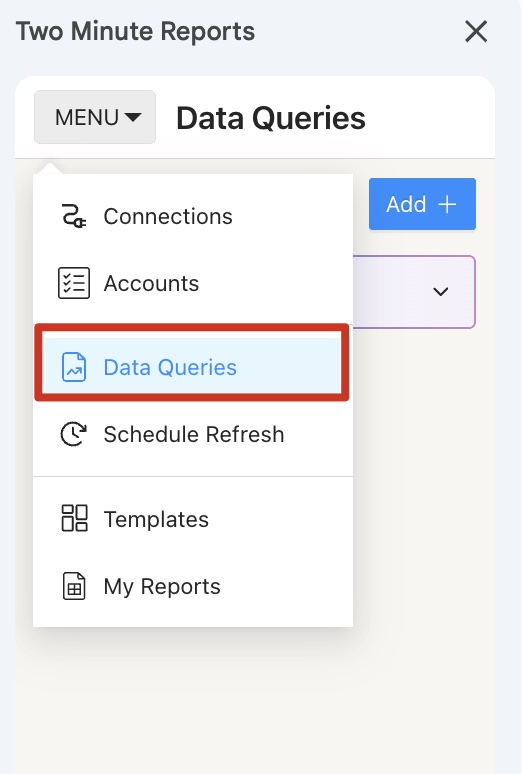
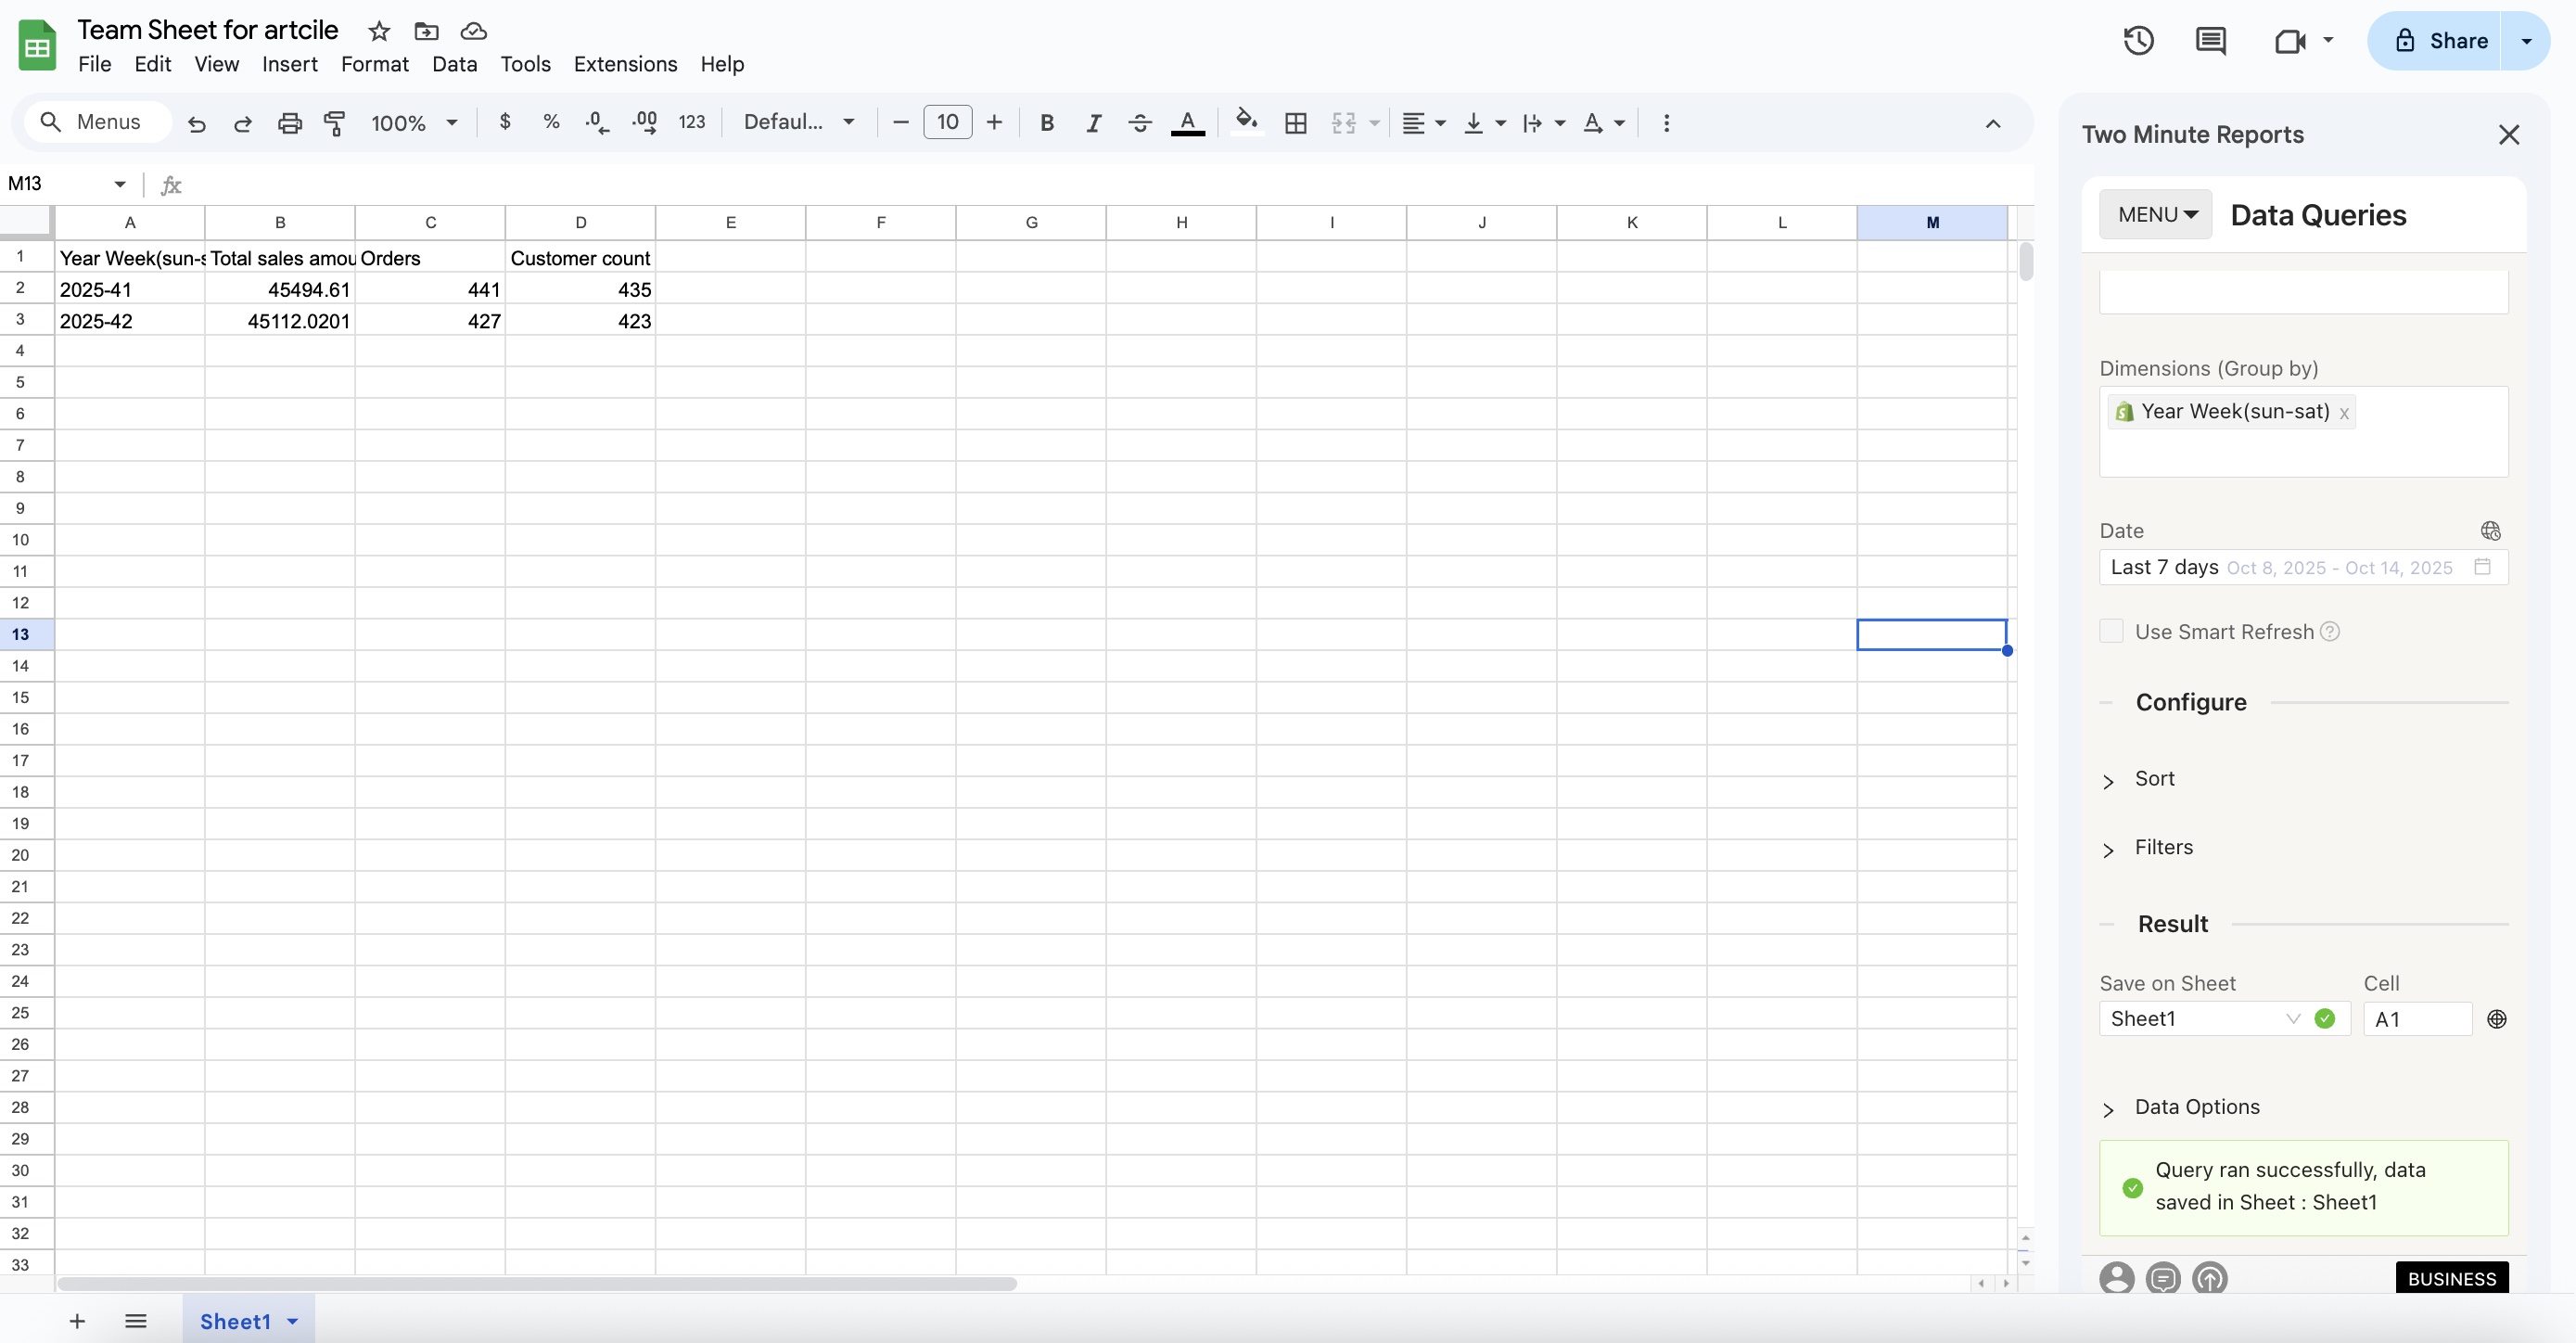
Step 3: Fetching Shopify store data to Google Sheets
To pull Shopify store data to Google Sheets, you must create a new query by navigating to the Data Queries section.
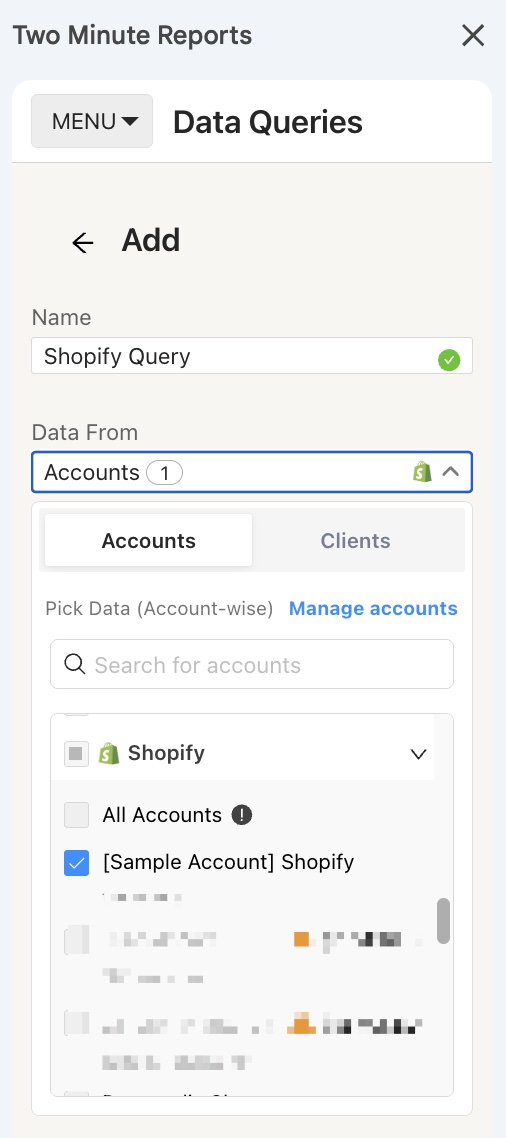
Click Add and choose the respective Shopify store accounts to analyze your performance. You can manage multiple store accounts in one place. Simply select one or more accounts to extract and gather insights.
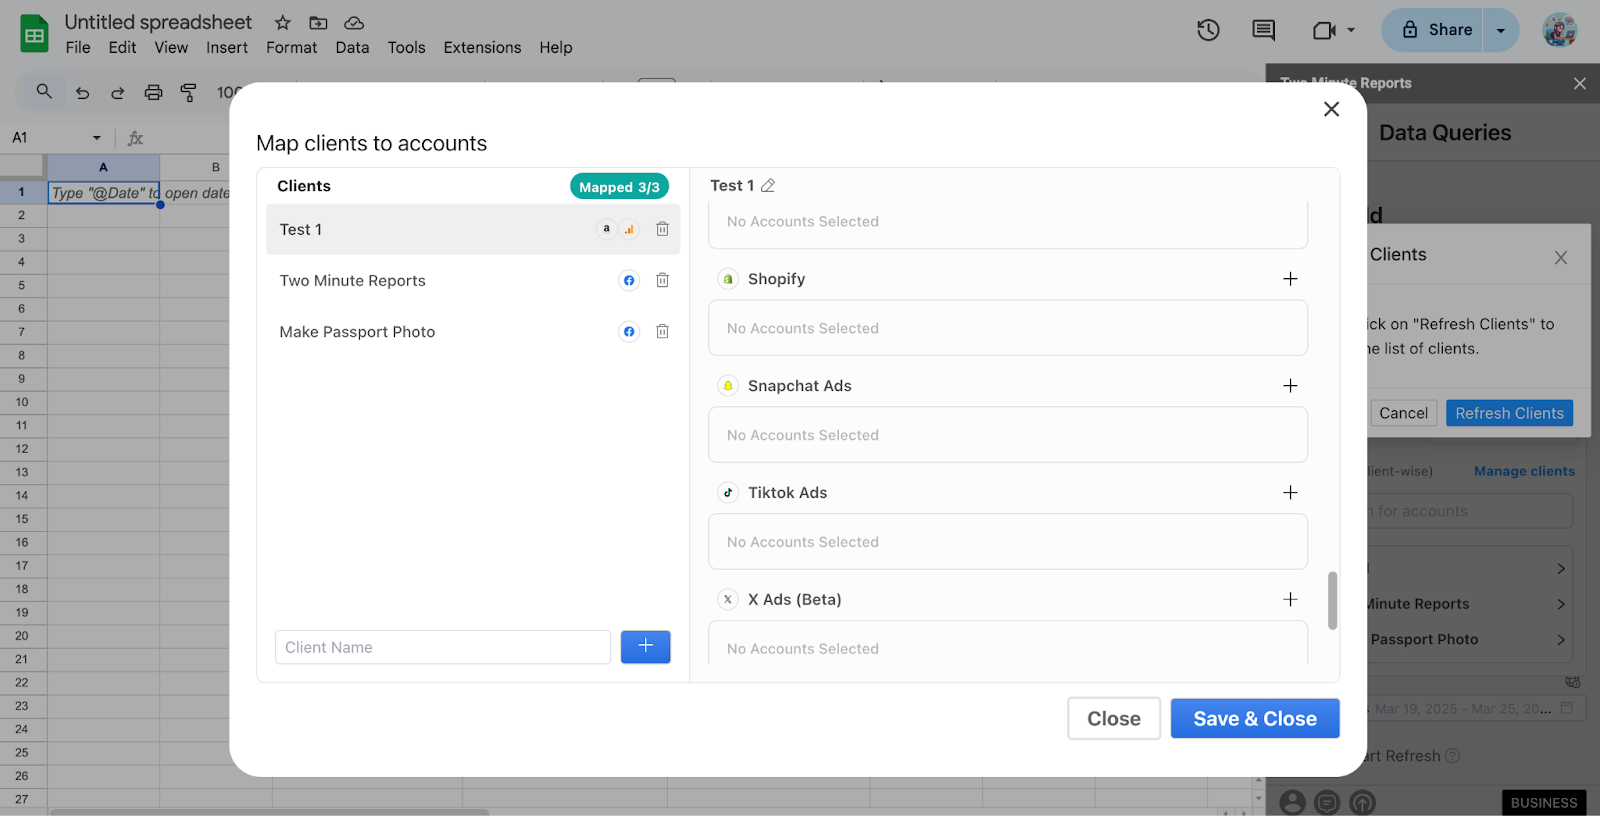
Alternatively, navigate to the Clients section. Add your client and map their corresponding Shopify store account.
Click on “Manage Clients” and map the necessary account details. Once done, click “Save & Close” to save your client’s details for future reference.
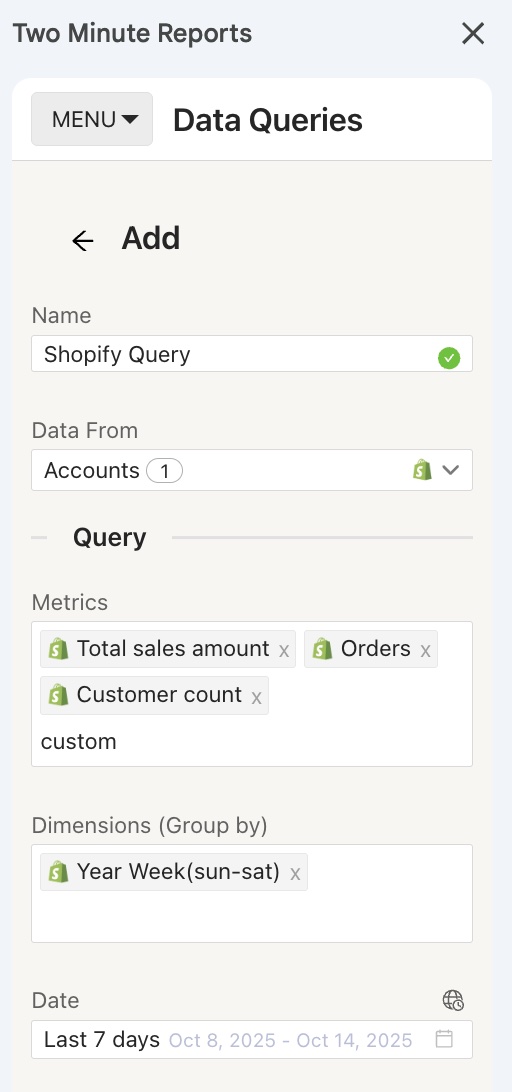
Next, add the Shopify metrics and dimensions you want to analyze. Once done, select the date range for which you want to track performance insights.
Next, you have to configure your data reporting by choosing how to customize it.
It would be best to customize your data reporting by selecting the relevant fields and choosing whether to sort them in ascending or descending order. You can also apply custom filters to display only the necessary information.
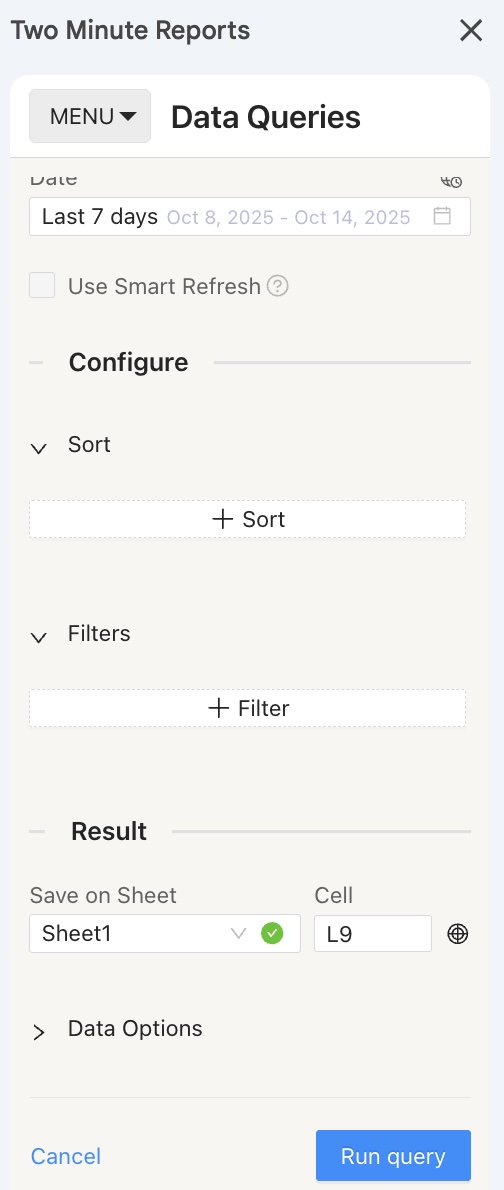
Once you finish the above steps, click Run Query to visualize the output.
Now, you can use different Google Sheet features, such as pivot tables and VLOOKUP(), to extract critical insights and build charts to visualize your Shopify store performance.
Pro TMR Tip: Run all your queries directly from the Extensions menu on your Google Sheets. Go to Extensions > Two Minute Reports > choose your desired quick action.
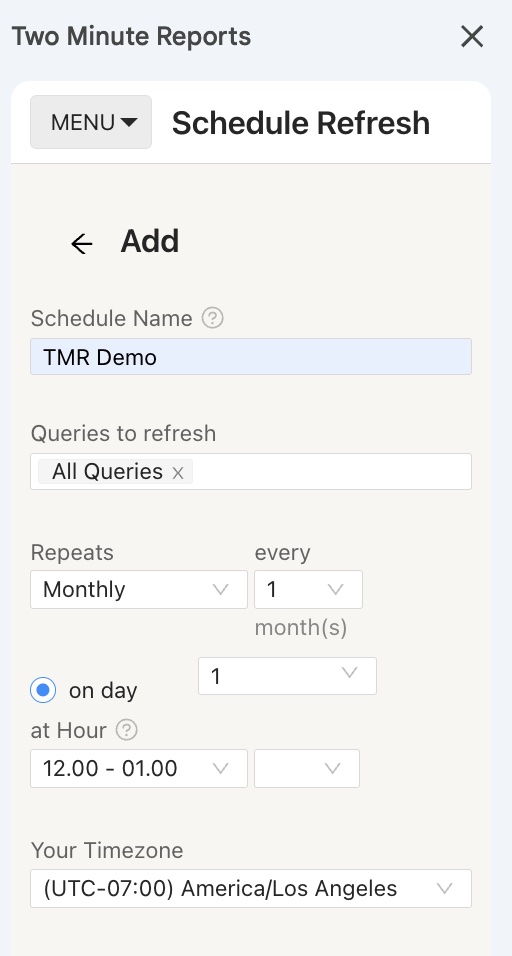
Step 4: (Optional) Get automatic data updates via Schedule Refresh
Once you create a report in Google Sheets, you can schedule automatic updates to get updated data. This feature is convenient for sending emails or refreshing your spreadsheets with live data and using them as a dashboard.
Under the email section, you can enter the recipient’s email ID and save the new schedule.
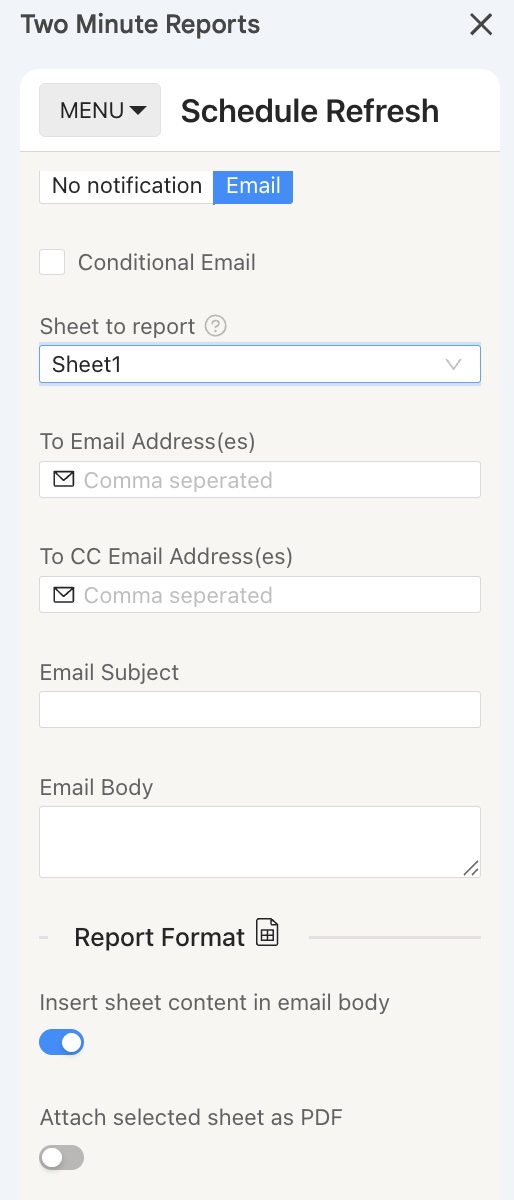
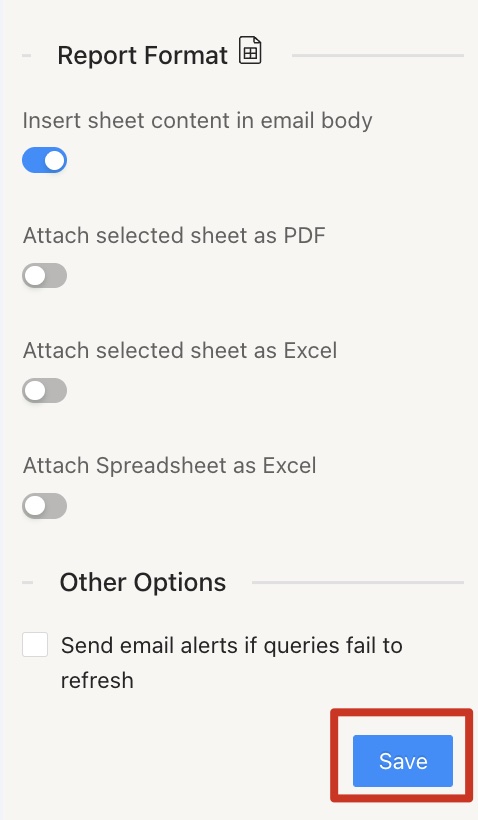
You can also choose to specify the reporting format. You can insert the sheet content in the email body, attach the selected sheet as a PDF or Excel, or attach the spreadsheet as an Excel file.
Two Minute Reports’ Schedule Refresh feature has further capabilities. Continue reading about this feature: How to Refresh Data Automatically in Google Sheets?
We hope you found this guide helpful. If you have any questions, please contact our support team via [email protected].