You can enable/disable an existing account in Google Sheets within seconds. Let me guide you through the steps as follows:
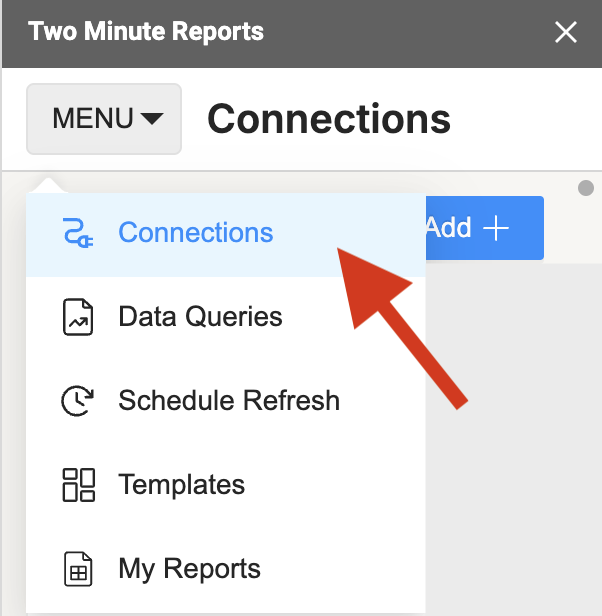
Step 1: Click the Menu dropdown in the TMR sidebar and select Connections.
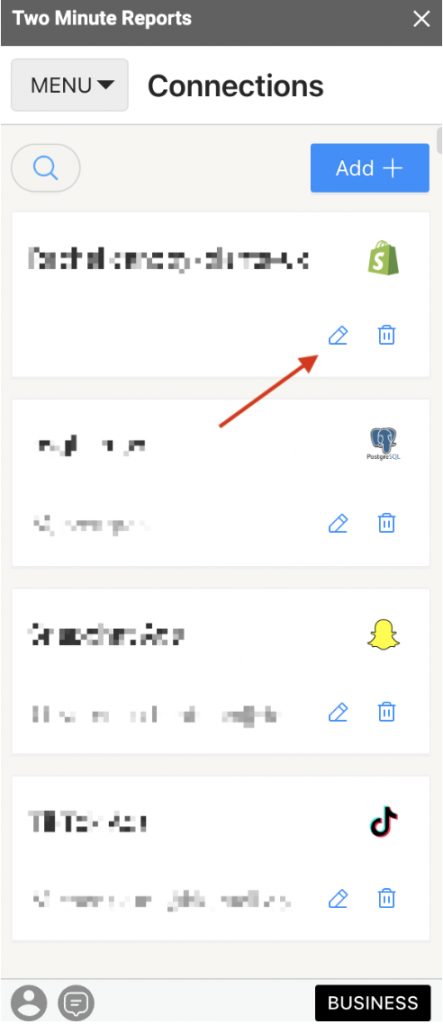
Step 2: The TMR sidebar lists all existing Connections. Click the “edit” icon of the Connection(s) whose account status you want to modify.
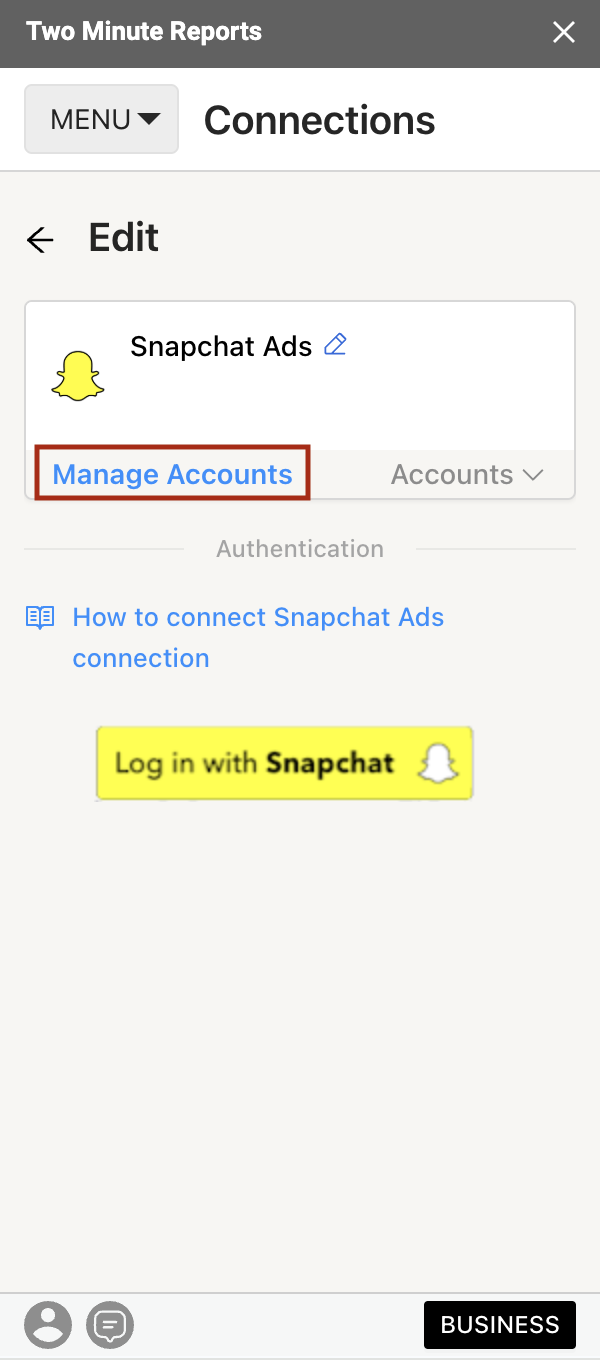
Next, click the Manage Accounts option, and a window will appear. This window will allow you to effortlessly enable and disable required accounts.

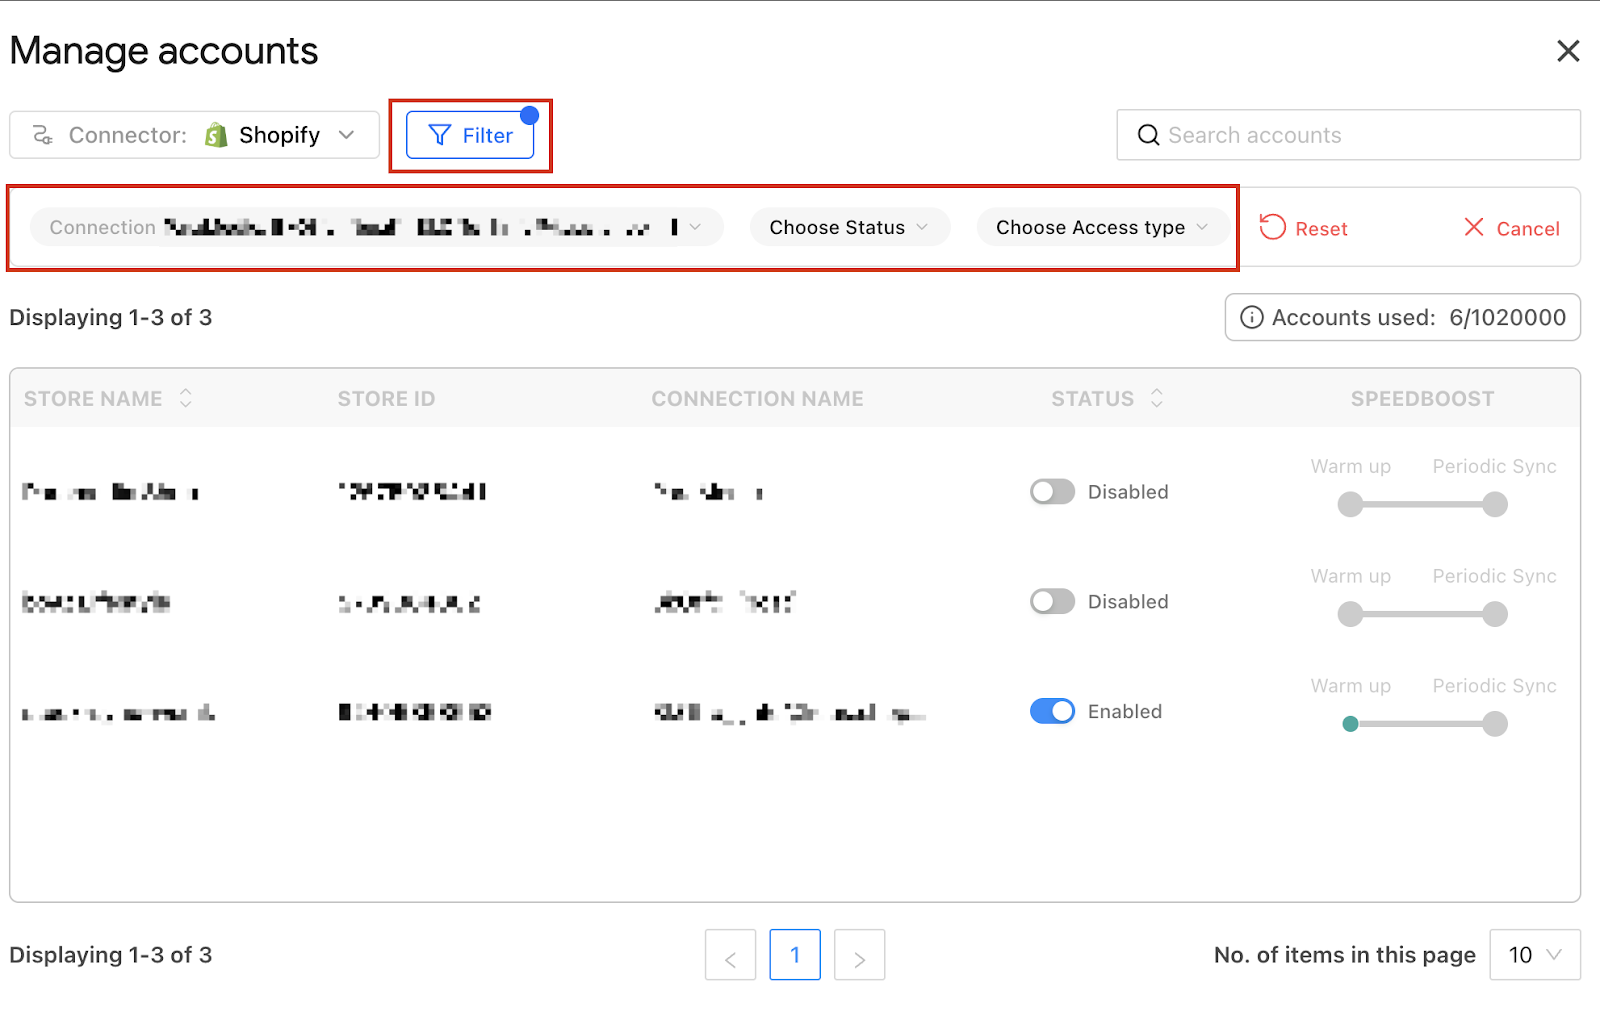
Step 3: After enabling/disabling the accounts, you can categorize them according to their status and access type. Click “Filter” to display the Connections based on the account status (enabled/disabled) and access type (available/revoked).
| Applying filters lets you focus on the important data. You can visualize a well-organized layout of what’s needed to run queries effectively. |
Once you’ve enabled the relevant accounts, you can start running queries to gain clear, actionable insights quickly.
Alternatively, if you wish to enable/disable an account(s) while running queries, click the “Manage Account” option under the Accounts tab.
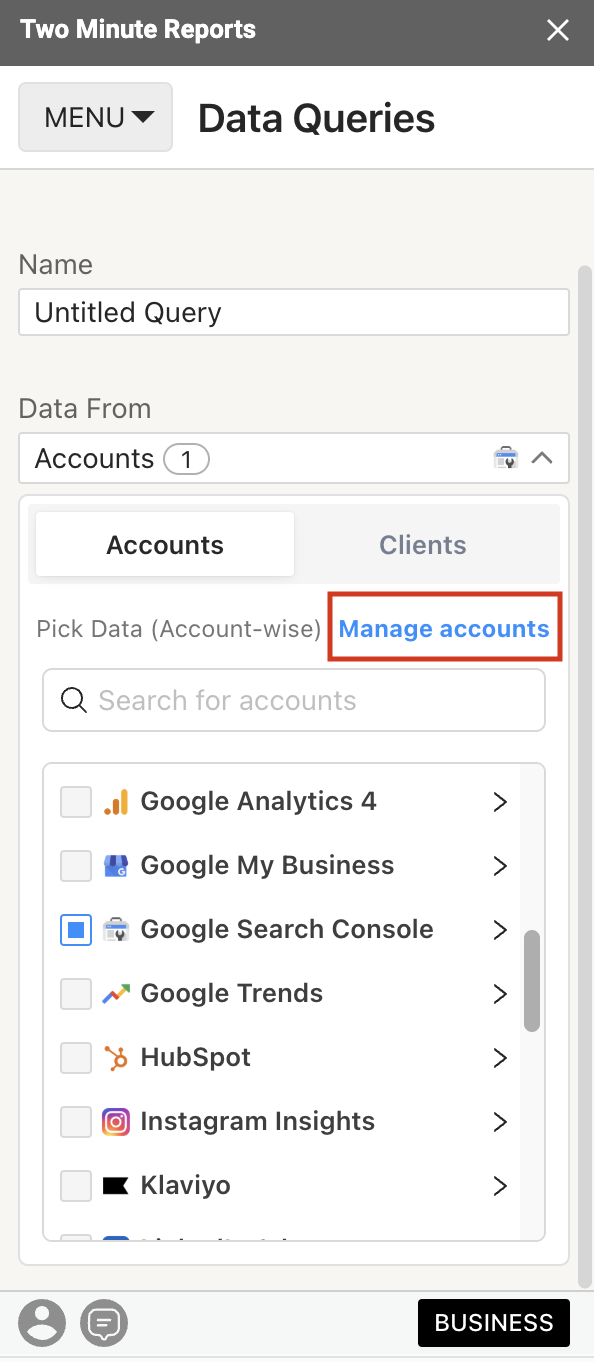
The “Manage accounts” window mentioned in Step 2 will appear, where you can instantly make relevant changes to your accounts. Once you have done this, ensure you click “Refresh Accounts” for the newly enabled accounts to be available for running a query.
You’re good to go now. The process of enabling/disabling accounts in Google Sheets with TMR is straightforward. This approach significantly streamlines the process of running queries so you don’t get overwhelmed with excess data.
| Need help creating a new Connection in Google Sheets? Read “How to create a Connection in Google Sheets” to get started and map multiple connectors and their accounts in a single dashboard. |
We hope you found this article helpful. If you have any questions, please contact our support team via [email protected].