In 2020, it’s important for the product nerds, marketers and smart spreadsheet users to connect MySQL to Google Sheets . Google Sheets has become indispensable in the life of any next generation Business. Whatever be the data that you are working with, its easier to create reports, analyse data and share them easily with Google Sheets. This amount of flexibility has made it extremely suitable for managing and tracking the day to day operations of a Business.
However there are few limitations that Google Sheets doesn’t solve out-of-the-box. One such limitation is the ability to get your data from external database like MySQL database into Google Sheets.
We will show you how to overcome that and also free up your time by automatically running your queries and emailing your reports.
There are few possible options out there using Google App script and plugins to connect MySQL to Google Sheets, but we found their design and functionality very buggy and feature incomplete. So we created “Two Minute Reports”.
In a matter of minutes without a single line of code, Two Minute Reports makes it easy to connect and send data from MySQL database to your Google Sheets.
Step 1: Install and Launch Two Minute Reports
This simple add-on for Google Sheets enables you to pull data from MySQL database into Google Sheets. Install it from the GSuite marketplace here. Do follow the steps below and experience the full benefits before buying Two Minute reports.
Install Two Minute Reports, if you have not done already.
Sign in to any Google Sheet and go to Add-ons -> Get add-ons.
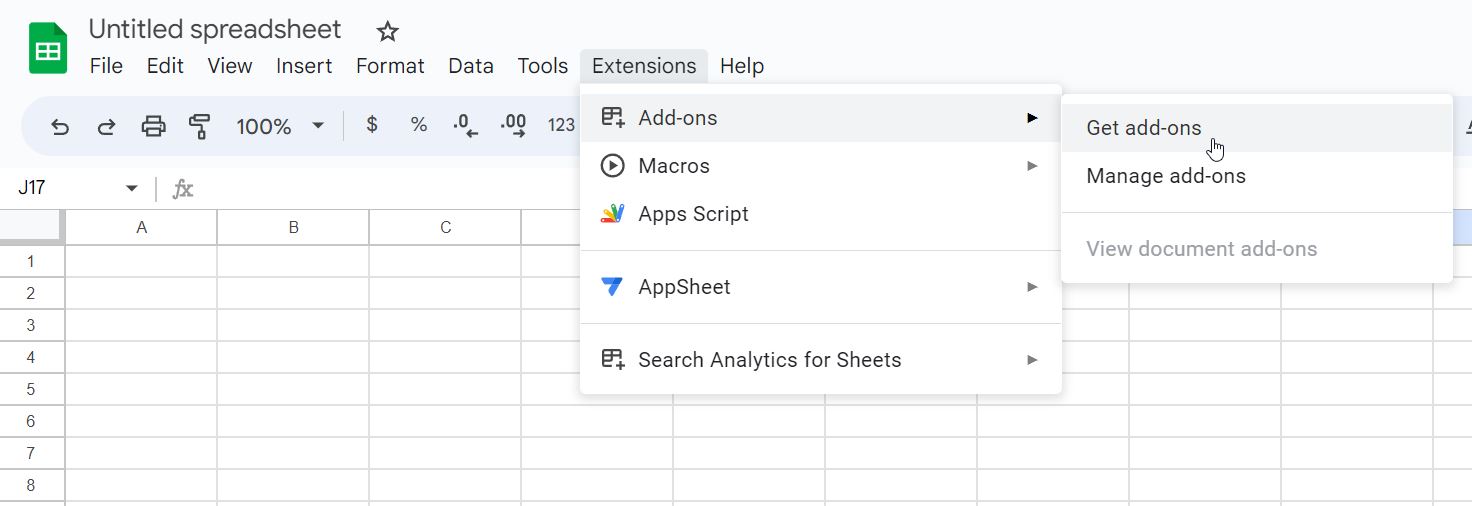
Search for Two Minute Reports and select Install.

Review and accept the permissions necessary to run Two Minute Reports. Two Minute Reports will be installed for you with the e-mail you are sign in to Google Sheets.
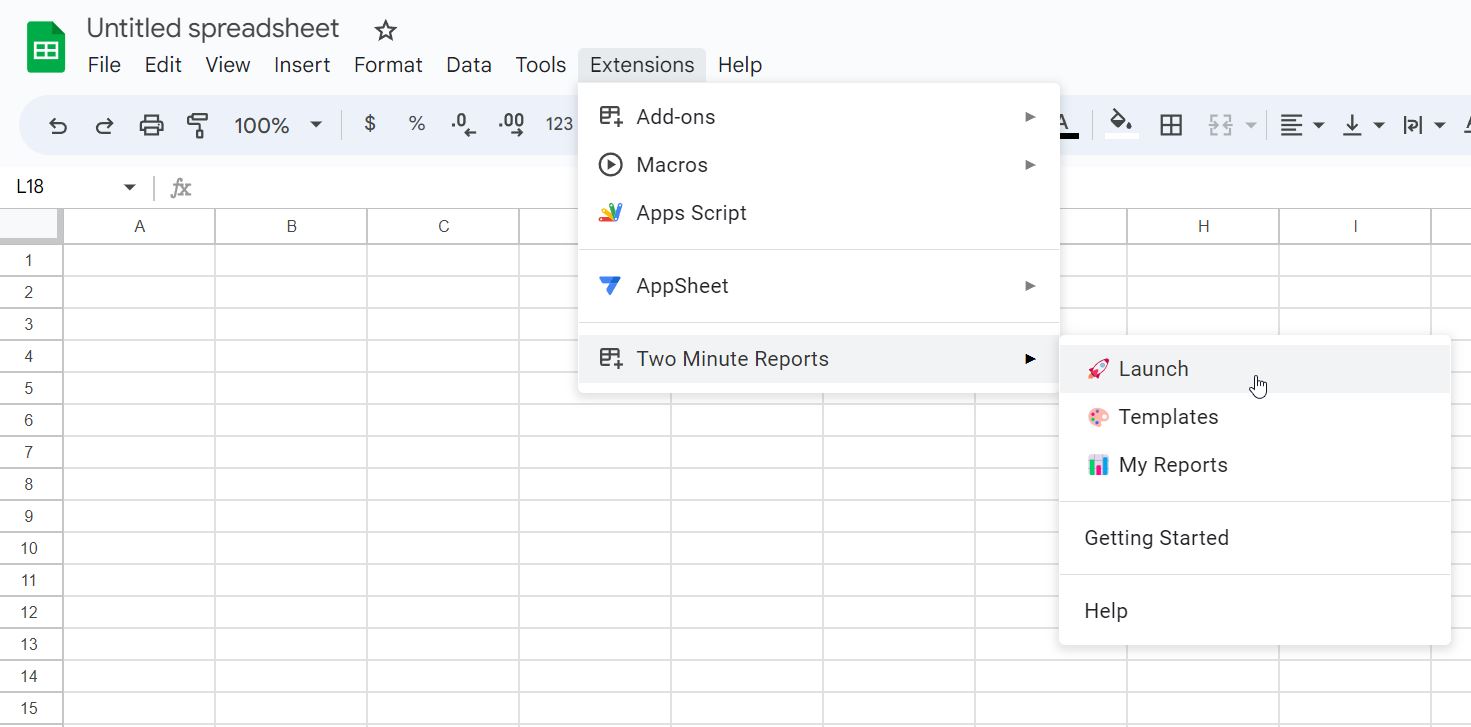
Open Google Sheets and go to Extensions -> Two Minute Reports -> Launch.
Step 2: Connect MySQL to Google Sheets
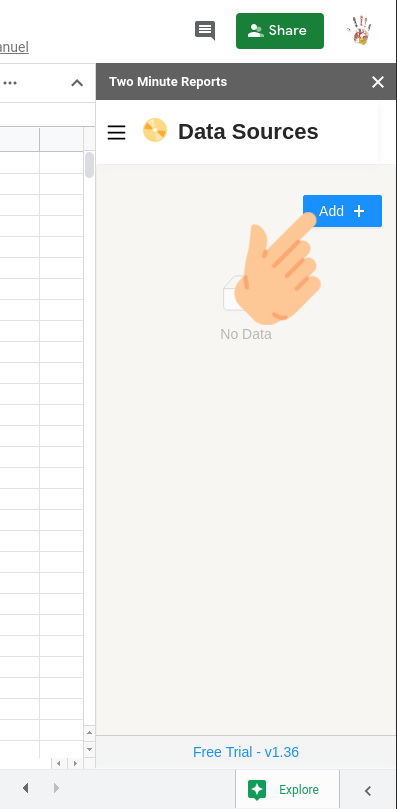
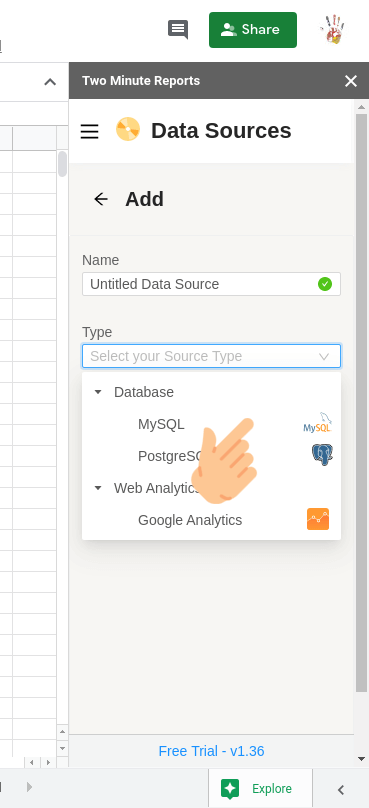
Two Minute Reports allows you to Add data from a growing list of different Data Sources. You can add your MySQL data source by going to the Data Sources section.
Fill-out your database details. Press “Test connection” once you are ready, your credentials will be validated and saved for future use.
If you get an error message, you might have to check your credentials or configure your MySQL database to whitelist the IP address of Google Servers or our Amazon Server. The error message will help in taking the appropriate action. We have also created simple scripts for you to quickly whitelist the required server IP addresses in your MySQL database. You can find the script here.
After adding your MySQL Data Source, you can add unlimited number of queries using the same Data Source. Your credentials are securely encrypted and stored within your Google Account. This makes sure your data does not leave the Google Servers and is not readable by anyone except you. Even when you share your Google Spreadsheet with others, they cannot read your credentials.
Step 3: Add SQL Queries to Google Sheets
Once you have added a Data Source, you can access it from any new or old spreadsheet within your Google Account. This makes it easy for you to connect to your MySQL database and create queries from different spreadsheets without having to re-enter all the credentials.
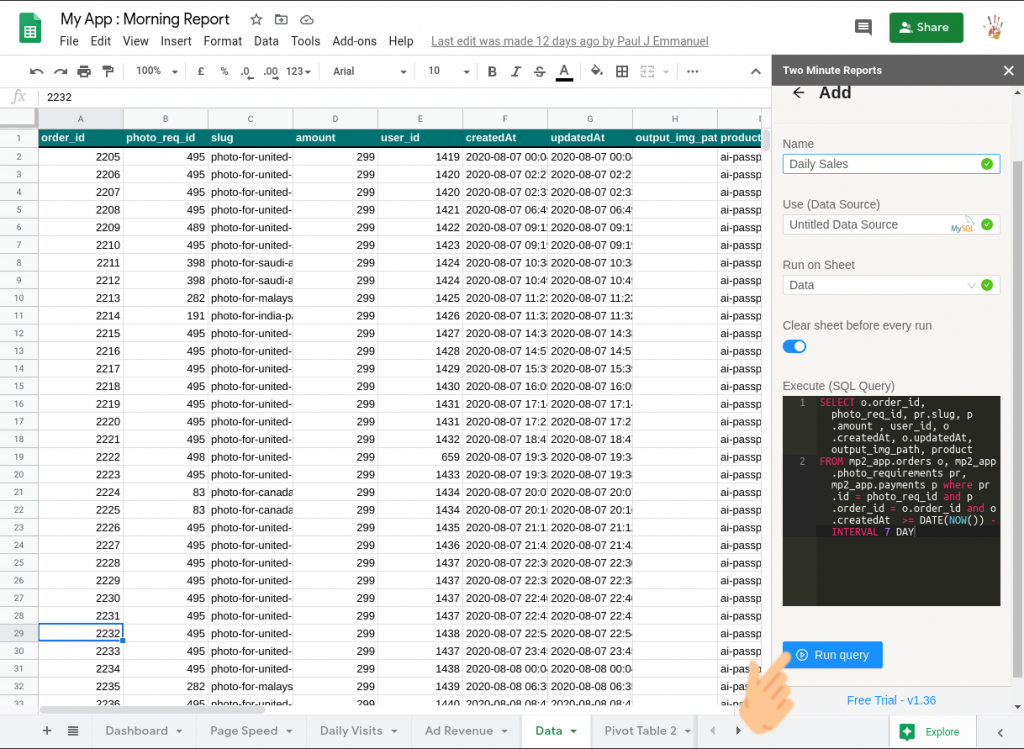
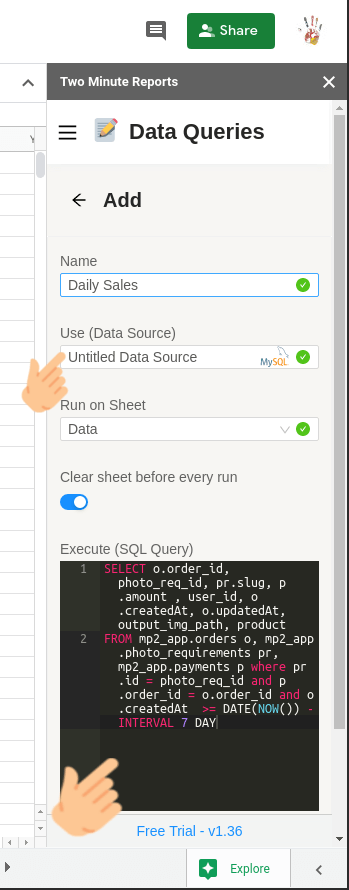
You can go to the Data Queries section and add your MySQL query. Start by selecting your newly added Data Source and enter your query in the dark SQL editor. Note that for security reasons we only allow “select” based sql queries to be executed in your MySQL database.
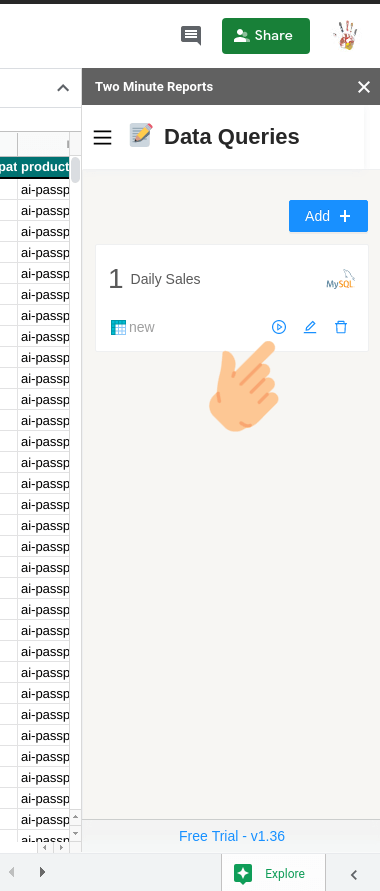
When ready press “Run query”, and data will be fetched from your database and stored in the specified spreadsheet in Google Sheets.
Once a query is added it gets saved in your spreadsheet. You can then rerun the query or modify it and reuse it easily within the Data Queries section.
Also do note that the queries are securely stored locally in your Google Sheets. And so it can only be accessed from within the Google Sheets that created it. This makes it easier to manage multiple queries properly within different google sheets. This is different from how we store Data Sources, they can be accessed from any spreadsheet within that Google account.
Step 4: (Optional) Schedule Automatic data Refresh and email
Once you create a report in Google Sheets, you can schedule automatic updates to get real-time data. This feature is convenient for sending emails or refreshing your spreadsheets with live data and using them as a dashboard.
Under the email section, you can enter the recipient’s email ID and save the new schedule.
You can also choose to specify the reporting format. You can insert the sheet content in the email body, attach the selected sheet as a PDF or Excel, or attach the spreadsheet as an Excel file.
Two Minute Reports’ Schedule Refresh feature has further capabilities. Continue reading about this feature: “How to Refresh Data Automatically in Google Sheets.”
We hope you found this guide helpful. If you have any questions, please contact our support team at [email protected].
Try Two Minute Reports for Free by installing from the GSuite marketplace, and start pulling data from MySQL to your Google Sheets. Cheers!
