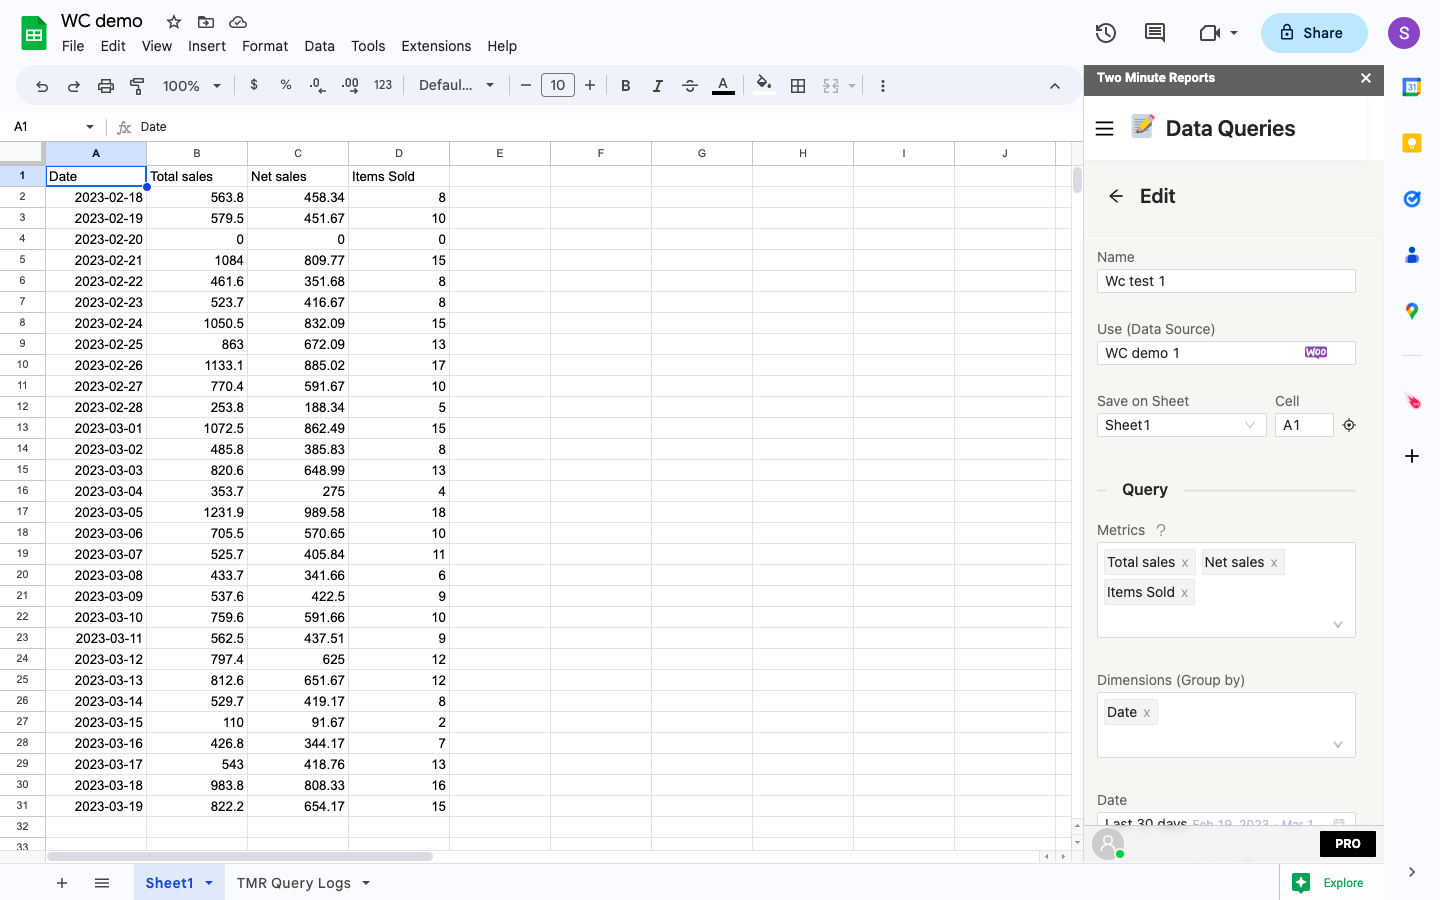
Step 1: Install and Launch Two Minute Reports
Install Two Minute Reports, if you have not done already.
Sign in to any Google Sheet and go to Add-ons -> Get add-ons.
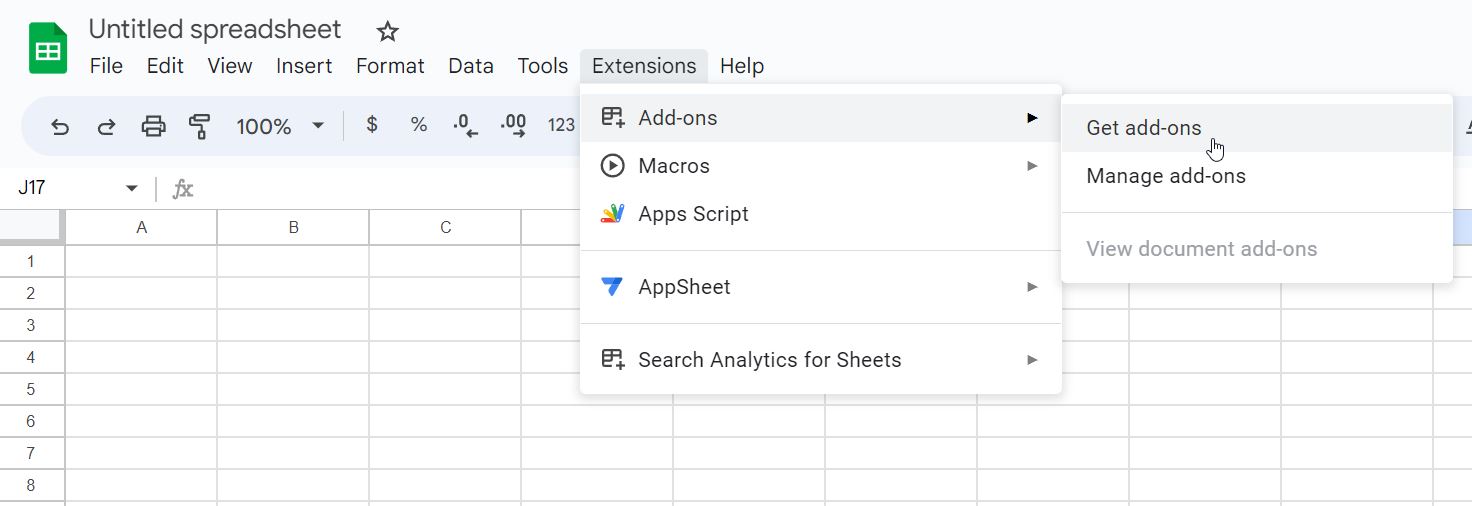
Search for Two Minute Reports and select Install.

Review and accept the permissions necessary to run Two Minute Reports. Two Minute Reports will be installed for you with the e-mail you are sign in to Google Sheets.
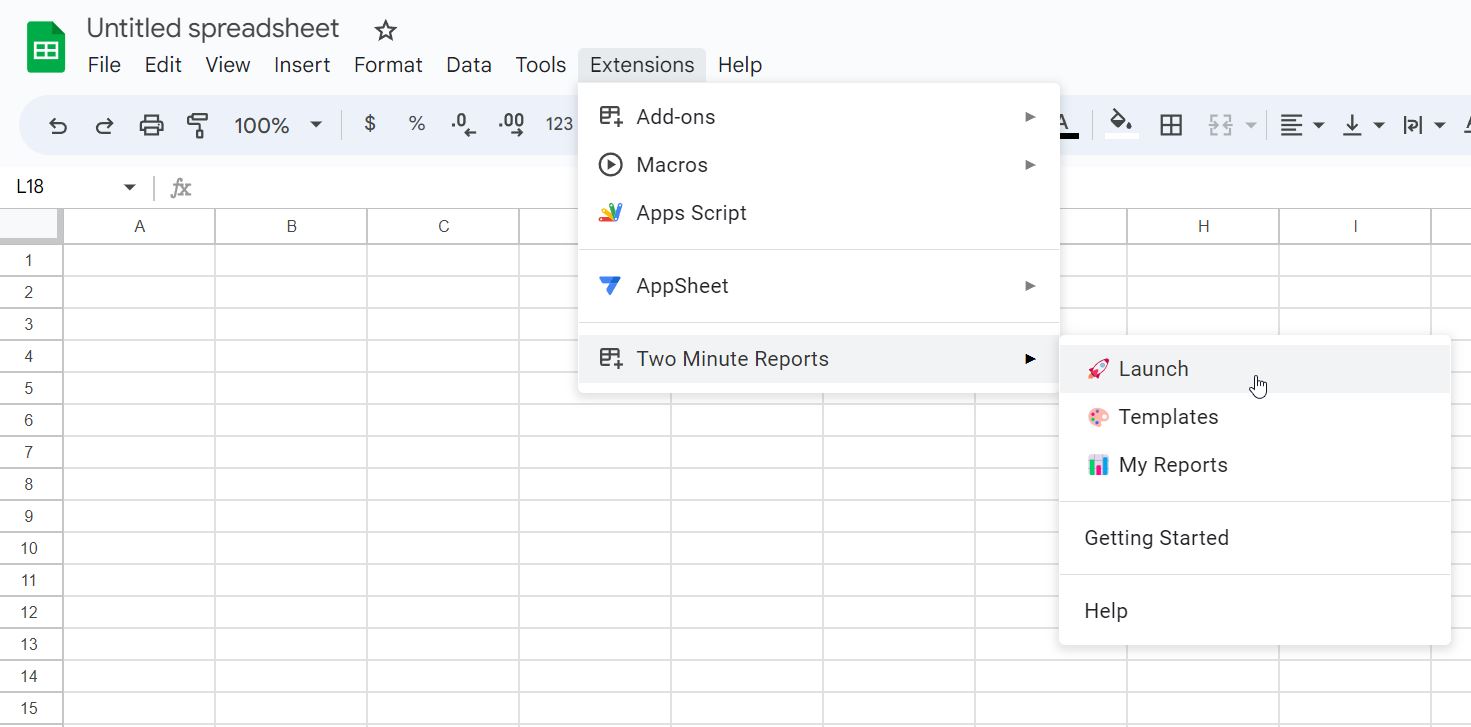
Open Google Sheets and go to Extensions -> Two Minute Reports -> Launch.
Step 2: Connect WooCommerce to Google Sheets
You would get TMR’s side bar at the right side of the sheet. You would be on the Data Sources sheet by default. Click on Add+ to create your new WooCommerce Data Source.
In the TMR side bar, Click on Select your source type option to view all the Data sources. From that, Choose WooCommerce from the Data source drop down and name your Data Source.
You will now be redirected to the Configuration part of WooCommerce.
Step 3: Generate API key and API secret
To get started with this process, you will need to log in to your WooCommerce account and navigate to the “Settings” page. From there, click on the “Advanced” tab and then select the “REST API” option.
This will take you to the WooCommerce REST API settings page.
On this page, you’ll see a section labeled “Keys/Apps.” This is where you can create and manage API keys for your WooCommerce store. To create a new key, click the “Create API key ” button.
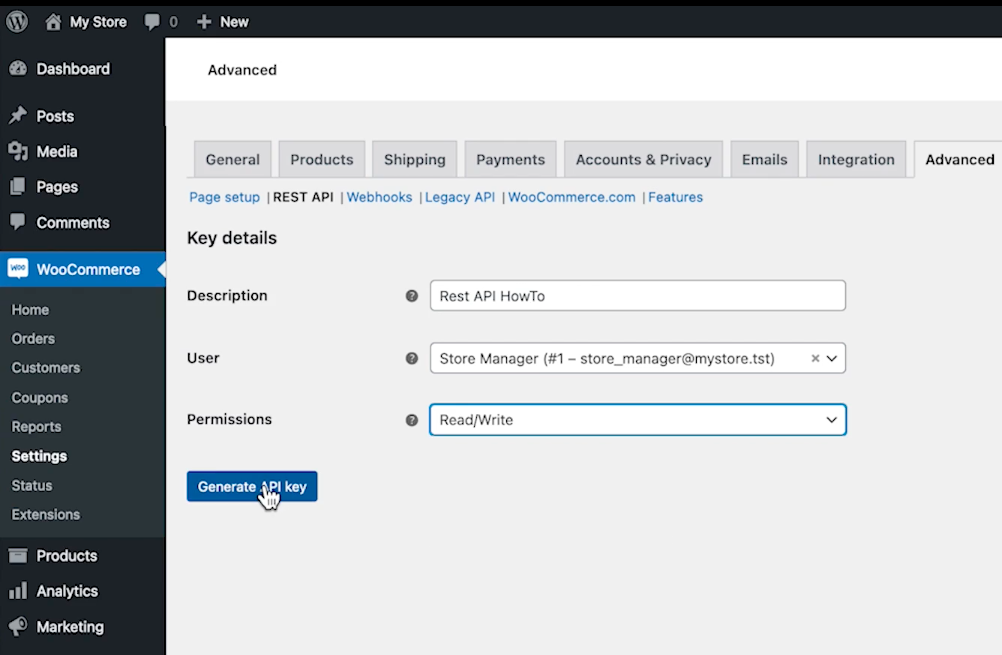
Here, you would first need to specify the description for the purpose of requesting the API key then followed by adding the user who is requesting the key and finally Specify the permissions for the key, which can be Read, Write or Read and write. Finally click on “Generate API key”.
Now, you would be able to view the API key and API secret for once.
Make sure to copy the API secret key and save it somewhere secure. You’ll need this key to authenticate your requests when using the WooCommerce API.
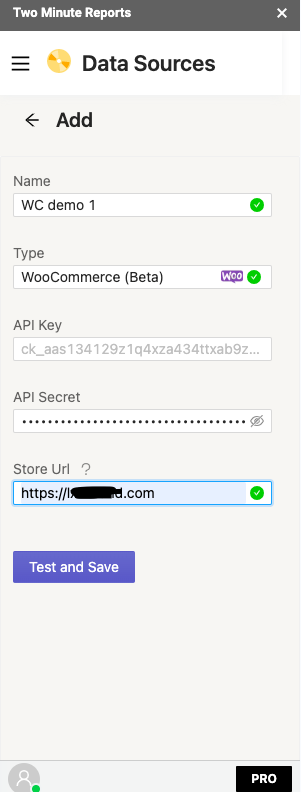
Now, use this in place of API key and API secret in our Two Minute Reports configuration section and add your store URL to create your new TMR’s WooCommerce Data Source.
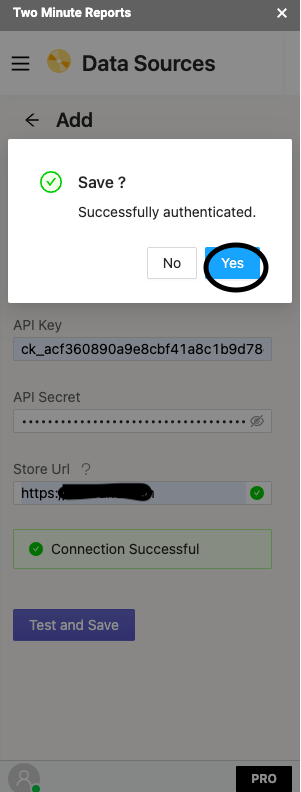
Once you add the credentials, Click on Test and Save. If your credentials where rite and the configuration was successful, you would get a successfully authenticated message in the TMR sidebar. Click Yes, to save the configuration.
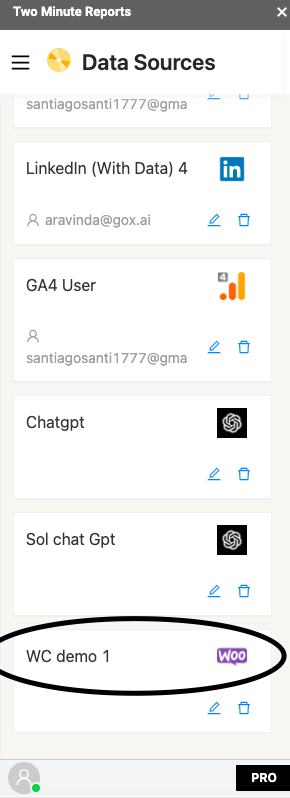
Now, you can check the Data Sources section to view your newly created Data Source.
Step 4: Getting WooCommerce data in Google Sheets
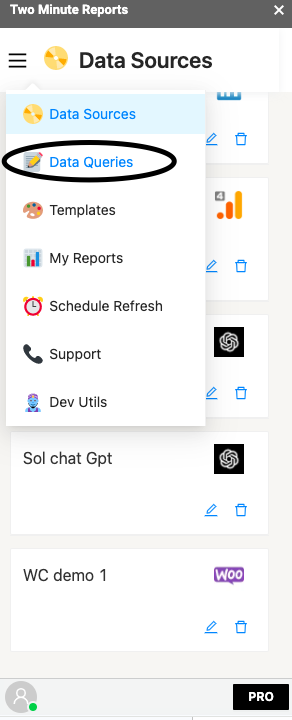
Click on the menu icon, to choose Data Queries section.
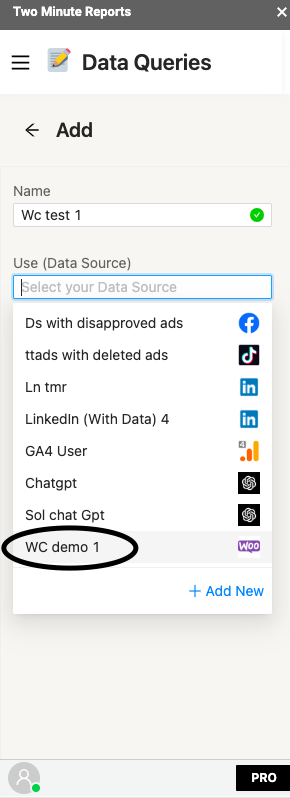
Now, Create a new Query by adding a new Query name and selecting the newly added Data Source.
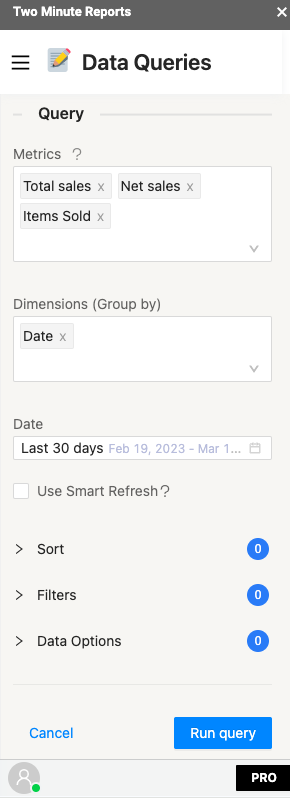
Now, you can start adding your desired metrics and dimensions for the date ranges you need and click on Run Query
Step 5: (Optional) Schedule Automatic data Refresh and email
Once you create a report in Google Sheets, you can schedule automatic updates to get real-time data. This feature is convenient for sending emails or refreshing your spreadsheets with live data and using them as a dashboard.
Under the email section, you can enter the recipient’s email ID and save the new schedule.
You can also choose to specify the reporting format. You can insert the sheet content in the email body, attach the selected sheet as a PDF or Excel, or attach the spreadsheet as an Excel file.
Two Minute Reports’ Schedule Refresh feature has further capabilities. Continue reading about this feature: “How to Refresh Data Automatically in Google Sheets.”
We hope you found this guide helpful. If you have any questions, please contact our support team at [email protected].
I hope this article helped you successfully create a new Data source, Query Config and a WooCommerce report from Scratch.

