Clients
The Clients feature lets you organize multiple customers, accounts, and data sources in one place. Instead of managing all integrations in a single workspace, each client gets its own dedicated environment with its own mapped accounts, branding, and settings.
This reduces operational clutter and gives you better control over reporting workflows, especially when handling multiple accounts.
What You Can Do
- Create and manage multiple clients from a single dashboard
- Map multiple data source accounts (Google Search Console, Facebook Ads, etc.) to each client
- Maintain clear separation of data across different clients
- Track client status (Active / Inactive)
- Customize client-level settings like currency and branding
- Quickly search, filter, and switch between clients
Key Components
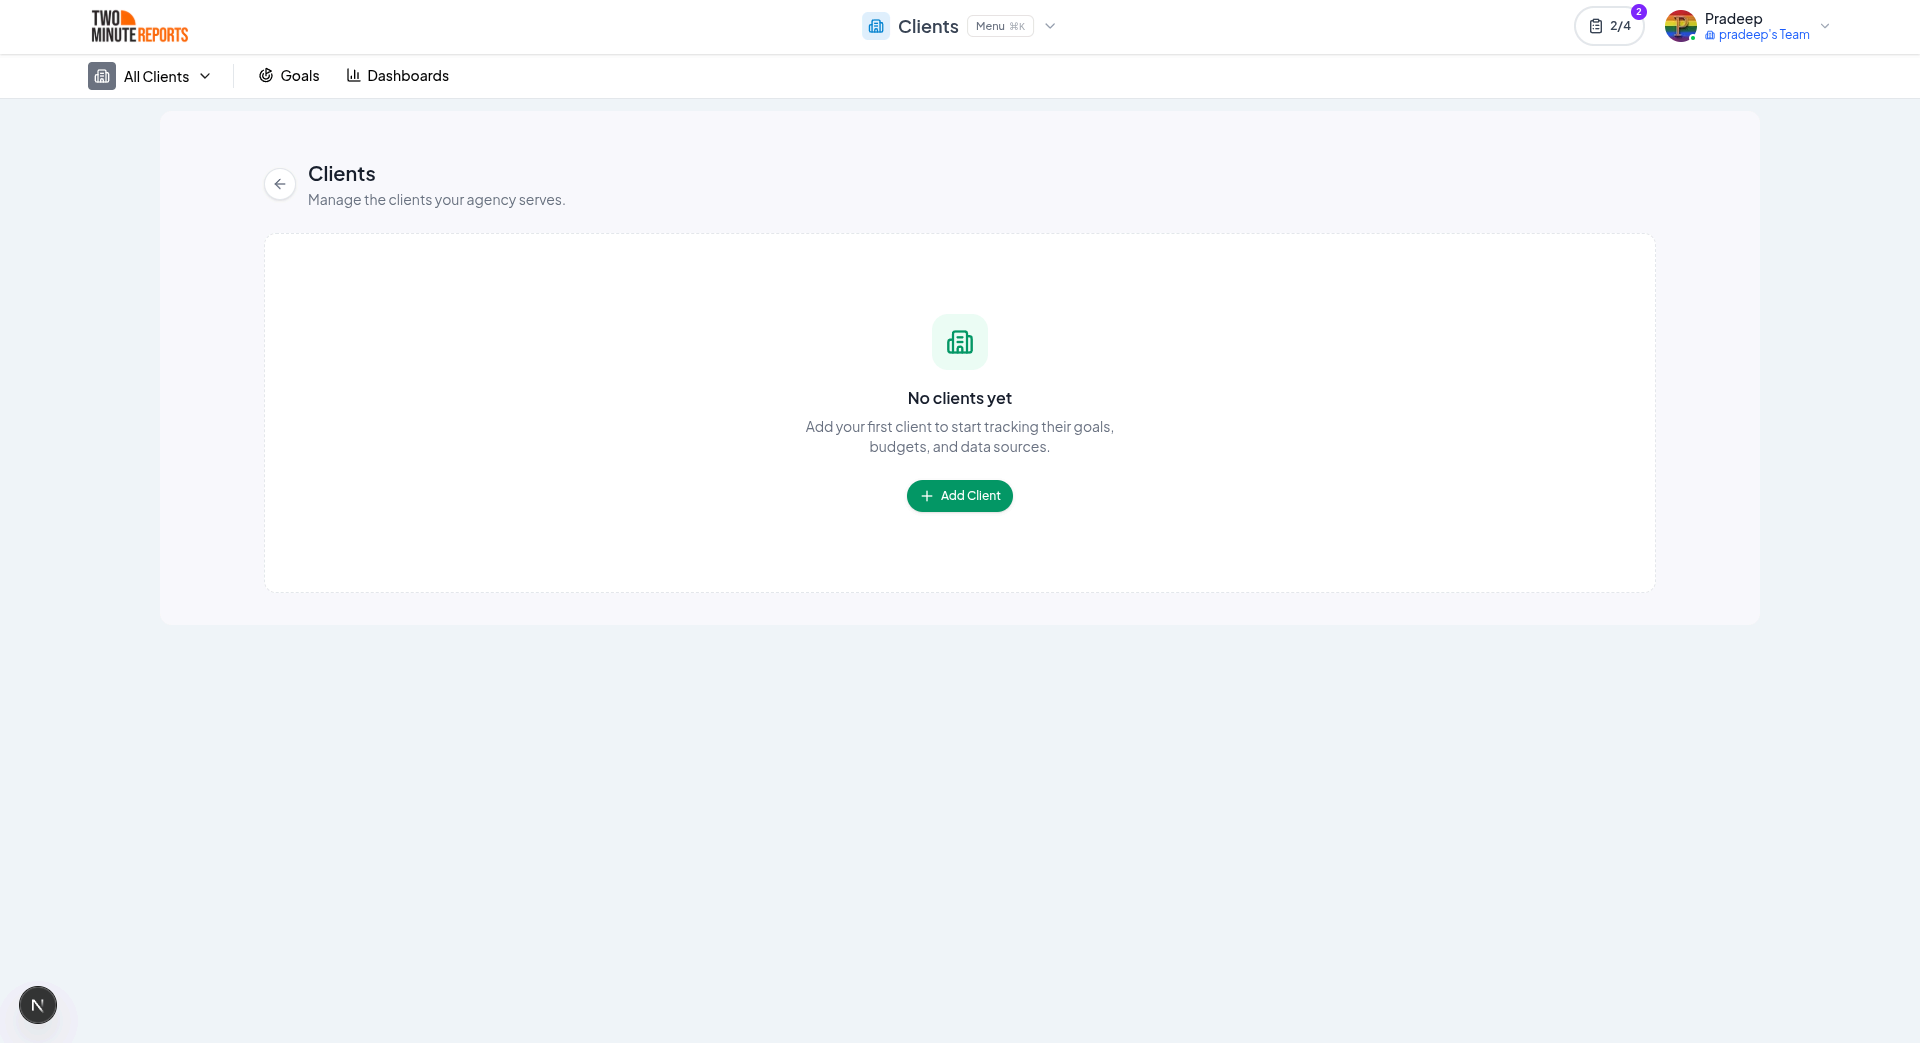
Clients Dashboard
The main view where all clients are listed.
- Displays all clients with their status and number of mapped accounts
- Provides filters: Active, Inactive, and All Clients
- Includes search functionality for quick access
- Allows quick switching between clients via dropdown
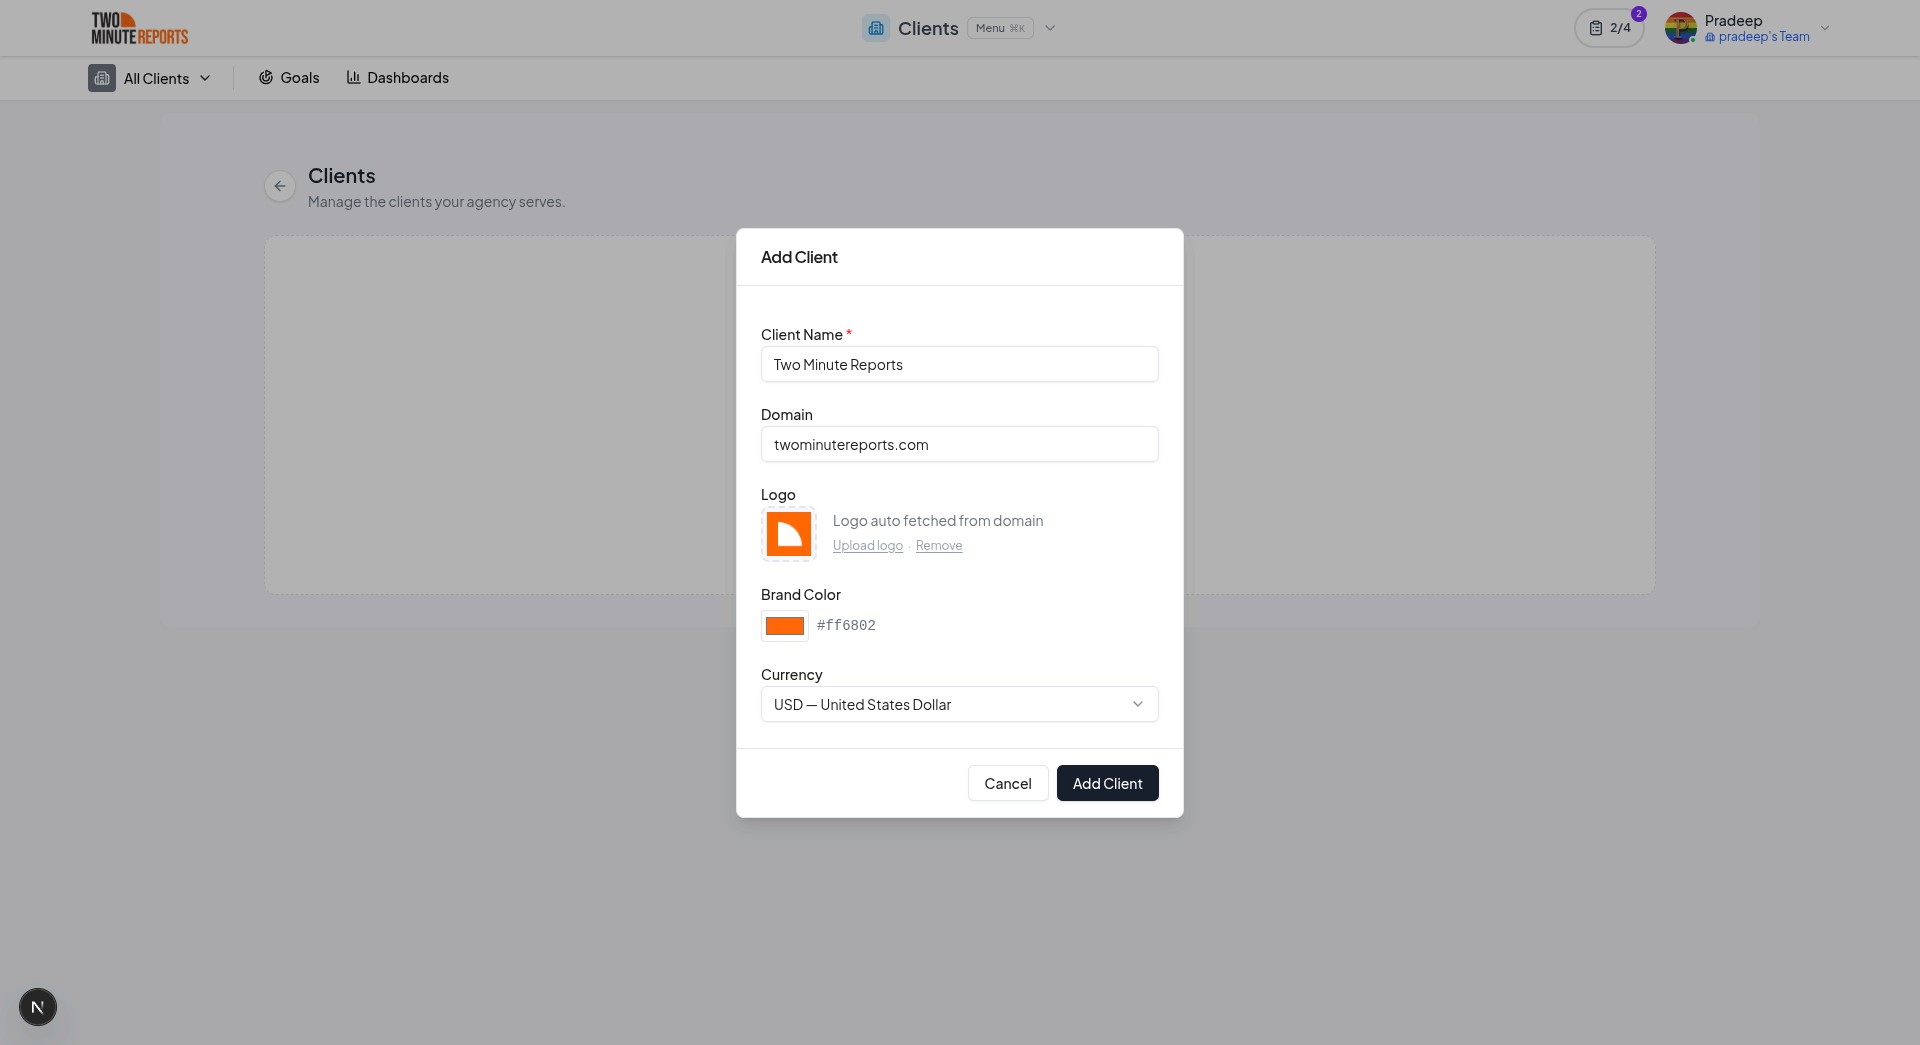
Add Client
A dedicated workflow to onboard a new client. Fields include:
- Client Name (required)
- Domain
- Logo URL
- Brand Color
- Currency
This ensures each client has a distinct identity within the platform.
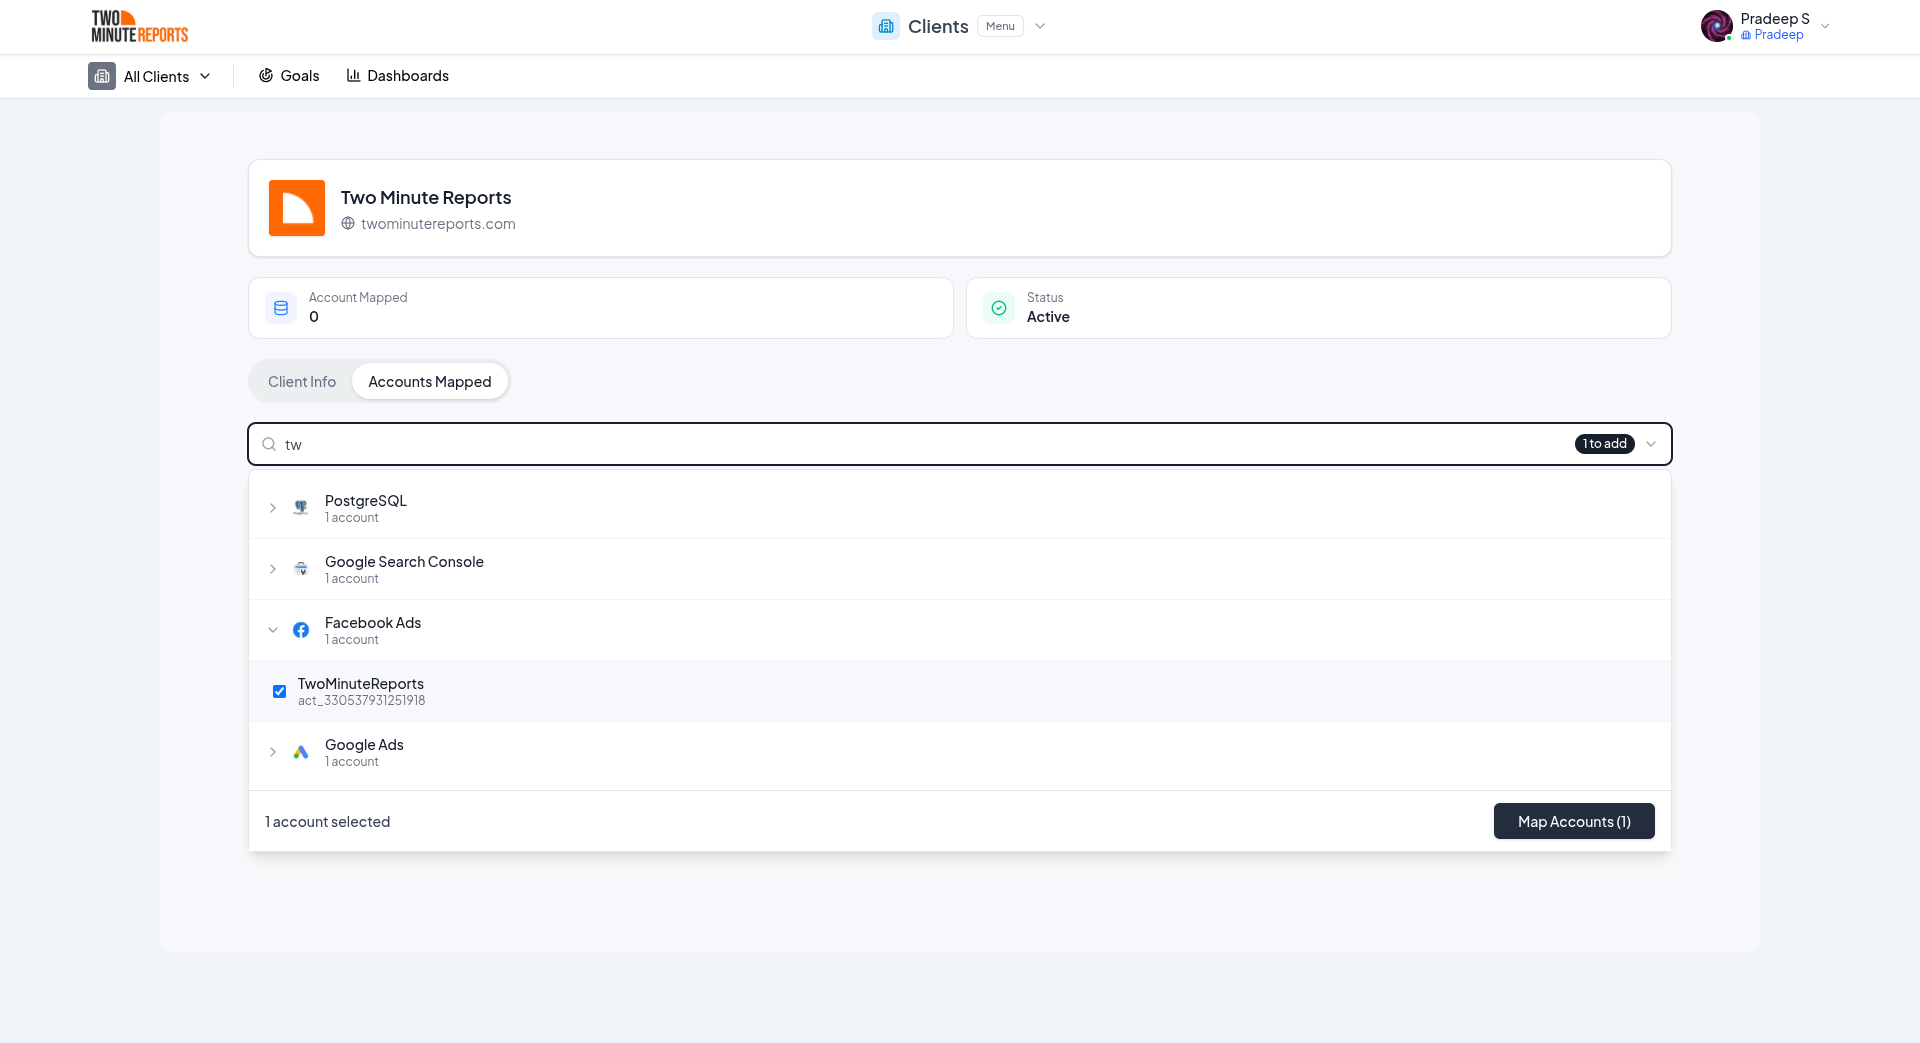
Client Information
The detailed view of a selected client. Acts as the central configuration hub for that client.
- Client name and domain
- Status (Active / Inactive)
- Branding details (logo and color)
- Currency settings
Accounts Mapped
This is where the actual value happens: the bridge between "client" and "data."
- Map multiple accounts (e.g., Google Search Console, Facebook Ads)
- View all connected accounts under a client
- Add or remove mappings as needed
- Search and select accounts for mapping
Status Management
Each client can be marked as:
- Active: Currently in use
- Inactive: Temporarily disabled without deletion
This supports lifecycle management without losing any configurations.
Set Up Your First Client
Step 1 - Create a Client
Navigate to Clients in the main menu and click Add Client.
Step 2 - Configure Client Settings
Update branding (logo, color), currency, and status based on your requirements.
Step 3 - Map Accounts
Go to the Accounts Mapped tab and connect the relevant data source accounts, for example, a specific Google Search Console property or a Facebook Ads account belonging to that client.
Step 4 - Use in Reporting
Once mapped, these accounts are available across your reporting workflows, always tied to the correct client.
Navigate Between Clients
- Access Clients from the main menu
- Use the dropdown to switch between clients
- Click on a client to view its details
- Toggle between Client Info and Accounts Mapped
Everything is designed to minimize clicks while maximizing control.
Benefits
Structured Data Management: No more mixing up accounts across clients. Each client has its own dedicated space.
Scalable for Agencies: Whether you manage 2 clients or 200, the structure remains consistent and manageable.
Faster Reporting Setup: Pre-mapped accounts eliminate repetitive setup work.
Improved Accuracy: Reduces the risk of pulling incorrect data into reports.
Better Client Experience: Custom branding and clean organization create a more professional workflow.
Best Practices
- Use consistent naming conventions for clients
- Map only relevant accounts to avoid clutter
- Regularly review inactive clients
- Set correct currency and branding at the start
- Avoid duplicating clients for the same business
Next Steps
- Set Up Goals - Track campaign budgets and performance targets per client
- Browse Connectors - See all 30+ data sources you can map to clients
- Getting Started - New to Two Minute Reports? Start here
Features
Everything you need to run agency-scale reporting: client management, goal tracking, fast queries, white labeling, data blending, and smart alerts.
Dashboards
Build live, always-current dashboards from your connected data sources, with drag-and-drop charts, multi-page layouts, custom themes, and shareable links.