API Bridge

Two Minute Reports' API Bridge connector lets you access and analyze your data directly in Google Sheets or Google Data Studio. Build custom reports, monitor key metrics, and make data-driven decisions — all without writing any code.
What you can report on
- Data from any REST API endpoint
- Custom JSON or CSV data sources
- Internal business metrics and KPIs
- Third-party platform data not natively supported by TMR
- Combine external data with other connectors in one report
Prerequisites
- The API endpoint URL you want to connect to
- Authentication credentials for the API (API key, Bearer token, or Basic Auth). If the API issues a short-lived token from its own auth endpoint, use Dynamic Bearer Token instead — GET and POST token endpoints are both supported.
- Knowledge of the JSON response structure you want to query
How to create a connection
- Go to https://hub.twominutereports.com/connections
- Click New Connection to create a connection
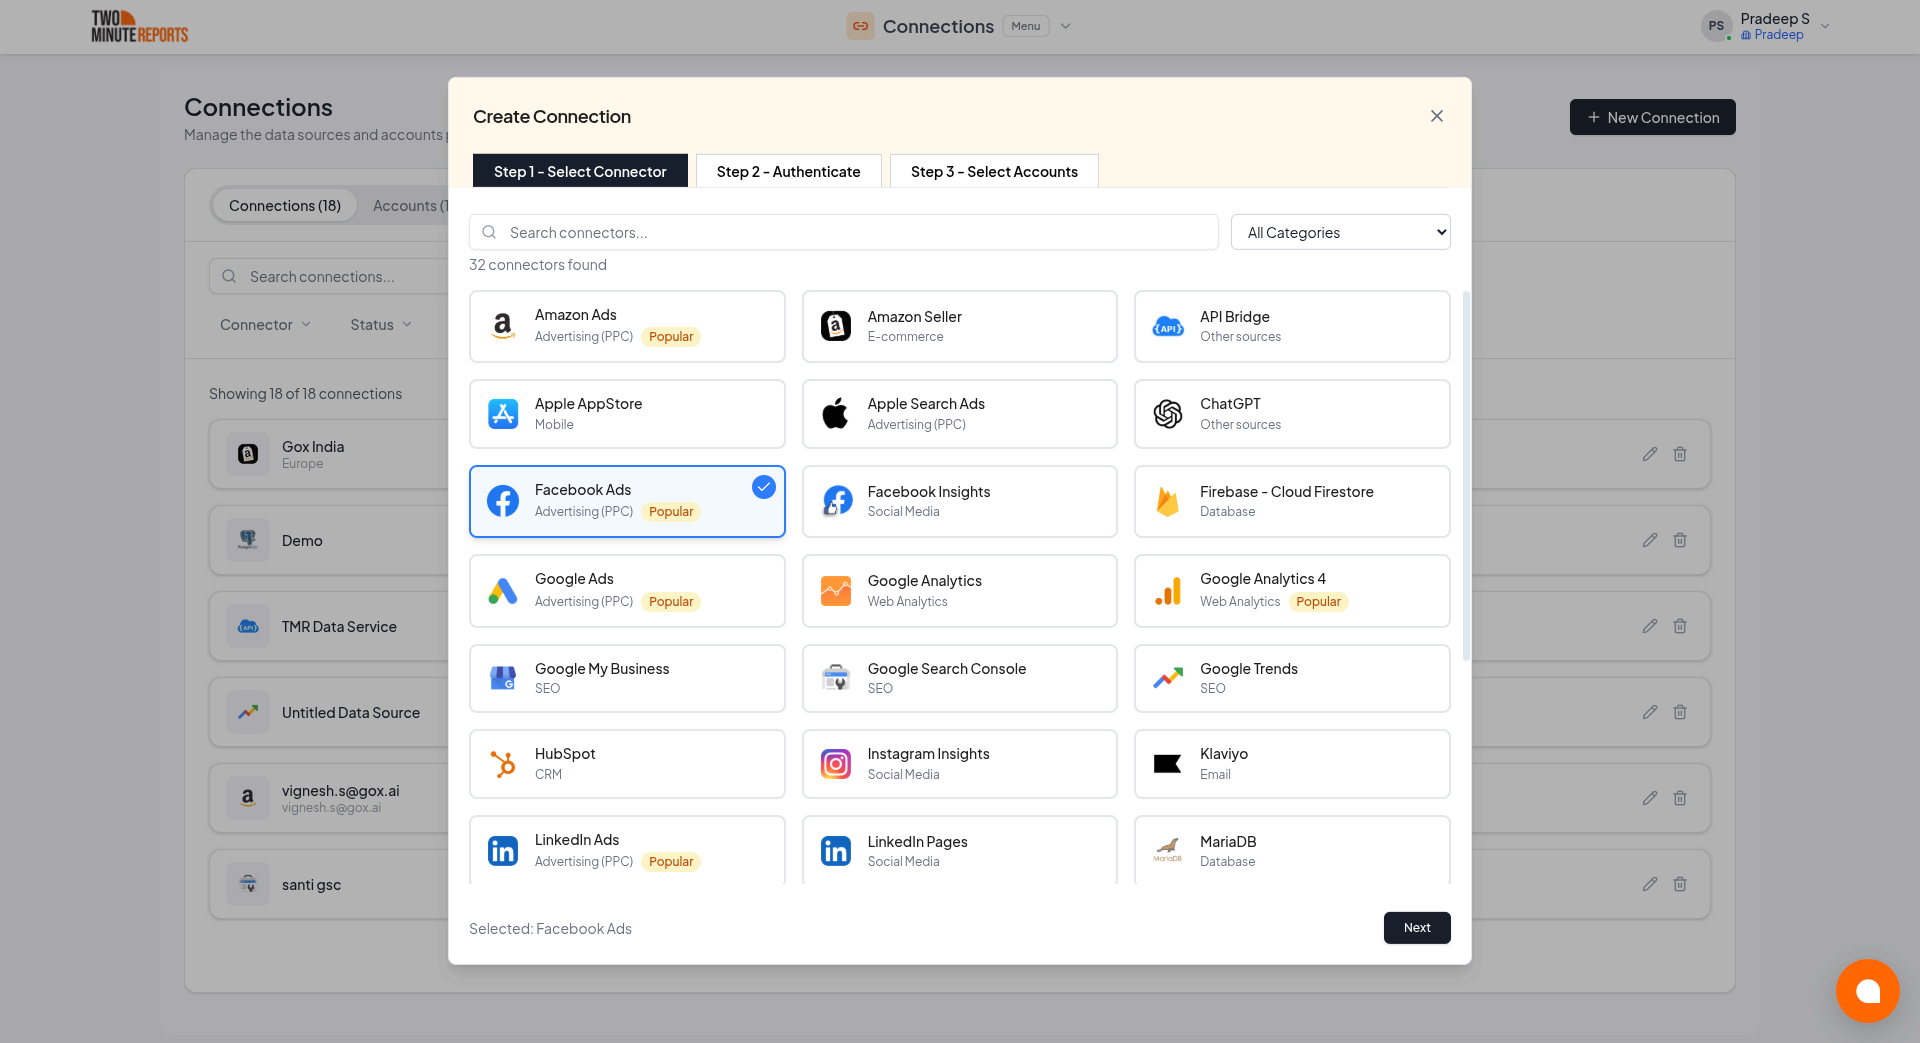
- Select API Bridge from the list of available connectors
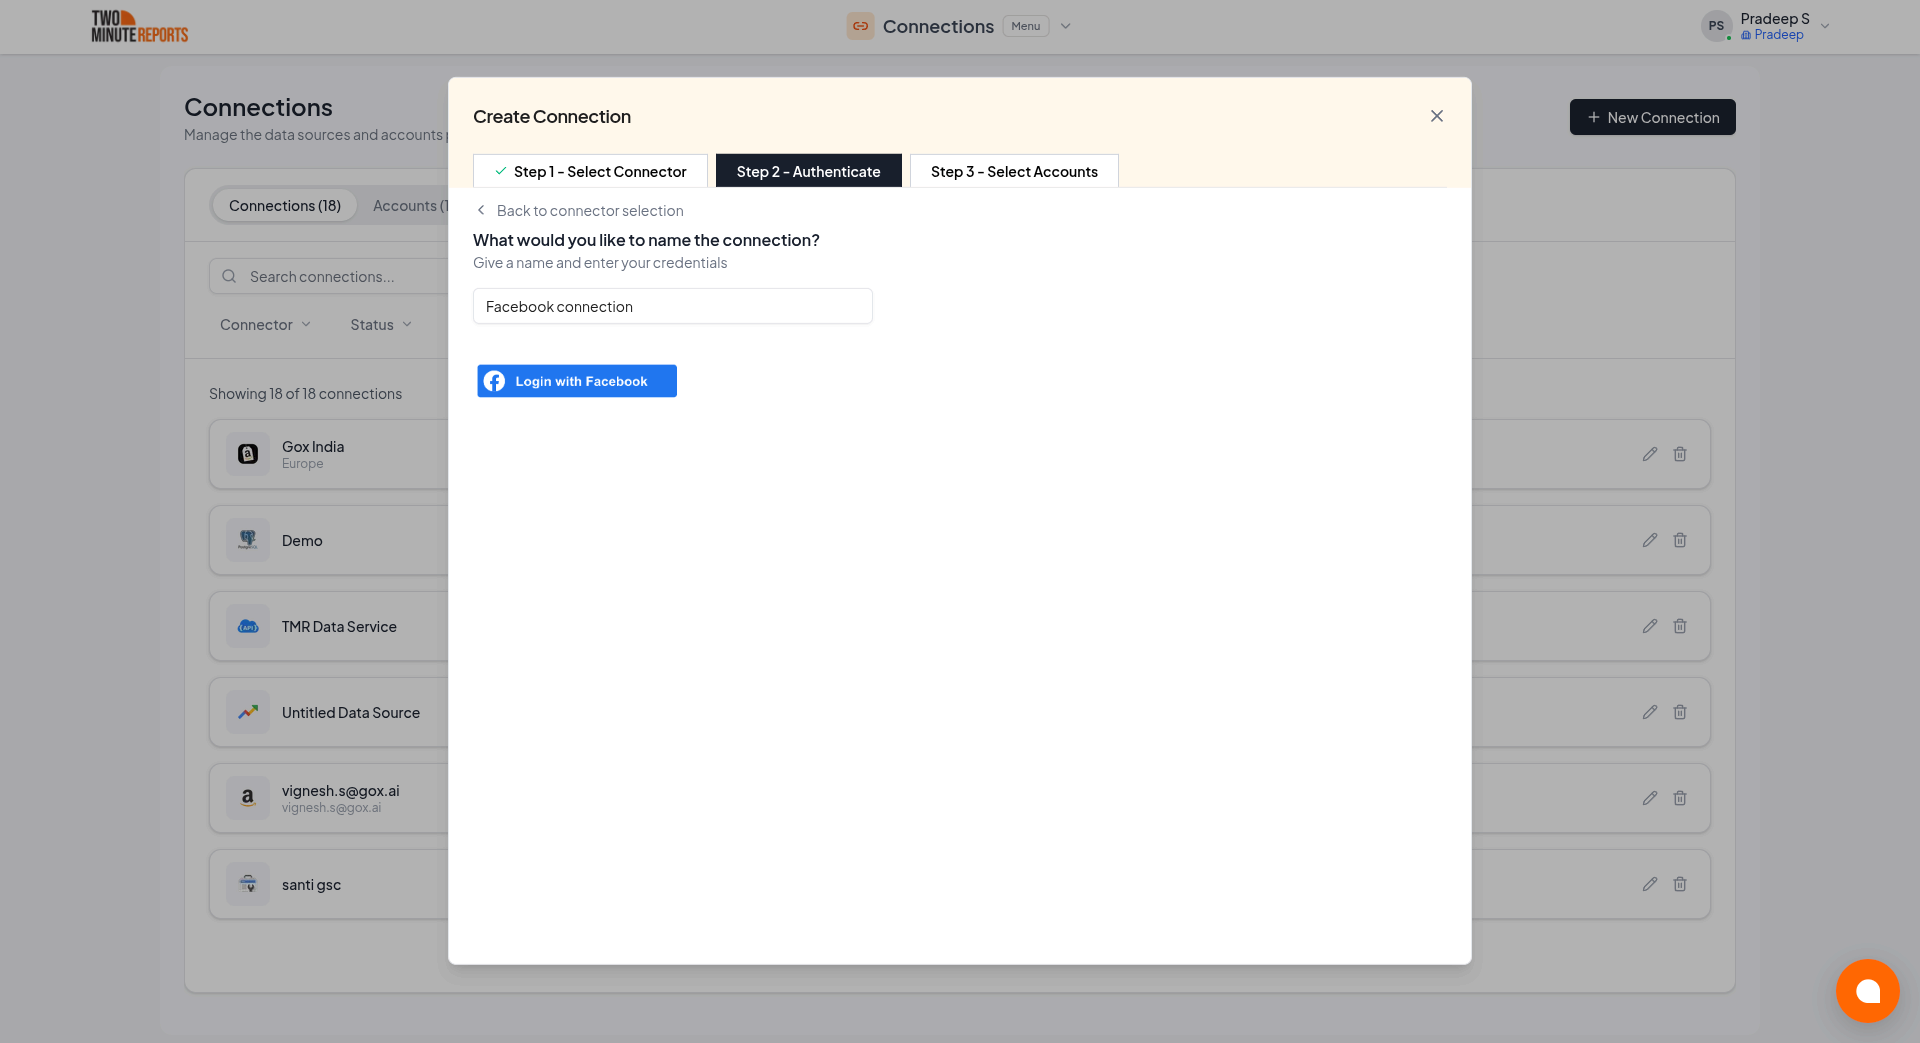
- Name the connection and authorize with your account credentials
After creating a connection:
- Enable the accounts you want to use from the available options
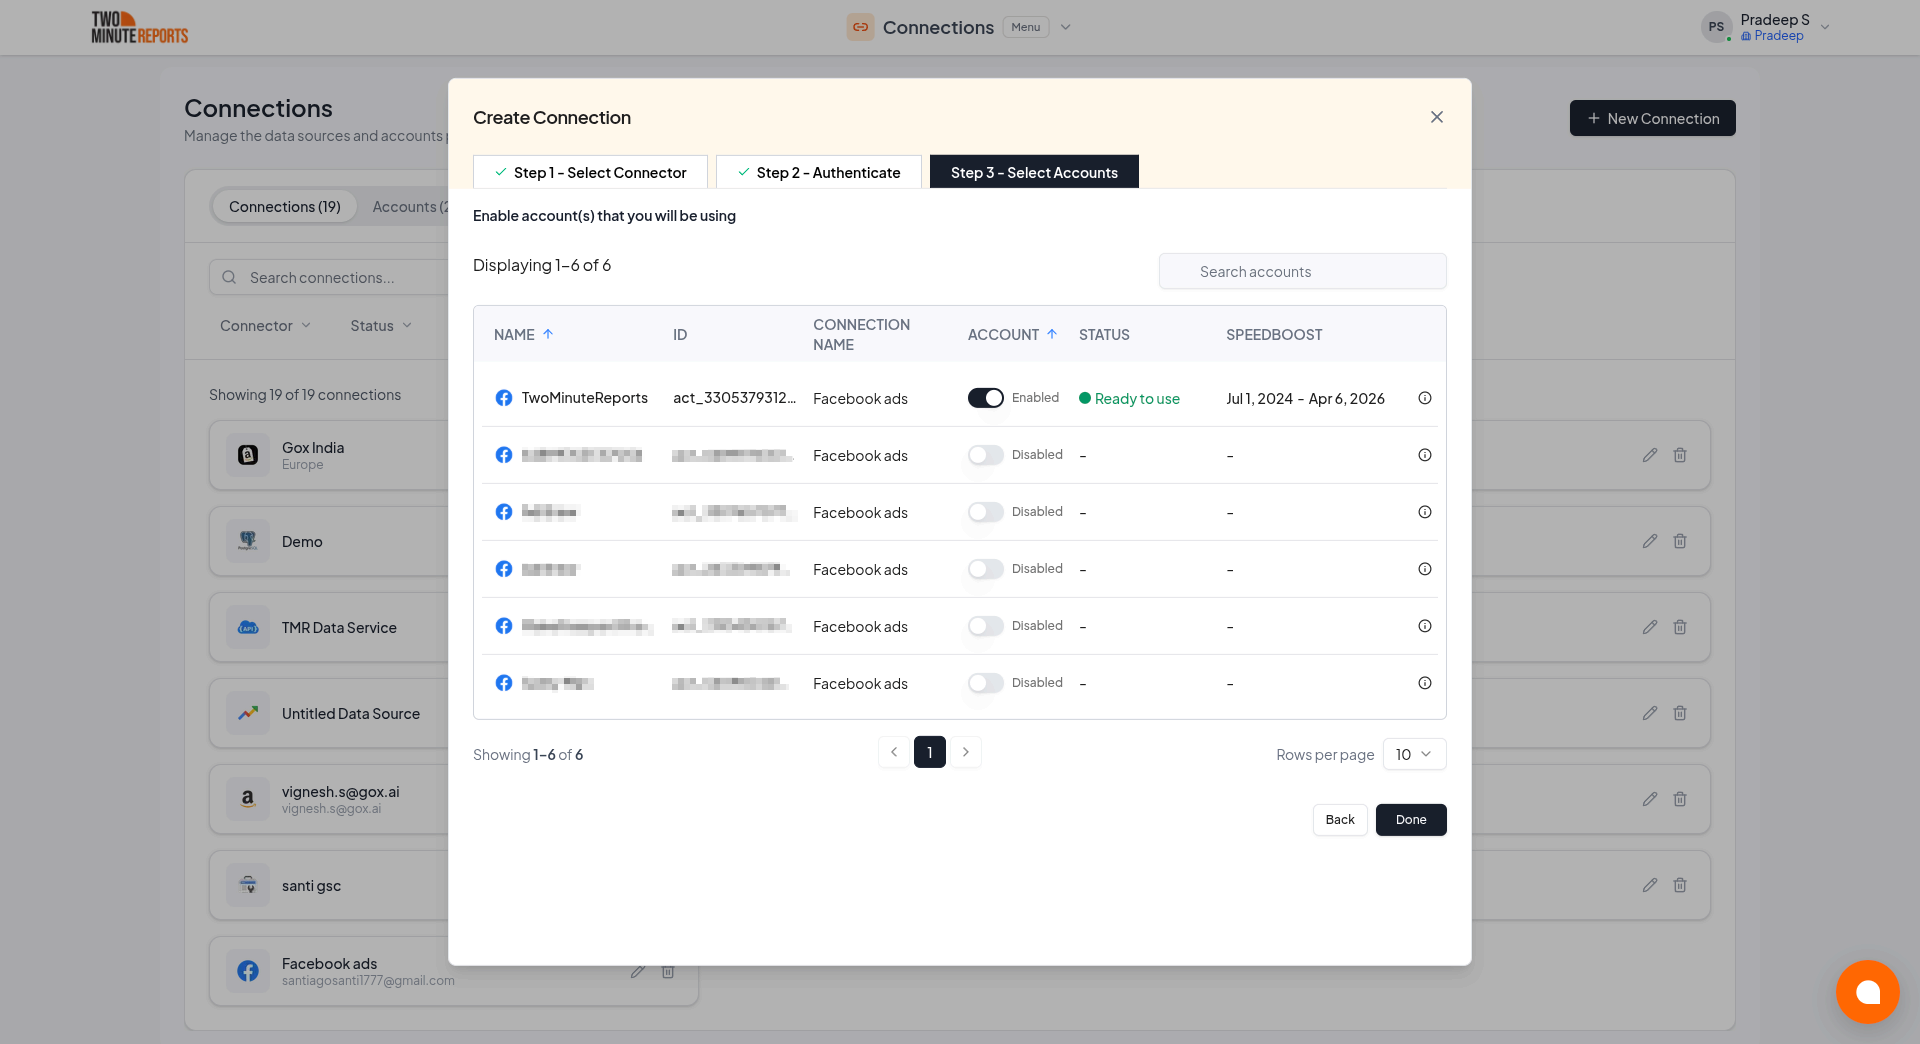
Important: Only enabled accounts can fetch data and count toward your plan usage. You can enable or disable accounts at any time in the hub to manage your plan usage efficiently.
Advanced features
JMESPath
By default, API Bridge returns the entire JSON response from the API. Use JMESPath to extract only the fields you need and keep your reports clean.
JMESPath is a query language for JSON. You enter a JMESPath expression in the JMESPath field when configuring your query config.
Selecting a field from an object:
# JSON: {"name": "Roberts", "age": 25, "profession": "teaching"}
name         # → "Roberts"
Selecting nested data:
# JSON: {"skills": {"primary-skill": "Cyber Security", "secondary-skill": "Web Development"}}
skills.primary-skill    # → "Cyber Security"
Selecting from an array:
# JSON: {"people": [{"firstName": "James"}, {"firstName": "Jacob"}, {"firstName": "Jayden"}]}
people[*].firstName     # → ["James", "Jacob", "Jayden"]
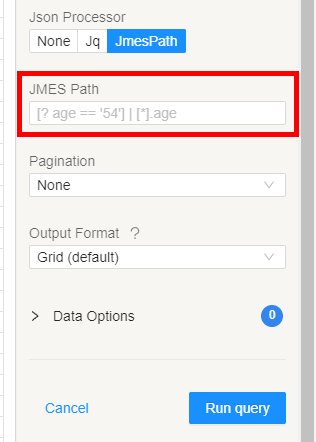
For more expressions, see the official JMESPath documentation.
Output formats
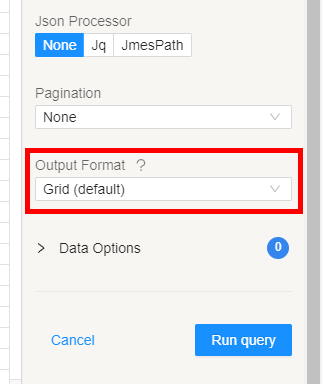
When your API returns nested JSON, choose how API Bridge should flatten it into columns and rows.
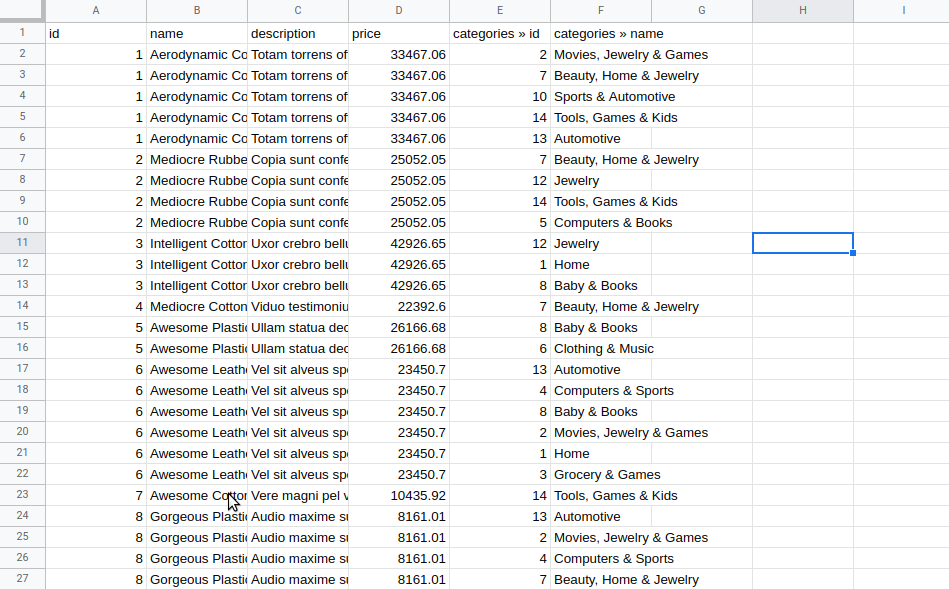
Grid format — creates a new row for each nested item and copies the parent fields down. Use this when each nested object represents a separate record.
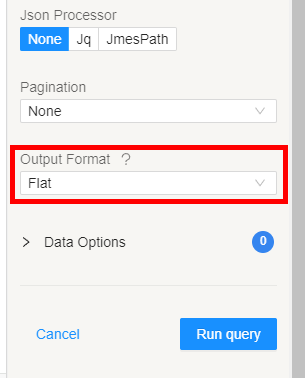
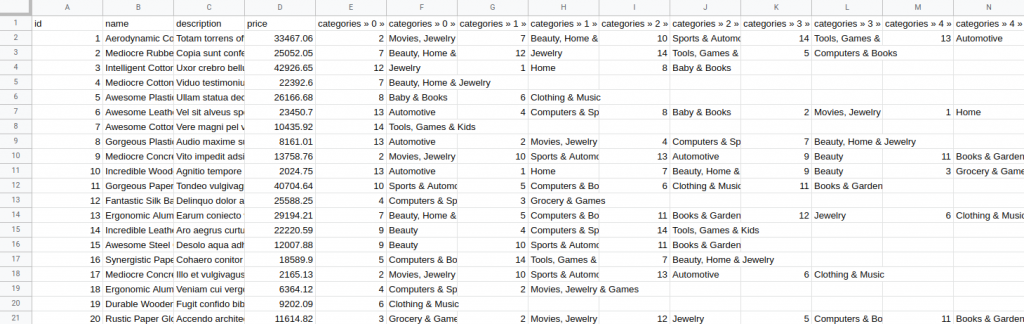
Flat format — creates a new column for each nested field. Use this when you want a single wide row with all fields spread across columns.
Pagination
API Bridge supports two pagination methods for APIs that split results across multiple pages.
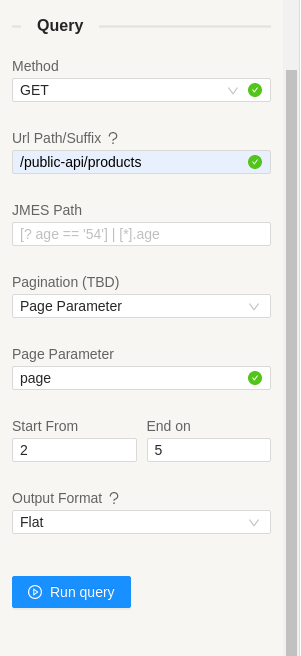
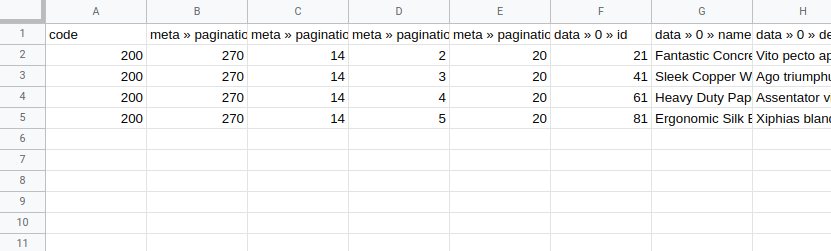
Page parameter — specify the page parameter name and the start/end page numbers. API Bridge fetches all pages in sequence and combines the results. The parameter name varies by API (page, count, p, etc.) — check your API's documentation.
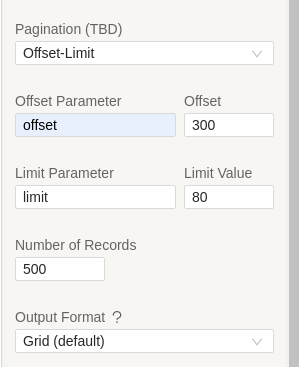
Offset-Limit — for APIs that use an offset and a limit per request:
- Offset — number of records to skip before selecting
- Limit — number of records to fetch per request
Specify the offset parameter name, starting offset value, limit parameter name, limit value, and the total number of records to fetch.
Dynamic Bearer Token
If your API uses short-lived bearer tokens that expire and require manual regeneration, use the Dynamic Bearer Token option. It automatically calls a token endpoint you specify before each data fetch, generates a fresh token, and uses it in the request — no manual updates needed.
How to set it up:
- In your data source, set Authorization to Dynamic Bearer Token
- Enter the Token Authentication URL — the suffix URL of your API's auth endpoint (e.g.
/auth/token). It is joined to your Base URL the same way a Suffix URL is. - Enter the Access token name — where the token sits in the auth response. A plain field name (
access_token,AccessToken) works, and so does a dotted path if the token is nested (data.token). - Enter the Token Header — the header TMR sends with your data requests, as a name and a value. The value must contain
{{token}}. See Choosing the Token Header below. - Choose the Token Request Method — GET or POST, whichever your auth endpoint accepts.
- If you chose POST, enter the Token Request Body as JSON. See POST token endpoints below.
- Add any headers your auth endpoint needs (e.g. an API key header) under Headers. These are sent with both the token request and the data requests.
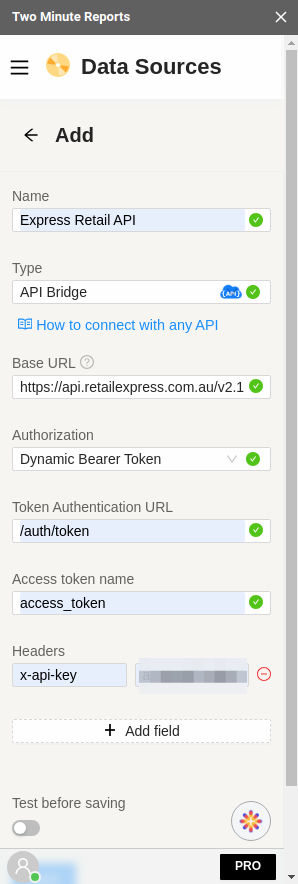
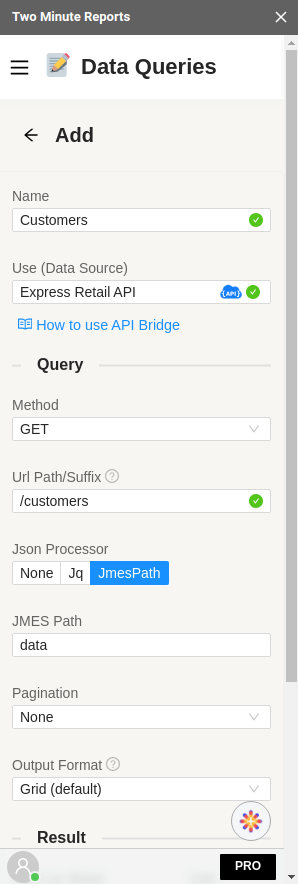
TMR will call the auth endpoint automatically on each refresh and use the returned token to fetch your data.
Choosing the Token Header
Most APIs expect Authorization: Bearer <token>, so the usual setting is:
| Field | Value |
|---|---|
| Name | Authorization |
| Value | Bearer {{token}} |
Some APIs want the raw token with no Bearer prefix, or want it in a header of their own name. Set the value to whatever that API documents, keeping {{token}} where the token belongs:
Authorization: {{token}}
X-Auth-Token: {{token}}
If you get a 401 or 403 on your data query while the connection test passes, a Bearer prefix the API does not want is the first thing to check.
POST token endpoints
Many APIs issue a token from a POST endpoint that takes a JSON body — a username and password, or a client id and secret. Set Token Request Method to POST and put that body in Token Request Body:
{
  "Username": "[email protected]",
  "Password": "your-api-password"
}
The body must be valid JSON. TMR sends Content-Type: application/json for you, along with any headers you added under Headers.
Timestamps and signatures in the token body
If your auth endpoint requires a timestamp or a signed request, the body supports placeholders:
| Placeholder | Resolves to |
|---|---|
{{nowISO}} | The current time, ISO 8601 (2026-09-07T09:41:11.458Z) |
{{nowEpoch}} | The current time, Unix seconds |
{{nowEpochMs}} | The current time, Unix milliseconds |
For a signature, wrap the string to be signed in an HMAC placeholder and enter the shared secret in Signing Secret Key. Inside the brackets you can reference {{nowISO}}, {{nowEpoch}}, {{nowEpochMs}}, and any other top-level field of the same body by its name:
{
  "clientId": "acme-123",
  "timestamp": "{{nowEpoch}}",
  "signature": "{{hmacSha256({{clientId}}{{nowEpoch}})}}"
}
That signs acme-123 followed by the current Unix timestamp, and puts the result in signature.
Available HMAC placeholders — pick the algorithm and encoding your API asks for:
hmacSha1, hmacSha1Base64, hmacSha1Base64Url, hmacSha256, hmacSha256Base64, hmacSha256Base64Url, hmacSha512, hmacSha512Base64, hmacSha512Base64Url
"signature": "{{hmacSha256({{clientId}})}}" is valid; a bare "clientId": "{{clientId}}" is not, and the query fails with Unknown placeholder in dynamicTokenBody. Write literal values directly.How often TMR fetches a new token
TMR caches the token rather than calling your auth endpoint on every request. If the auth response includes an expires_in field, TMR honours it with a 10% safety margin (minimum 60 seconds); otherwise it caches the token for 15 minutes. If a data request comes back 401 or 403, TMR discards the cached token, fetches a fresh one and retries the request once.
Spreadsheet formulas in queries
In Google Sheets, you can use cell references inside your API Bridge Suffix URL or request body. This lets you drive query parameters dynamically from values in your spreadsheet — without editing the query config each time.
Wrap any cell reference with triple plus signs (+++) on both sides to tell TMR it's a formula, not part of the URL.
Single cell reference:
+++Sheet1!A2+++
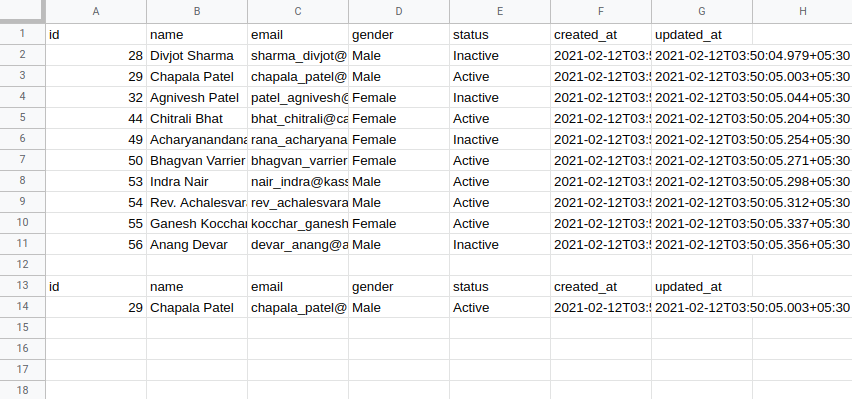
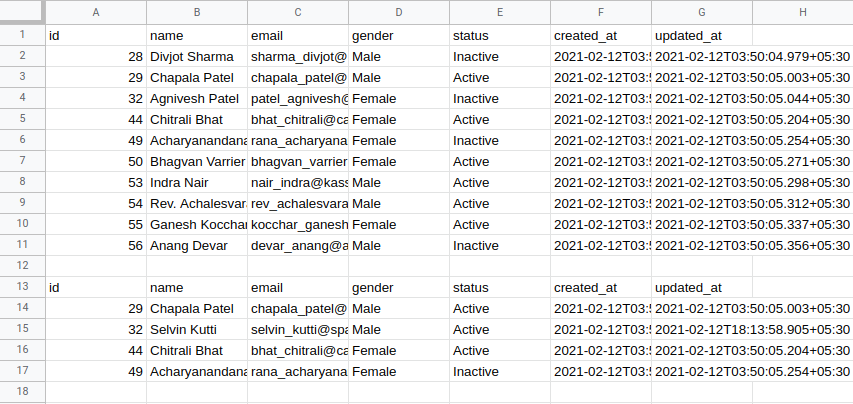
For example, with this data in your sheet:
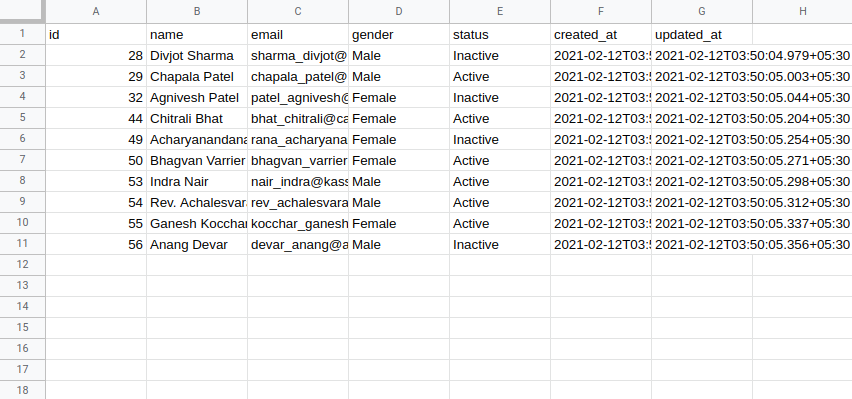
Setting the Suffix URL to /users/+++Sheet1!A3+++ fetches the user whose ID is in cell A3:
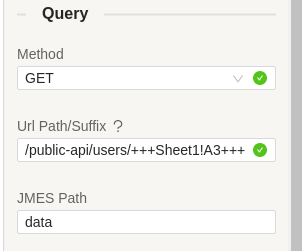
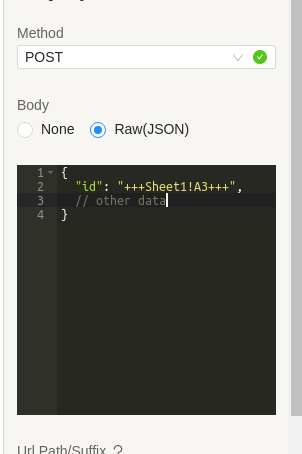
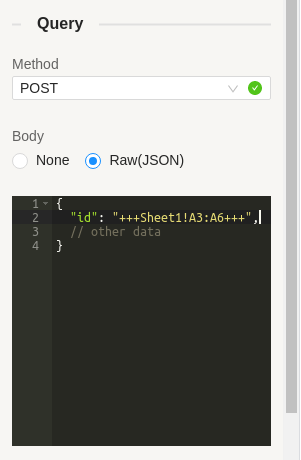
Cell references also work in the Body field for POST and PUT requests:
Cell range reference:
+++Sheet1!A3:A6+++
TMR makes one request per row in the range and combines the results. For example, with a range of values:
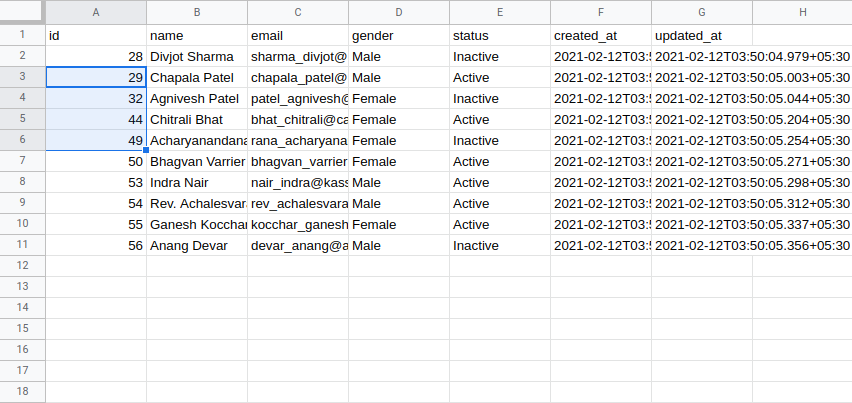
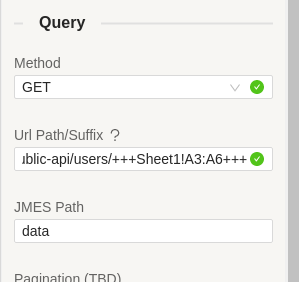
Setting /users?id=+++Sheet1!A3:A6+++ runs four requests, one per row:
Multiple columns:
/users?gender=+++Sheet1!D2:D5+++&status=+++Sheet1!E2:E5+++
TMR runs one request per row, combining values from both columns in each request.
Range references also work in the POST body:
+++Sheet1!A2+++ is correct; +++A2+++ is not.How to get API Bridge data into your reports
To pull API Bridge data into Google Sheets:
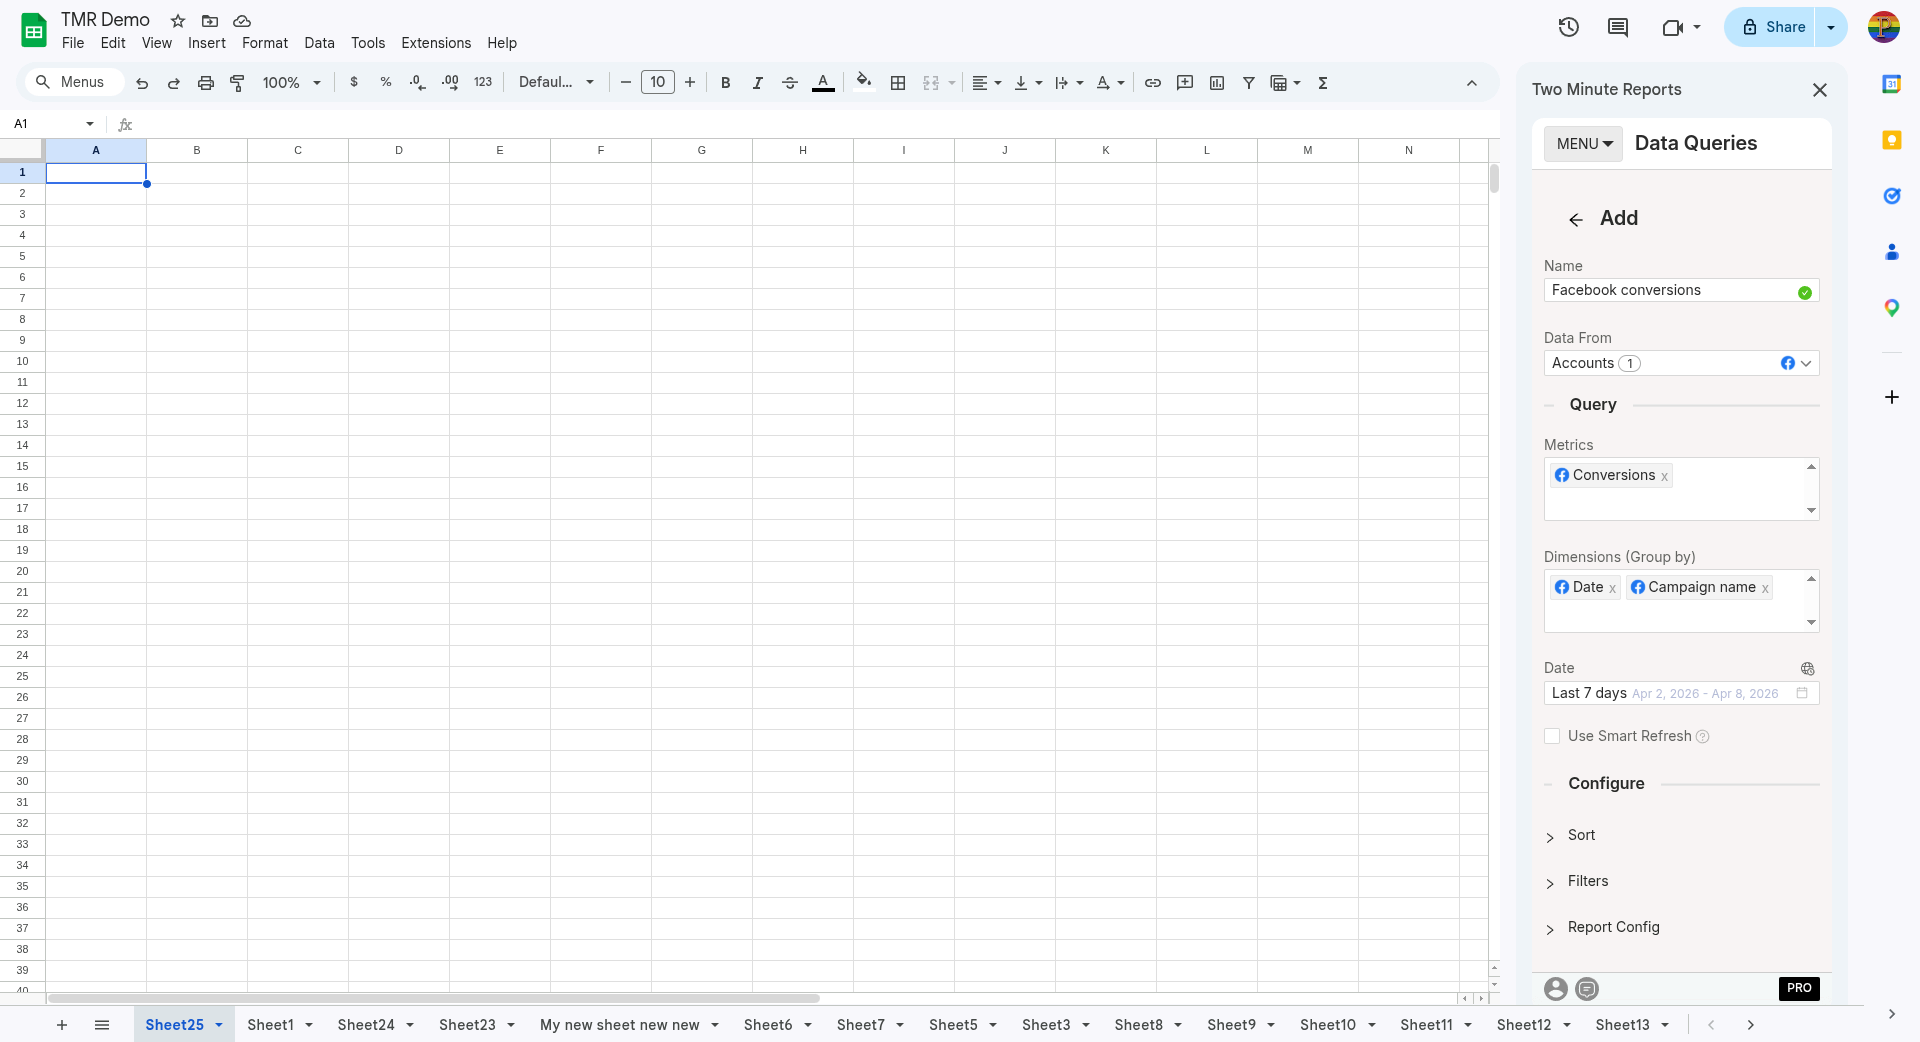
- In the TMR sidebar, go to Data Queries and click Add
- Select the accounts you want to analyze (can select multiple)
- Choose your metrics and dimensions from available options
- Select the date range for your analysis
- Configure sorting and filtering options as needed
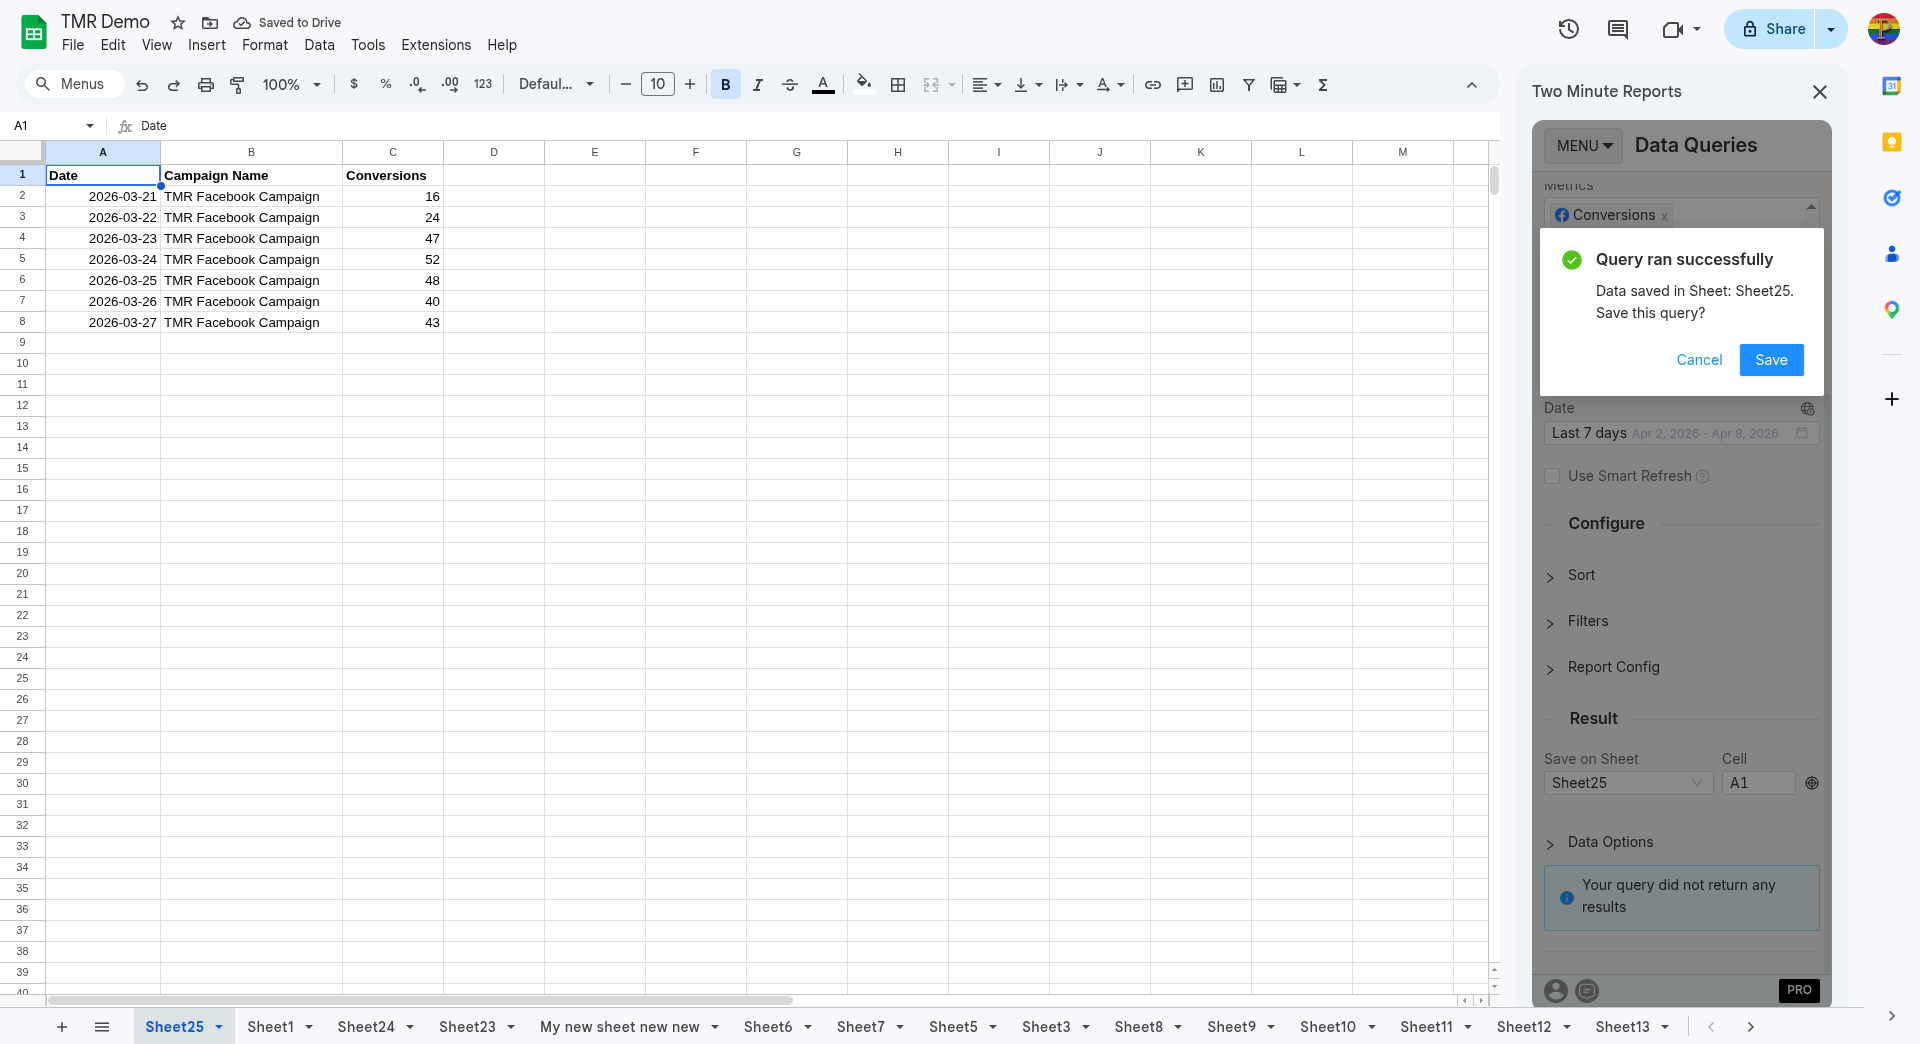
- Click Run Query to populate the data into Google Sheets
To pull API Bridge data into Google Data Studio:
- Click Open in Google Data Studio, then click + Create Report.
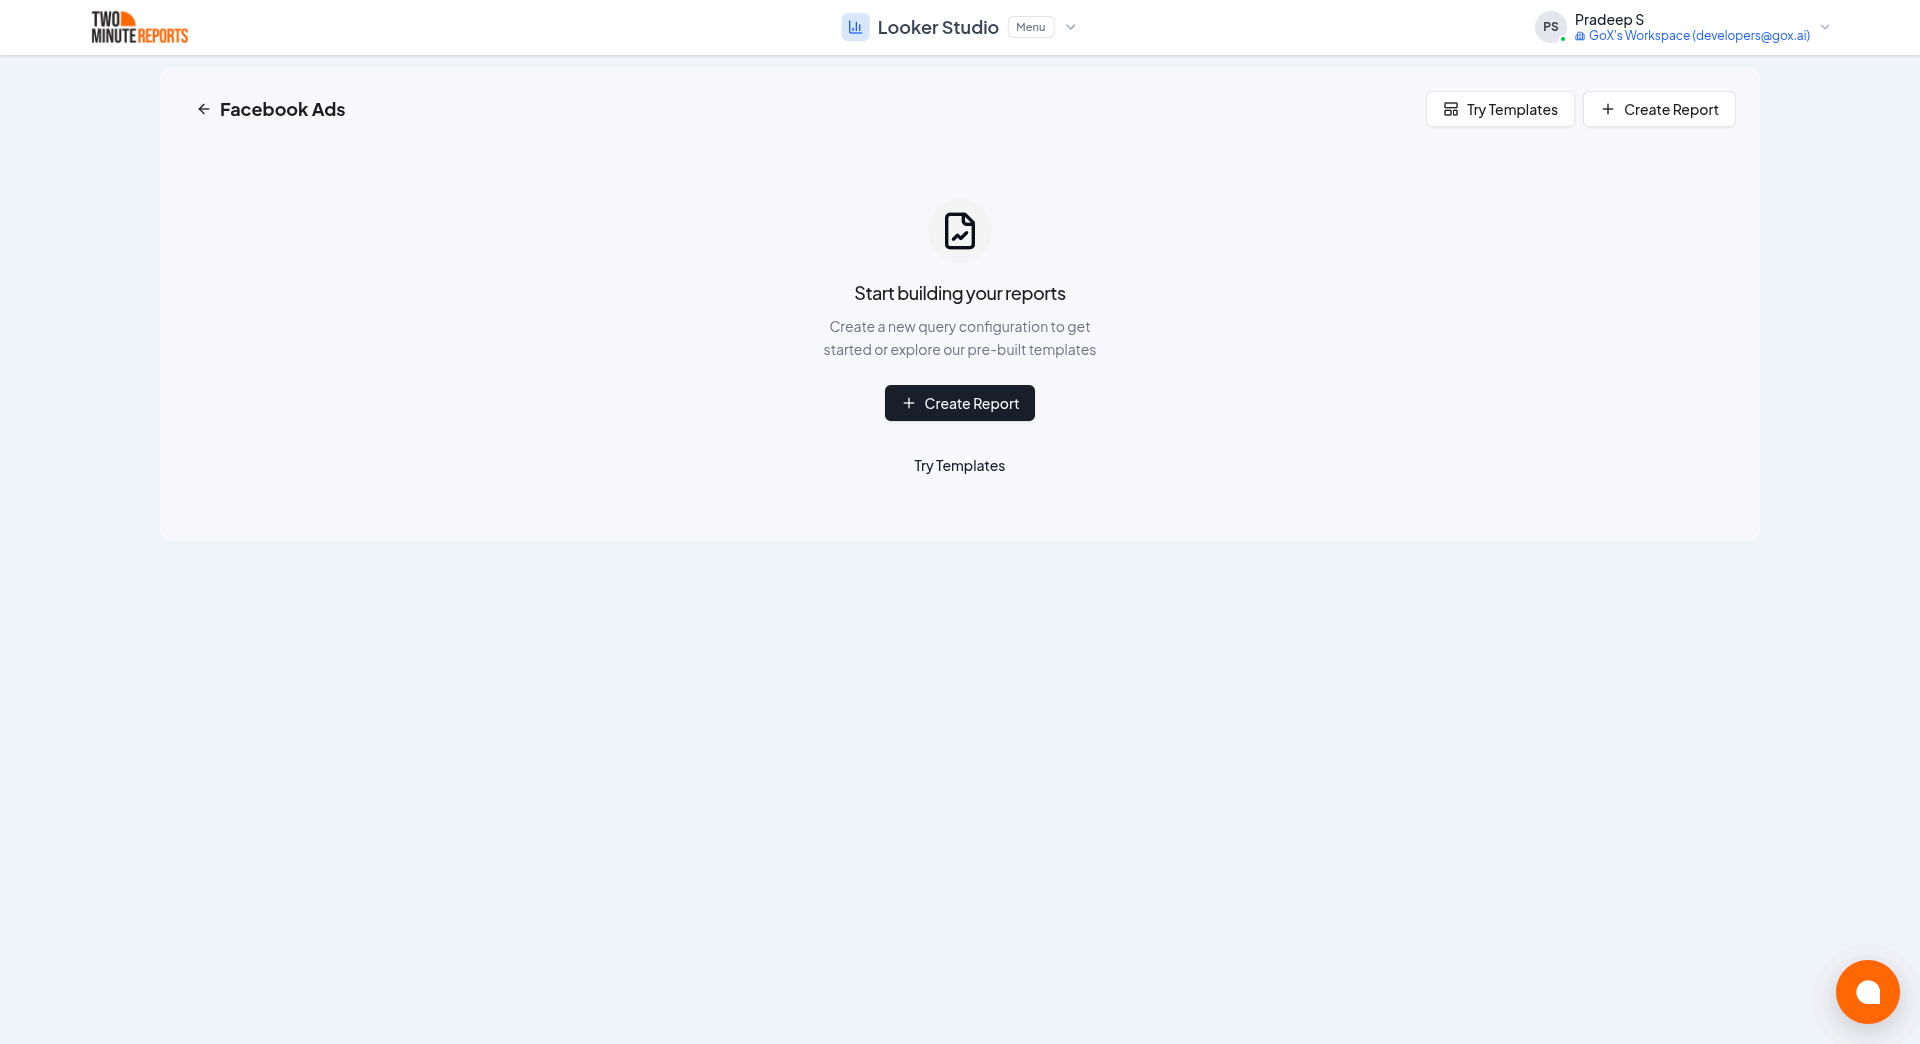
- A query config panel will appear. Do one of the following:
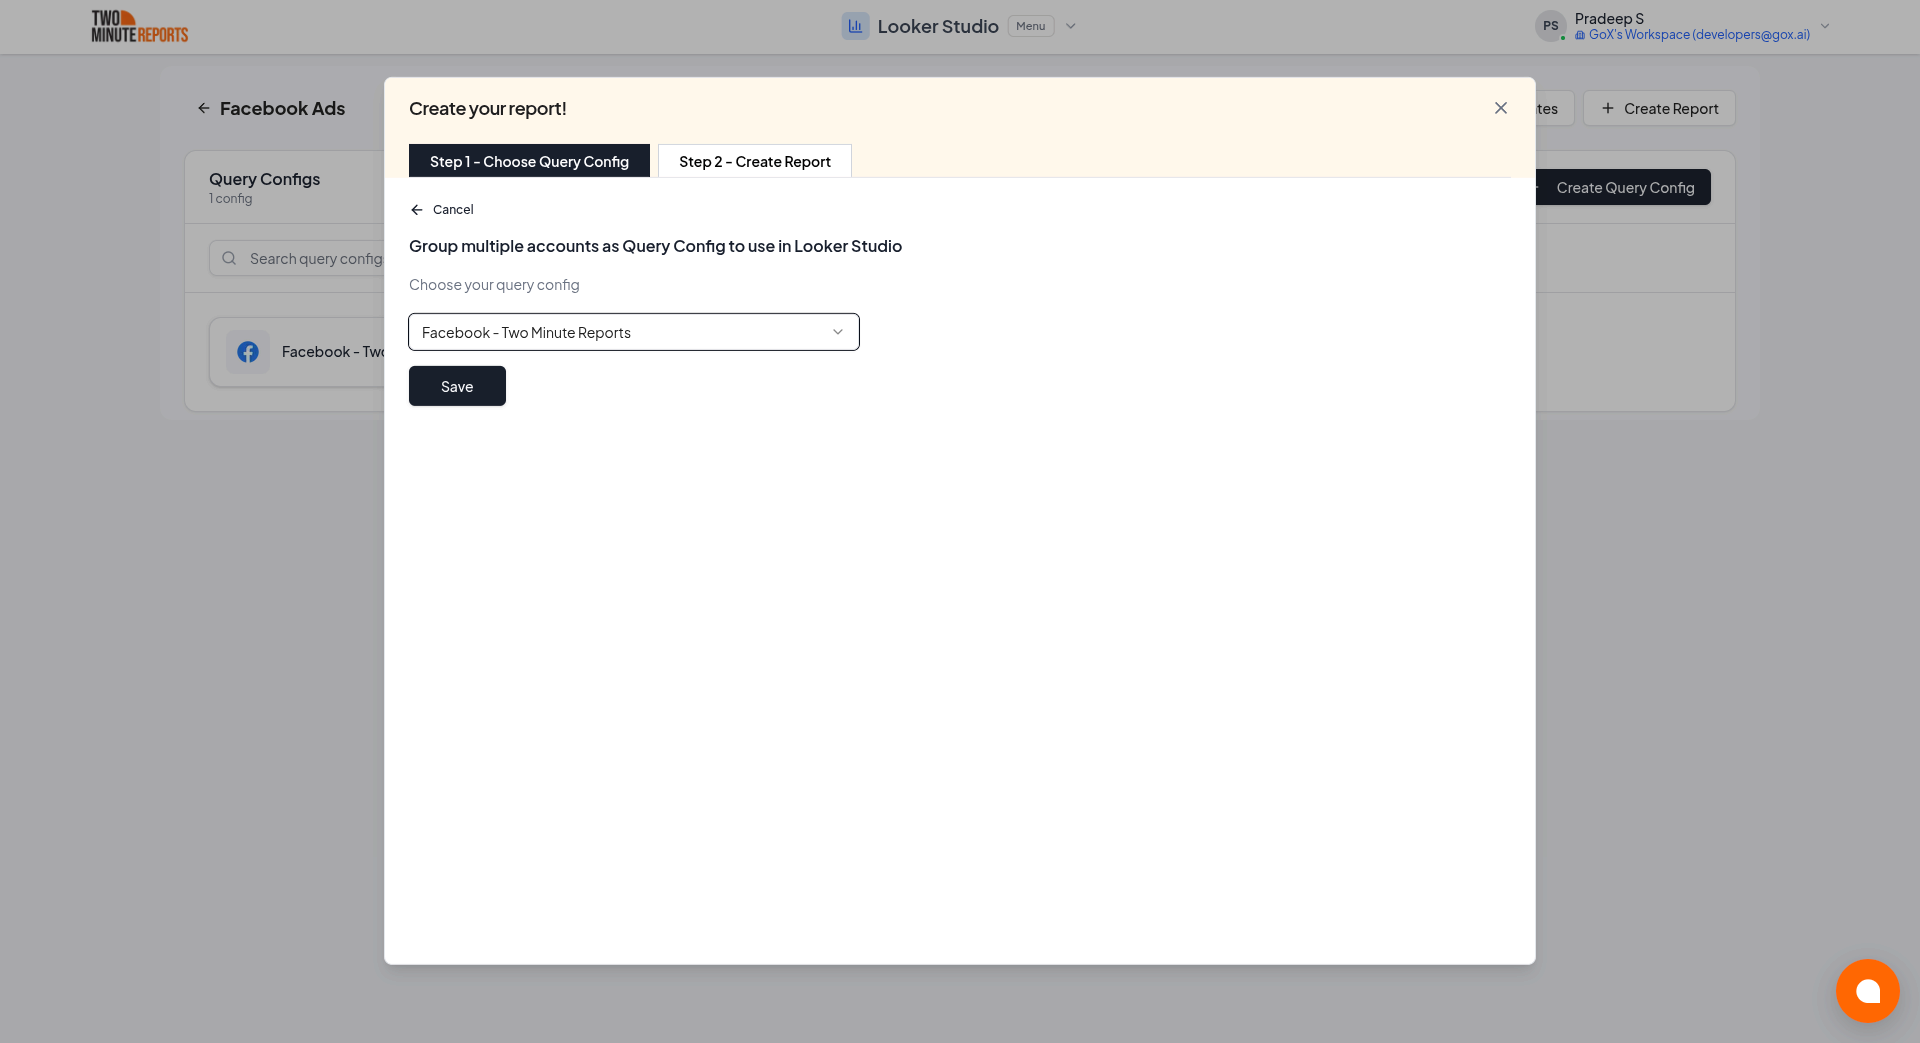
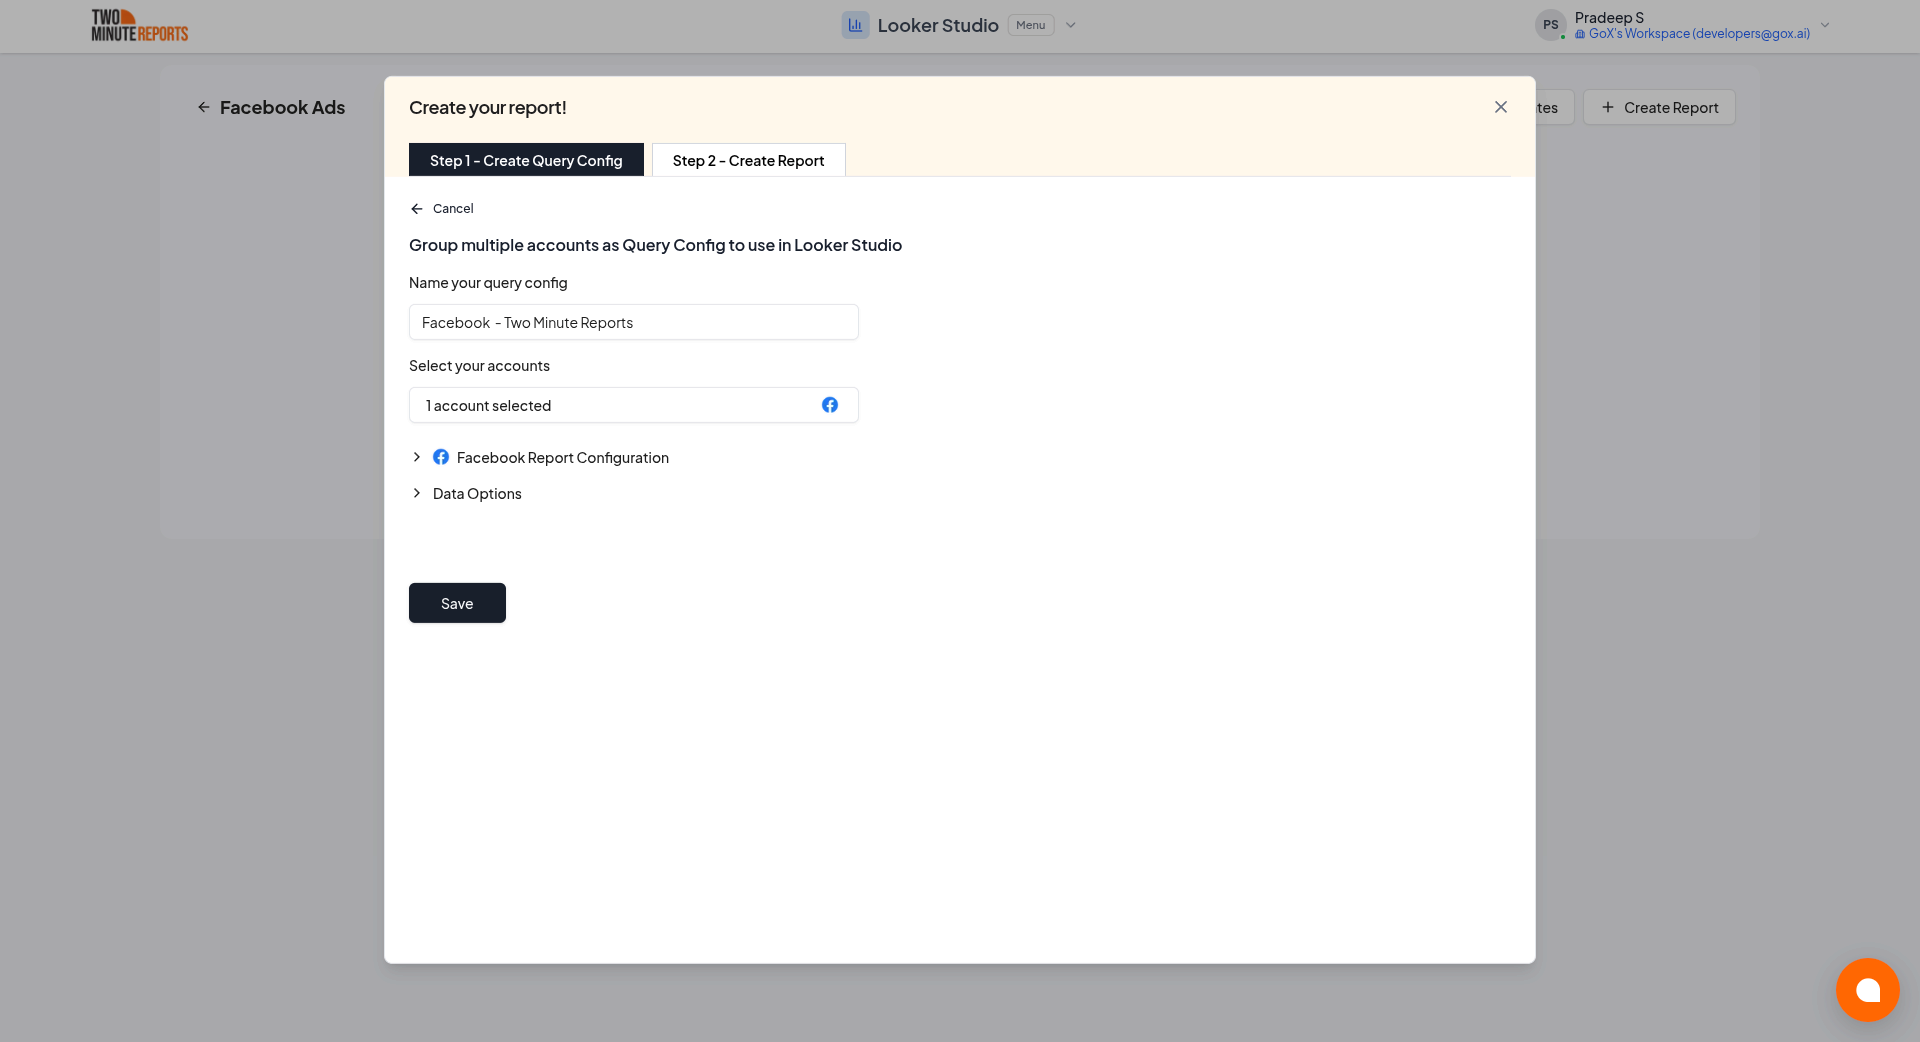
Creating a new query config: Enter a name, select the accounts you want to include from the dropdown, then click Save.
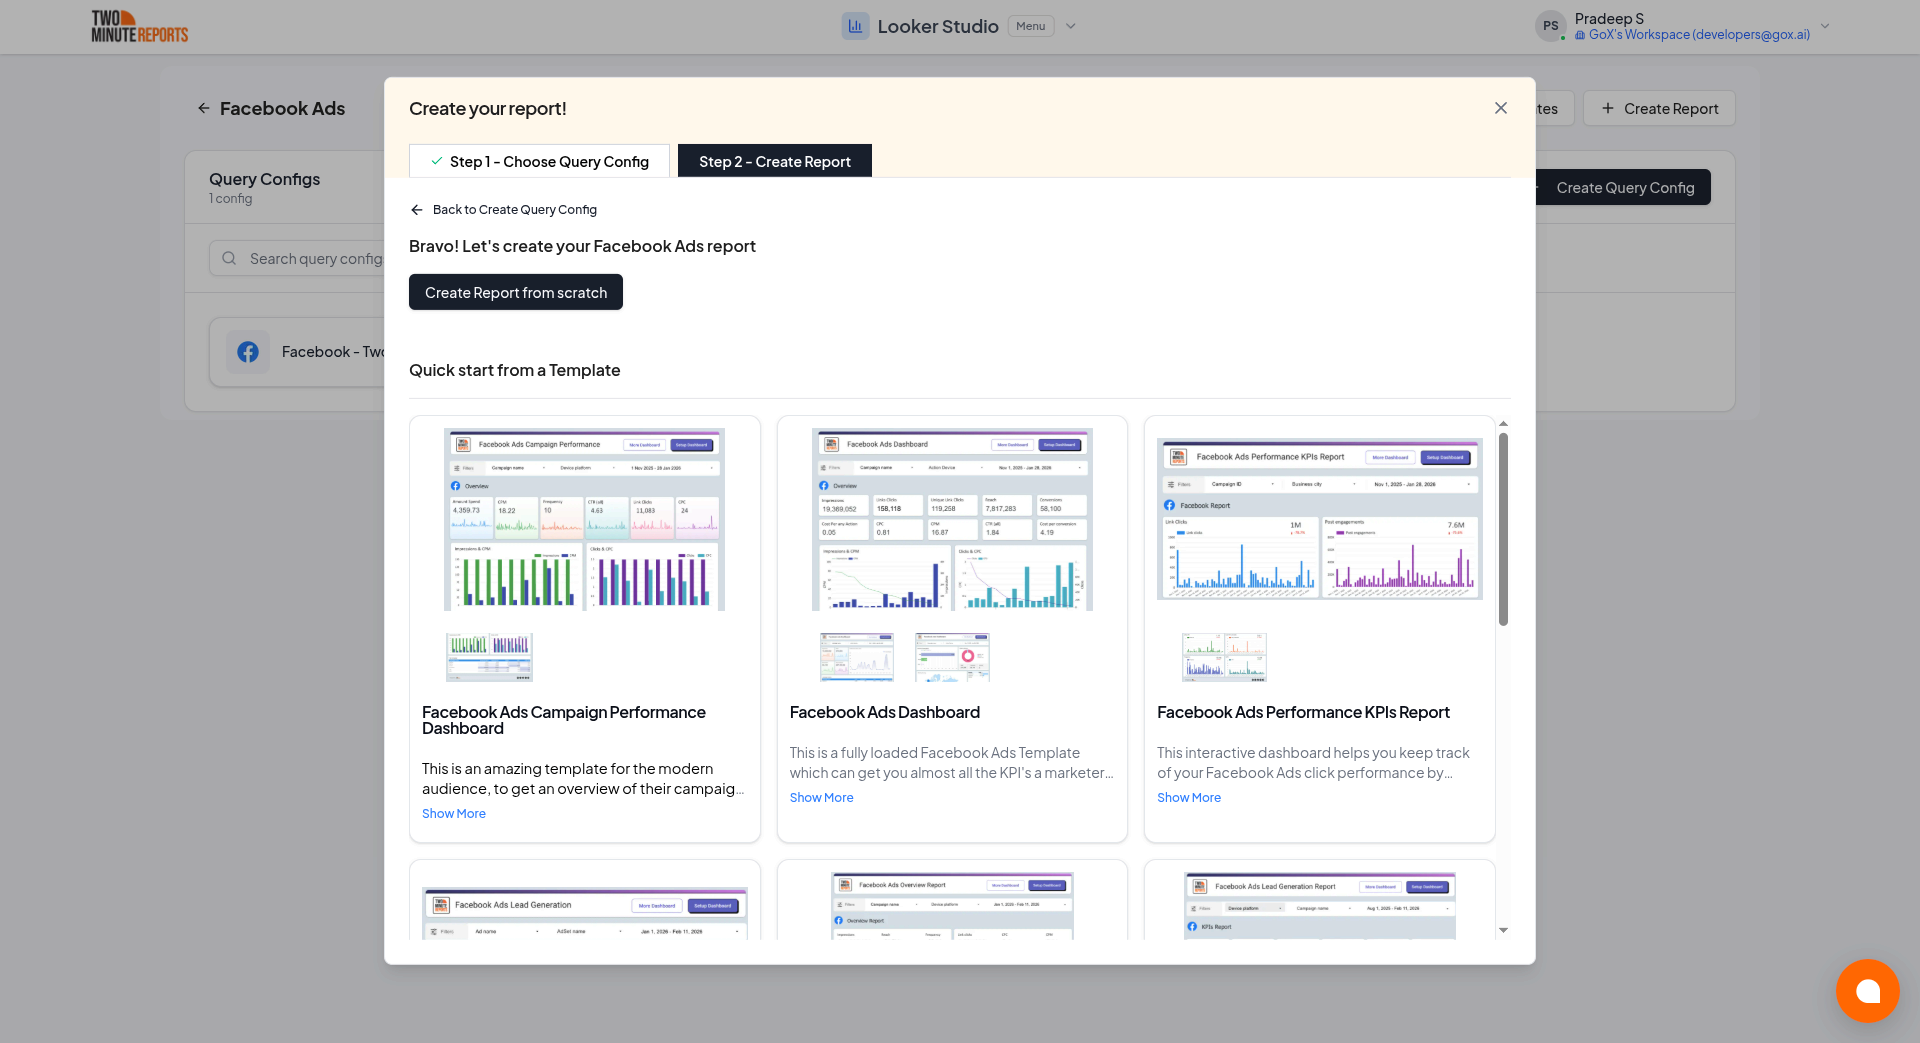
- Choose Create report from scratch to build a custom report, or select one of the pre-built templates to get started quickly.
- In the Google Data Studio connector panel, select your team and choose the required query config from the dropdown. Click Connect in the top-right corner.
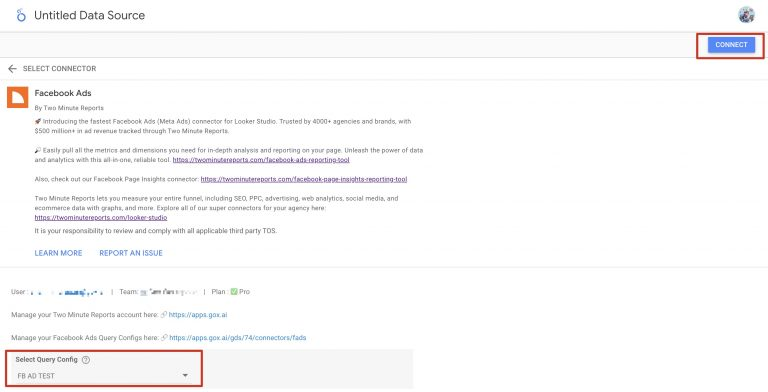
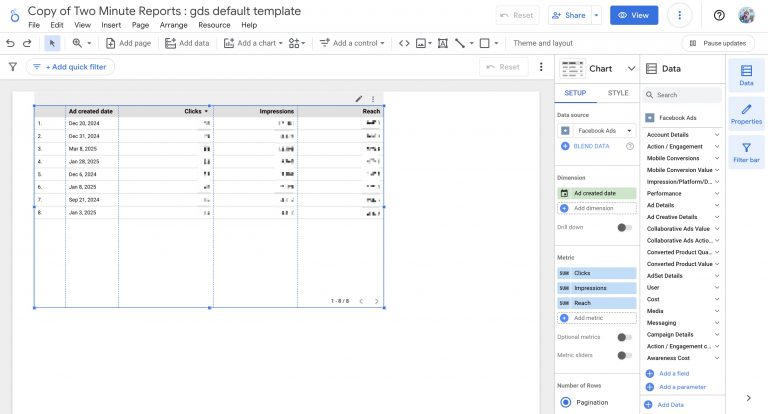
- You'll land on the Google Data Studio dashboard. Drag and drop the available API Bridge metrics and dimensions onto your canvas to start analyzing your data.