

Design and branding
Open Design in the report's top bar. The panel has two parts: Theme, the look the report starts from, and Customize, every part of the look in one list. Every change shows on the page as you make it.
The design isn't frozen with the figures. A design change shows on the report's link right away, and it doesn't send the report back to Draft. A PDF you already sent is kept as it went out.
How a report's look is built
From the bottom up:
- A preset, a team theme or a client theme: the base look
- The client's brand color, when it's on
- This report's changes: anything you change under Customize
Theme
The top of the panel shows the current look: its name and what it is, such as Team default, Dark preset or The default look. Select Change to pick a preset: 10 Light and 10 Dark. Picking a preset changes the colors and type. Your cover, header, footer and page settings stay.
Under it:
- For {client}: the themes saved for this report's client.
- Team themes: the themes your team saved for reports. The team's default is marked Default. A report uses the default unless you pick another theme or a preset.
And the actions:
- Use team default drops this report's changes and goes back to the team's default theme, so a later change to that theme reaches this report too.
- Save as team theme saves this report's look as a theme your team can use on any report. Give it a name. On a client's report, For {client} is on: the theme is suggested first when you create a report for that client. Turn it off to offer the theme for every client. This report switches to the new theme.
- Set as team default makes the team theme this report uses the team's default theme, for reports and dashboards.
- Edit {theme} for every report opens the theme in the theme builder. A change there restyles every report and every dashboard that uses that theme. Done, or Report at the top left of the builder, brings you back to this report.
Saving and changing team themes needs the Create and edit themes permission.
Customize
The sections, in order, are Brand, Fonts, Colors, Typography, Cover, Header and footer, Page numbers, Contents, Section openers, Closing page, Charts, Blocks and Page setup. Each section opens on its own. A dot marks what this report changes, and each section has a reset link.
To drop this report's changes to colors, type, charts and blocks, select Clear this report's style changes. Your logos, brand, cover, header, footer, page numbers, contents, closing page and page setup stay.
Brand
Logos
Agency logo is your team's logo, and Client logo is the logo of the report's client. Select Add logo or Change to upload one. For the client, you can also select Use the logo from {domain} to take it from the client's website.
Logos are saved on your team and on the client, not on the report. A change shows on every report and dashboard that uses them. Changing the agency logo needs Change team settings, and changing the client logo needs Add and edit clients.
Choose which logos the report shows:
| Logos | What shows |
|---|---|
| Agency and client (the default) | Both |
| Client only (white label) | Only the client's logo. Your agency's never shows |
| Agency only | Only yours |
| No logos | None |
Missing logo decides what shows when a logo isn't there: Show the name in type (the default), or Show nothing.
Where logos go is set by the cover, the header and the footer, below.
The client's brand color
- Use the brand color of {client}: the client's brand color becomes the accent and the chart colors. Set the client's color and logo on the client's page.
- Keep the theme's chart colors: use the client's color as the accent only.
A report with no client has no client brand to use.
Accent color is the color for charts and highlights.
Fonts
Body font and Heading font: choose from our list of web fonts, or from Your fonts. The heading font can be Same as body.
Your fonts
Upload your agency's own fonts and use them on any report in your team.
- Under Fonts, select Upload font.
- Choose the file: WOFF2, WOFF, TTF or OTF, up to 4 MB.
- Give it a name, and choose a Fallback font from the list.
- Select Upload font.
The font is added to Your fonts in the font lists. The fallback is used wherever your font can't load. You can change a font's fallback, or remove the font, from the list under Fonts. A removed font leaves the list for new choices. Reports that already use it keep it.
Uploading, changing and removing fonts needs Create and edit reports.
Colors
- Page background, and Page background image: an image behind every page. Keep it light so the text reads.
- Headings, Body text, Muted text and Borders
- Chart colors: a preview of the colors charts use, in order. To make a new set from the accent color, choose a style under Generate from accent: Distinct, Gradient, Diverging, Harmony, Soft, Vibrant or Rainbow.
- Good, bad and neutral: Positive, Negative, Warning and Neutral, for changes and tones.
The other sections
| Section | What you can set |
|---|---|
| Typography | Sizes for headings and body text, block titles, chart text, tables and funnels |
| Cover (documents) or Title slide (Slides) | See below |
| Header and footer | See below |
| Page numbers (or Slide numbers) | See below |
| Contents (documents) or Agenda (Slides) | See below |
| Section openers | See below |
| Closing page (or Closing slide) | See below |
| Charts | Legend position, Data labels, Grid lines, Shaded area under lines, Bar corners, Donut hole |
| Blocks | Background, Border, Border width, Corners, Padding, Shadow |
| Page setup (documents) | Paper: A4 or US Letter, and the margins in millimeters |
| Slide margins (Slides) | The margins of each slide |
Cover and title slide
Start with a cover (or Start with a title slide) adds a first page with the report's name. It's on by default.
Layout has six choices:
| Layout | What it looks like |
|---|---|
| Left aligned (the default) | The title on the left |
| Centered | Everything centered |
| Color band | The title in a band of color across the page |
| Full image | A photo that fills the cover, under the words |
| Split | The title beside a photo or a panel of color |
| Minimal | Type only |
To add an image, select Upload under Photo (for Full image and Split) or Background image (for the other layouts). Use a PNG, JPG or WebP image, up to 10 MB.
Under Text, set the Title, the Line above the title, a Subtitle, up to three Extra line rows (for example "Confidential"), Prepared for and Prepared by. An empty field shows nothing.
Under Show, choose what else the cover shows: Client name, Period, Period it's compared with, Name who prepared it and Date (the date the report was marked ready).
Under Logos, Show logos puts the logos on the cover. Set their Size (S, M or L) and Position: Over the title, Along the top, or In the footer. Whose logos show is set under Brand.
Under Colors, set the cover's Background and Title color.
Edit the cover on the page
You can also change the cover where you read it. Select any text on the cover and type. Press Enter, or select somewhere else, to keep the change.
In the editor, a bar shows above the cover:
- The six layouts, to switch with one click
- Add text: add a field the cover doesn't show yet, such as Subtitle, Extra line, like Confidential, Who it's for or Your name
- Cover settings: opens the Cover section in Design
The closing page works the same way, with Closing settings.
Header and footer
Show the header and Show the footer add a band to every page. Each band has a Left, Center and Right slot, and each slot shows one of: Nothing, Logos, Agency logo, Client logo, Report name, Period, Client name, Agency name or Custom text, such as "Confidential". Line between it and the page adds a rule.
A new document has a footer with the report name. The header is off.
Page numbers
Number the pages is on by default. In Slides, the section is Slide numbers. Set the Format (Page 2 of 9 or Page 2), the Position (top or bottom, left, center or right), the First number, and Skip the cover (or Skip the title slide).
Contents and agenda
Add a contents page (or Add an agenda slide) adds a page after the cover that lists your sections and headings, with the page each one is on. Set its Title, and under List choose Sections only, Sections and headings or Every heading. A report with no section dividers or headings lists its page names instead.
Section openers
A section opener is how a Section divider block looks.
- Style: Title and line, Color band, or Own page (Own slide in Slides), which gives each section a page of its own. Slides use Own slide unless you change it.
- Start each section on a new page (documents): keeps the style, and starts each section at the top of a page.
- Align: Left or Center, and Color.
Closing page
End with a closing page (or End with a closing slide) adds a last page. It's off by default.
- Title (the default is "Thank you") and Message, for example "Questions about this report? We're happy to walk you through it."
- Contact card: a Photo (initials show without one), Name, Job title, Email, Phone, Website and Booking link. The booking link must start with https://.
- What's next: the date of the Next report, and the Next review call.
- Agency logo: shows your logo on the page.
Themes and the theme builder
Your team's themes are on the Themes page. A theme has no kind: one theme styles dashboards, documents and slides. A theme is for the whole team, or for one client. To make it a client's theme, select Assign to a client in its menu. One theme can be the team default, for reports and dashboards alike. See Themes.
The theme builder previews the theme on a dashboard, or on a report in either layout: the tabs are Dashboard, then Document and Slides under Report. Document and Slides show the theme on a complete sample monthly report, with built-in figures: a summary with headline figures, a section per channel, goals and next steps. The cover, contents page and closing page show when the theme turns them on. When you open a section of the settings, the preview goes to the first page that shows it. When you pick a client for the theme, the sample uses that client's name, logo and brand color.
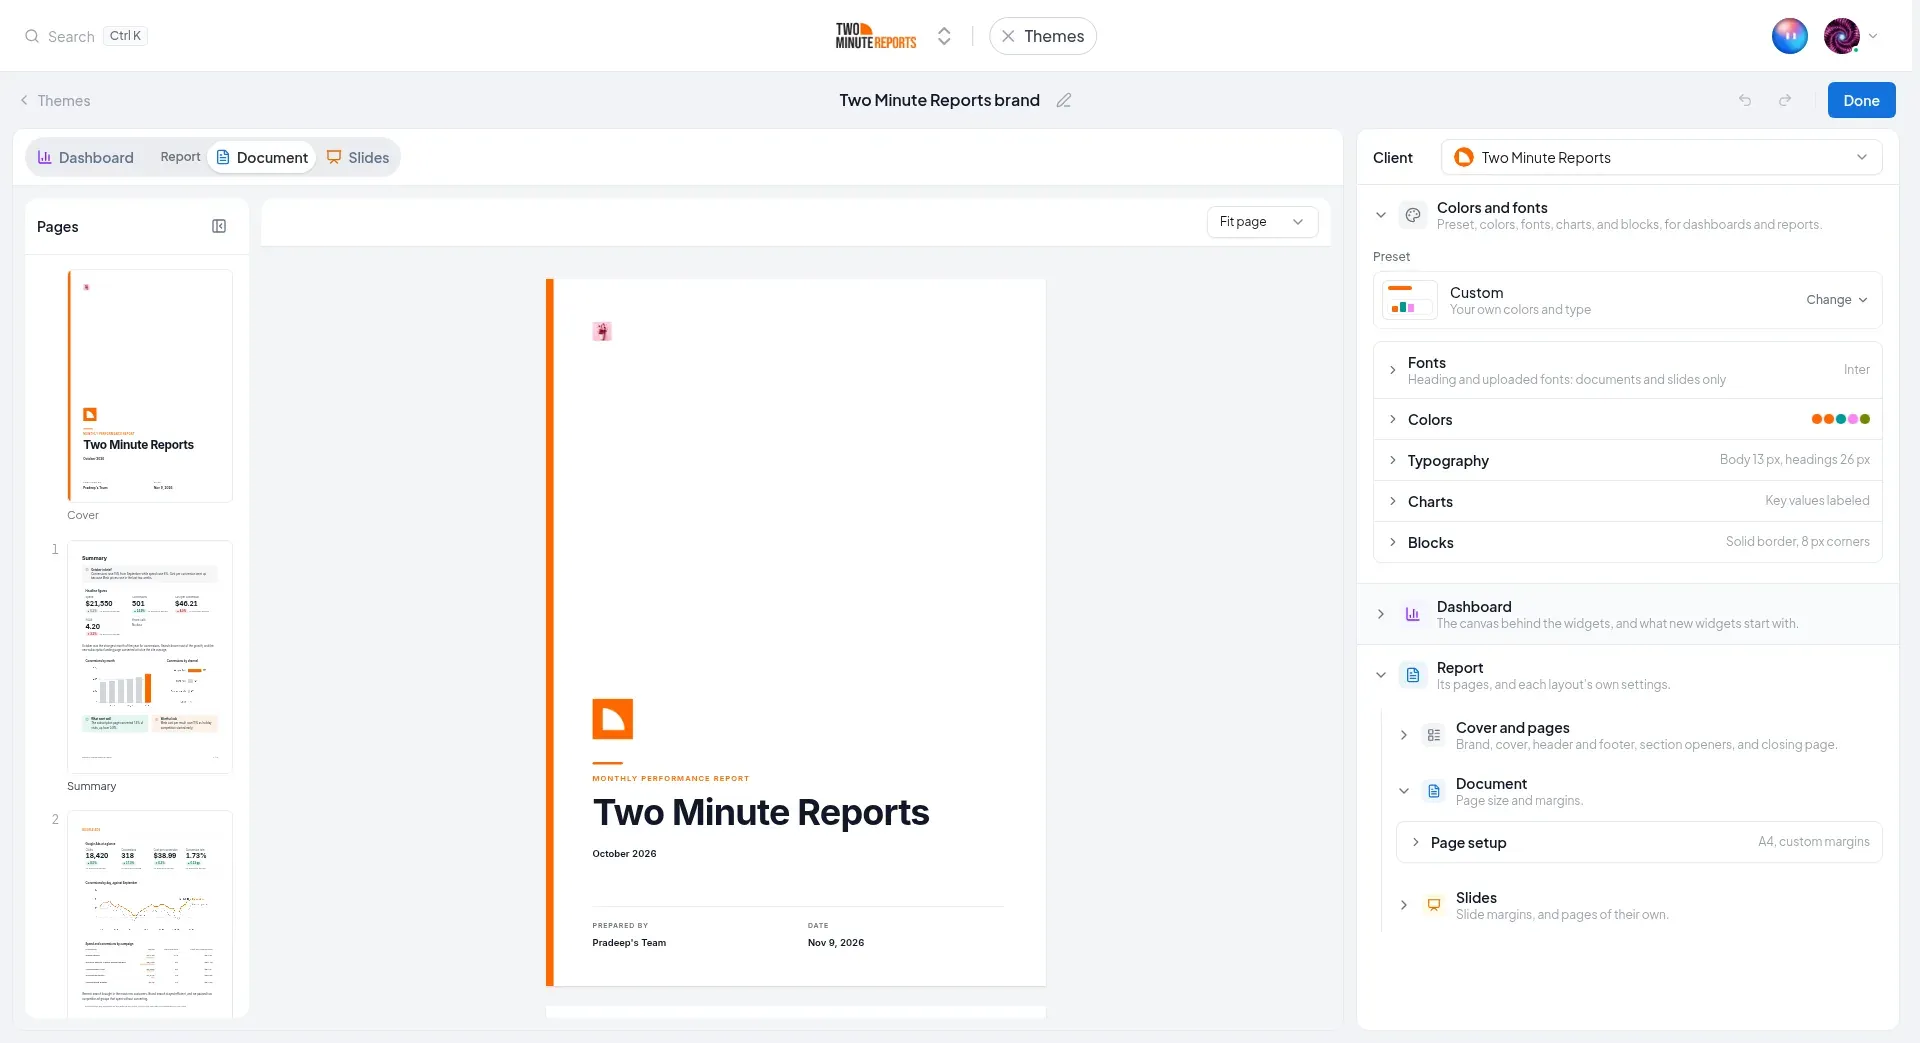
The settings are grouped by where they apply:
- Colors and fonts: the preset, fonts, colors, typography, charts and blocks. Dashboards and reports both use these, so every preview changes with them. The heading font and uploaded fonts apply to documents and slides only.
- Dashboard: the canvas behind the widgets, and what new widgets start with.
- Report, with three parts:
- Cover and pages: brand, cover, header and footer, page numbers, contents, section openers and the closing page, the same in documents and slides.
- Document: page size and margins.
- Slides: how far content sits from the edge of each slide, and Own title slide, section openers, and closing slide. Off, slides use the same ones as documents. On, Cover and pages changes the slide versions while you preview Slides.
When you start, Colors and fonts and the part for the tab you preview are open. Picking a tab opens its part, and opening a part shows its layout in the preview. The builder remembers which parts you opened until you close the browser tab.
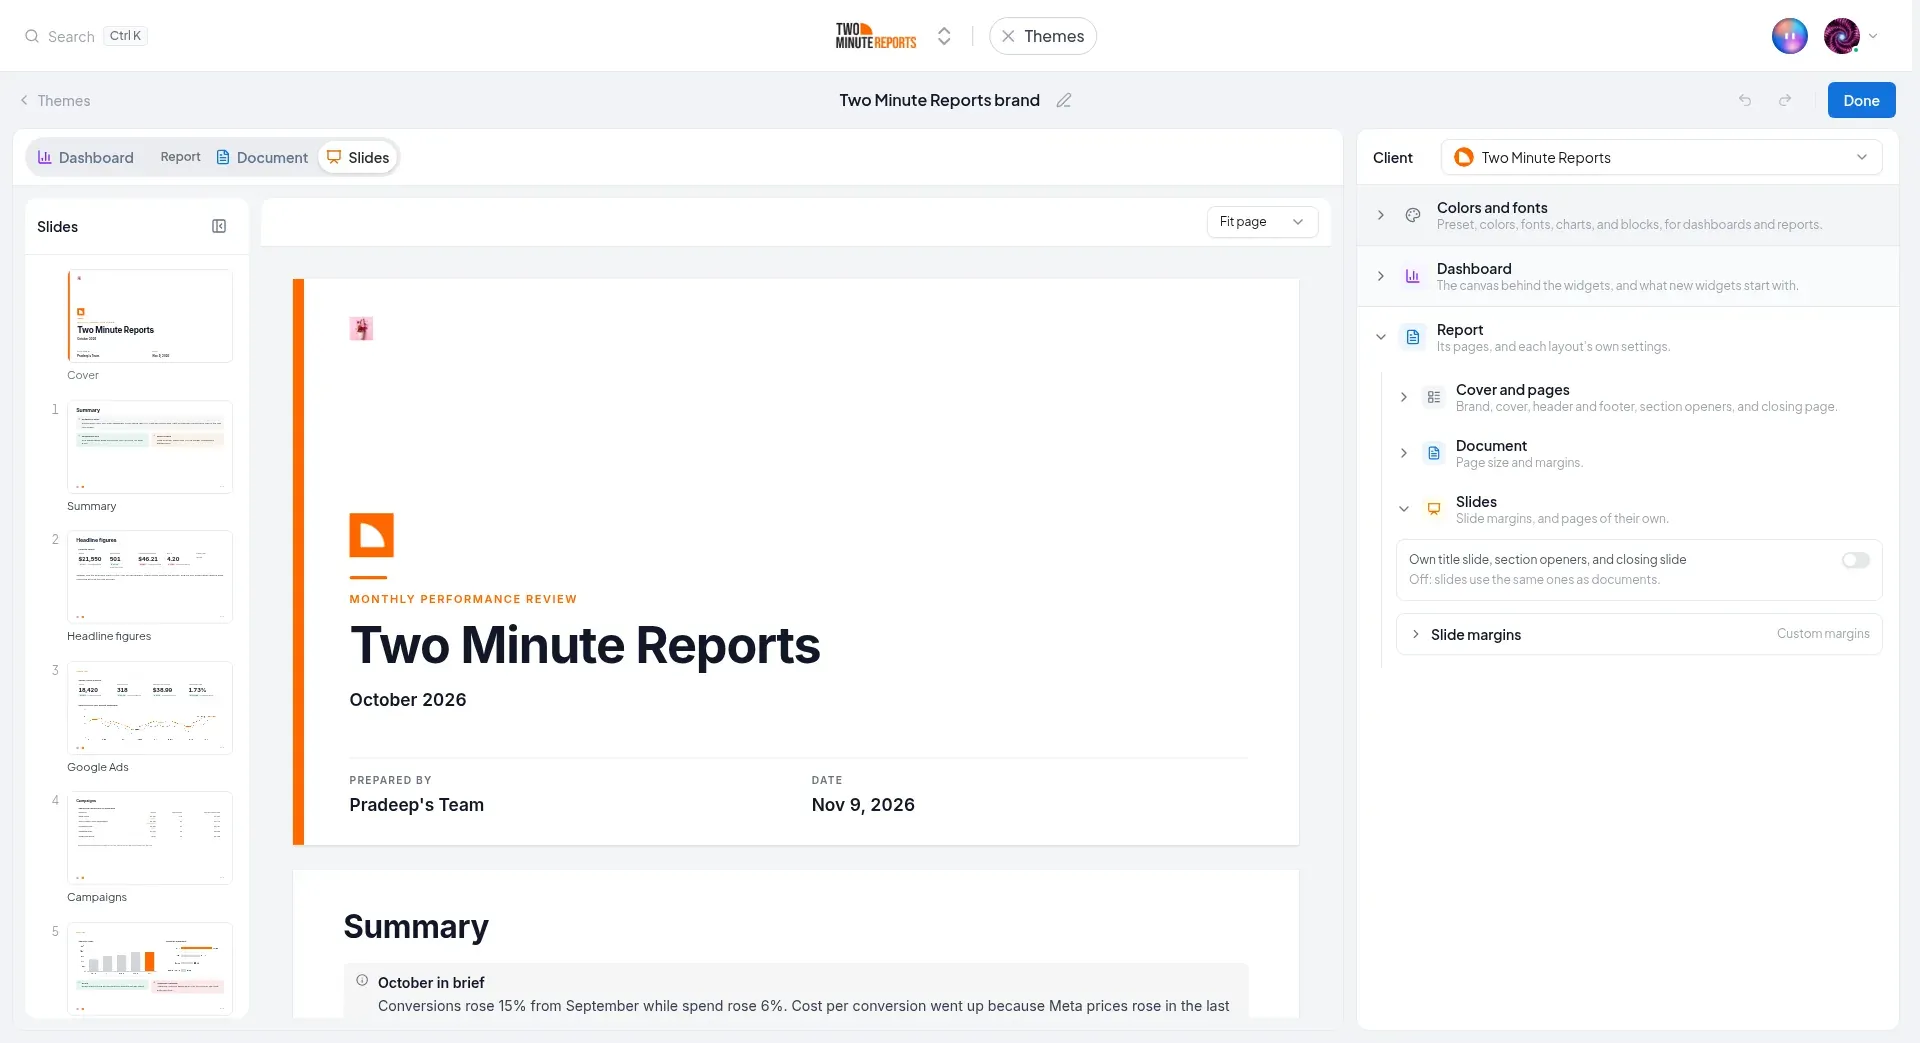
The builder saves as you go.
Next steps
Edit a report and comment
Edit a report on the page, accept or reject the changes Dash suggests, and comment with your team. Comments never hold a report up.
Share, download and send
Share a report like a dashboard, download it as a PDF or PNG images (and PowerPoint for Slides), and email it from your Gmail once or each month. Every send is kept.